Yae Miko Hyper Carry Build Guide | Genshin Impact | Abyss Ready | F2P
In this Genshin Impact Guide I’m going to be showing you my Hyper Carry team for one of the newest characters in the game, Yae Miko. This build is meant to emphasize on pushing the personal damage of Yae Miko; to deal with both single target and AOE situations. It also causes enough electro reactions to squeeze more damage from Fischl if she’s on the team.
I’ll explain how to build a Yae Hyper Carry Team to face a wide variety of content, and deal potent damage. If you’ve been looking for a Free to Play Yae Miko build for endgame, then look no further. I’ll go through what Weapons to use, what Artifacts to upgrade and which companions to pick up, so check this one out!
Mục Lục
Yae Miko Hyper Carry Build Guide
This is a budget-friendly version Yae Miko build, making it suitable for new and free to play players. Yae Miko lack any signature artifact set, so she doesn’t burden the player with farming for a specific set. She’s super easy to kick off with any mixed pieces, and she can reach her maximum potential much faster than most other DPS characters. In terms of team members, she can easily team up with full four-star supports. Her team is especially easy to form, with the fact that her limited banner had two of the best supports for her, Fischl and Kujou Sara, as rate up characters. So most players with Yae Miko likely have a higher constellations Electro support ready to get going.
In our combo, we use two electro characters, Yae Miko and either Fischl and Sara. So we benefit from the high energy regeneration from Electro Resonance, and establish Electro Aura on enemies. Then we can use an Anemo character to apply an Electro resistance shred, and add damage from Swirls. The choice of Anemo characters are Sucrose, Kaedehara Kazuha, or even Venti, with the former being accessible as a four star, and the latter being more expensive five-star options. Finally, we use the overall best buffer in the game, Bennett, to push the team’s damage as high as possible.
Yae Miko has a unique Elemental Skill, that needs to be used three times, to leave three small turrets. These turrets stay on the field for up to 14 seconds and keeps attacking enemies while Yae is off-field as well. Upon using Yae’s burst she uses three turrets and unleashes a massive three electro nukes after her burst. So the playstyle revolves around using her skill three times, switching Yae out, casting all buffs from the team, switching back in, and dealing massive burst damage.

Yae Miko Hyper Carry Build Attributes
Yae follows a simple DPS build, with Attack on Sands, Electro damage on Goblet, and either Crit Rate or Crit Damage on Circlet. This stays true in all builds, with rarely any exception. What’s different between Yae and other standard DPS though, is that Yae can also benefit from the Elemental Mastery (EM) stat. EM adds a small damage multiplier to Yae’s Elemental Skill, causing it to deal more damage. The bonus from the EM is smaller by comparison to the bonus given by Attack, so it can’t replaces your attack stat, and you only use EM if it’s an additional stat on an artifact, on top of Attack.
The energy requirement for Yae Miko to use her burst on cooldown is around 130%~140% ER in this team. Since Fischl regenerates a lot of electro particles, in addition to the extra energy generated from Electro resonance, Yae can go without having Raiden Shogun in her team. She also doesn’t need ER as the main stat on Sand piece, and can accumulate enough from sub stats alone.
Don’t forget to maintain a 1:2 ratio between Crit Rate and Critical damage on the character sheet page, as this always maximizes the damage of characters.

Yae Miko Hyper Carry Build Weapons
Yae uses is a Catalyst, a weapon magical in nature, allowing all normal and charged attacks to deal Electro damage. As the main carry, Yae doesn’t see competition over weapons, you can always give her the best Catalyst you have. She has very strong options for both free to play and those who plan to spend. In the weapon slot, we can either focus on Crit weapons, or Attack weapons.
Free Four Star weapons

Oathsworn Eye is a free weapon, gifted to players upon playing Three Realms Gateway Offering Event. It was available in the Enkanomiya region, during version 2.5 of the game, back in February and March 2022. If you completed the event, you were given enough refinement materials to bring Oathsworn Eye to max refinement level. The event occurred at the same time the Yae banner was run, so there’s a high chance players who used wishes on Yae have gotten Oathsworn Eye as well.
The weapon has one of the highest base attacks on four-star catalyst (565 Attack), and have 27.6% Attack as sub-stat. On top of that, its passive gives the wielder 48% Energy Recharge for 10 seconds after using the Elemental Skill. So the weapon alone is more than enough to fulfil the energy requirement of Yae; and you can focus all your artifacts on offensive stats only, to deal more damage.
If you have got R5 Oathsworn Eye, look no further for another free weapon. Upgrade only if you have a five-star weapon, or you have bought a Battle Pass weapon.
Battle Pass Weapon

Among four-star weapons, Solar Pearl is the only guaranteed upgrade over Oathsworn Eye. But it comes with a real-money cost, and a special condition that might be annoying to meet, to reach max potential.
Solar Pearl has a lower base attack (510 attack), but comes with a significant 27.6% Crit Rate sub stat. This stack with the 19.2% Crit Rate Yae has from the ascension passive. This eases up the switch from Crit Rate to Crit Damage on Circlet’s main stat, for more damage. On top of that, Solar Pearl can give a 20% damage bonus to Yae Elemental Skill and Elemental Burst, if you use one normal attack before casting Burst and Skill.
The additional normal attack can be tricky and annoying to remember every time, but if used right, it causes an overall damage increase. So only pick this weapon, if you are willing to put up with the hassle of managing one more thing in your rotation.
Gacha 4 Star Weapons

If you get lucky with gacha pulls, you might obtain The Widsith, which is one of the best four-stars available for Yae. It has a long cooldown, so Yae will benefit from it in one rotation, and miss it in the second rotation. But when the buffs align, Yae deals massive damage with this weapon. This goes especially well, if you have a higher refinement level of The Widsith, as it gives insane buffs.
Another good thing about Yae with The Widsith, is that she can utilize all three buffs from it. Whether she procs Attack, Elemental Damage, or an EM buff, they all will benefit her. Unlike some other Catalyst users who benefit from only one of two.
The Ultimate weapon
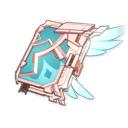

Several Five Star weapons are really good on Yae Miko, especially Lost Prayer to the Sacred Winds, and Skyward Atlas. You can get either of them through the standard banner, and they will be an easy upgrade. You don’t have to spend any money or precious Primogems to get either, so I don’t recommend summoning Yae’s signature weapon, Kagura’s Verity.
Yae Miko Hyper Carry Build Artifacts
Figuring out how to customize your Artifacts can be quite challenging, as there are so many components when it comes to making a Build in Genshin Impact and generally it takes some trial and error before getting it right. With the continuous release of new artifacts every couple of patches, things do get a bit complicated. But in this section, I will save you some time as I’ve set this up for maximum performance for this Yae Hyper carry build.
Hybrid Set
Yae scale better with hybrid sets, so it’s easy to mix and match best pieces from each set. Attack sets have become numerous in Genshin Impact lately, with four sets that provide 18% Attack on two pieces bonus. These sets are: Gladiator’s Finale, Shimenawa’s Reminiscence, Vermillion Hereafter, and Echoes of an Offering. With Gladiator’s Finale dropping from world bosses, and Shimenawa’s Reminiscence from same domain as Emblem of Severed Fate in Inazuma. Finally, Vermillion Hereafter, and Echoes of an Offering both drop from the one domain, that’s in The Chasm.
If you are new to the game, you have the option to farm Vermillion Hereafter, and Echoes of an Offering from one domain. This way, you can equip your Yae much quicker. However, veteran players likely have some amazing pieces of Gladiator’s Finale over the long time they spent in-game. So they have the option to farm either Shimenawa’s Reminiscence domain, and mix it with Gladiator’s Finale. Or farm Thundering Fury domain for a 15% Electro damage bonus, and mix with Gladiator’s Finale.
And in rare cases, two pieces with EM bonus such as Wanderer’s Troupe, and superior sub stats might actually be stronger than other sets. As the set bonus of 80 EM is only marginally less efficient than 18% attack or 15% Electro damage from other sets. So sub stats become the more determining factor.
The decision to which domain you farm, is highly dependent on what sets your main DPS from other Abyss teams require.

This set is rarely used, and not so many teams can benefit from it. It requires the team to meet two conditions in order for it to work:
- Your team always inflicts Electro element aura on enemies, more than any other element.
- Enemies that don’t have internal elemental Aura (slimes and Heralds)
These two conditions are not easily met in Abyss, unless you use your team only against bosses and natural enemies. So it’s a situational option, that gives higher damage, but requires going out of your way to farm. That renders the set inefficient to use your resin on, unless you have another character that prefers using the other set dropping from the same domain Thundering Fury.

Yae Miko Hyper Carry Build Talent Skills

![]() Spiritfox Sin-Eater
Spiritfox Sin-Eater
Normal and Charged attacks of Yae Miko have insignificant modifiers and slow attack speed. We don’t build around this Talent and leave it at level 1. The only time to use a normal attack at all, which is only with Solar Pearl, in order to trigger its passive bonus.
Yakan Evocation: Sesshou Sakura
Yae Elemental Skill is the single target damage component of her kit. It hit a fixed number of times, and deals the same damage, regardless of the number of enemies present. She summons a Spirit Fox, in each elemental skill use. Yae can summon up to three Spirit Foxes, that stay on the field for 14 seconds, and strike enemies at random. With the three foxes up, an enemy will get hit every second. It functions similarly to Fischl‘s skill, but requires more field time.
If foxes are in close proximity, they are linked together. Such a link allows them to level up, dealing more damage. So the first hit Yae deals upon summoning the first fox have the lowest damage. Then damage increases when you summon the second fox, and peaks at the third. Then continue on peak until the duration runs out. The skill damage is dynamic, and can’t snapshot stats at cast time. So it’s ideal to use Yae’s elemental skill first in the rotation, to start dealing damage early on. Switch to supports afterwards, to buff the subsequent hits. Then switch back to Yae later, to cast her Elemental burst after the buffs.
Casting Elemental Burst will consume all the foxes on the field, forcing you to re-cast them again. It further emphasizes the playstyle of casting skills, switching out, casting support skills and bursts, switching in, casting bursts, and recasting skills.
Great Secret Art: Tenko Kenshin
The AOE component of Yae kit is her burst, she takes a long animation to cast a thunder strike, which deals a lot of damage. Her burst then consumes the foxes left by her skill, causing additional thunder strikes per fox used (up to three additional strikes). All strikes have a good AOE and can hit multiple enemies, so it’s wise to gather enemies before using Burst.
A fully buffed Burst deals a lot of AOE damage. It adds a lot of flexibility to Yae, and allows her to adapt to various situations. And in Spiral Abyss, it could be tactically used to delete the first waves of enemies. This quicken the spawning of the second wave, so you start dealing damage to them earlier, resulting in a quick clear time.
Yae Burst has the absolute longest cooldown in the game, it requires a whole 22 seconds to be available again. Cooldown is the definitive factor in determining team rotation time, as you can’t do any rotation shorter than 22 seconds. It also means, players can’t build Yae solely as a burst DPS, and should focus on maximizing both Burst and Skill damage.
Yae Miko Hyper Carry Build Team composition
Genshin Impact has a unique playstyle that relies on switching characters and chaining combos across these characters. So a solid part of this Yae Miko Hyper Carry build is knowing which characters will accompany her, and what roles they will play.
In this section, I’ll fill you in on some of the best characters that synergize well with this build. It’s universally recommended for you to use a five-star support character, but our build could be done with four-star characters only if needs be. That doesn’t mean you can’t get upgrades from five-star characters, because you could argue a special case for some Anemo units such as Venti or Kazuha. However, not having either of them doesn’t stop Yae from doing a good job.
The high cost of Yae Miko’s Burst, and her lack of strong energy regeneration forces us to use an Electro Battery. Having two Electro characters on the team, allows more energy particle generation through Electro Resonance. There are two Electro characters worth using the Electro battery slot, Raiden Shogun, or Fischl. With Fischl focusing on single target damage, and taking less field time. Raiden focuses on AOE, regenerating more energy, and extending the rotation by taking so much field time. Picking Raiden also makes the team very expensive, and changes it into a dual carry team. If played right, a C6 Fischl can output more damage than C:Zero Raiden at a similar investment. So I highly recommend picking up Fischl and building her.
You could also pick Kujou Sara in this slot, if you have her at C6, and not have Fischl. But beware of her clunky playstyle, and whether it’s right for you.
Fischl is best off-field DPS that pairs with Yae, as she relies on Oz to stay on the field, long after she switches out. Additionally, Fischl has a passive talent that causes her to strike additional time, whenever an active character causes an Elemental reaction while Oz is on the field. This passive encourages us to pair Fischl with Sucrose, and infuse Sucrose with another element such as Pyro to cause a lot of reaction damage.
Other good thing about Fischl, is that she was featured as a rate up character in Yae banner, so most players who own Yae, also own Fischl.
Stats
For the best results, we build Fischl as a typical damage dealer. It means we prioritize Electro Damage Bonus, % Attack, Critical Rate, and Critical Damage. Since we build Electro to be Aura rather than proc reaction with Fischl herself, she doesn’t need any EM.
Your main stat should be % Attack on Timepiece, Electro Damage Bonus on Goblet, and Crit Rate or Crit Damage on Headpiece.
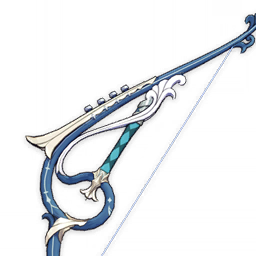 Weapon
As a sole bow user in the team, Fischl will not see any competition for weapons, so we’re free to give her the best bow we possess. Fischl has very strong weapons choices such as The Stringless. It’s an amazing four-star weapon that increases both Elemental Skill and Elemental Burst damage, especially at a high refinement level.
Skyward Harp, Polar Star, and Thundering Pulse are all five-star upgrades to Fischl‘s personal damage over The Stringless. While Elegy for the End is a perfect support substitution, to maximize Yae Miko damage instead.
Artifacts
Since C6 Fischl establishes Electro aura, and not proc reactions herself, the four pieces Thundering Fury Artifact set might not be an ideal choice. It’s better to go with the hybrid build of 2x Thundering Fury and any of the attack sets: Gladiator’s Finale, Shimenawa’s Reminiscence, Vermillion Hereafter, and Echoes of an Offering
Yae Miko Burst have a wide AOE; her Skill also have a tiny AOE that can hit couple enemies if they are very close to each other’s. So an Anemo support is important for Yae Miko team, to help group the enemies. The only Anemo unit who can group enemies very tight together to allow her Skill to shotgun is Venti. However, Venti doesn’t provide buffs to the team, so other alternatives are still competitive, and even stronger, such as Kazuha or Sucrose.
Kazuha at C:Zero is not much stronger than Sucrose. And Yae Miko is one of the rare characters who benefit from Sucrose‘s EM buff to deal more damage, without reactions. So if you don’t have Kazuha, or need him for another team, just stick with Sucrose, she’s the second strongest contender in the Anemo slot in Yae team.
This Yae Hyper Carry team has Sucrose as the backbone for all reactions. For the lack of high application of any other Element besides Electro, we aim to infuse Sucrose burst with Pyro (from Bennett application). So Sucrose can continue to deal Pyro damage and pyro swirls for the duration of her burst. But we also swirl Electro with her Skill, to shred Electro resistance through Viridescent Venerer, and share the EM bonus with the entire team. So you need Sucrose to be at C1 at least, to get two Casts of her Elemental Skill.
For 8 seconds after casting Burst, Sucrose gathers enemies and applies AOE Pyro. This part is crucial to allow Yae to Burst all enemies at once, and allow Overload to add more AOE damage. Then after Yae on cooldown, you can fill time with Sucrose Normal Attacks, to keep swirling Electro, dealing more damage, and triggering Fischl‘s passive.
Stats
As always, Sucrose go for full EM on all slots, Goblet, Headpiece, and Sands. That’s meant to maximize the Swirl reaction damage of Sucrose, and EM sharing buff for the team. Swirl damage is not affected by Attack or Crit stats, so we fully ignore them. On top of that, the Swirl reaction is affected by character level, so Sucrose is one of the characters we can level up all the way to 90.
For sub stats, you always need more EM, and Energy Recharge. Everything else is irrelevant.
Weapon
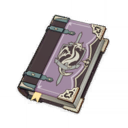
With Bennett in the team the Thrilling Tales of Dragon Slayers on Sucrose is not a must. The weapon gives a 48% Attack buff for the next character switched in after the wielder. And to benefit from it fully, we have to feed this buff to Yae. But I find it hard to switch from Sucrose to Yae Miko directly in this team, and it gets even harder if you want to use Sucrose for normal attacking during Yae cooldown. So while Thrilling Tales of Dragon Slayers is a strong buffer, I recommend another weapon instead.

The craftable Catalyst, Hakushin Ring is an absolute fit into this build. Instead of buffing the Attack of one friendly unit, Hakushin Ring buff the Electro damage of the entire team. The buff is triggered when the wielder cause an Electro reaction. And since enemies always have Electro, and Sucrose deal Anemo damage, she do Electro Swirl with most of her hits.
Once triggered, the buff lasts for 6 seconds unless refreshed with another swirl. So we have 6 seconds after switching out Sucrose to use Yae Miko’s Burst. These 6 seconds are exactly enough to to use Bennett Skill, and Burst, Fischl Skill, and Yae Miko Burst. That way, we snapshot the buff into the majority of Yae damage (her burst), and the entirety of Fischl skill.
Artifacts
Sucrose needs the Viridescent Venerer here in order to shred Electro resistance of enemies. This debuff lasts for 10 seconds, so you have to get back to Sucrose within 10 seconds of switching her out in order to refresh the duration.
Viridescent Venerer also buffs Sucrose’s swirl damage. It gives a higher modifier of 60% damage though, so if fully built, Sucrose can contribute a good chunk to the team’s total DPS.
Bennett is the prime “Attack” stat buff in Genshin Impact, and in this team, he buff both Fischl and Yae Miko damage immensely. As a sole Pyro unit though, he require some serious investment in ER to always have his burst ready.
In this team, make sure to cast Bennett‘s Elemental Burst and skill right after Sucrose cast her burst. Reason is, Sucrose can Infuse her burst with Pyro, so it add some Overload reactions to increase team damage. You will typically use Fischl Skill and Yae burst within radius of Bennett Burst, so they both snapshot the buff Bennett provides.
Stats
We build Bennett with offensive stats if we can. So focus on Energy Recharge to maximize the uptime of his Elemental Burst. With all electro particles generated in this team, his ER goes down a bit, to around 150-160%. These can be fulfilled by using ER on the Timepiece, which frees up the weapon slots to have a higher base attack.
Bennett‘s Attack buff scales with his Base Attack, which comes from levelling and Ascending him, and his weapon, and is not affected by the Attack stat on Artifacts. So we should give him a weapon with a good base attack. And to maximize his healing, we have the option to give him HP stats.
The main stats on Bennett goes as follows: Crit Rate on Circlet, Pyro Damage Bonus on Goblet, and either ER on Sands. For sub stats, get as many offensive stats and ER as you want.
Weapon
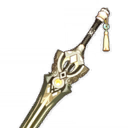
All Energy recharge weapons for Bennett are decent. But in this team, with lower ER requirements, ad longer rotation, we can just stick to ER Timepiece, and use a higher base attack weapon.
Example of four-star swords with the high base attacks are: Blackcliff Longsword, from Paimon shop, the free weapon Prototype Rancour, and the limited banner The Alley Flash.
If you have got a five-star Sword that no DPS character is using, you can give it to Bennett. The increase in base attack will translate to a higher attack buff for the entire party, and yield a huge damage boost. That’s especially true if you’ve got a Skyward Blade, which has a high base attack, and Energy Recharge sub stat.
Artifacts
Bennett is a classic support character who prefers good old Noblesse Oblige, to grant attack buff for the entire party. The buff can be snapshotted in a similar fashion to Bennett’s buff from Burst.
We hope you found this build useful, and hopefully, it gives you a good idea of how to maximize Yae Miko potential.
Check out our Genshin Impact In 2022: Should You Play?. And if you enjoyed this Genshin Impact Guide be sure to check out more even more info on our Genshin Impact Wiki. You can also keep an eye out for more guides and be sure to not miss our Shenhe In-Depth Cryo Support Guide, and Hu Tao And Yoimiya Dual DPS Build










![Toni Kroos là ai? [ sự thật về tiểu sử đầy đủ Toni Kroos ]](https://evbn.org/wp-content/uploads/New-Project-6635-1671934592.jpg)
