
Using Eleventy to host your blog – LogRocket Blog
Sahil Parikh is a web entrepreneur, developer, and author of The SaaS Edge. He is based in Mumbai, India. Besides tech, he loves tennis, golf, and traveling with his wife and daughter.
Finding the perfect website to host your blog is challenging. I, for example, have moved my blog a few times in the last decade. Initially, my blog was hosted on WordPress, then Posterous, and, recently, on SquareSpace.
Why did I move my blog so many times? Because I wanted more control over the design and content in it. As for self-hosted WordPress, managing versions, plugins, and security issues was not something I wanted to do every month.
Then, after I started blogging more, I disliked the experience of creating and publishing on SquareSpace. The page load was slow, the site was clunky, and the mobile editor experience was horrible, and there was nothing I could do to fix it besides optimize a few images.
I then learned about the Jamstack movement on various blogs. Blogs don’t need to be dynamic. Technically, it doesn’t make sense to pull data out of a database when a page is requested. Instead, it makes more sense to create the pages (HTML) beforehand (during the build process).
The idea of the Jamstack movement made a lot of sense (even when you start thinking about security), and I started digging into the world of static site generators (SSGs).
That’s when I stumbled upon Eleventy (11ty) and started using it for my blog. In this article, I’ll cover what 11ty is, why is it gaining popularity, why I chose it for my blog and how you can get started by creating your very own blog using 11ty.
Mục Lục
What is Eleventy (11ty)?
Eleventy is a static site generator written in JavaScript. Eleventy takes your pages (written in one of the many templating engine it supports) and converts them into HTML during the build process. Eleventy sounded exciting, and I decided to jump into reading a lot more about it and why I should use it for my blog.
“While Eleventy uses JavaScript in node.js to transform templates into content, importantly (by default) it does not recommend nor force your HTML to include any Eleventy-specific client-side JavaScript. This is a core facet of the project’s intent and goals.
“We are not a JavaScript framework. We want our content decoupled as much as possible from Eleventy altogether, and because Eleventy uses templating engines that are Eleventy-independent, it gets us much closer to that goal.” – Zach Leatherman, creator of Eleventy
11ty is developer-friendly and supports various templates. I chose the Nunjucks template (it sounded cool and reminded me of my Karate days). While other SSGs are tied to one templating engine, 11ty supports:
- HTML
- Markdown
- Liquid (used by Jekyll)
- Nunjucks
- Handlebars
- Mustache
- EJS
- Haml
- Pug
Eleventy is written in JavaScript (but not a JavaScript framework), which gives you access to the node package manager (npm) ecosystem.
“Eleventy is the most flexible of the JavaScript-based SSGs, and it’s not even close. The templating alone gives it a win on that count. In some ways, Eleventy wins among JS-based SSGs by what it doesn’t do: i.e., it doesn’t force you to use a particular framework and it doesn’t force you to use GraphQL just to do simple little things.” – Bryce Wray
“I had been looking for an SSG that did not require client-side JS or a library like React, even though I like React for larger interactive applications. I just think we overuse frontend frameworks when we really don’t need to. So I tried out Eleventy and never looked back.” – Sia Karamalegos
By then, I was sold on 11ty. Now I had to try it out to see for myself to see if it was easy to set up and get going.
Getting started with Eleventy
I immediately noticed that 11ty’s site documentation is a delight to read. I used one of 11ty’s starter packs and set up a bare-bones blog in less than five minutes.
To get started, let’s clone and set up the official eleventy-base-blog starter project:
git clone https://github.com/11ty/eleventy-base-blog.git myblog
Go to the newly created directory by cd myblog.
Next, install the dependencies:
npm install
Feel free to open this project in your editor of choice to look at the directory structure and even edit the _data/metadata.json.
Now, let’s run 11ty with npx eleventy --serve. Once this command is run, Eleventy creates a _site directory with all your website files and even runs a hot-reloading local web server to serve those files. Your new blog is at http://localhost:8080.
Creating a blog post with Eleventy
Let’s create a new blog post now.
Duplicate posts/fourthpost.md and rename it to fifthpost.md. Update the title, description, date, and tags on the top of the file (this is called the Front Matter Data — think of it as metadata for your blog post).
Next, update the content at the bottom of the file, save, and head back to your browser. And there, your new post is visible.
I prefer a center-aligned website, so open up the css/index.css file and add:
@media screen and (min-width: 768px) {
  body {
    max-width: 768px;
    margin: 0 auto;
  }
}
Next, instead of featuring only three posts on the homepage, show five posts. Edit the Nunjucks code in index.njk file to be:
{% set postslist = collections.posts | head(-5) %}
One other update is to show the description of the post (the front matter data on the top of every *.md post file in /posts) on the homepage. This will let visitors get an excerpt of the blog post before they click on the link.
Open up postlists.njk and add the highlighted line to your code as well (in this post, we are not going to worry about styles).
<ol reversed class="postlist" style="counter-reset: start-from {{ (postslistCounter or postslist.length) + 1 }}">
{% for post in postslist | reverse %}
  <li class="postlist-item{% if post.url == url %} postlist-item-active{% endif %}">
    <a href="{{ post.url | url }}" class="postlist-link">{% if post.data.title %}{{ post.data.title }}{% else %}<code>{{ post.url }}</code>{% endif %}</a>
    <time class="postlist-date" datetime="{{ post.date | htmlDateString }}">{{ post.date | readableDate }}</time>
    {% for tag in post.data.tags %}
      {%- if collections.tagList.indexOf(tag) != -1 -%}
      {% set tagUrl %}/tags/{{ tag }}/{% endset %}
      <a href="{{ tagUrl | url }}" class="post-tag">{{ tag }}</a>
      {%- endif -%}
    {% endfor %}
  </li>
    {{ post.data.description }}<br/><br/>
{% endfor %}
</ol>
Lastly, let’s install a reading time plugin that adds a reading time estimate to each post. I found the eleventy-plugin-reading-time in the npm directory.
npm install --save eleventy-plugin-reading-time
Update the .eleventy.js config file to have:
const readingTime = require('eleventy-plugin-reading-time');

module.exports = (eleventyConfig) => {
  eleventyConfig.addPlugin(readingTime);
};
We are now ready to use the readingTime filter in our Nunjuck template files. Open up postelist.njk and add this line below.
<ol reversed class="postlist" style="counter-reset: start-from {{ (postslistCounter or postslist.length) + 1 }}">
{% for post in postslist | reverse %}
  <li class="postlist-item{% if post.url == url %} postlist-item-active{% endif %}">
    <a href="{{ post.url | url }}" class="postlist-link">{% if post.data.title %}{{ post.data.title }}{% else %}<code>{{ post.url }}</code>{% endif %}</a>
    <time class="postlist-date" datetime="{{ post.date | htmlDateString }}">{{ post.date | readableDate }}</time>
    {% for tag in post.data.tags %}
      {%- if collections.tagList.indexOf(tag) != -1 -%}
      {% set tagUrl %}/tags/{{ tag }}/{% endset %}
      <a href="{{ tagUrl | url }}" class="post-tag">{{ tag }}</a>
      {%- endif -%}
    {% endfor %}
    {{ post | readingTime }}
  </li>
     {{ post.data.description }}<br/><br/>
{% endfor %}
</ol>
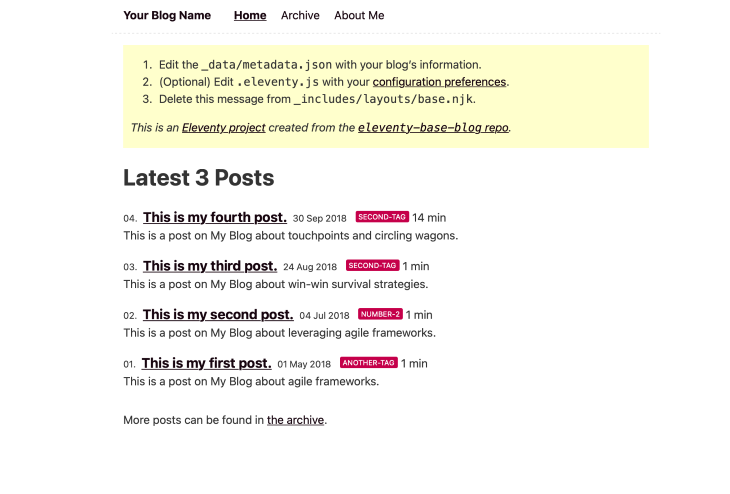
This is what your blog should look like!
11ty has a growing community behind it, and there are tons of articles and how-tos on the web to follow along. Once I designed my blog with Eleventy, I used Tailwind CSS to style it and then hosted it on Netlify. If you are looking for an SSG that is not opinionated, simple, flexible, and fast, I would recommend you give 11ty a shot.
LogRocket: Full visibility into your web and mobile apps

LogRocket is a frontend application monitoring solution that lets you replay problems as if they happened in your own browser. Instead of guessing why errors happen, or asking users for screenshots and log dumps, LogRocket lets you replay the session to quickly understand what went wrong. It works perfectly with any app, regardless of framework, and has plugins to log additional context from Redux, Vuex, and @ngrx/store.
In addition to logging Redux actions and state, LogRocket records console logs, JavaScript errors, stacktraces, network requests/responses with headers + bodies, browser metadata, and custom logs. It also instruments the DOM to record the HTML and CSS on the page, recreating pixel-perfect videos of even the most complex single-page and mobile apps.
Try it for free.
Share this:


![Toni Kroos là ai? [ sự thật về tiểu sử đầy đủ Toni Kroos ]](https://evbn.org/wp-content/uploads/New-Project-6635-1671934592.jpg)


