
Turn on Network Discovery on Windows 11 With 2 Steps
Mục Lục
Turn on Network Discovery on Windows 11 With 2 Steps
Network Discovery is a useful tool to master for security purposes.
2
Share
X
- There are two ways in which you can turn on Network Discovery in Windows 11.
- Inside the Control Panel, you will find all the Network and Internet settings you need.
- You can also tackle this by using the Settings app. While we’re at it, you can turn on File Sharing as well.

X
INSTALL BY CLICKING THE DOWNLOAD FILE
Fix Windows 11 OS errors with Restoro PC Repair Tool:
This software repairs common computer errors by replacing the problematic system files with the initial working versions. It also keeps you away from critical file loss, hardware failure, and repairs damages made by malware and viruses. Fix PC issues and remove viruses now in 3 easy steps:
-
Download Restoro PC Repair Tool that comes with Patented Technologies
(patent available here
- Click Start Scan to find Windows 11 issues that could be causing PC problems.
- Click Repair All to fix issues affecting your computer’s security and performance
- Restoro has been downloaded by
0
readers this month.
Network Discovery is a function that was first introduced in Windows Vista and that allows Windows PCs to locate and discover other computers and devices through a network.
Today, we’ll see how to turn on Network Discovery in Windows 11.
When you’re connected to a private network, such as your home or place of employment, the discovery feature is immediately enabled.
It is deactivated on public networks, such as guest Wi-Fi or networks that are not trusted, in order to prevent other PCs from automatically detecting your devices on those networks.
In some cases, Network Discovery is stopped in private networks as well, and as a result, other computers will not be automatically identified by the operating system.
If this is the case, and you desire to enable it, the methods outlined below should be of assistance.
Follow along as we will first see if the feature is safe and then jump into the methods by which you can turn on Network Discovery in Windows 11.
Is Network Discovery safe?
To put it simply, Network Discovery is crucial and safe because every single MSP or IT team, regardless of the vertical or size of the organization, requires network visibility in order to do its job.
IT teams are unable to grasp the network’s ins and outs unless they have a full understanding of the devices that are connected to it.
Furthermore, an in-depth awareness of the links between them, and how they interact with one another is crucial.
Network Discovery may also be a valuable instrument in the field of cybersecurity.
For example, an incorrect IP address is frequently a symptom of malicious or rogue devices that are capable of delivering malware to a computer system.
Considering that the feature’s major goal is to locate and map assigned IP addresses, IT teams will have an easier time distinguishing between genuine and invalid device IP addresses.
Its tools enable managed service providers (MSPs) to conduct frequent scans to ensure that there are no threat actors lurking on the other end of a network’s perimeter.
Finally, it may assist MSPs and IT administrators improve digital security by allowing them to determine which ports are open on their connected devices.
Any open ports on a device that aren’t required for normal functioning have the potential to pose a security threat.
How can I turn on Network Discovery in Windows 11?
This being said, let’s now see what you can do if Network Discovery is turned off in Windows 11. As a bonus, you will also see how to turn on File Sharing.
Expert tip:
SPONSORED
Some PC issues are hard to tackle, especially when it comes to corrupted repositories or missing Windows files. If you are having troubles fixing an error, your system may be partially broken.
We recommend installing Restoro, a tool that will scan your machine and identify what the fault is.
Click here to download and start repairing.
Also, if you were wondering how to turn on File sharing, you can check the radio button next to Turn on file and printer sharing. That’s it!
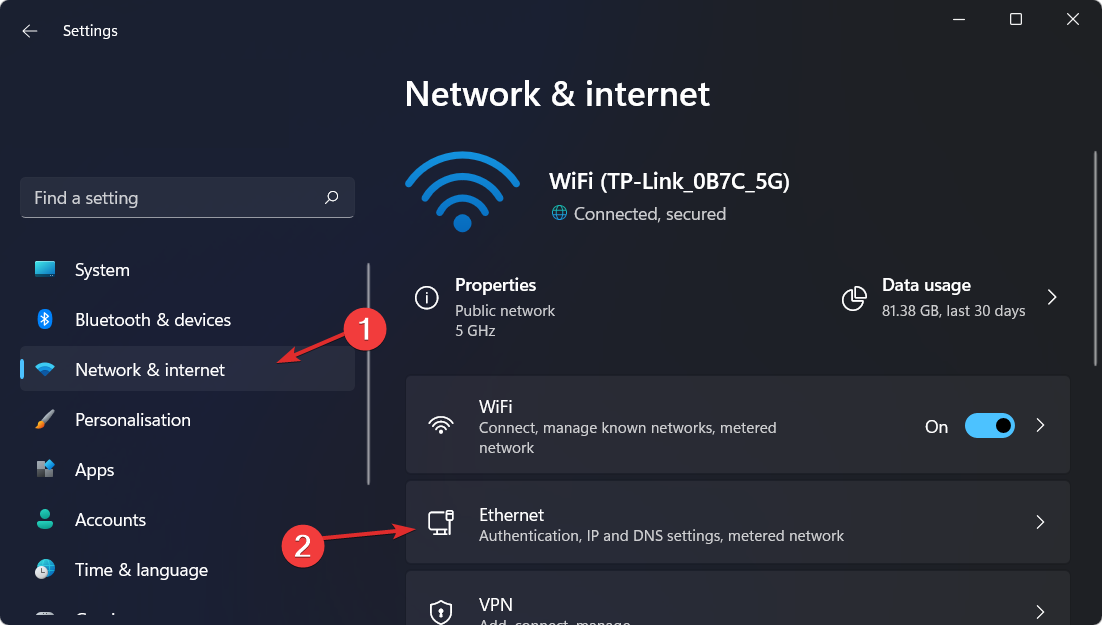
1. Use Settings to enable Network Discovery
- Open the Settings app by pressing Windows + I simultaneously.
- Then, navigate to Network & Internet followed by Ethernet. Note that if you are connected to WiFi, you will have to click on it instead of Ethernet.

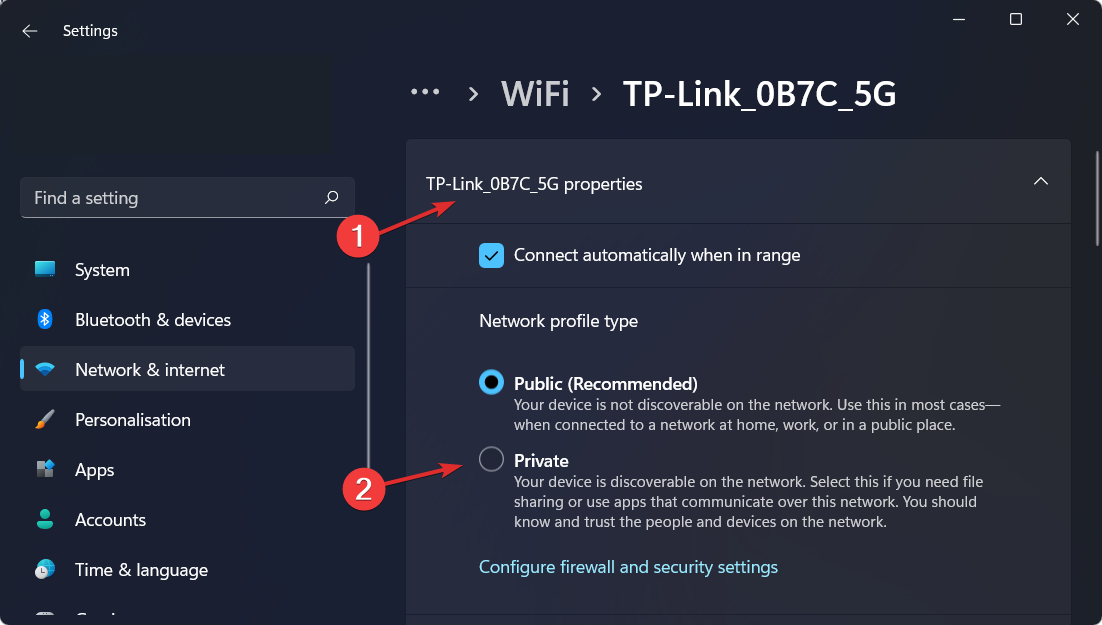
- Now under the WiFi or Ethernet properties, you will have the Network profile type section under which you can choose Private.
- This option will automatically enable Network Discovery.
2. Turn on Network Discovery in Windows 11 using Control Panel
If your Network Discovery is not turned on, you can easily enable it through the built-in Control Panel settings.
The advanced sharing settings for your network allow you to turn Network Discovery on and off in just a click.
1. Press the Windows key to open the Windows Search function and enter Control Panel.

2. Click on the topmost result to open Control Panel.
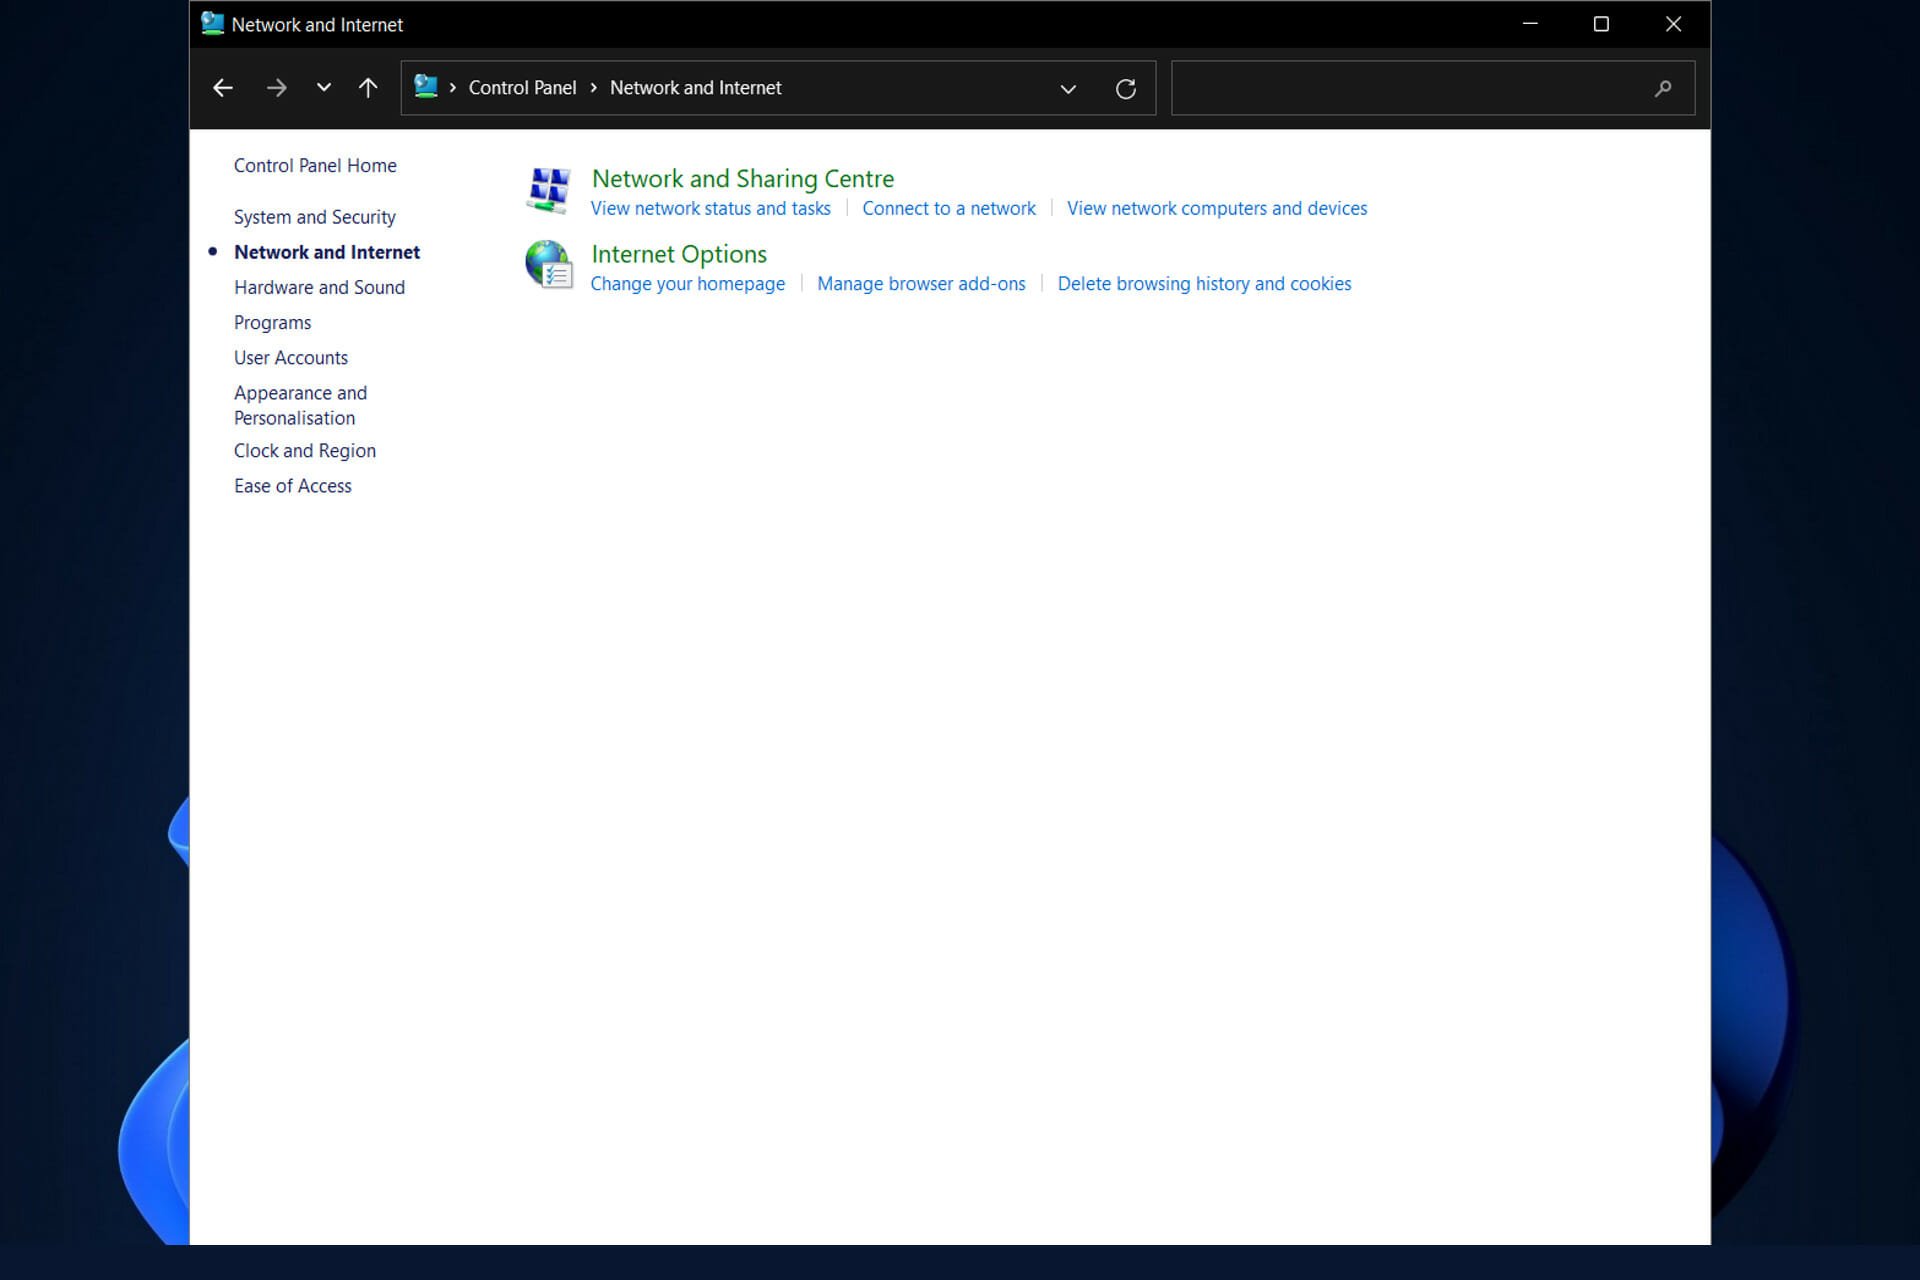
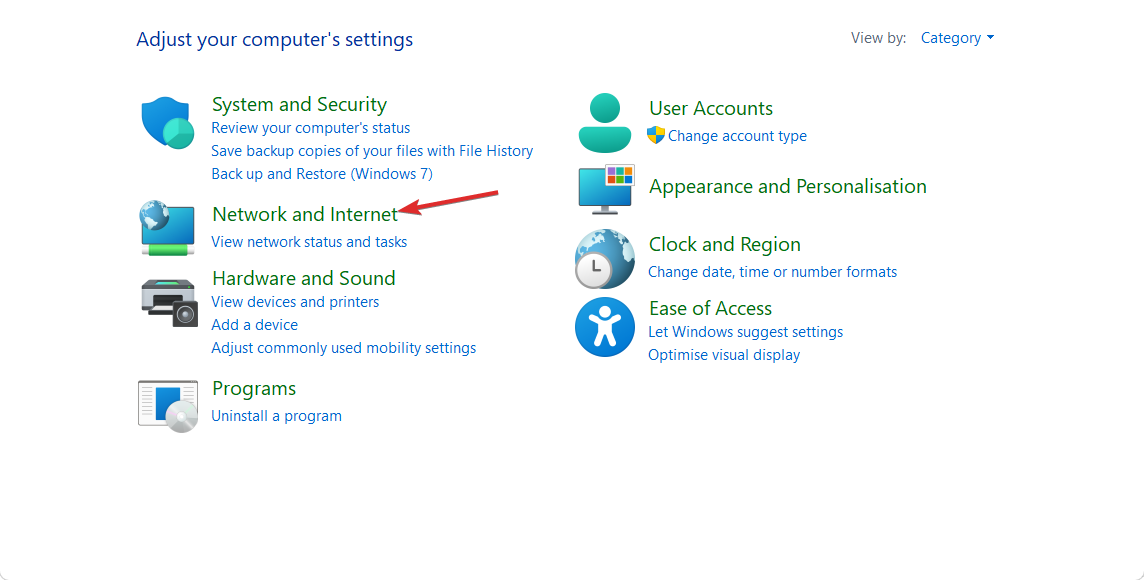
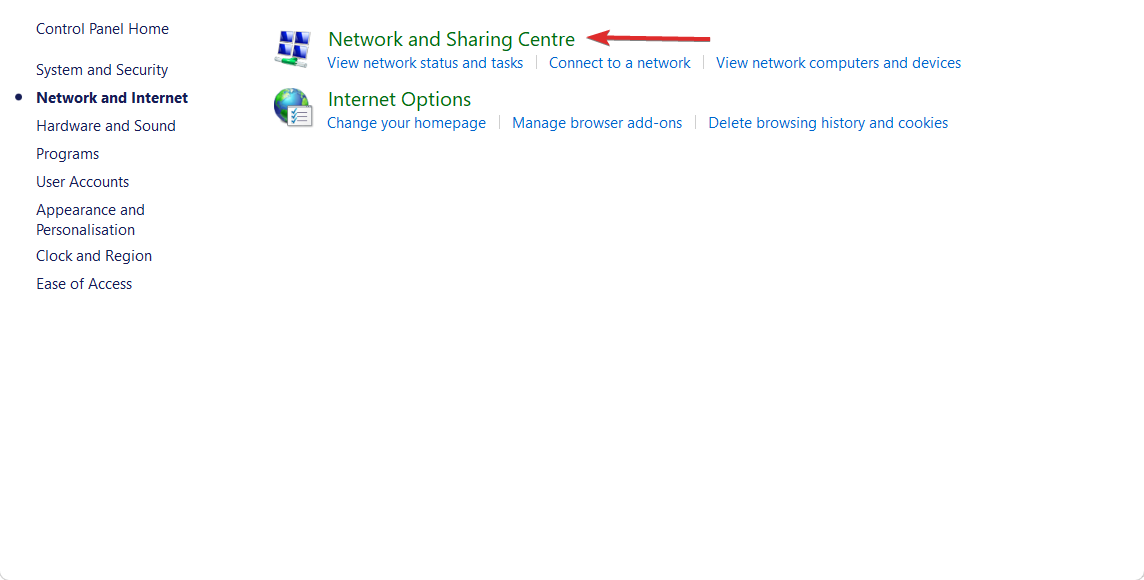
3. Now click on Network and Internet.
4. Next, select the Network and Sharing Centre option.
5. From the left panel choose the Change advanced sharing settings option.

6. Here all you have to do is check the radio button next to the Turn on network discovery option. If you want to turn off the feature, you can simply follow the same steps as above but check the radio button next to the Turn off network discovery option.
We have shown you the two methods by which you can easily turn on Network Discovery in Windows 11.
However, this does not guarantee streamlined behavior on all your devices. Don’t worry, as always we have you covered! Here’s what to do if Network Discovery is not showing all computers.
Furthermore, there are cases in which you are able to successfully activate this feature across PCs, but it fails to remain active.
If the Network Discovery feature simply won’t stay on, have a look at the dependency services settings before anything else.
We hope you found this guide helpful. If you haven’t managed to figure it out or better still, if you have more solutions in mind, feel free to drop us a line in the Comments section below.
Still having issues? Fix them with this tool:
SPONSORED
If the advices above haven’t solved your issue, your PC may experience deeper Windows problems. We recommend downloading this PC Repair tool (rated Great on TrustPilot.com) to easily address them. After installation, simply click the Start Scan button and then press on Repair All.
Was this page helpful?
x
Start a conversation


![Toni Kroos là ai? [ sự thật về tiểu sử đầy đủ Toni Kroos ]](https://evbn.org/wp-content/uploads/New-Project-6635-1671934592.jpg)


