LayerStack Tutorials – LayerStack – How to restart Network Interface / Network Adapter on Linux & Windows Cloud Servers
Once you make changes in the server network configuration file, then require to restart the server networking service in order to reflect the changes.
This guide will describe the steps to restart the network interface or network adapter in the Linux and Windows servers.
Mục Lục
Restarting Network interface/adapter in Linux OS
Ubuntu / Debian
-
Use the following command to restart the server networking service.
# sudo /etc/init.d/networking restart
or
# sudo /etc/init.d/networking stop
# sudo /etc/init.d/networking start
else
# sudo systemctl restart networking

-
Once this is done, use the following command to check the server network status.
# sudo /etc/init.d/networking status
or
# sudo systemctl status networking

Ubuntu 17.10 and higher versions use NetPlan as the default network management tool and its configuration files are written in YAML syntax with a .yaml file extension.
Run the below command to update networking and then any changes that have been made to the network will take effect:
# netplan apply

AlmaLinux
-
Use the following command to restart the server networking service.
# nmcli networking off
# nmcli networking on
or
# systemctl restart NetworkManager

-
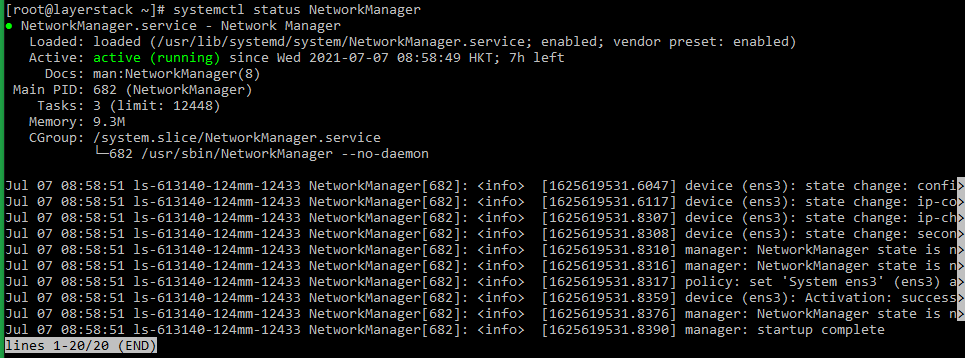
Once this is done, use the following command to check the server network status.
# nmcli -o
or
# systemctl status NetworkManager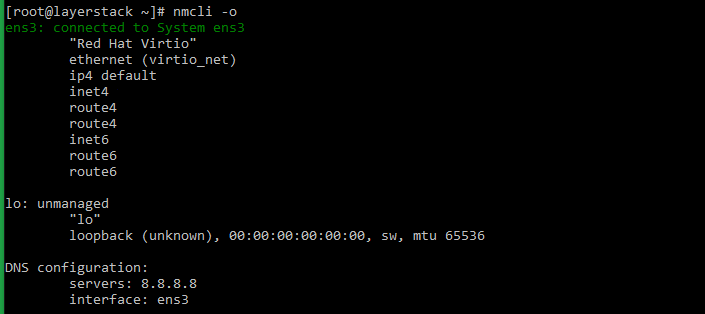
Rocky Linux
-
Use the following command to restart the server networking service.
# nmcli networking off
# nmcli networking on
or
# systemctl restart NetworkManager

-
Either of the below commands can be executed to check the status of the networking service.
# nmcli -o
or
# systemctl status NetworkManager

CentOS 8
-
Use the following command to restart the server networking service.
# nmcli networking off
# nmcli networking on
or
# systemctl restart NetworkManager.service

-
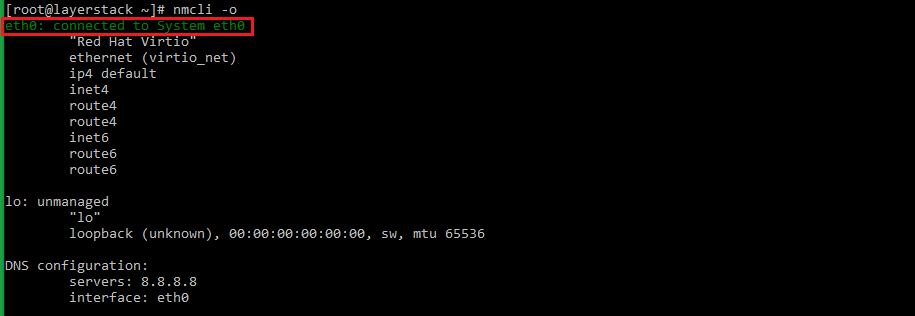
Either of the below commands can be executed to check the status of the networking service.
# systemctl status NetworkManager.service
or
# nmcli -o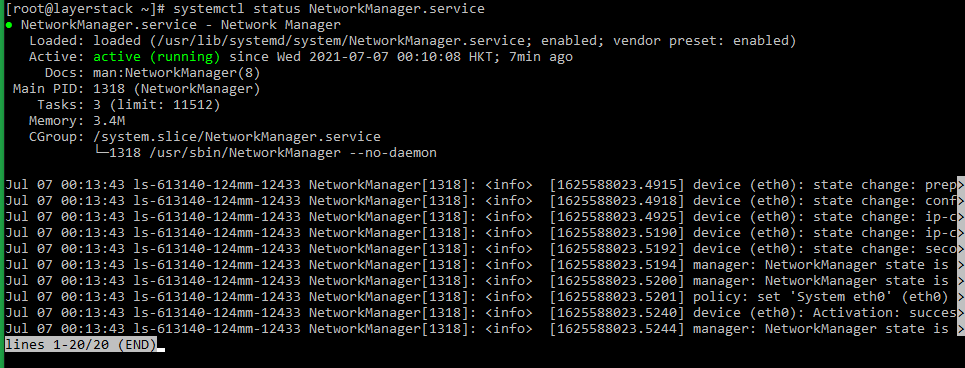
CentOS 7
-
Use the following command to restart the server networking service.
# systemctl restart network.service
or
# service network restart
or
# /etc/init.d/network restart

-
The status of the networking service can be checked by making use of any of the below commands.
# systemctl status network.service
or
# service network status
or
# /etc/init.d/network status


CentOS 6
-
Use the following command to restart the server networking service.
# service network restart
or
# /etc/init.d/network restart

-
Once this is done, use the following command to check the server network status.
# service network status
or
# /etc/init.d/network status

Windows OS
Using the Enable/Disable mode of network adapter
-
Click on the Windows key to open start and search
Settingsand go to theNetwork and Internetthen click onChange adapter optionwhich is shown in the below image.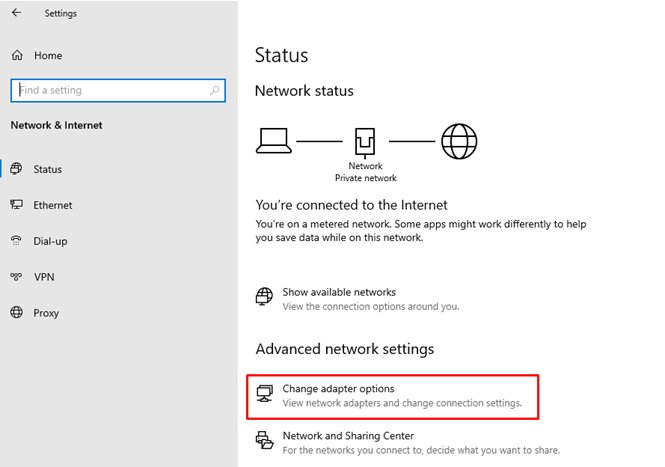
Then will get the below page:
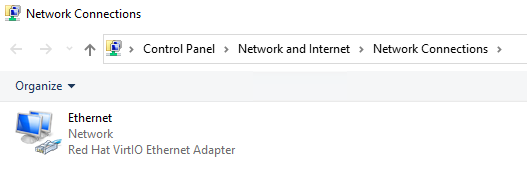
-
Right-click the
Ethernet deviceand click onDisableoption.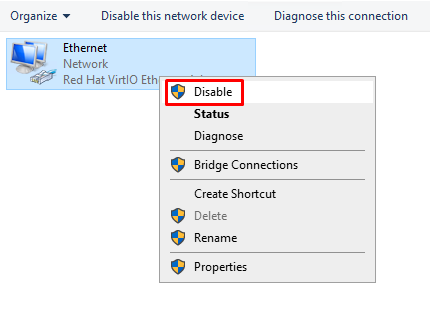
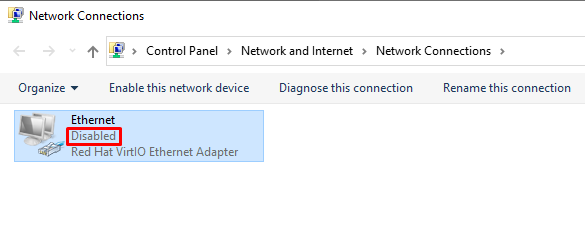
-
Again, Right-click the
Ethernet deviceand click onenableoption.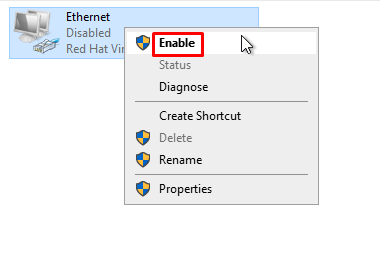
-
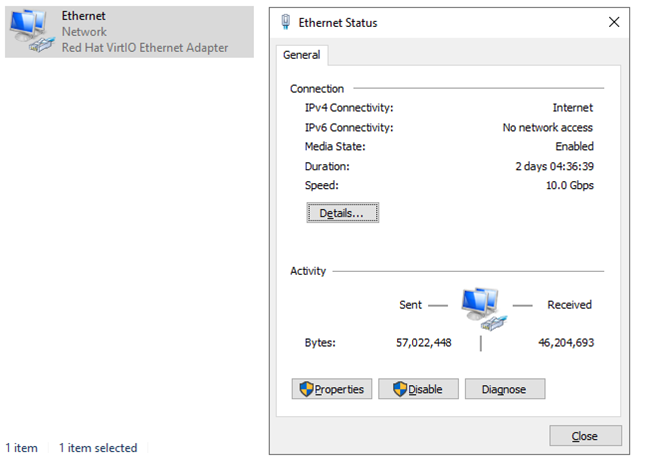
Once this is done, Right-click the
Ethernet deviceand click onstatus.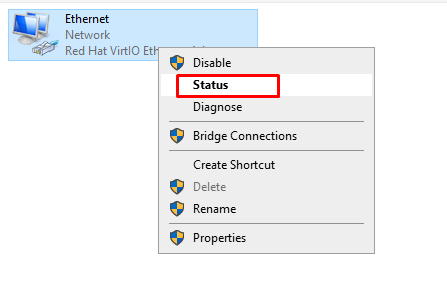
Using the netsh command
In Windows OS, the command line method involves using the netsh command for resetting the network and TCP/IP stack.
-
Go to
Startand typeCMDin the search window.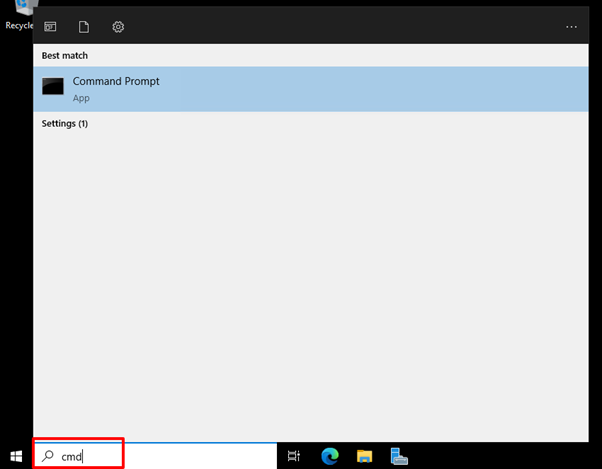
-
Once opened the
Command Prompt, the command for restarting the network interface, as provided below, can be executed.> netsh winsock reset
-
Regularize the networking process as indicated in the message after restarting the server.
-
In addition to the above command, may also use the command which resets the TCP/IP stack. The command is as follows.
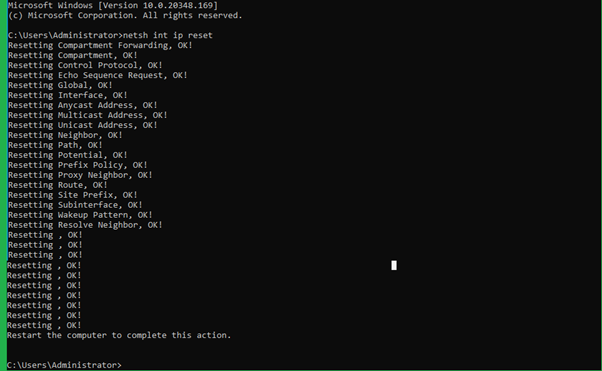
> netsh int ip resetThe output will be as follows:
Using the Network Reset option (Windows 10/11)
The reset button method can be used in Windows 10 & 11 versions by which the user can restart the Network interface. The steps for this are given below.
-
Click on Windows
Start Menubutton and then selectSettings.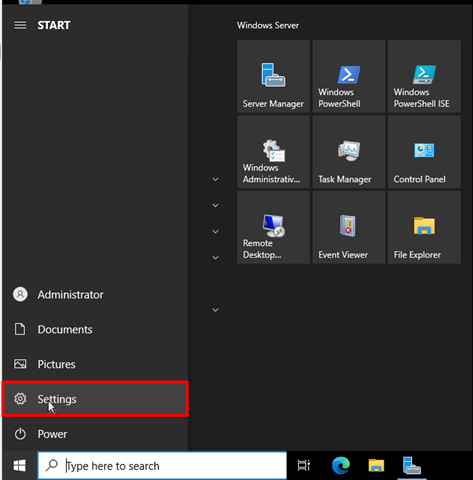
-
From the
Settingsoption, selectNetwork & Internetoption.
-
Here you would be able to see the adapter options i.e
Advanced Network Settings, from which you can click onNetwork Resetoption.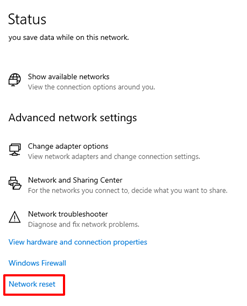
-
Click on the
Reset Nowbutton on the right side ofNetwork resetoption and you will be prompted for the confirmation. ChooseYesfor proceeding with resetting the network settings.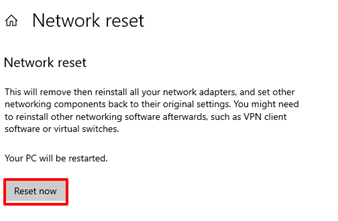
Once clicked on
Yes, the network adapter will start to reset and you will be able to restart the network interface.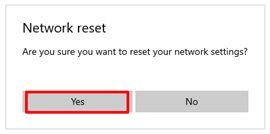


![Toni Kroos là ai? [ sự thật về tiểu sử đầy đủ Toni Kroos ]](https://evbn.org/wp-content/uploads/New-Project-6635-1671934592.jpg)


