
How to Use the Medela Pump in Style with Max Flow (2022)
How to Use the Medela Pump in Style with Max Flow (2022)
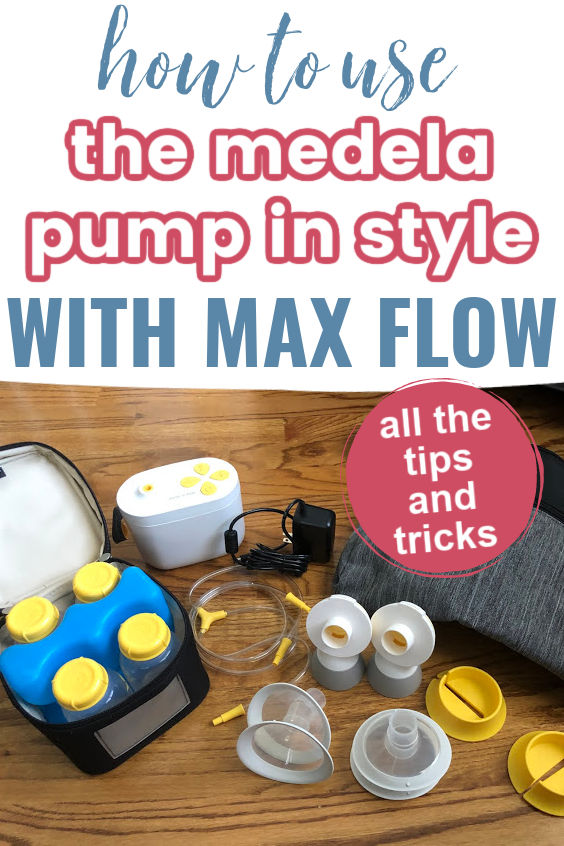
Not sure how to use your new breast pump? Here’s a step by step guide to using a Medela Pump in Style with Max Flow – how to set it up, how to clean it, and tips and tricks for getting as much milk as possible!
This post may contain affiliate links, which means that if you click through and make a purchase, I’ll be compensated at no additional cost to you. I only recommend products I love! More info here.
For years, the Medela Pump in Style has been one of the most popular pumps on the market. Recently, Medela introduced a new, upgraded version of this pump – the Pump in Style with Max Flow. Here’s everything you need to know about using it.
If you don’t have your Pump in Style yet, you may be able to get it free through insurance super easily here, or you can buy it from amazon.
(Have the older version of the Pump in Style? Here’s a post on how to use the Pump in Style Advanced that will be helpful for you.)
Here’s a story showing how it’s put together and works:
Mục Lục
How do you assemble the Medela Pump in Style with Max Flow?
Here’s how the Max Flow looks with everything put together:
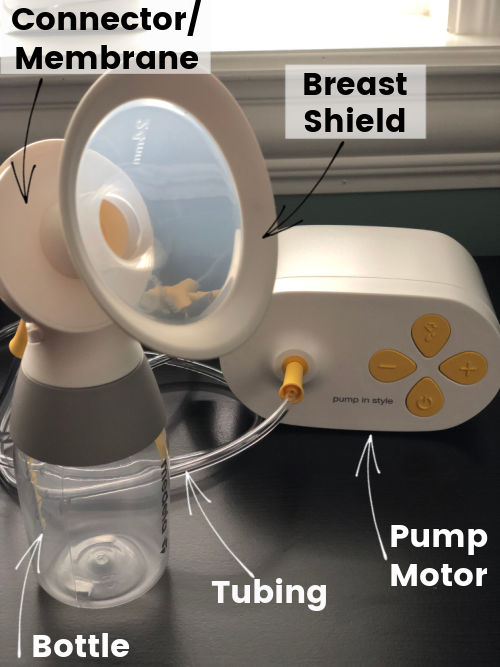
The difference pieces to put together include:
- Breast shields – Breast shields are also called flanges (or “horns”) and are the part that fits on your breast. Note that breast shields come in different sizes, and the size that comes with your pump might not be the correct size for you. (More on breast shield sizing here.)
- Connectors – This piece connects together the bottles, tubing, and breast shields. It also includes the valve, which stretches and pulls each time the pump sucks.
- Tubing – The tubing connects the pump motor to your breast pump parts. You can set it up to either double or single pump.
- Bottles – Your breast milk flows into the bottles as you pump. If your baby drinks out of bottles other than Medela bottles, you can try screwing them onto the connector (narrow mouth bottles may screw directly; other bottles may require an adapter like this one).
- Pump Motor – The motor creates the suction that pulls the milk out of your breasts. You can adjust the levels of suction and the mode on the faceplate.
To put your Pump in Style together, connect each piece – the flange, the membrane, and the bottle – to the connector as shown in the photo above. Then attach the tubing to the connector and the pump motor.
How do you use the Medela Pump in Style with Max Flow?
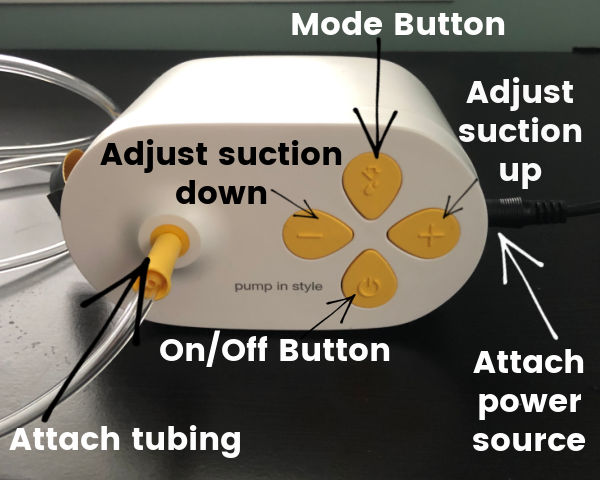
On the breast pump, you’ll see:
- On/Off Button – Press this button to turn the pump on or off.
- Mode Button – The Medela Pump in Style has two modes: letdown mode (fast, light suction) and expression mode (slower, deeper suction). The mode button allows you to toggle between them. The Pump in Style starts in letdown mode and automatically switches to expression mode after one minute. You can use this button to switch it sooner if you’d like, or switch it back if you haven’t let down yet when it moves into expression mode.
- Suction Buttons – Push the – button to decrease the level of suction on the pump, and the + button to increase the suction.
- Power Source – Plug your power cord (or battery pack) in here.
- Tubing Port – This is where you attach the tubing from your pump parts to the pump motor.
To use the Medela Pump in Style with Max Flow, follow the below steps. (Before pumping for the first time, make sure to wash and sterilize your breast shields, connectors, membranes, and bottles.)
- Plug the pump in (either to an outlet using the power adaptor, or to a battery pack)
- Attach the tubing to the pump
- Put your bottles, connectors and membranes, bottles, and breast shields together (as pictured above)
- Attach the tubing to your connectors
- Place the breast shields on your breasts
- Press the power button to turn the pump on
- After the pump switches to expression mode, push the + to increase the suction to the highest level that is comfortable for you. (Keep going until you feel a bit of discomfort, and then push the – button once to decrease it so that you’re comfortable.)
How long should you pump? It depends on a couple of things – why you’re pumping (if you’re trying to build a freezer stash, are at work, are exclusively pumping, etc.) and how old your baby is. More on this here, but I would default to 15-20 minutes if you’re not sure.
What do you do when you’re done pumping?
After you’re done pumping, you’ll want to store the breast milk that you collected and wash your pumping gear.
How to Store Your Breast Milk
Remove the bottles from the connectors and either put the caps on the bottles, or transfer your milk to a breast milk storage bag if you plan to freeze it.
If you plan to feed the milk in the next few hours, you may want to just leave it out at room temperature. Otherwise, it makes sense to store it in the fridge or freeze it.

Much more on storing breast milk here.
How to Clean Your Pump Parts and Breast Pump
To clean your pump parts, take the breast shields and bottles off of the connectors. Open the connectors and remove the membranes.
Rather than wash your pump parts directly in the sink, fill a wash basin with warm, soapy water. Using a bottle brush that is only used for infant feeding items, clean the pump parts and any bottles you’re washing thoroughly.
You can also wash them in the dishwasher.
Wipe down your pump faceplate with a clean, damp cloth as needed.
More on washing pump parts and bottles here.
Sterilizing your Pump Parts
The CDC recommends sterilizing pump parts daily if your baby is under three months old, is currently ill, or was born premature. (If none of these is the case, they do not give a specific timeline for sterilizing but say it may not be necessary as often.)

More on sterilizing pump parts here.
Troubleshooting Issues with the Pump in Style with Max Flow
Here’s what to try if you’re pump doesn’t seem to be working, or if the suction isn’t as strong as it used to be:
- Make sure that the tubing is securely attached to the pump motor and to the pump parts on both sides. (If both sides aren’t attached, neither side will work.)
- Check that your power source is connected securely. If you’re using a battery pack and suction seems lower than normal, try plugging your pump into an outlet if possible and see if you notice a difference.
- Try taking your pump parts apart and putting them back together again. Sometimes the membrane isn’t in exactly the right spot.
- If your pump parts are wet, try a dry set.
- If it’s been a while since the last time you replaced your pump parts, try getting a new set. After a few months, they stop working as well (they might get microscopic tears, they can stretch, residue can build up, etc.).
If none of these tips works, I would recommend reaching out to Medela customer service via phone or live chat.
Additional tips for using your Medela pump
Below are some tips and tricks I would recommend trying to make pumping with your Medela pump easier.
1. Pump hands-free
Pumping is much easier when you don’t have to hold up your breast shields the entire time. A hands-free pumping bra can free you up to do other things (work on your laptop, play with your baby, eat, etc.) while you pump.See some great options here.

2. Set a timer on your phone to track how long you’ve pumped
The Pump in Style doesn’t have a timer, so set a timer or an alarm on your phone. This way, you don’t overestimate the amount of time you’ve spent pumping (for me, it always feels like it’s been a lot longer than it actually has).
Note that the Pump in Style with Max Flow automatically shuts off after 30 minutes.
3. Get a battery pack if you will need to be mobile
If you’re only pumping at work in a lactation room with an outlet, you might not need this. However, if you are exclusively pumping, or if you ever travel for work, or even if you pump at home and don’t want to be stuck next to an outlet, a battery pack can be really helpful.
Some versions of the Pump in Style with Max Flow come with this battery pack:

If yours doesn’t, you can buy it separately or try a car adapter. More on battery packs here.
4. How to Single Pump with the Max Flow
If you want to just pump on one side, attach one side of the tubing to the connector, and the other to tubing holder.

(If you just leave it unattached, there won’t be any suction.)
More on single pumping here:
That’s what you need to know about how to use a Medela Pump in Style with Max Flow! Have any questions that I didn’t answer? Leave them in the comments below!


![Toni Kroos là ai? [ sự thật về tiểu sử đầy đủ Toni Kroos ]](https://evbn.org/wp-content/uploads/New-Project-6635-1671934592.jpg)


