
How to Use Piping Bags, Piping Tips and Couplers – Curly Girl Kitchen
Whether you’re an inexperienced baker, or just looking to improve your skills with decorating cakes and cupcakes, then you need to know how to use piping bags, piping tips and couplers. This is a basic skill that anyone can master! Not only will I show you how to use a piping bag, but in today’s comprehensive tutorial post, you’ll find lots more useful information to help you with your cake decorating techniques.
We’ll talk about disposable vs reusable piping bags, which size piping bag you should choose for your project, and how to fill piping bags without making a mess. Then we’ll discuss couplers, what they’re for, when to use them, and how to put them together. Lastly, we’ll cover piping tips, including my favorite ones, how to use them, and the one piping tip every baker should own. I’ll even show you how to fill piping bags with multiple colors of frosting, for striped or blended colors on your baking projects. So let’s get started!
You might also love these posts on How to Make Perfect American Buttercream and How to Stack, Fill, Crumb Coat and Frost Layer Cakes.
This site contains affiliate links. As an Amazon associate, I earn from qualifying purchases. This means that I may make a small commission if you purchase a product using those links. This in no way affects my opinion of those products and services. All opinions expressed on this site are my own.
Mục Lục
Types of Piping Bags
Disposable Piping Bags
Disposable piping bags are made of plastic, and you can simply throw them away when you’re finished using them. They’re easy to use and easy to hold. They’re pretty inexpensive if you buy them in large packs. And it’s really hassle free to not have to bother washing all the buttercream out of them. Of course, they’re not super eco friendly. But if you’re new to using piping bags, I recommend you go with disposable ones.
Reusable Piping Bags
Reusable piping bags are also called “featherweight” or pastry bags, and they’re usually made of nylon. They’re thicker and larger, so they hold more filling. They’re very durable, but also more expensive. They can be a pain to wash, and are really not recommended for beginner cake decorators.
Favorite Brands
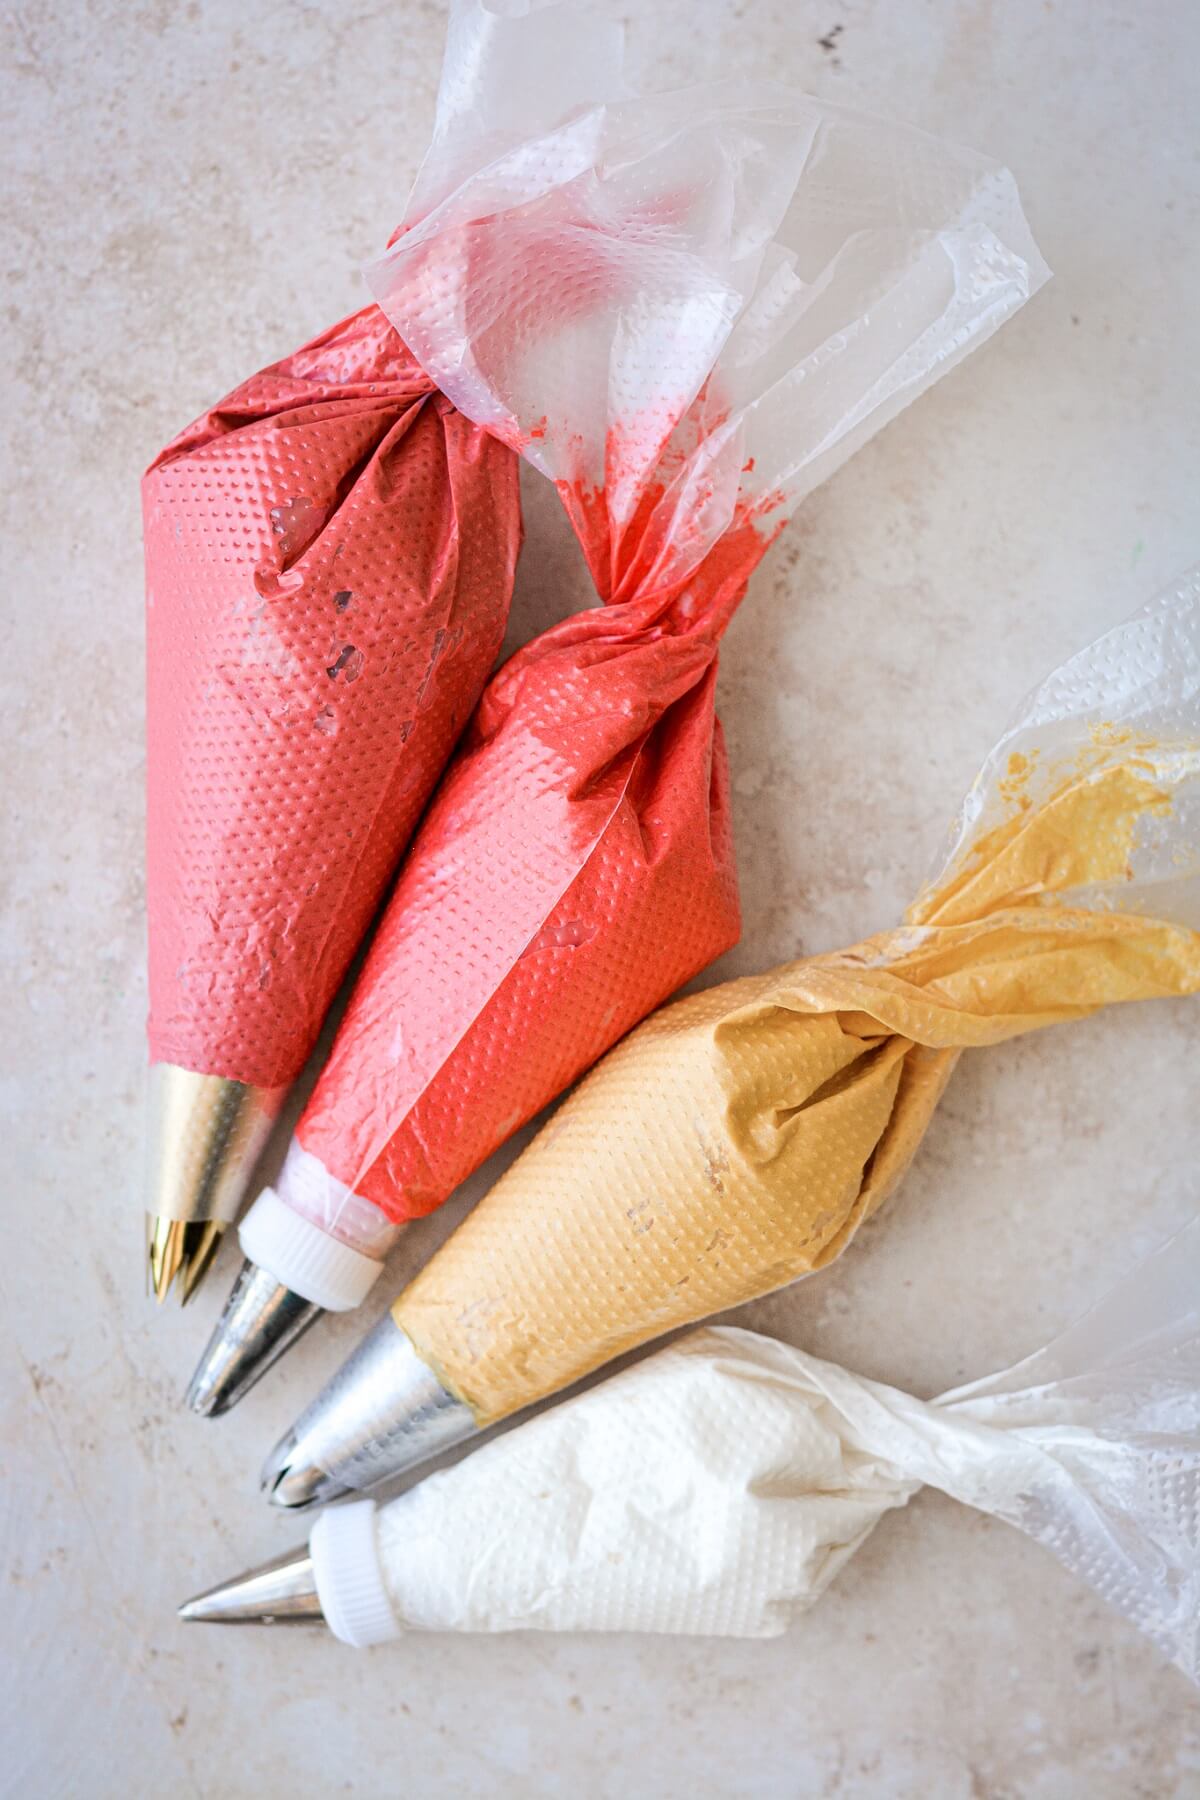
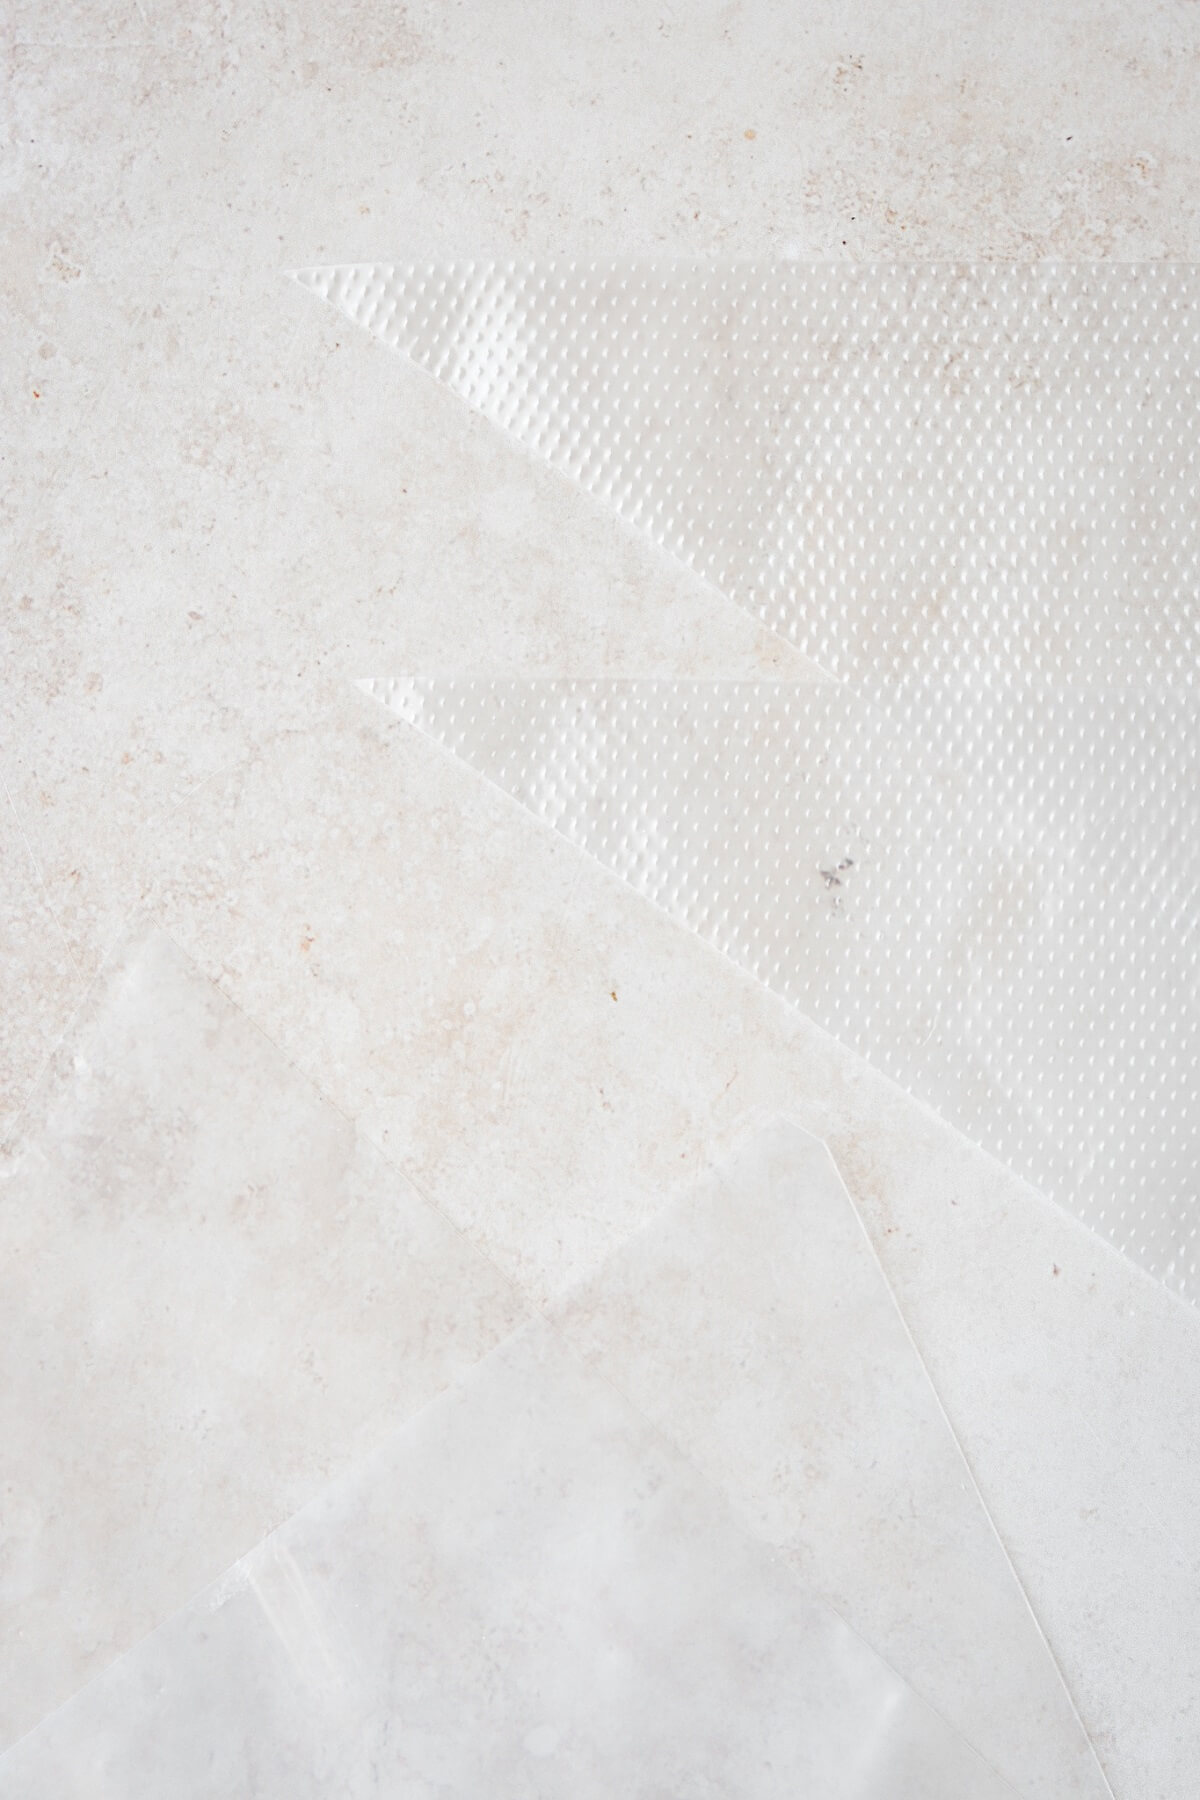
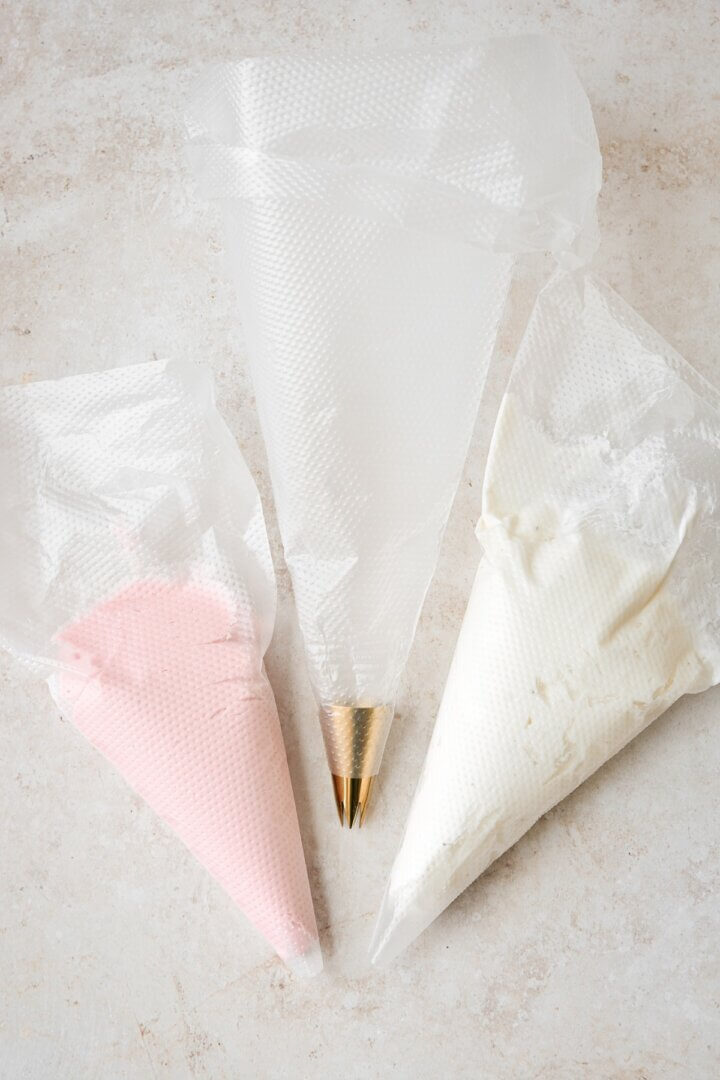
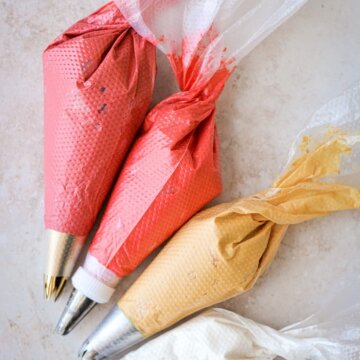
I’ve tried a few different brands of disposable piping bags over the years, and I typically use Wilton, which are always reliable and sturdy. I also frequently use these piping bags, too. The outside is textured, which I like since they don’t feel as slippery when the outside gets greasy with buttercream. You can see in the photo below the textured bags next to the smooth Wilton bags. Neither of these has ever split open or exploded on me while piping.
Most Common Sizes of Piping Bags
12-Inch
- Best For: Small details on cakes or cookies such as polka dots, small borders and lines, small flowers, swags and writing.
- Do not use 12-inch piping bags for frosting cupcakes, as they don’t hold a lot of frosting, and you will need to constantly refill the bag, which gets messy.
16-Inch
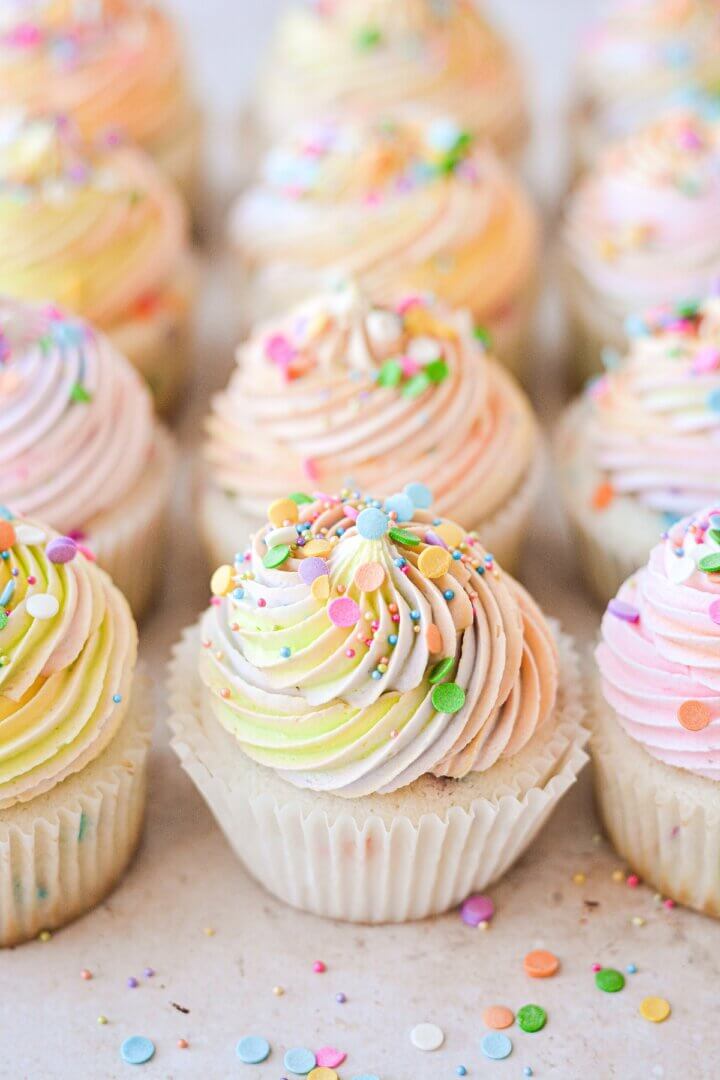
- Best For: Larger applications of frosting, such for frosting cupcakes or sugar cookies, piping decorative swirls on top of cakes, large borders and covering a cake all over with rosettes (“rosette cake”).
- If you can find 18-inch piping bags, these work even better for frosting a large amount of cupcakes, since you won’t have to refill the bag as often.
All About Couplers
What are couplers and why use them?
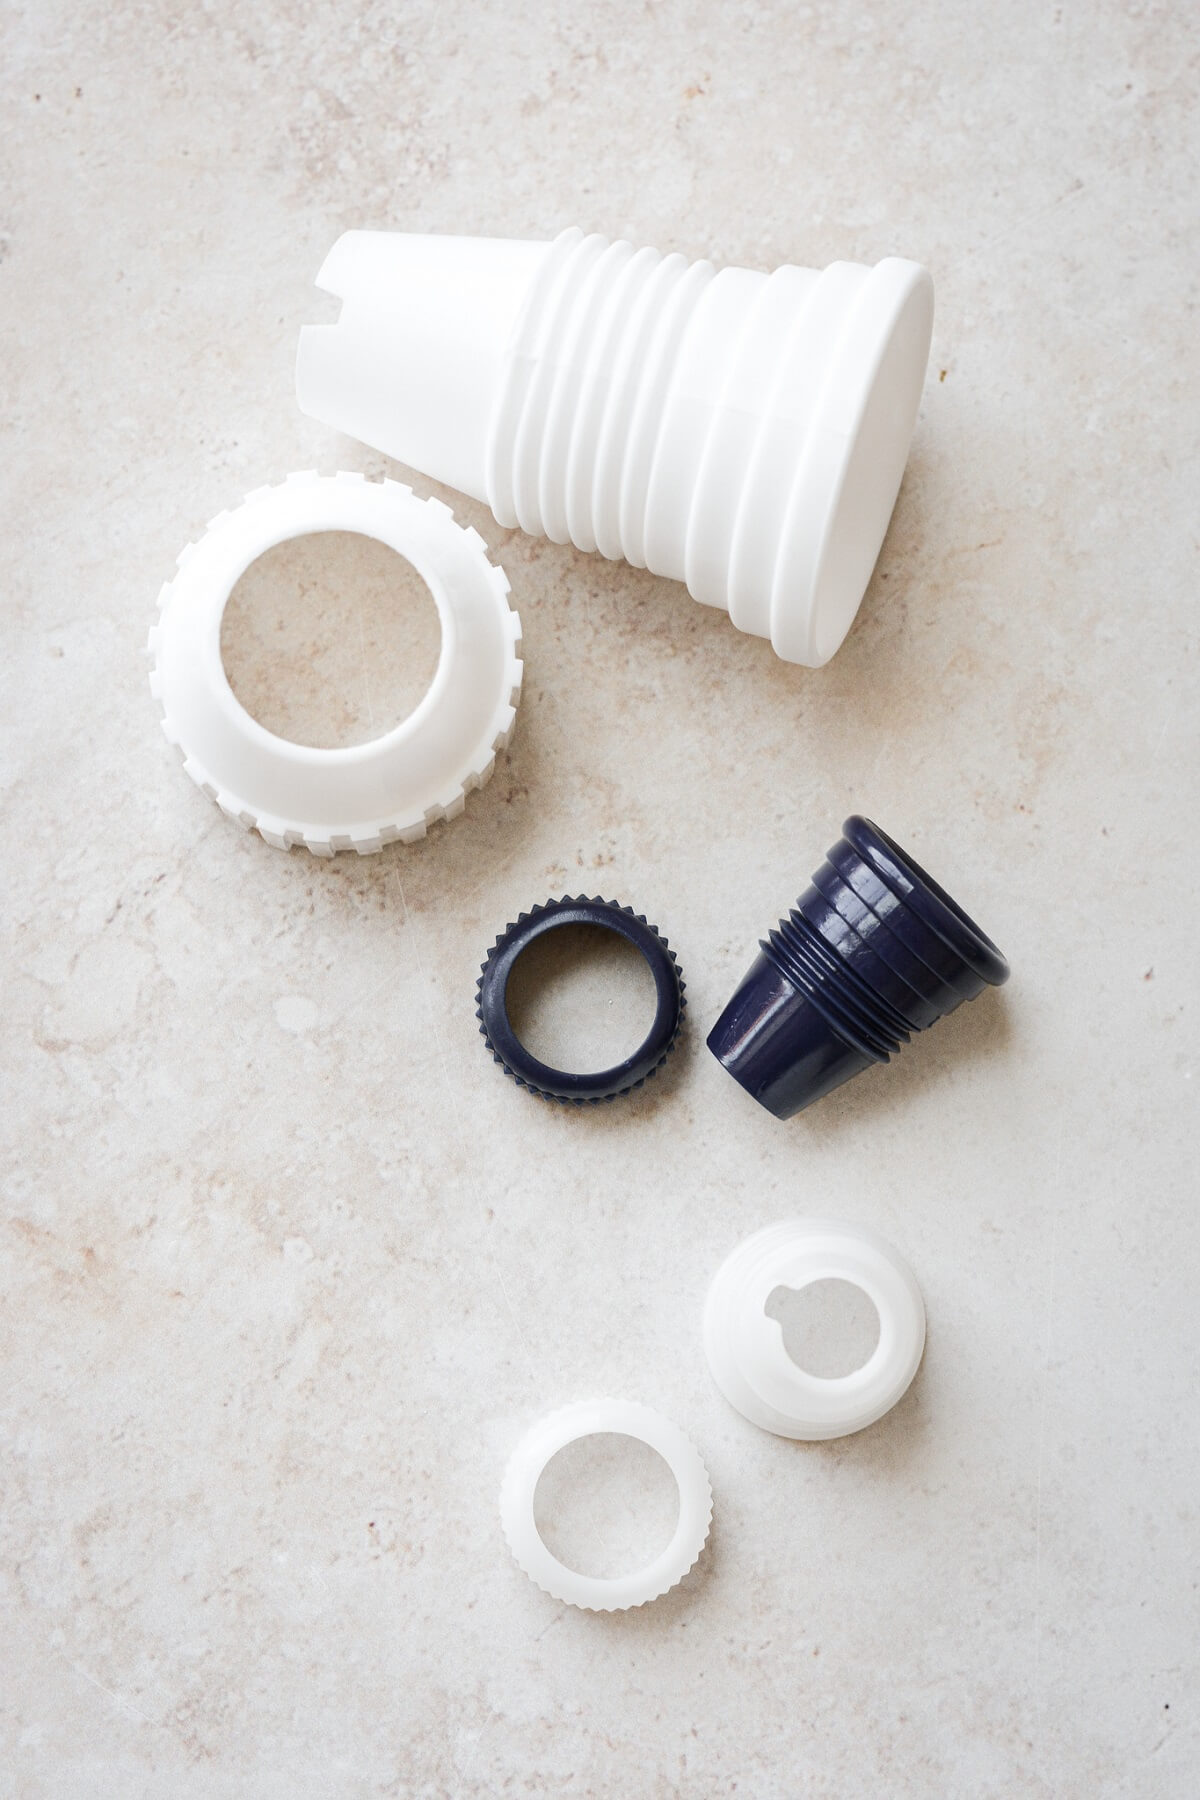
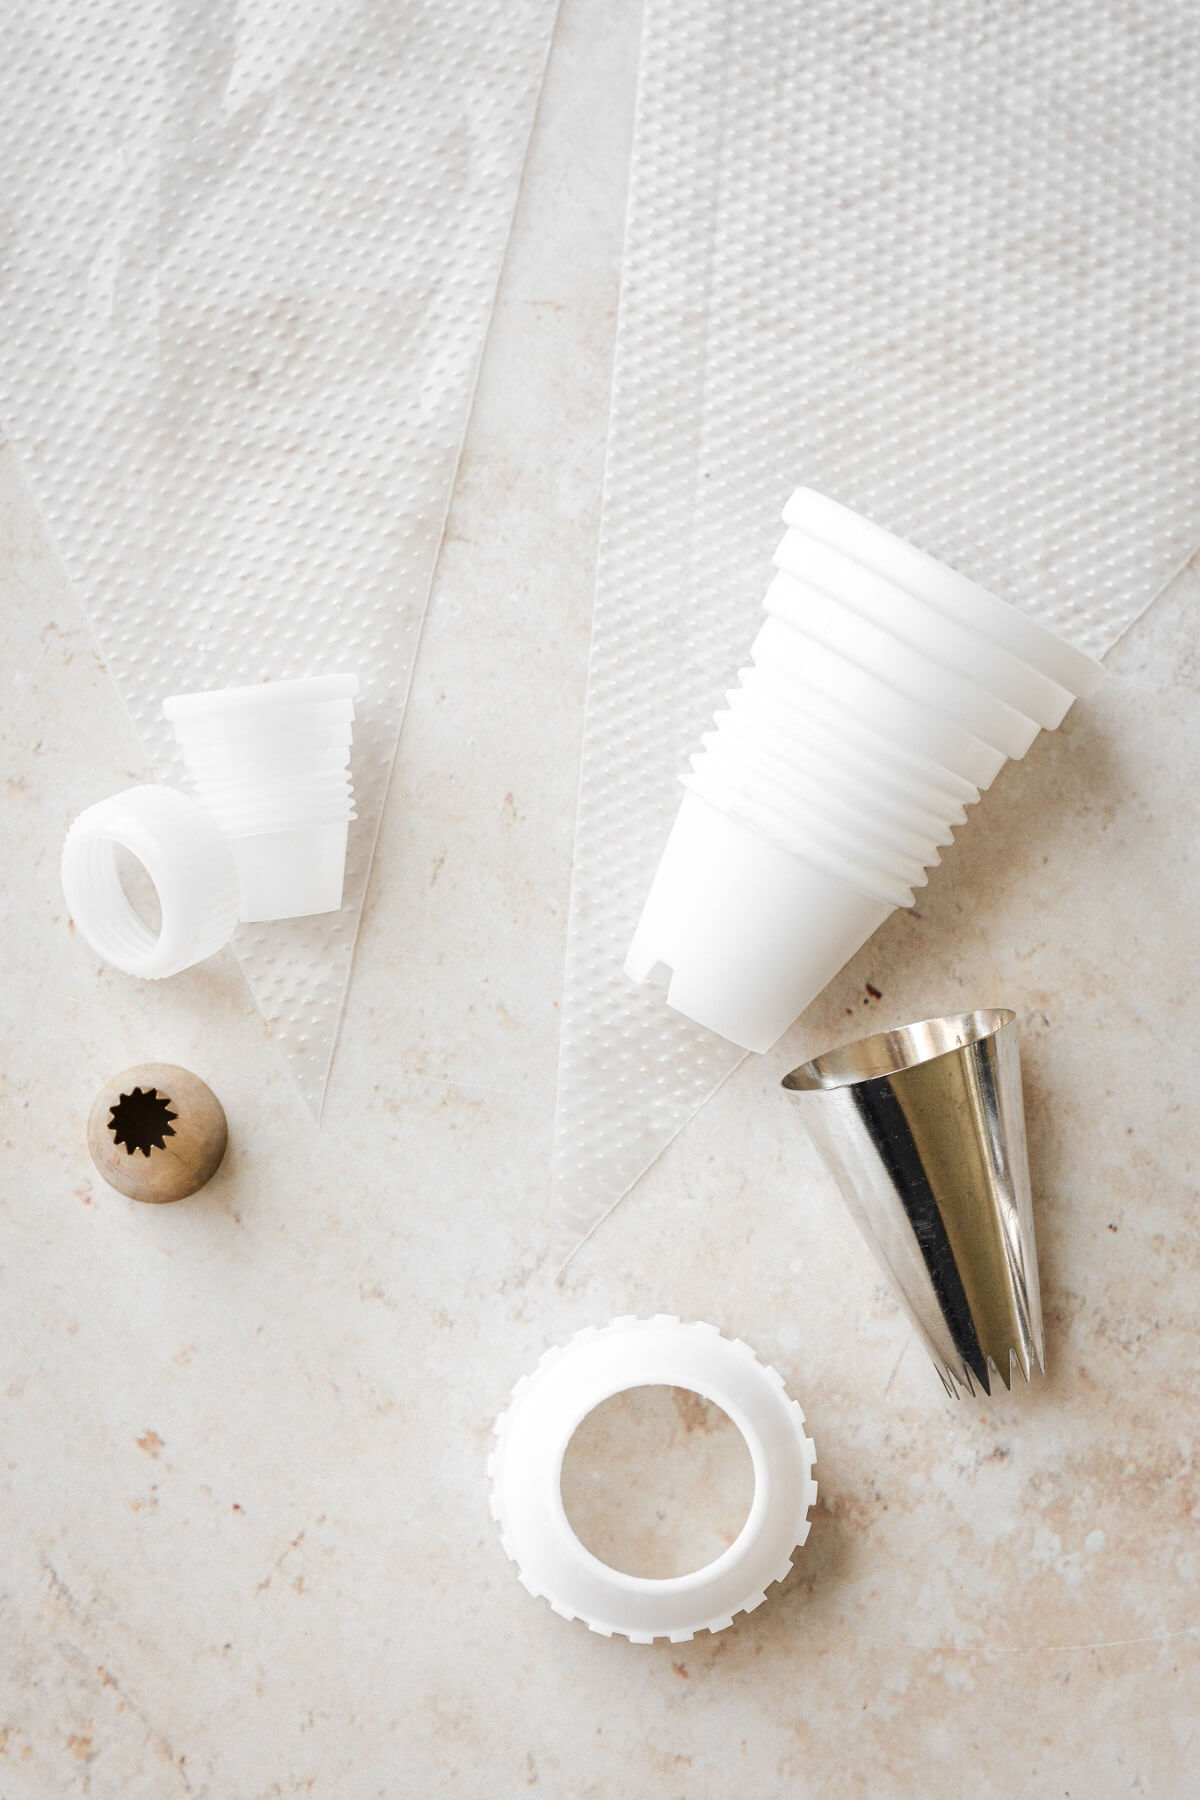
A coupler is a 2-part tool that you can use to secure piping tips to piping bags. Couplers are made up of the main part that goes inside the piping bag, and the ring which goes on the outside of the piping bag. A coupler is necessary when you want to be able to easily change tips throughout the decorating process. To change tips, simply unscrew the outer ring, then secure a different piping tip with the ring.
Are there different sizes of couplers?
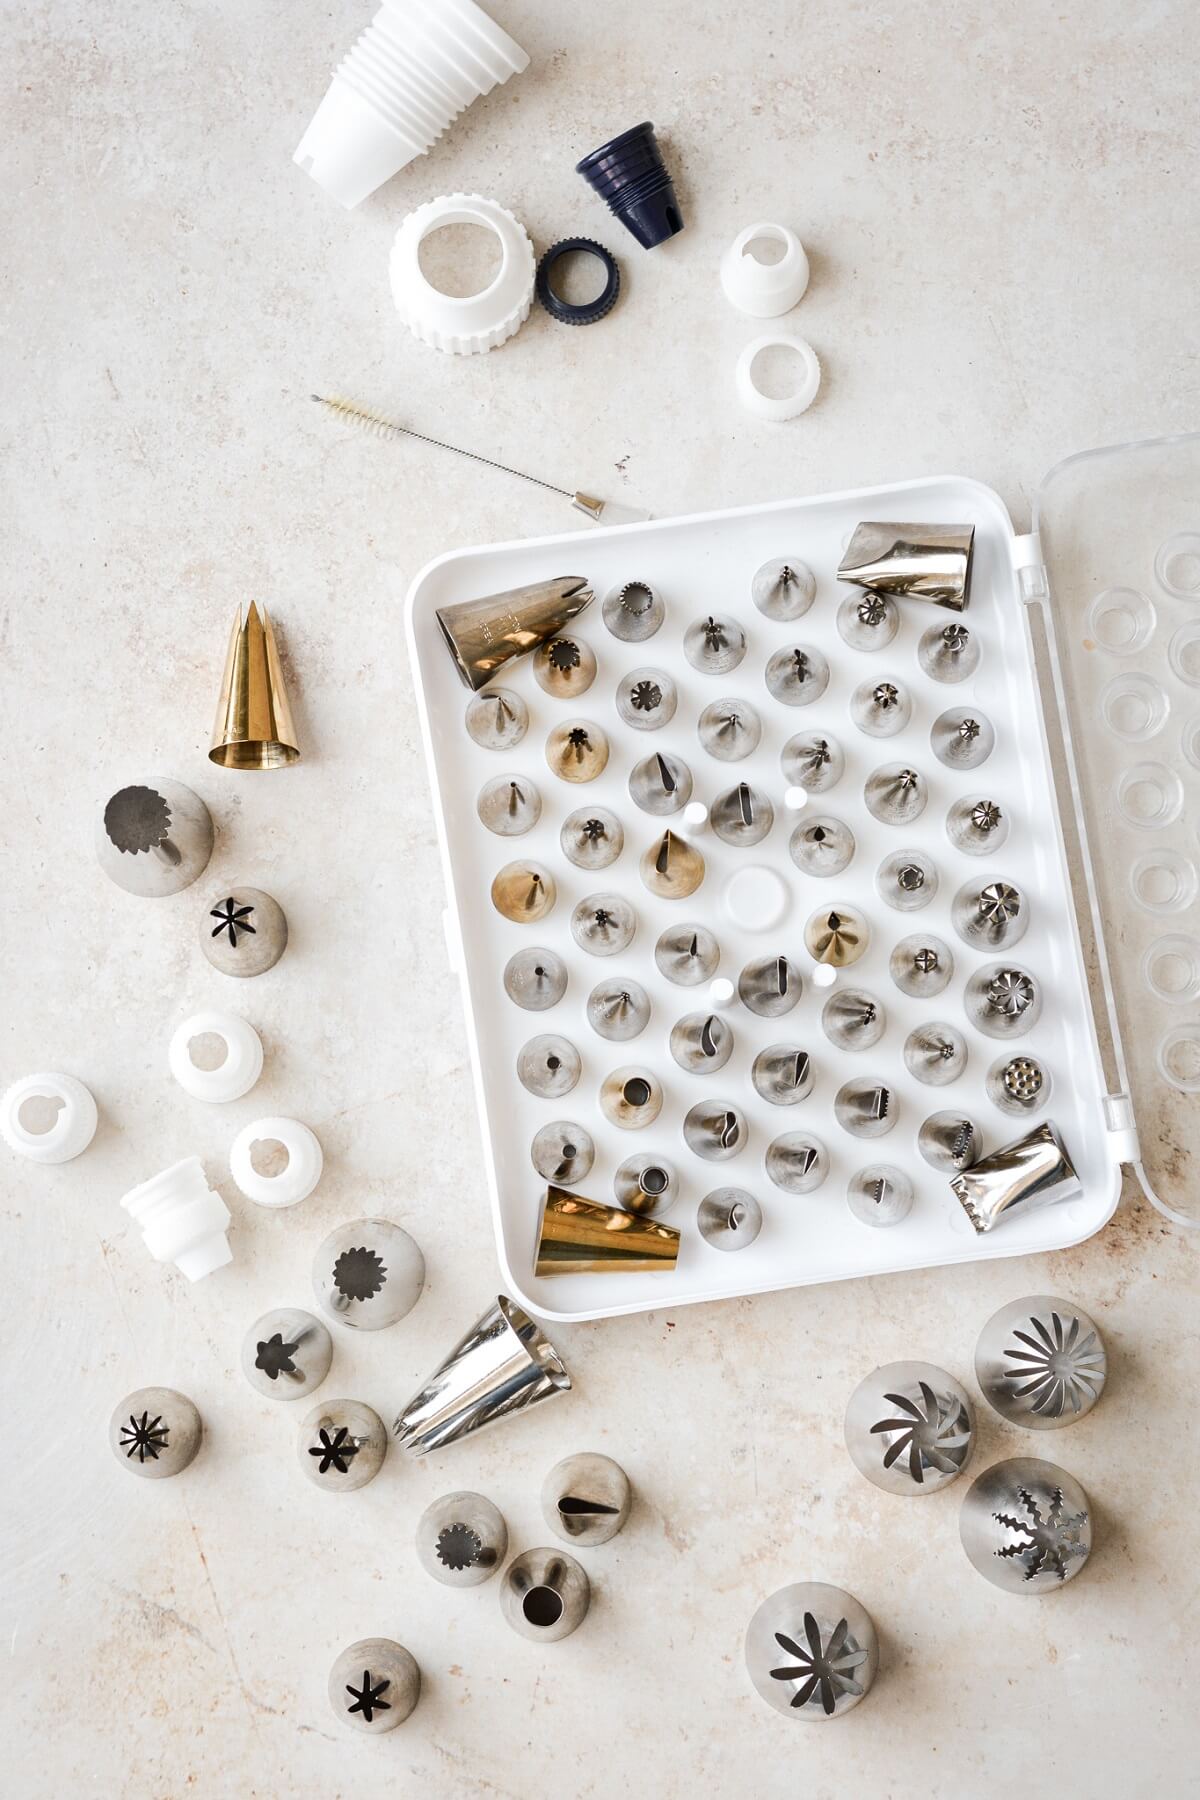
Yes, there are several sizes of couplers that you can use, as shown in the photo above. Standard sized couplers are small, and will be included in this master piping tip set. They are compatible with most of the small, standard sized tips. Then there is a much larger coupler that you can use with larger piping tips such as 1M, 4B, 6B (not 8B, though), 2D, 2A, 2C and 125.

Can you use a piping bag without a coupler?
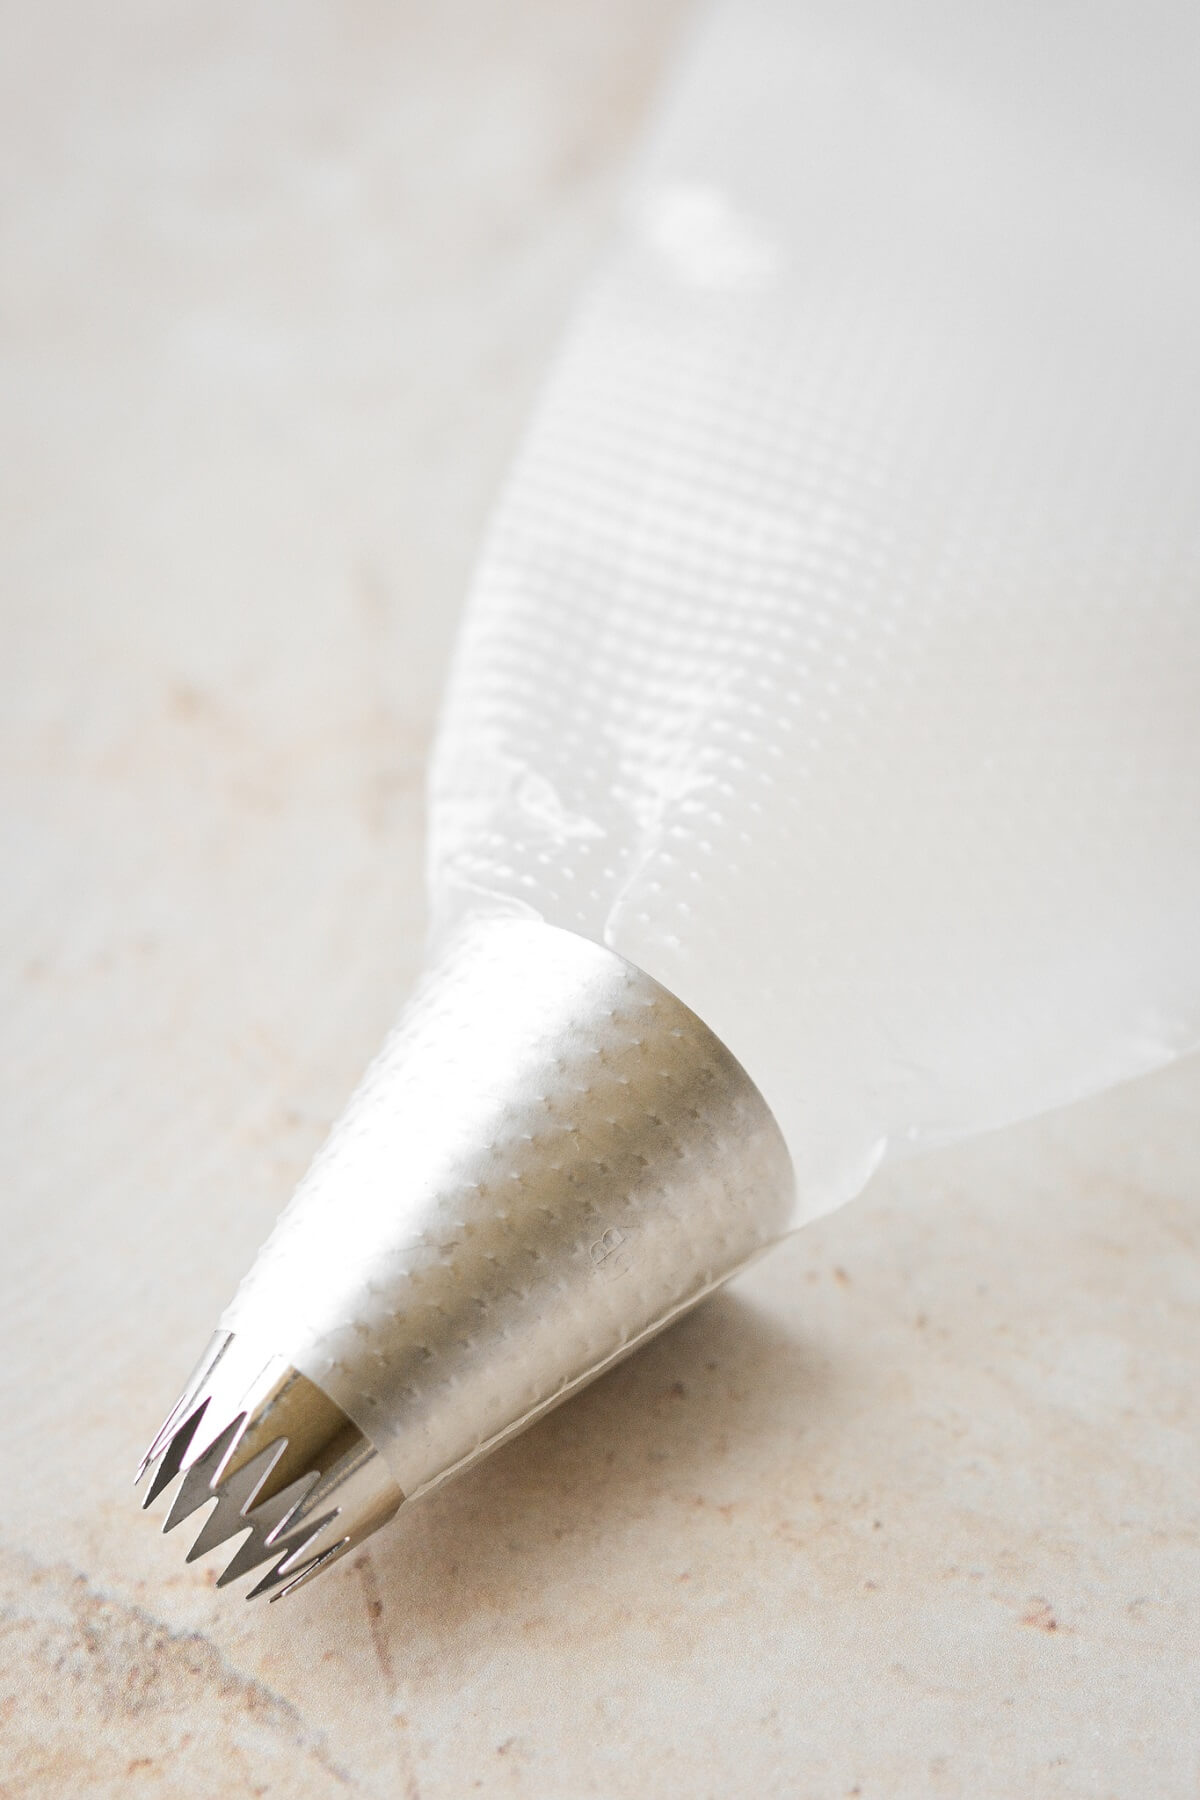
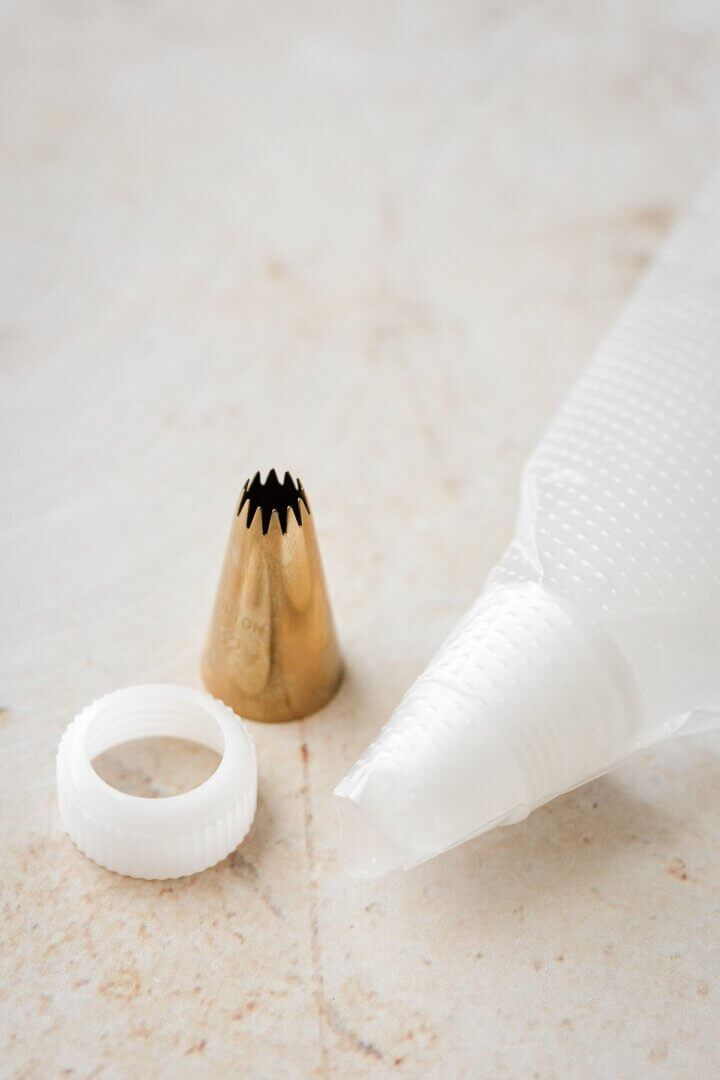
Yes, you can use piping bags without couplers, by just dropping the tip right down into the piping bag and snipping off the tip of the bag. You should cut enough off the tip of the bag so that the bag doesn’t cover the teeth of the piping tip. This is easier to do with larger tips than smaller tips, and I always use couplers with smaller tips.
All About Piping Tips
Which piping tips do you really need?
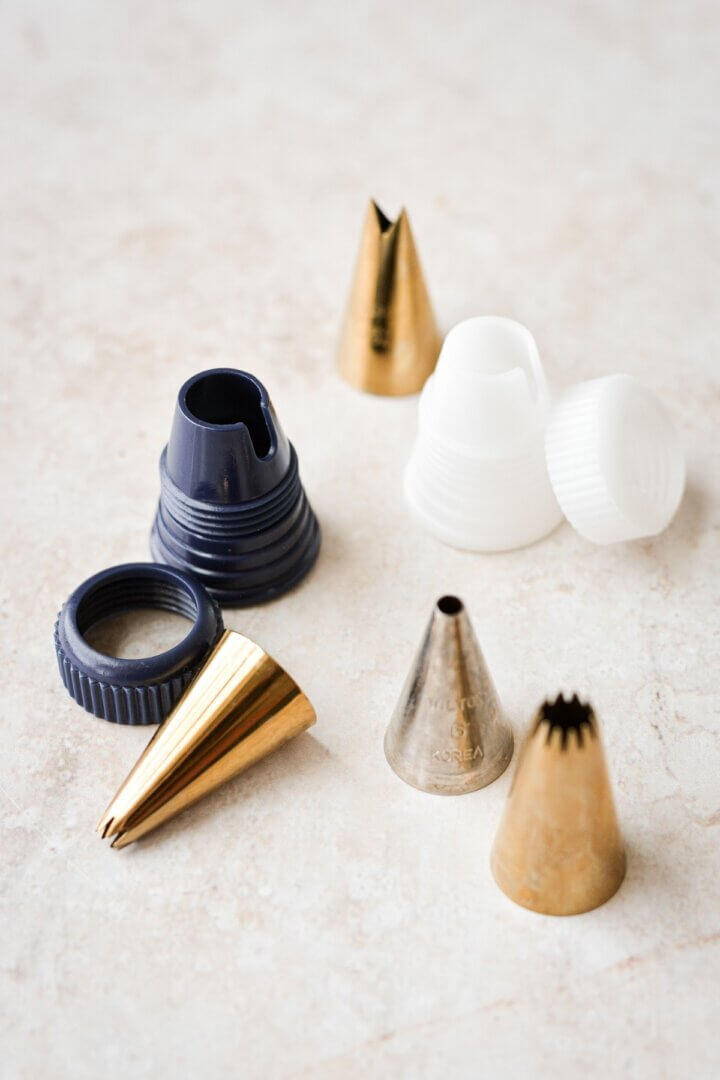
So, I’ve been at this cake decorating thing for a while. In the next photo is my master piping tip set that I started with, as well as a variety of larger, specialty tips that I’ve collected over the years. And I use many of them, pretty frequently, although I rarely use all the tiny little flower tips in my set.
But which ones do YOU need? If you’re planning on decorating cakes or cookies with lots of detail and tiny piping, then you may want to invest in a master set, since it has so many standard tips that you would need.
And if you’re more of an “occasional baker” who just wants to add a little flair to your cakes, cookies and cupcakes? Then I would suggest just a few of the larger piping tips. 1M, 2D and 6B would be some of the best ones for piping rosettes, cupcake swirls, and cake borders.
Do all piping tips need to be used with a coupler?
If using a large piping tip, such as tip 1M or 2D, you can simply drop the tip inside the bag without a coupler. Use scissors to snip off the tip of the bag. Cut just enough so that the teeth of the piping tip are not covered by the bag, but not so much that the hole is big enough for the tip to fall through. I always use couplers with smaller piping tips, but you don’t have to, as long as you don’t cut the opening in the piping bag too big.
Which piping tip is the most versatile?
The most versatile piping tip is tip 1M, also known as a large open star tip. If you only own one piping tip, let it be this one! I love this tip so much, I wrote an entire post about how to decorate cupcakes 6 ways with just tip 1M.
What are the best piping tips for frosting cupcakes vs decorating cakes?
When it comes to decorating cupcakes, the most common newbie mistake is in using a tip that’s too small. You want to use bigger piping tips for frosting cupcakes. Tips like 1M, 4B, 6B, and 2D are going to be best for fluffy swirls of frosting that mound prettily on top of the cake. You can also use these larger tips for decorating the top of your cake with swirls, like on this cherry pistachio cake. Use small tips for small details, like the tiny piped flowers on this turquoise floral cake.
How to Fill Piping Bags
Most Important Tips for Filling Piping Bags
- DO fold over the top of the bag. This helps to keep the top of the bag clean, and also gives you something to hold onto as you’re filling the bag.
- DON’T over fill the bag. A too-full bag is hard to hold onto, and the filling will all squish out the top. Only fill it 1/2 – 2/3 full.
- DON’T cut off too much from the tip. Start with a small hole, and then make it a little bigger as needed, so your piping tip doesn’t fall through.
- DO twist the top of the bag or secure it with a clip or rubber band.
Step by Step Instructions
Prepping the Piping Bag.
First, prepare your piping bag by folding the top half of the bag outwards. This is called a “cuff”, and is helpful for covering your hand as you fill the bag to keep things less messy.
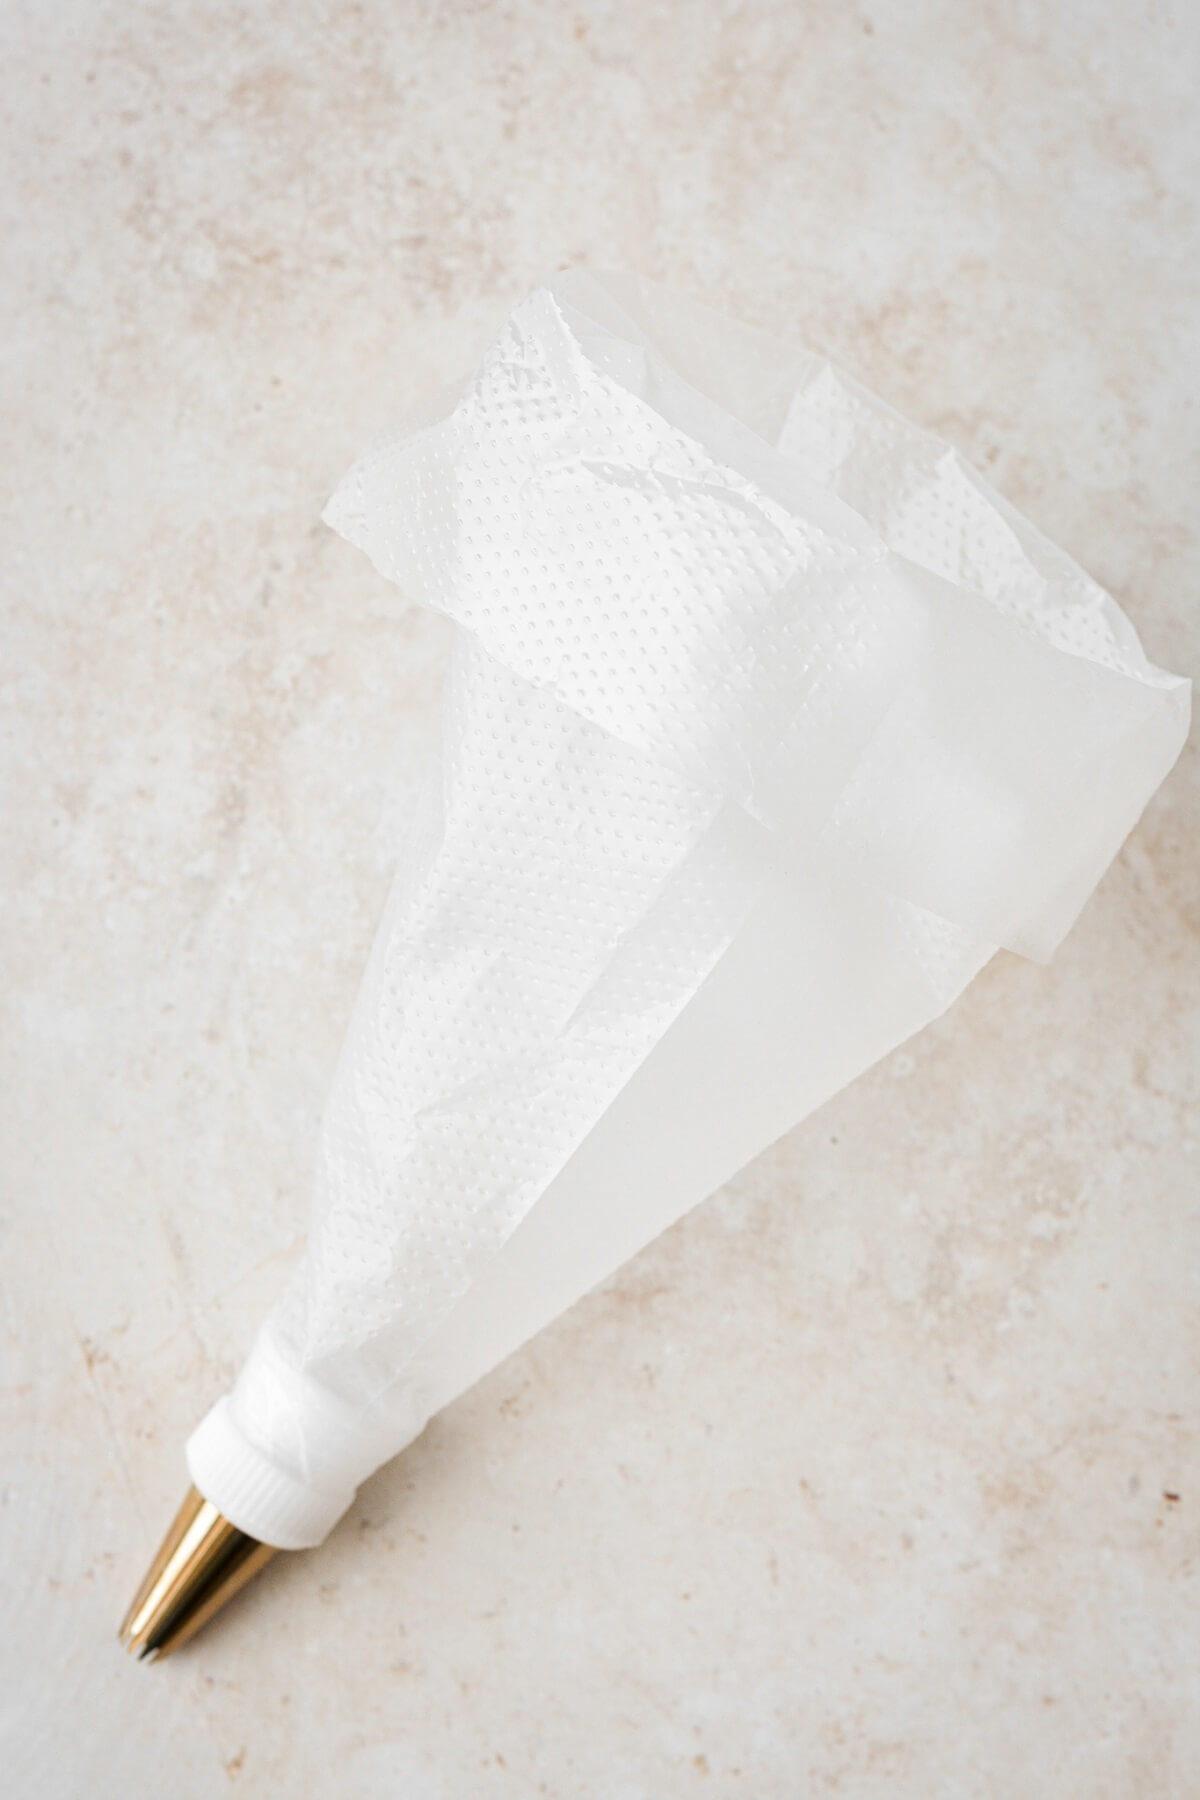
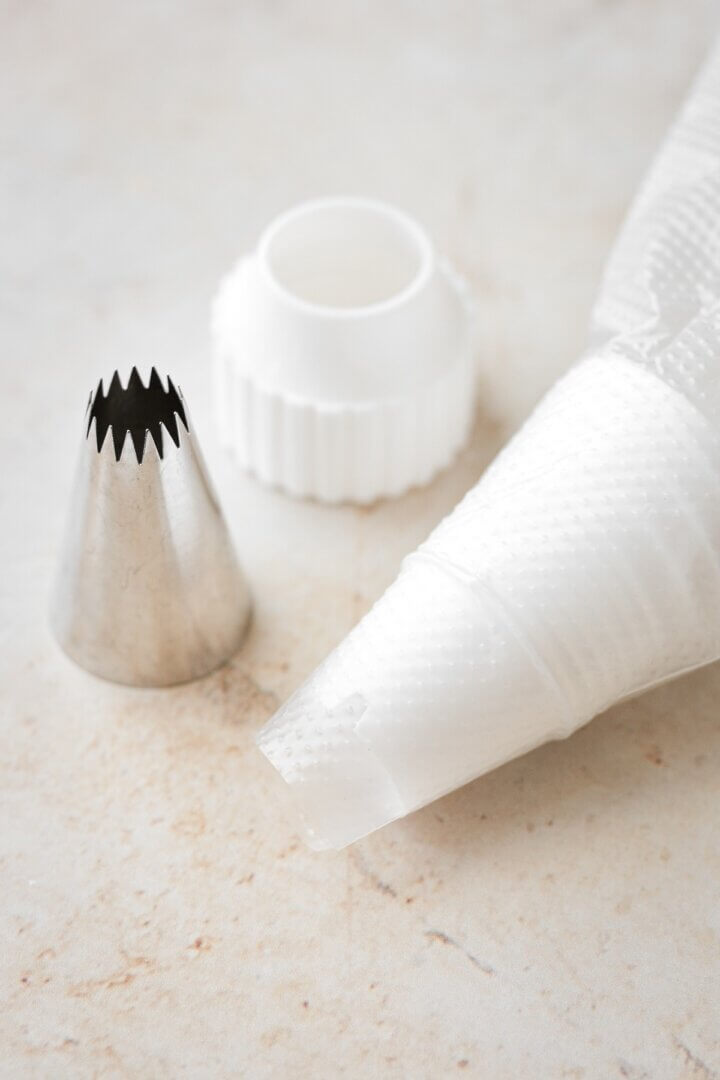
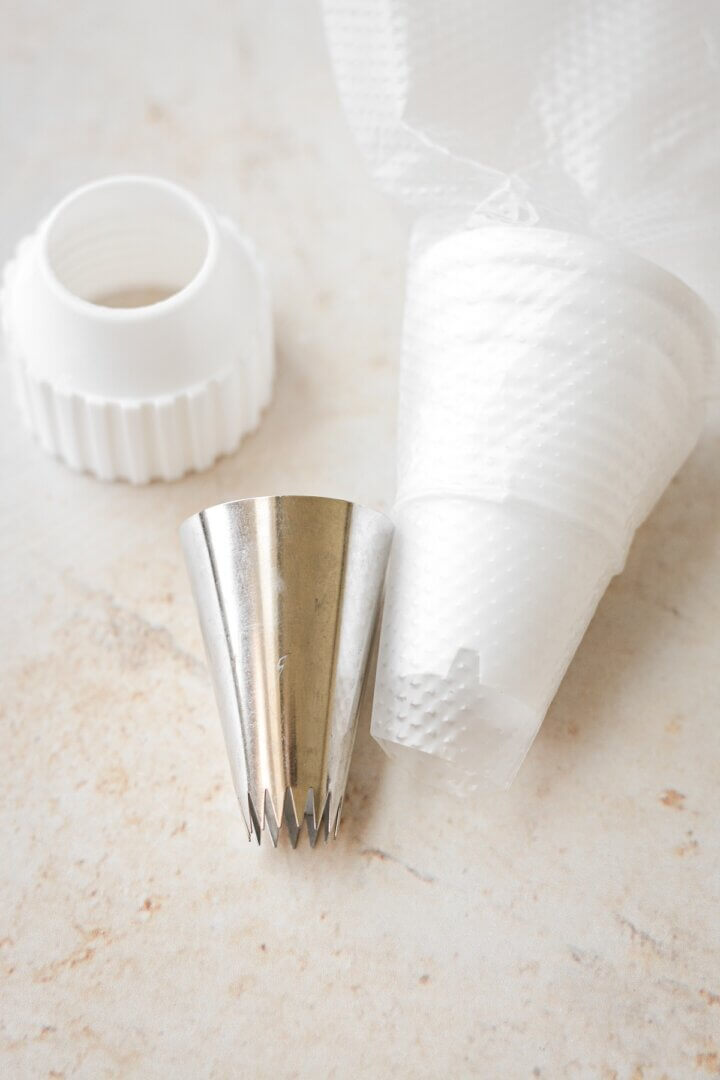
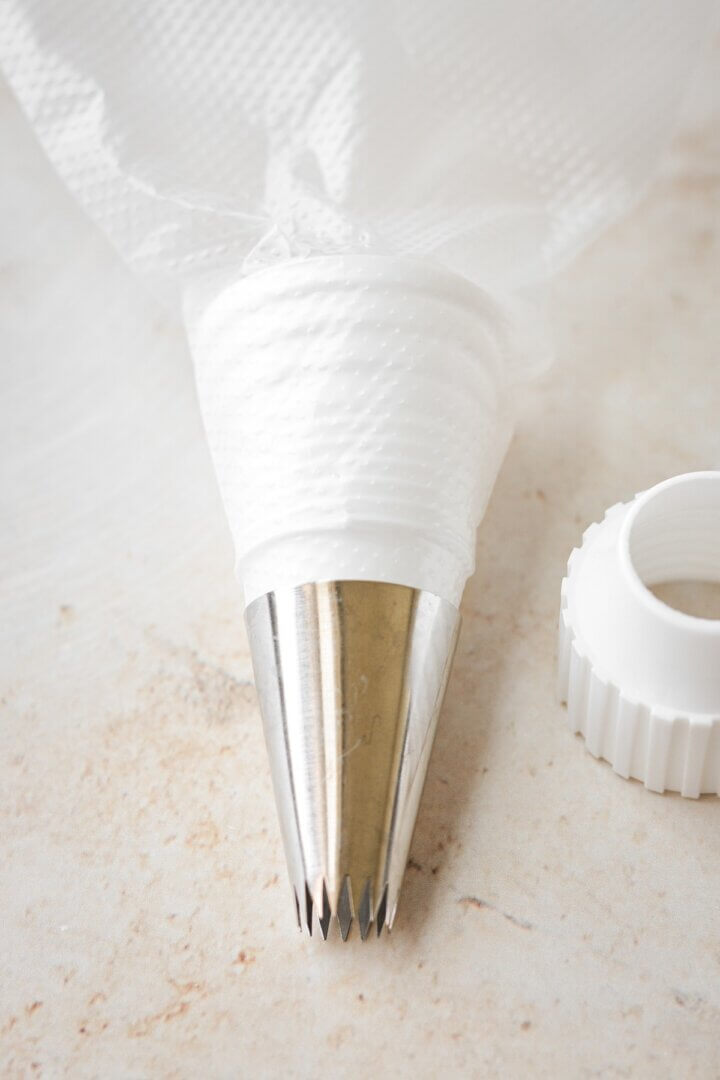
Using Piping Bags without Couplers.
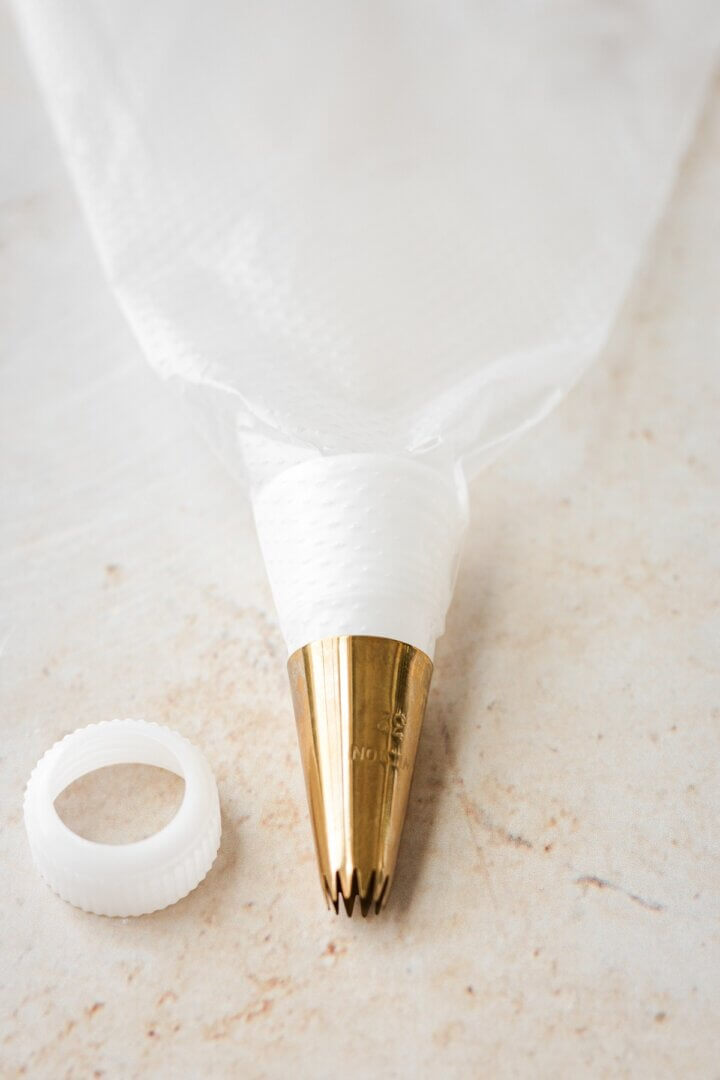
If using a large piping tip, such as tip 1M or 2D, you can simply drop the tip inside the bag without a coupler. Use scissors to snip off the tip of the bag. Cut just enough so that the teeth of the piping tip are not covered by the bag, but not so much that the hole is big enough for the tip to fall through.
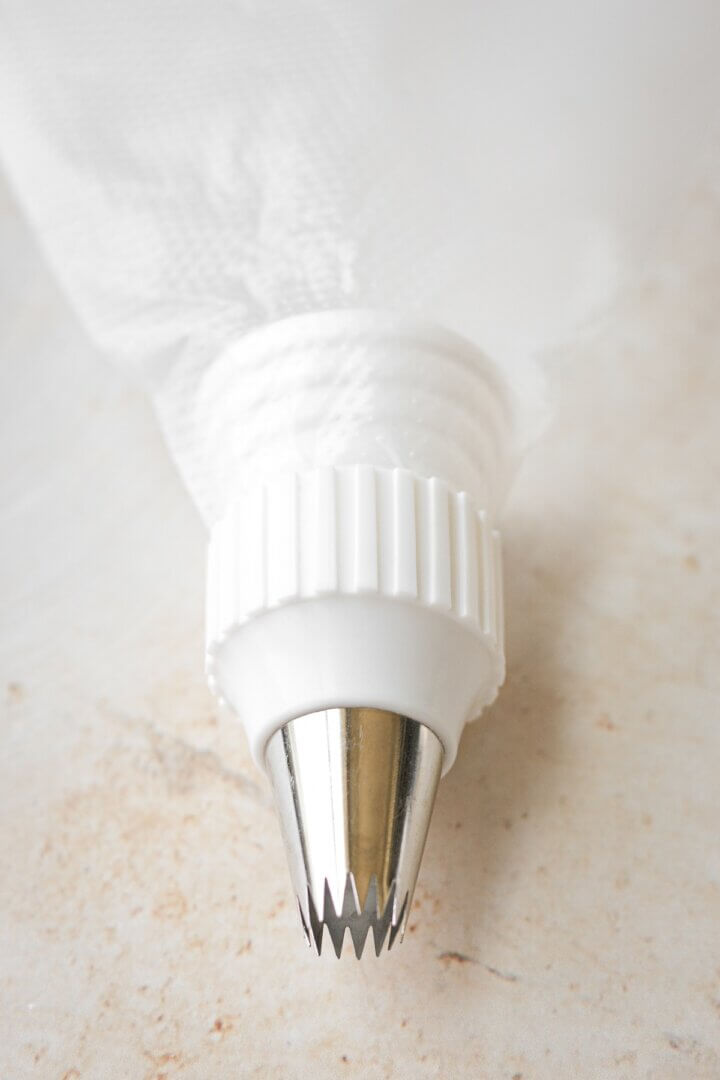
Using Piping Bags with Couplers.
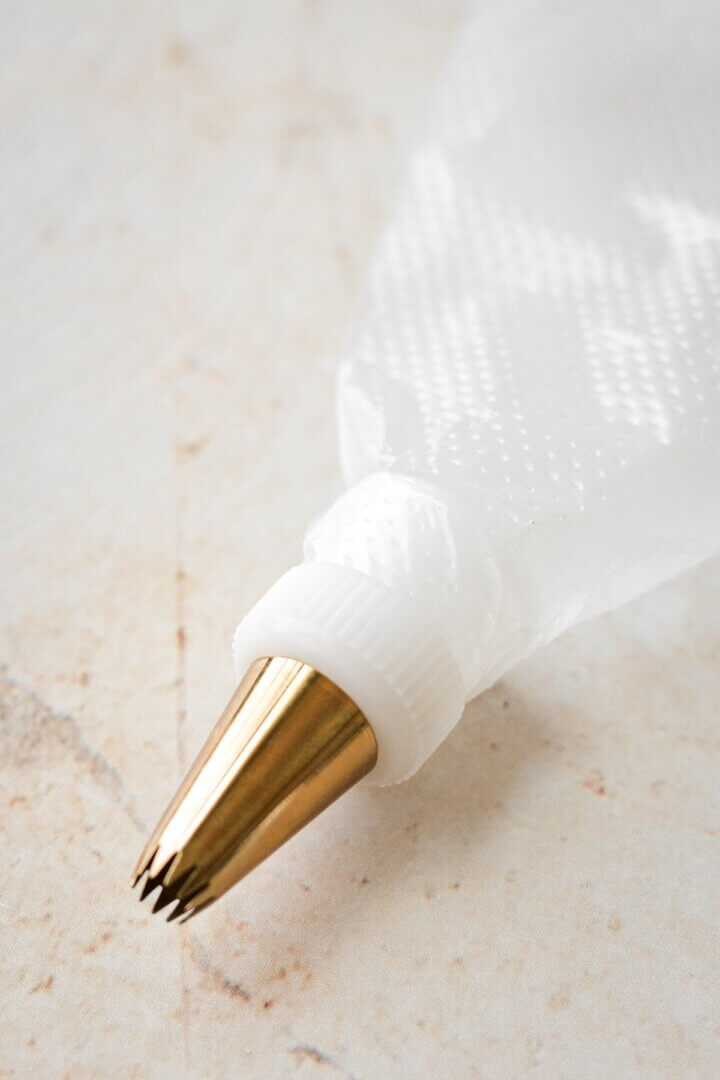
If using smaller piping tips, or if you’re planning on changing tips throughout the decorating process, you need to use a coupler in conjunction with the tips. Drop the larger part of the coupler inside the bag. Use scissors to snip off the tip of the bag. The bag should extend slightly beyond the coupler, but not so far that it will stick out of the tip when you place the tip on. Now secure the piping tip to the coupler with the coupler ring, and screw the ring on tightly.

Filling Piping Bags.
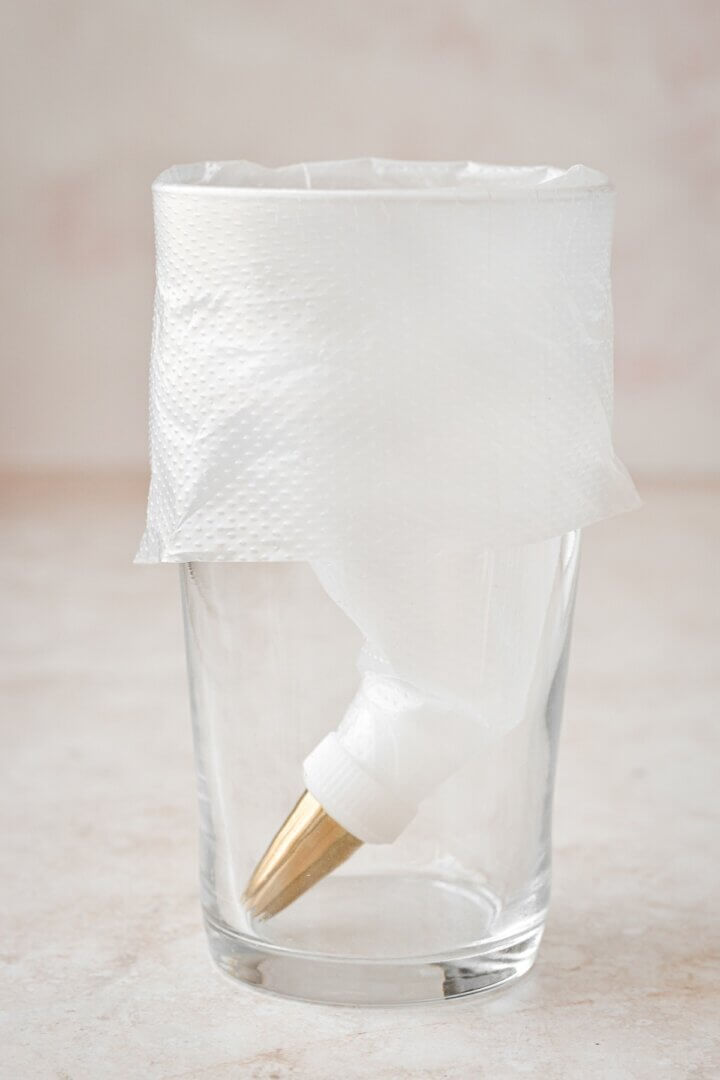
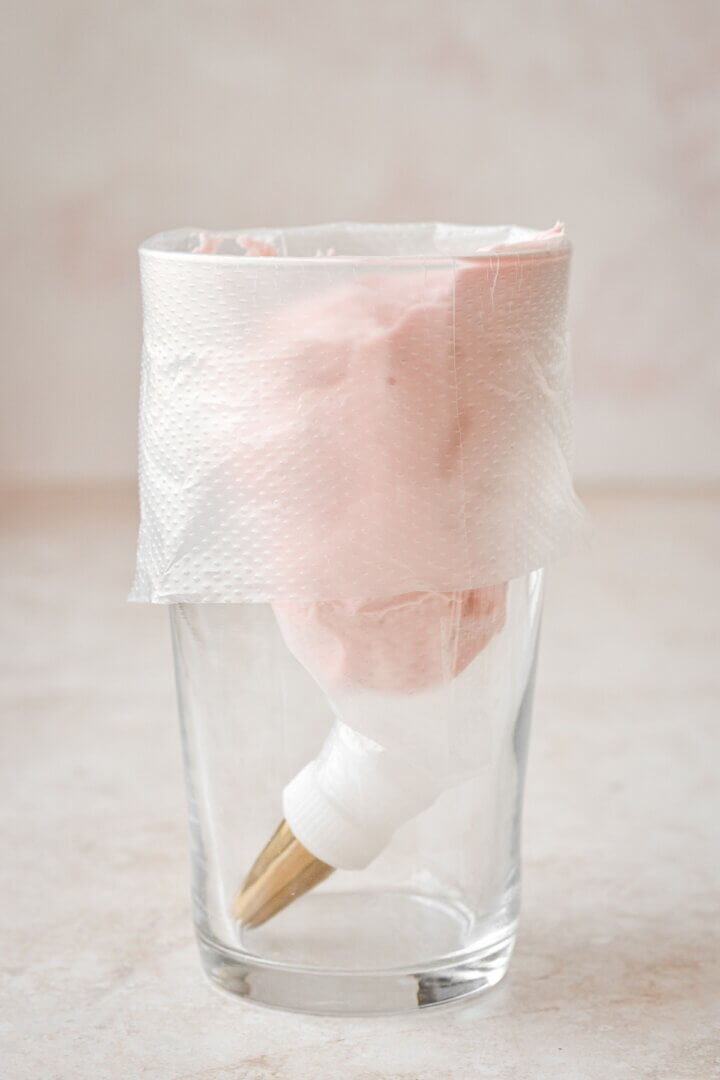
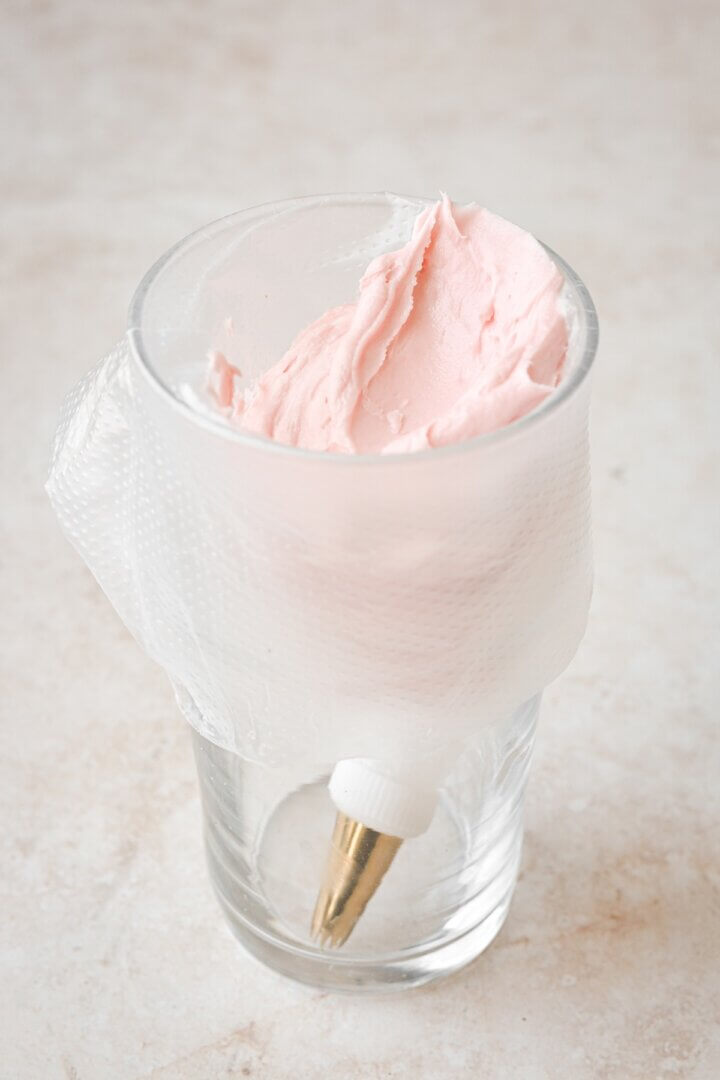
To fill the bag, you may find it helpful to place the bag inside a glass, with the top half of the bag folded over the edge of the glass. Once you’re more experienced with filling piping bags with buttercream, you may not find this to be necessary. But I recommend using a glass for stability when filling a piping bag with soft, runny fillings, such as chocolate ganache, pastry cream, royal icing or caramel sauce.
Use your rubber spatula, or a spoon, to spoon your filling into the bag, only filling the bag halfway. Press the filling down towards the tip, encouraging any air pockets to escape – this is called “burping” the bag. A little filling may push out of the tip if there are any air bubbles. Now twist the top of the bag to secure the filling inside.
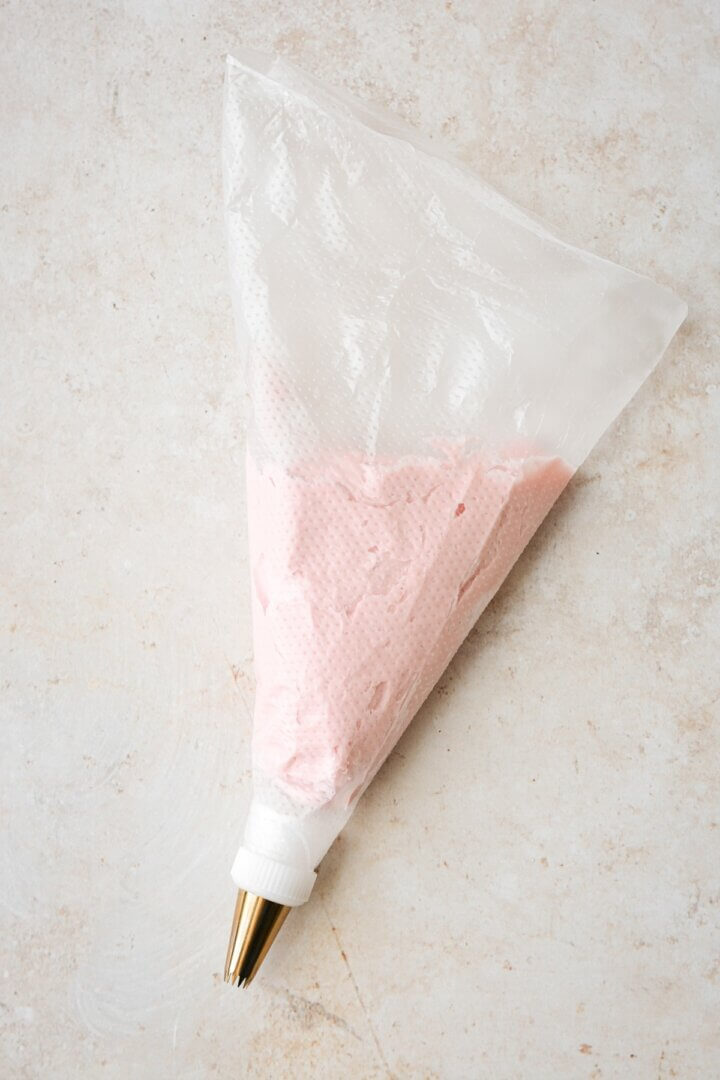
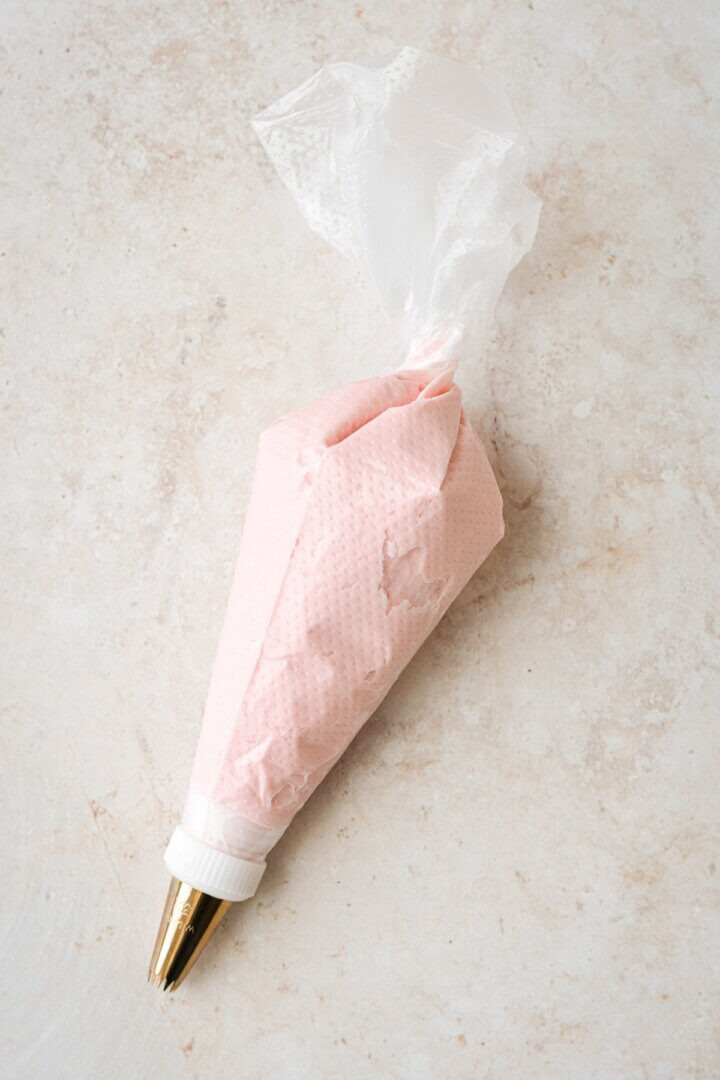
Securing the Top of the Bag.
For runny fillings like pastry cream or royal icing, you may want to secure the top of the bag with a rubber band, as these fillings have a tendency to slip back up towards the top and spill out. With buttercream frosting, it’s generally not necessary to secure the top with a rubber band, and twisting the bag at the top is sufficient to keep the buttercream moving downwards.
Piping the Filling.
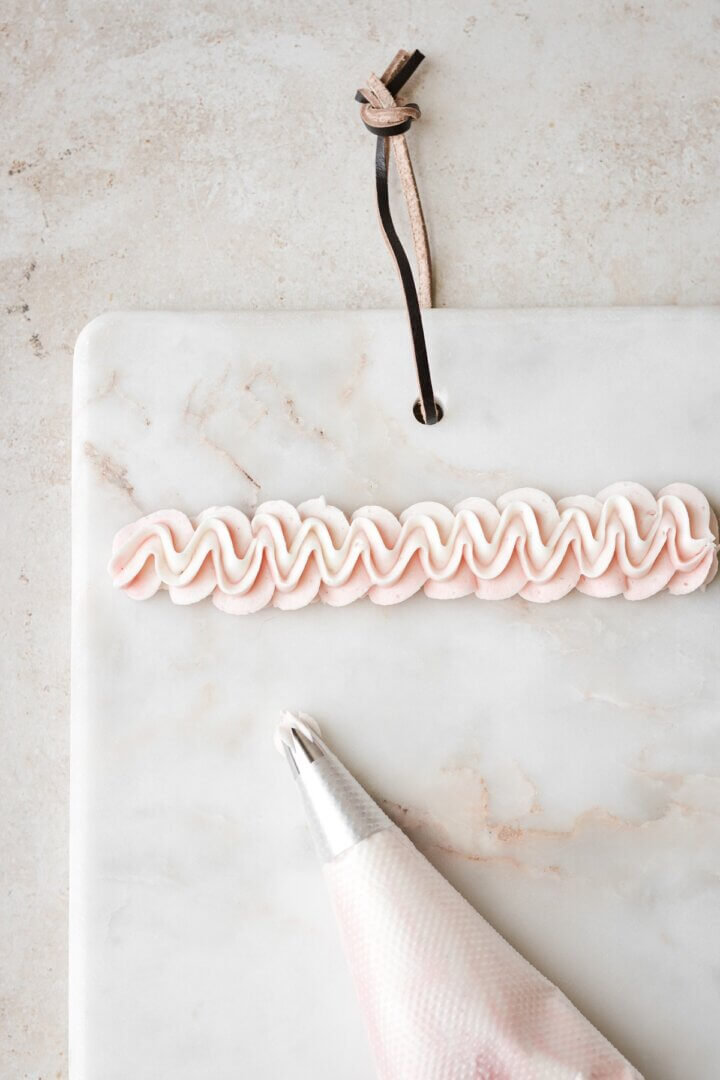
To start piping, use your dominant hand to hold the piping bag at the top of the filling, where the bag is twisted shut. Use your other hand to help guide the bag as you begin piping. Squeeze the filling with your dominant hand, keeping the pressure as steady as possible, then releasing pressure when you want to stop piping. I find it immensely helpful to practice first on a plate or cutting board, before you begin piping on your cakes, cupcakes or cookies. After practicing, you can scoop up the buttercream and use it again. As you squeeze the filling out, pause to press the remaining filling down towards the tip, and twist the top of the bag again to get a secure grip as you continue piping.
Refilling Piping Bags.
When the bag is empty, or nearly empty, fold the top edge back out and fill the bag again as instructed earlier. Refilling a piping bag can be a bit messier than filling it the first time, but if you didn’t overfill it to begin with, then the top half of the bag should be fairly clean, making the process less messy. Burp the bag again, twist the top and continue piping.
Changing Piping Tips.
To change piping tips, simply unscrew the coupler ring, remove the tip, and secure a new tip with the coupler ring.
Setting the Piping Bag Down.
If you need to set your piping bag down to take a break, you can lay it on your counter if it’s filled with buttercream or frosting. If it’s filled with something softer or runnier, you should set it inside a tall glass to prevent the filling from spilling out.
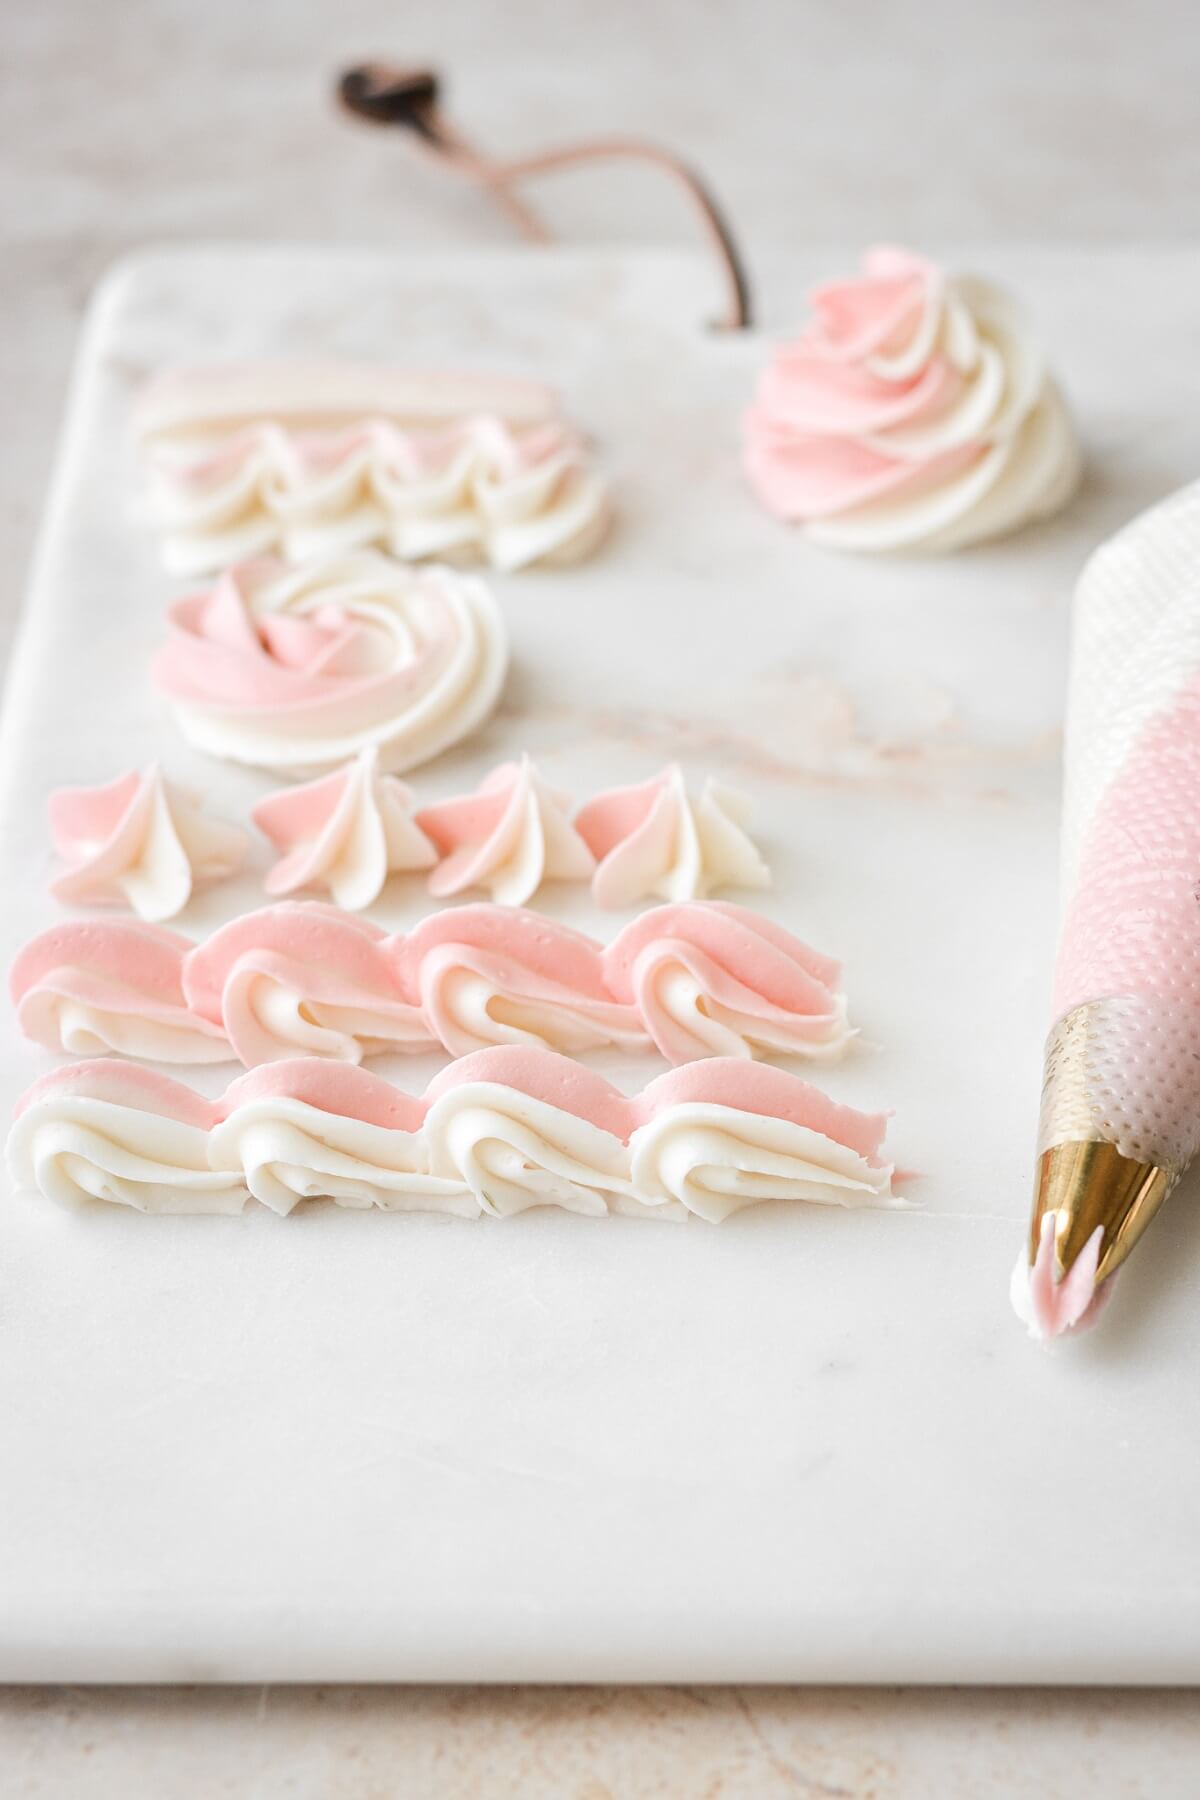
How to Pipe Frosting or Buttercream with Multiple Colors
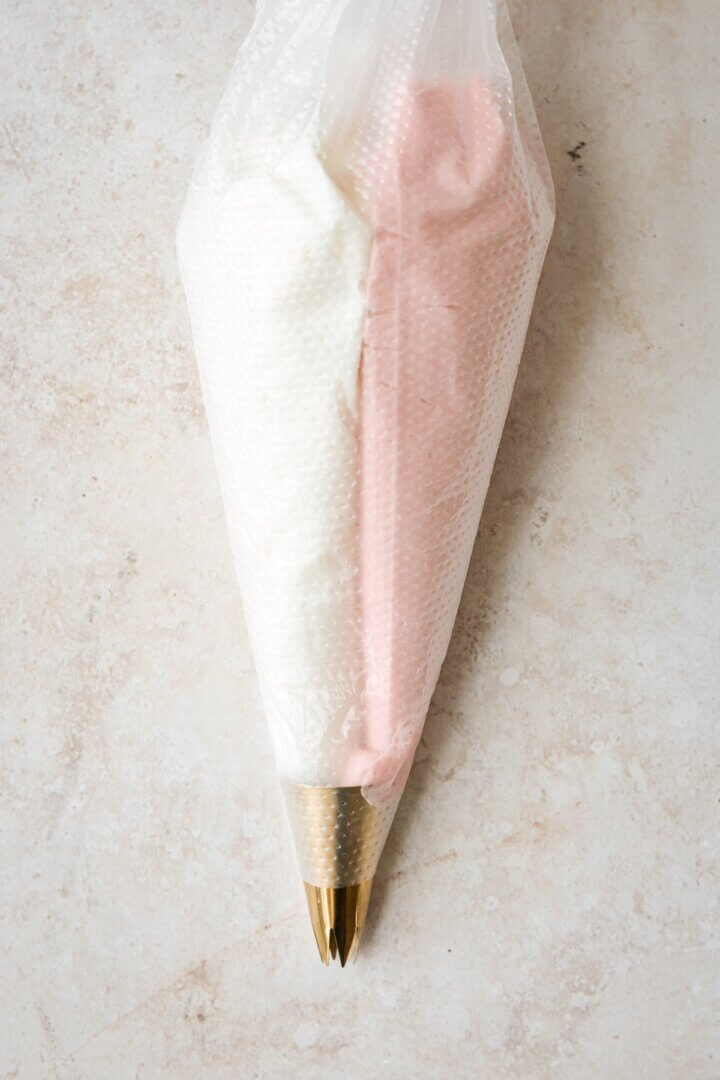
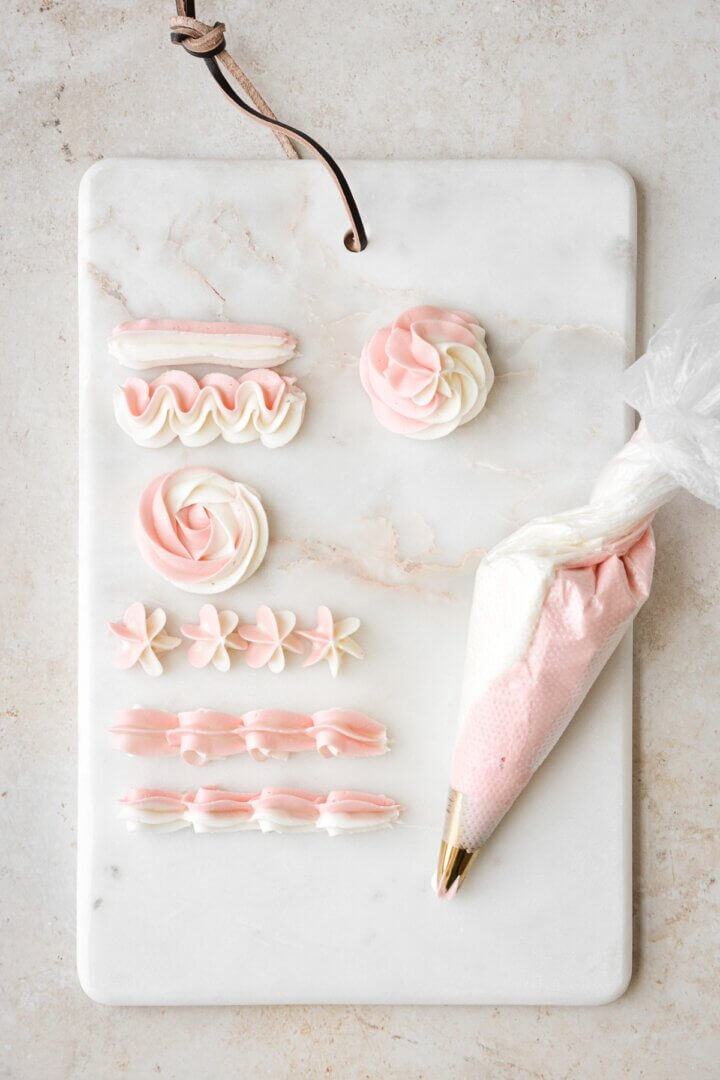
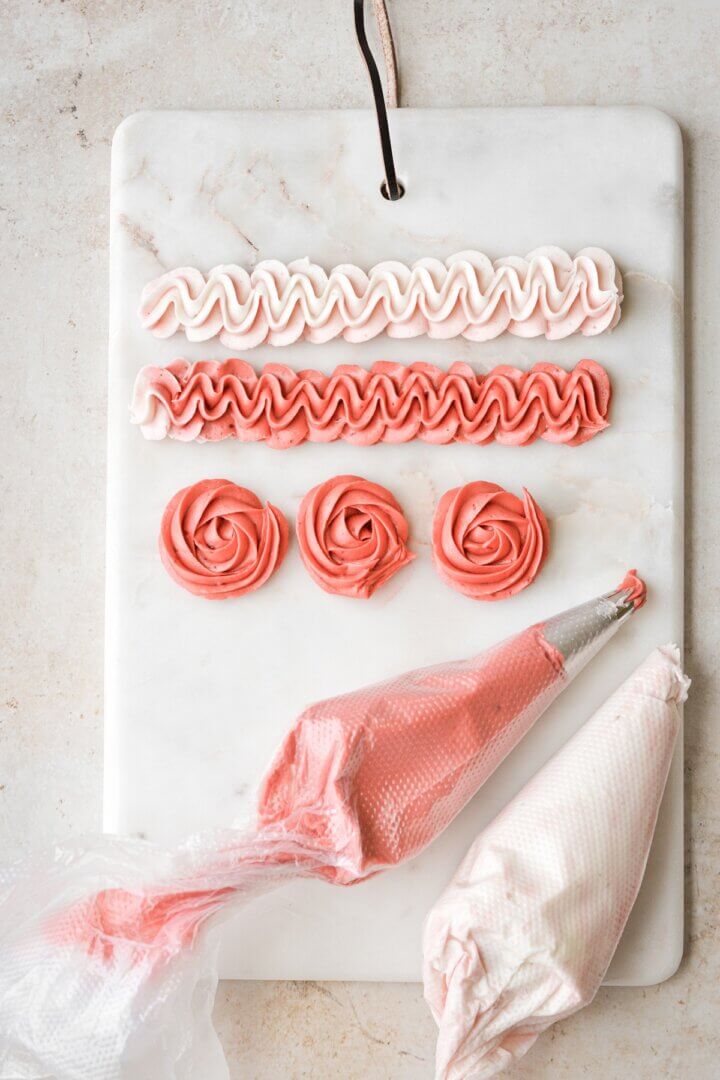
Piping Striped Frosting.
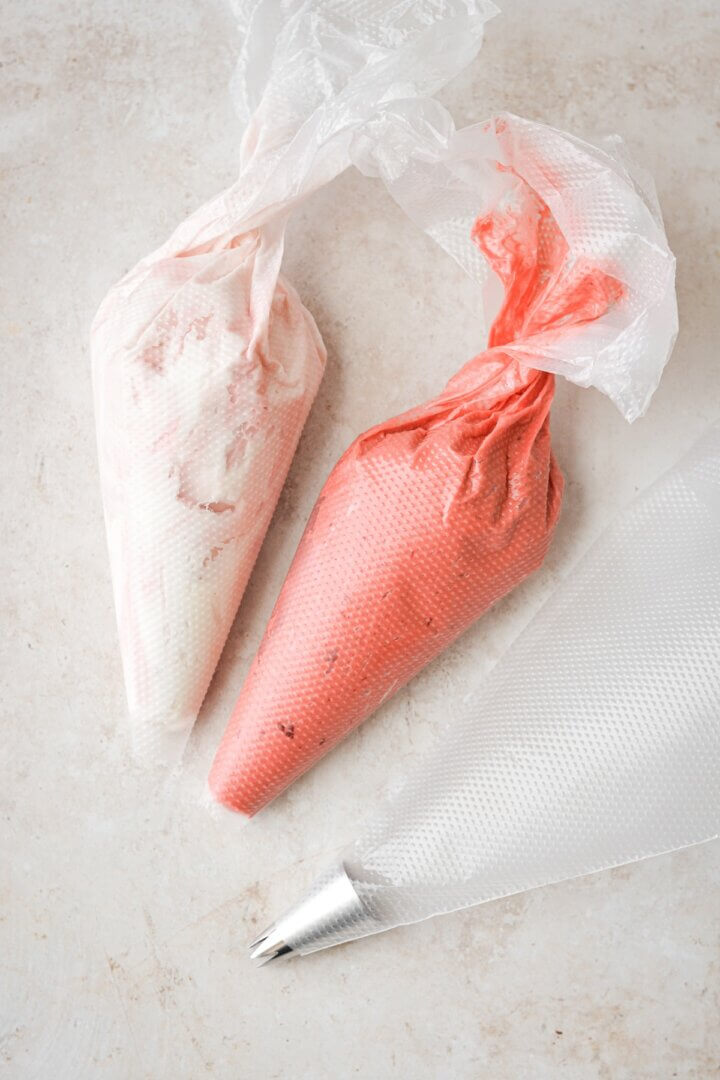
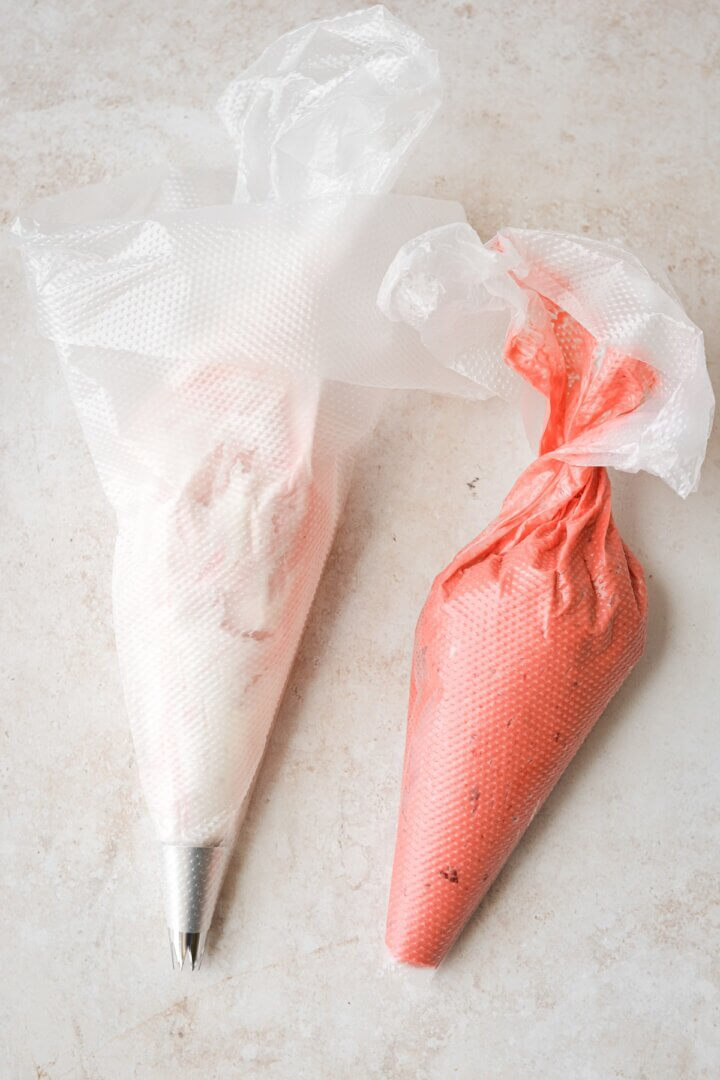
Prepare a 16 inch piping bag with a tip or coupler + tip. Fill 2 or more 12 inch piping bags with frosting, using a separate bag for each color. The more colors you use, the less frosting you should fill each bag with, since they need to all be able to fit side by side in the larger bag. Snip the ends off the smaller piping bags – no need to fit these with piping tips. Now drop the smaller bags into the larger one, trying to keep them all side by side. Twist the top and squeeze the frosting until the colors flow out of the tip side by side in a striped pattern.
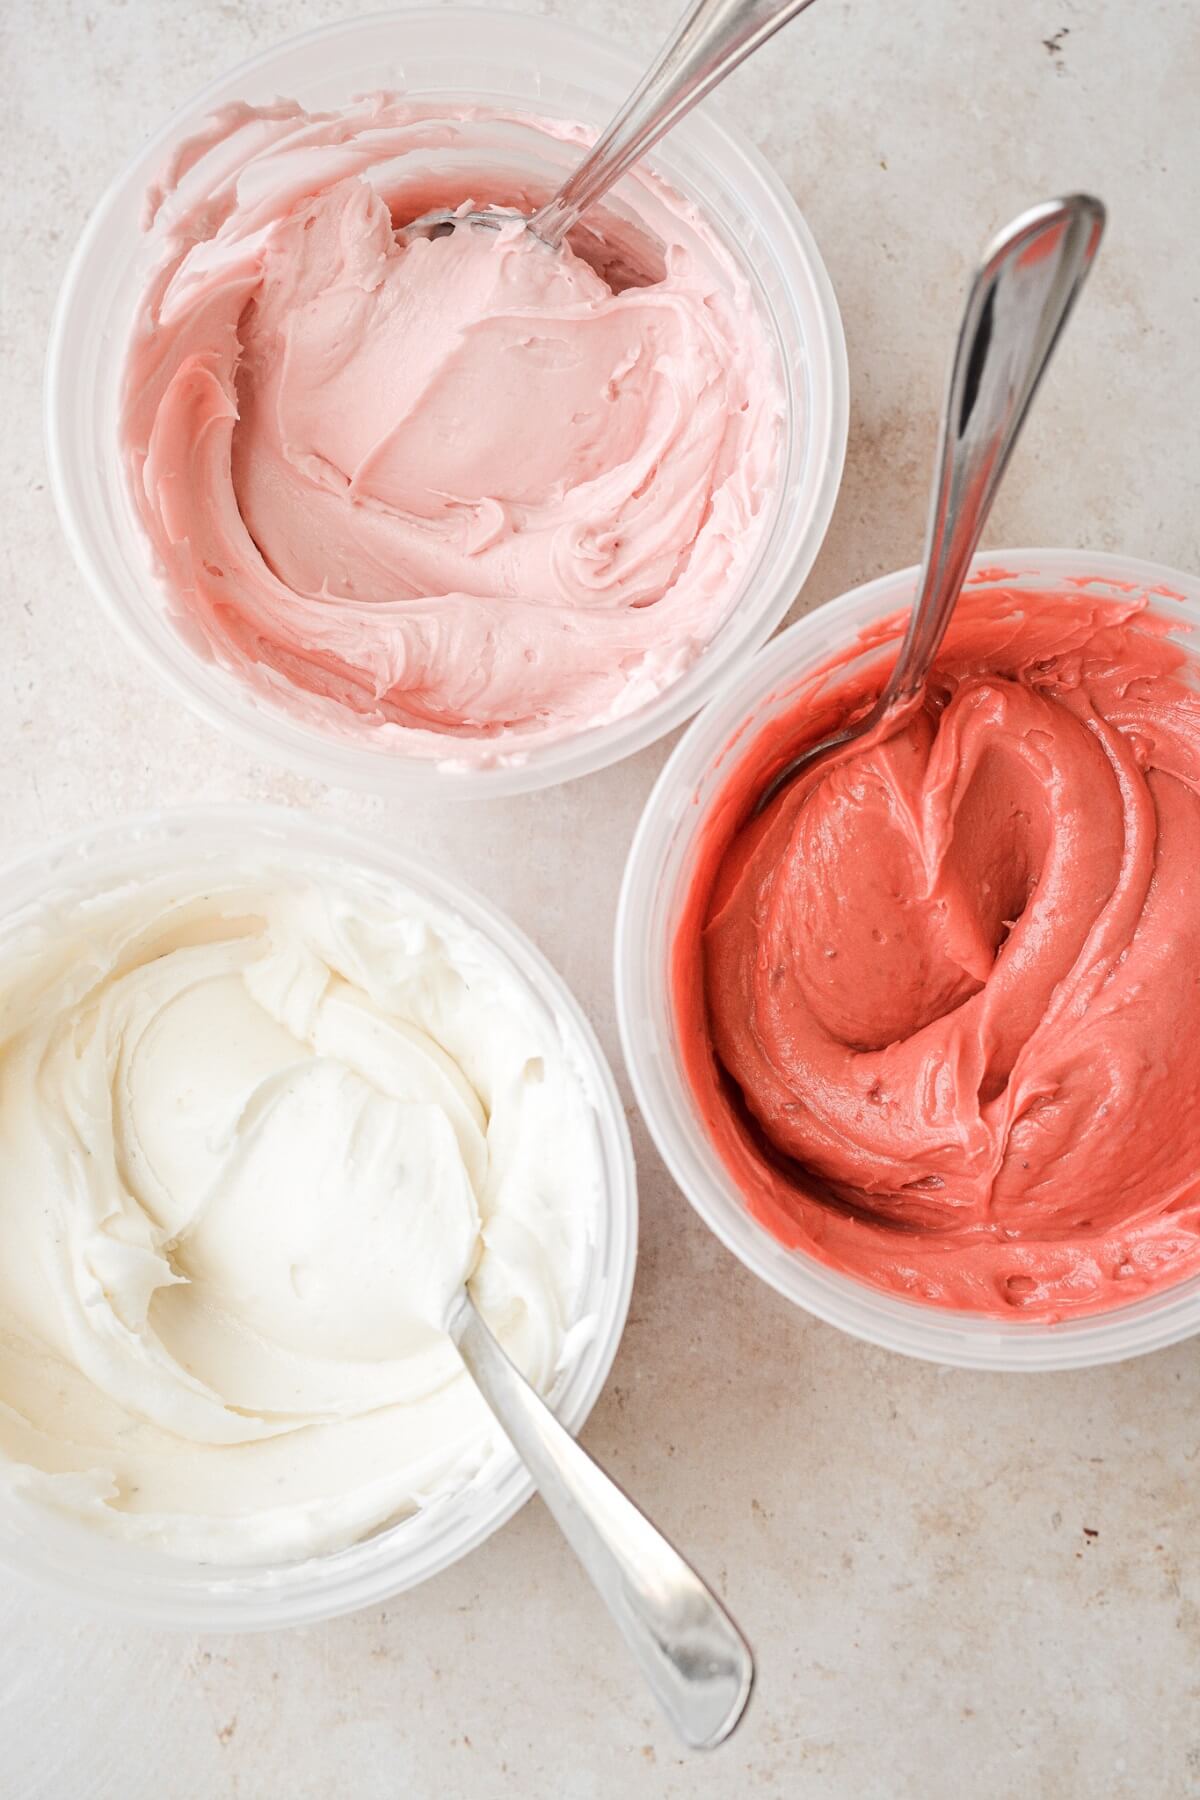
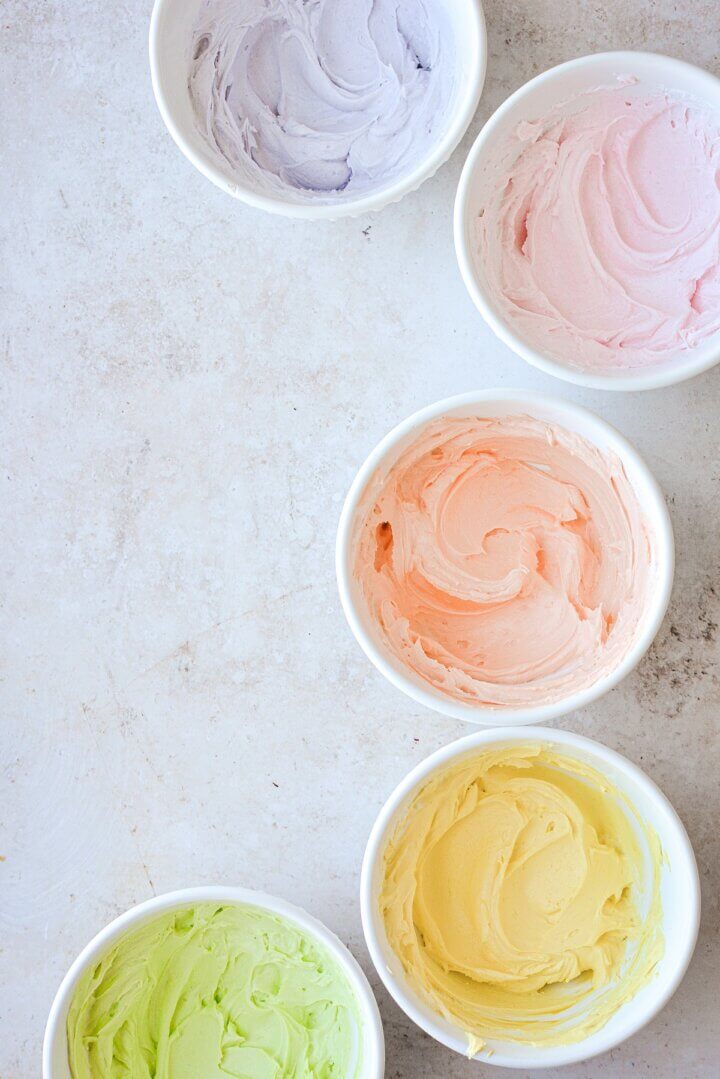
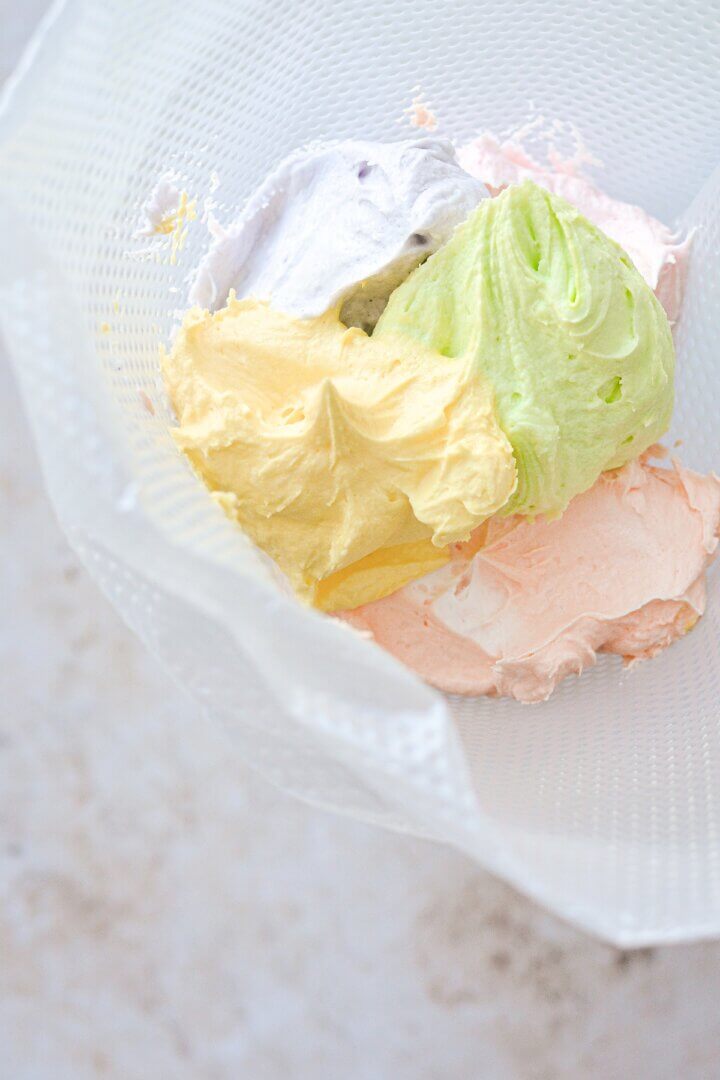
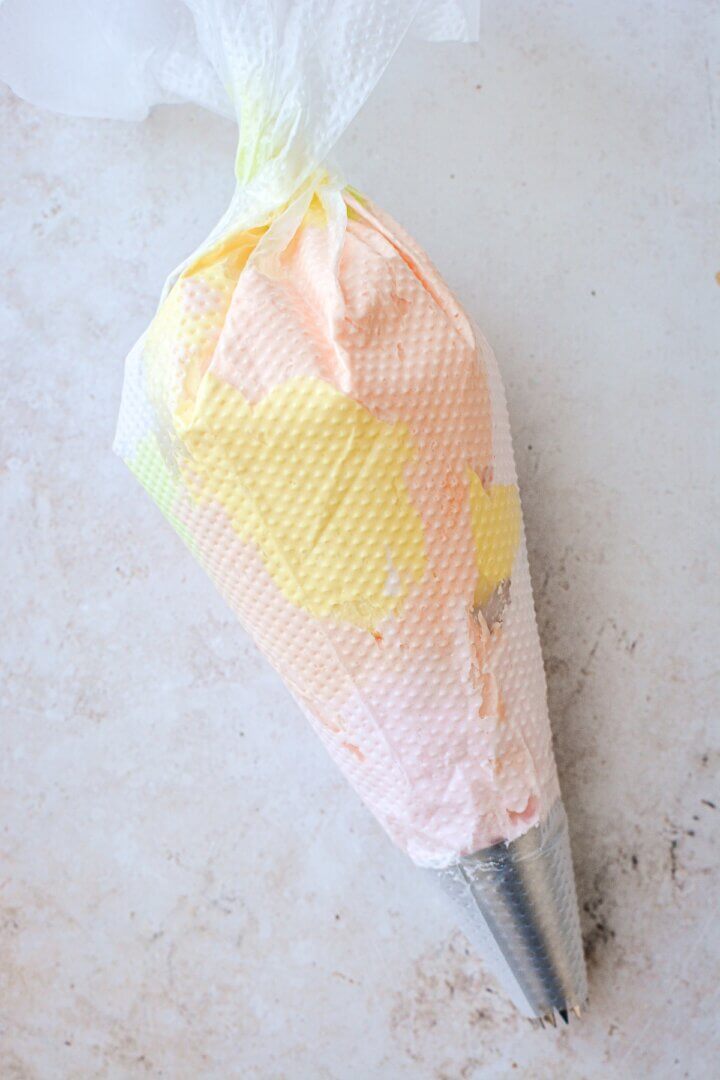
Piping Blended Frosting.
Prepare your piping bag with a tip or coupler + tip. Use a spoon to randomly fill the bag with 2 or more colors of buttercream, so that the colors blend together as you pipe the frosting. You can also combine multiple colors in a bowl, gently swirl them together without over-mixing the colors, then fill your piping bag with the blended colors.
Using a Double Piping Bag Method without a Coupler for Different Colors.
Fit a piping bag with a piping tip. Fill 2 or more separate piping bags with different colors of filling. Snip the ends off the filled bags – no need to fit these with piping tips. Drop one filled bag inside the empty bag, and pipe your filling as instructed. When you want to change colors, remove the filled bag from the empty bag, and drop another filled bag inside the empty bag to pipe with that color.
Be sure to read all of my BAKING FAQs where I discuss ingredients, substitutions and common questions with cake making, so that you can be successful in your own baking! I also suggest reading these comprehensive posts on making Perfect American Buttercream, How to Stack, Fill, Crumb Coat and Frost Layer Cakes and How to Use Piping Bags.
Frequently Asked Questions
Can I use a plastic storage bag instead of a piping bag?
I don’t advise it. Plastic zip top bags aren’t as strong as piping bags, and have a tendency to burst open from the pressure of squeezing.
What’s the best buttercream for piping?
My Perfect American Buttercream is wonderful for piping, as well as for frosting cakes.
How do you know if your buttercream is the right consistency for piping?
This is something you’ll learn from experience, but if your buttercream seems soft and runny in the bowl, then it will be soft and runny in the piping bag. Your buttercream should be thick, fluffy, and able to hold its shape, without being too dry or crumbly. You’ll love my American buttercream recipe for piping all sorts of designs. When piping things like intricate roses, beat in more powdered sugar for a stiffer consistency.
You Might Also Like
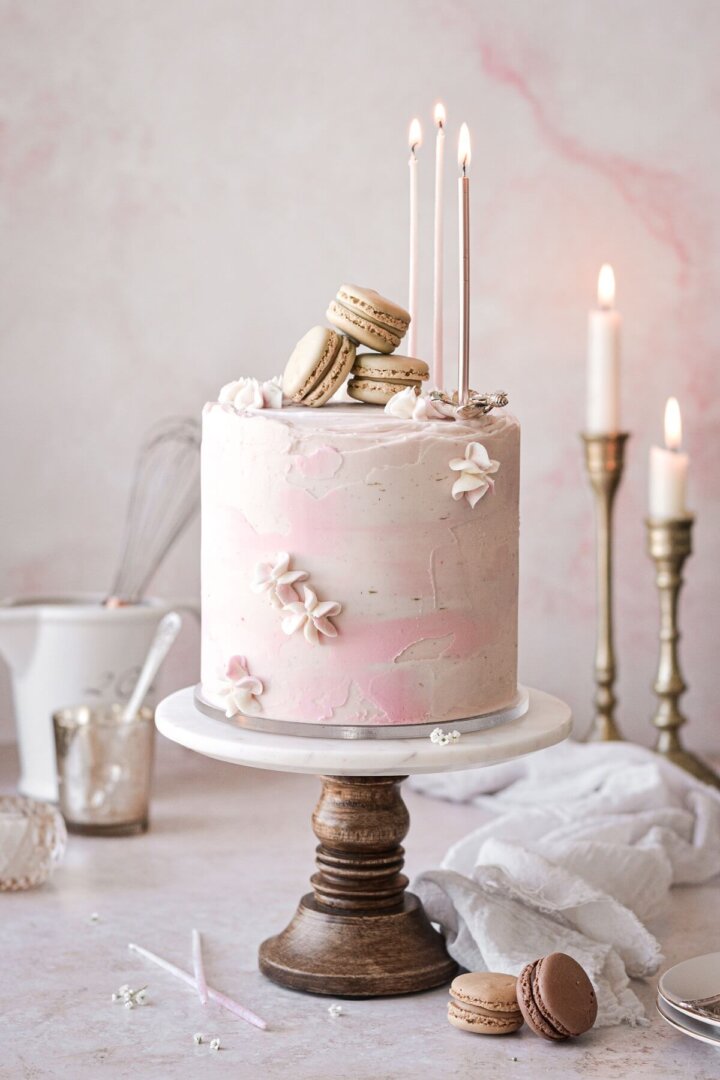 Textured Watercolor Cake
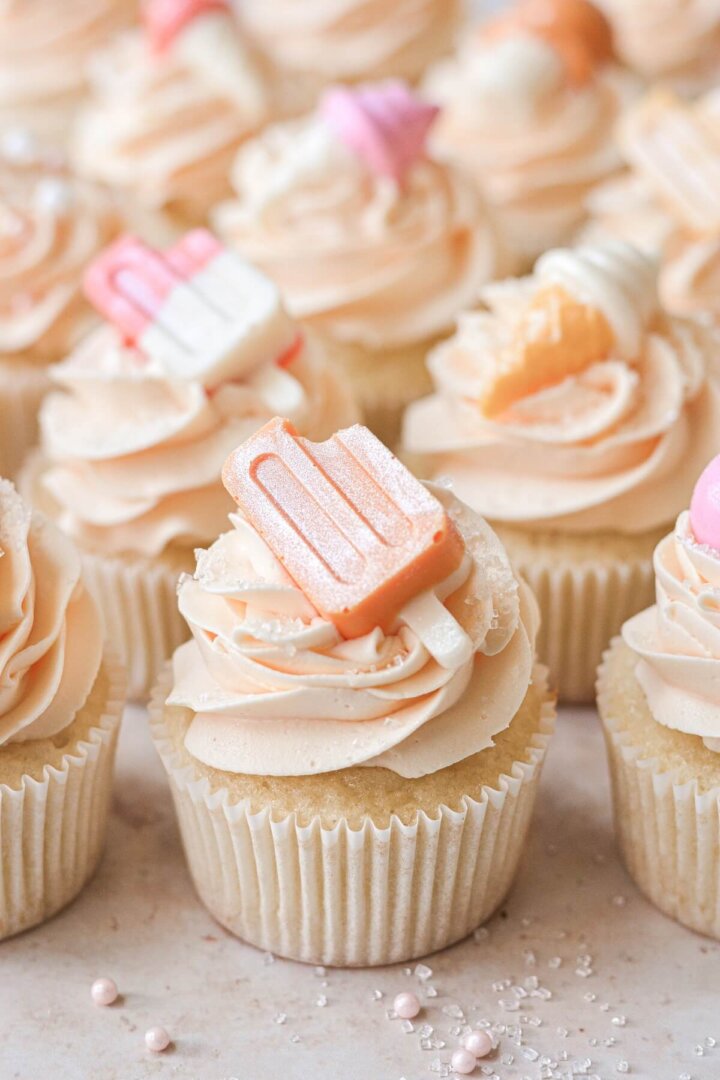 Orange Creamsicle Cupcakes
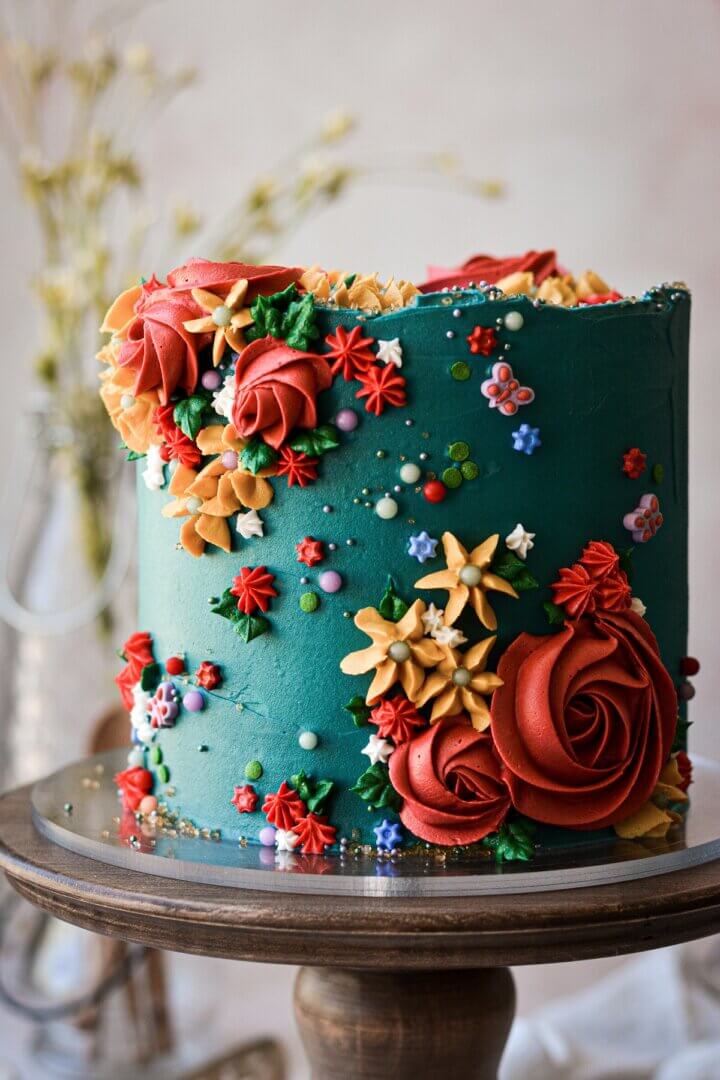 Turquoise Floral Cake
 Cherry Pistachio Cake
Favorite Products


Did you love today’s recipe? Please rate the recipe and let me know in the comments what you thought! Also, be sure to follow Curly Girl Kitchen on Instagram, and tag me when you try one of my recipes so I can see all your delicious creations!
How to Use Piping Bags, Tips and Couplers
A step by step tutorial on how to use piping bags with tips and couplers for piping buttercream frosting, pastry cream, and other fillings.
All recipes on Curly Girl Kitchen are developed for high altitude at 5,280 feet. See FAQs for adjusting to higher or lower elevations.
from
votes
Print Recipe
Pin Recipe
Prep Time
10
mins
Total Time
10
mins
Course
Dessert
Cuisine
American
Equipment
-
Piping Bags,
12 inch and 16 inch
-
Piping Tips,
variety of sizes
-
Couplers
-
Scissors
-
Rubber Spatula
Ingredients
-
Buttercream Frosting,
or filling of your choice
Instructions
-
Prepping the Piping Bag. First, prepare your piping bag by folding the top half of the bag outwards. This is called a “cuff”, and is helpful for covering your hand as you fill the bag to keep things less messy.
-
Using Piping Bags without Couplers. If using a large piping tip, such as tip 1M or 2D, you can simply drop the tip inside the bag without a coupler. Use scissors to snip off the tip of the bag. Cut just enough so that the teeth of the piping tip are not covered by the bag, but not so much that the hole is big enough for the tip to fall through.
-
Using Piping Bags with Couplers. If using smaller piping tips, or if you’re planning on changing tips throughout the decorating process, you need to use a coupler in conjunction with the tips. Drop the larger part of the coupler inside the bag. Use scissors to snip off the tip of the bag. The bag should extend slightly beyond the coupler, but not so far that it will stick out of the tip when you place the tip on. Now secure the piping tip to the coupler with the coupler ring, and screw the ring on tightly.
-
Filling Piping Bags. To fill the bag, you may find it helpful to place the bag inside a glass, with the top half of the bag folded over the edge of the glass. Once you’re more experienced with filling piping bags with buttercream, you may not find this to be necessary. But I recommend using a glass for stability when filling a piping bag with soft, runny fillings, such as chocolate ganache, pastry cream, royal icing or caramel sauce.
Use your rubber spatula, or a spoon, to spoon your filling into the bag, only filling the bag halfway. Press the filling down towards the tip, encouraging any air pockets to escape – this is called “burping” the bag. A little filling may push out of the tip if there are any air bubbles. Now twist the top of the bag to secure the filling inside.
-
Securing the Top of the Bag. For runny fillings like pastry cream or royal icing, you may want to secure the top of the bag with a rubber band, as these fillings have a tendency to slip back up towards the top and spill out. With buttercream frosting, it’s generally not necessary to secure the top with a rubber band, and twisting the bag at the top is sufficient to keep the buttercream moving downwards.
-
Piping the Filling. To start piping, use your dominant hand to hold the piping bag at the top of the filling, where the bag is twisted shut. Use your other hand to help guide the bag as you begin piping. Squeeze the filling with your dominant hand, keeping the pressure as steady as possible, then releasing pressure when you want to stop piping. I find it immensely helpful to practice first on a plate or cutting board, before you begin piping on your cakes, cupcakes or cookies. After practicing, you can scoop up the buttercream and use it again. As you squeeze the filling out, pause to press the remaining filling down towards the tip, and twist the top of the bag again to get a secure grip as you continue piping.
-
Refilling Piping Bags. When the bag is empty, or nearly empty, fold the top edge back out and fill the bag again as instructed earlier. Refilling a piping bag can be a bit messier than filling it the first time, but if you didn’t overfill it to begin with, then the top half of the bag should be fairly clean, making the process less messy. Burp the bag again, twist the top and continue piping.
-
Changing Piping Tips. To change piping tips, simply unscrew the coupler ring, remove the tip, and secure a new tip with the coupler ring.
-
Setting the Piping Bag Down. If you need to set your piping bag down to take a break, you can lay it on your counter if it’s filled with buttercream or frosting. If it’s filled with something softer or runnier, you should set it inside a tall glass to prevent the filling from spilling out.
-
Piping Striped Frosting. Prepare a 16 inch piping bag with a tip or coupler + tip. Fill 2 or more 12 inch piping bags with frosting, using a separate bag for each color. The more colors you use, the less frosting you should fill each bag with, since they need to all be able to fit side by side in the larger bag. Snip the ends off the smaller piping bags – no need to fit these with piping tips. Now drop the smaller bags into the larger one, trying to keep them all side by side. Twist the top and squeeze the frosting until the colors flow out of the tip side by side in a striped pattern.
-
Piping Blended Frosting. Prepare your piping bag with a tip or coupler + tip. Use a spoon to randomly fill the bag with 2 or more colors of buttercream, so that the colors blend together as you pipe the frosting. You can also combine multiple colors in a bowl, gently swirl them together without over-mixing the colors, then fill your piping bag with the blended colors.
-
Using a Double Piping Bag Method without a Coupler for Different Colors. Fit a piping bag with a piping tip. Fill 2 or more separate piping bags with different colors of filling. Snip the ends off the filled bags – no need to fit these with piping tips. Drop one filled bag inside the empty bag, and pipe your filling as instructed. When you want to change colors, remove the filled bag from the empty bag, and drop another filled bag inside the empty bag to pipe with that color.
Notes
If the heat of your hand starts to warm up and melt the buttercream or frosting in the piping bag, stick the piping bag in the refrigerator for a few minutes to firm it back up, then continue piping.
Keyword
Cake Decorating, How To Use Piping Bags
Tried this recipe?
Let us know how it was!https://curlygirlkitchen.com/


![Toni Kroos là ai? [ sự thật về tiểu sử đầy đủ Toni Kroos ]](https://evbn.org/wp-content/uploads/New-Project-6635-1671934592.jpg)


