How to Install Windows 11 on Hyper-V Virtual Machine
Introduction
Windows 11 offers a redesigned shell experience and significant improvements beneath the surface, such as increased security and Android app support. Windows 10 users can upgrade to Windows 11 free of charge.
If you want to experience the new Windows version before you decide to use it as your daily driver, install it inside a virtual machine. VMs allow you to test the system without impacting your current OS installation.
This tutorial will show you how to create a Windows 11 virtual machine using Microsoft Hyper-V virtual machine software.
Prerequisites
- Windows 10 Pro, Enterprise, or Education on the host computer.
- Administrative privileges.
Mục Lục
Install Windows 11 on Hyper-V
Creating a Windows 11 installation using Hyper-V is a simple three-step process:
- Enabling Hyper-V feature in Windows 10.
- Creating a Windows 11 VM.
- Installing Windows 11 on the VM.
Step 1: Enable Microsoft Hyper-V in Windows 10
Hyper-V comes preinstalled on systems running Windows 10 Pro, Enterprise, and Education. However, it needs to be enabled before use.
To do so:
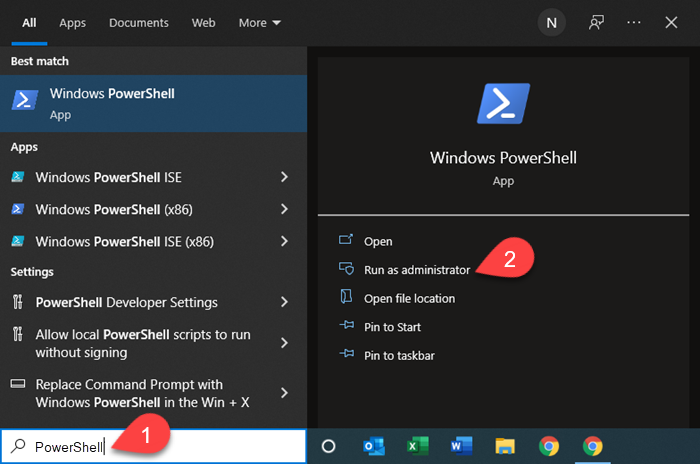
1. Find Windows PowerShell using the taskbar search bar.
2. Select Run as administrator in the pane on the right side to open Windows PowerShell.
3. Enter the following command at the PowerShell:
Enable-WindowsOptionalFeature -Online -FeatureName Microsoft-Hyper-V -AllWait for the process to finish.

When the process completes, the system asks to restart the computer. Press Enter to confirm.

4. When the system boots up again, press Win + R to open the Run command box, then type:
services.msc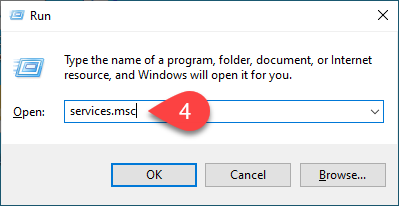
Hit Enter or click OK to run the Services window.
5. Right-click Hyper-V Virtual Machine Management in the list of available services.
6. Select Properties in the context menu.
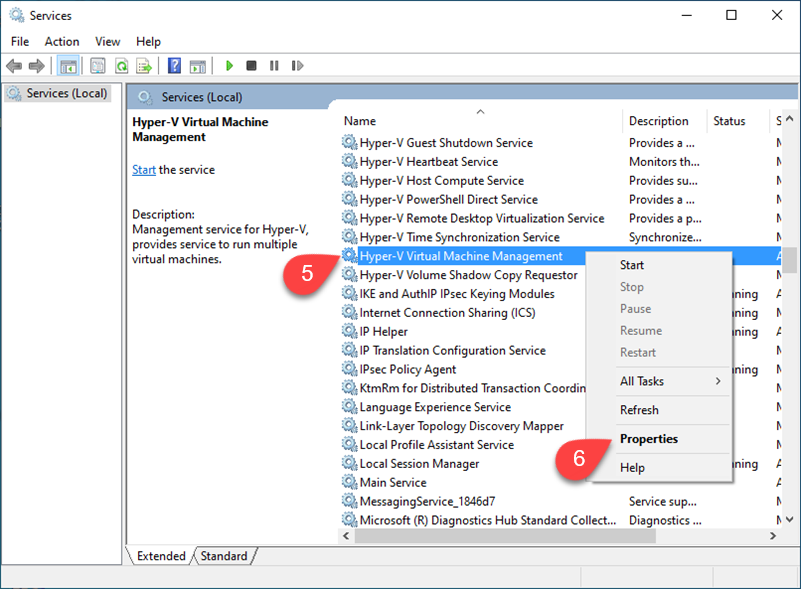
The General tab of the Properties window opens.
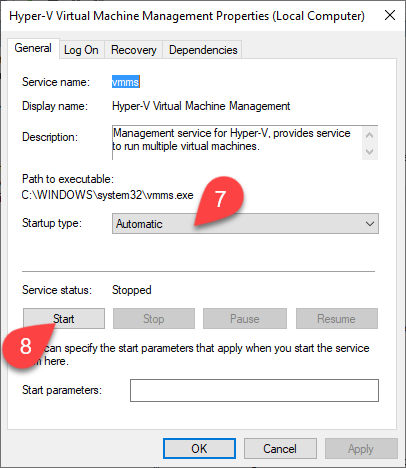
7. Choose the startup type for the Hyper-V service. You can choose between:
- Automatic (Delayed) – The service starts after the boot process completes.
- Automatic – The service starts during the boot process.
- Manual – The service does not start at the system boot but can be activated manually.
- Disabled – Disables the service.
8. Select the Start button to start the Hyper-V Virtual Machine service. Click OK to exit.
Step 2: Create Windows 11 Virtual Machine on Hyper-V
1. Use the taskbar search to find Hyper-V Quick Create.
2. Select the application in the search results to run it.
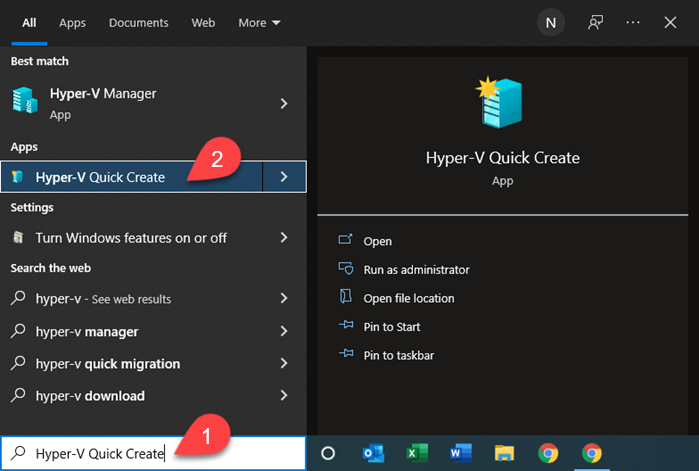
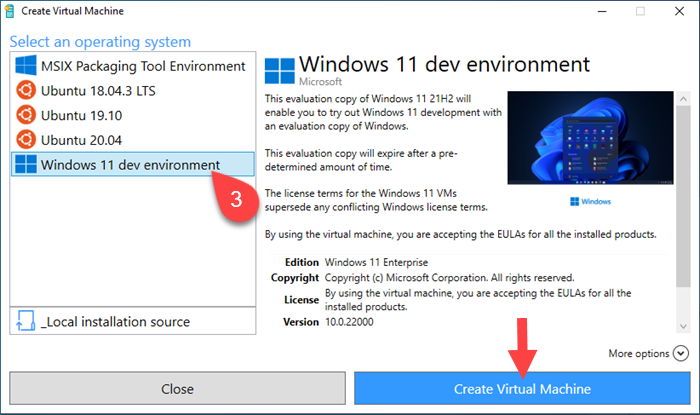
Confirm you want to open the application at the User Account Control prompt. Hyper-V Quick Create starts. Out-of-the-box, Hyper-V offers an evaluation copy of Windows 11 Enterprise edition.
3. Select Windows 11 dev environment on the list and click Create Virtual Machine to proceed.
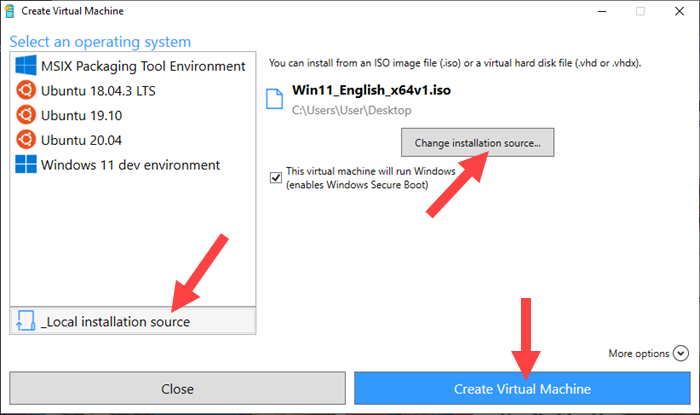
Optionally, download an ISO Windows 11 file from the official website and create a VM. To do so:
- Select _Local installation source option and then click Change installation source
- Locate the ISO file on your system and add it to Hyper-V.
- Click Create Virtual Machine to proceed.
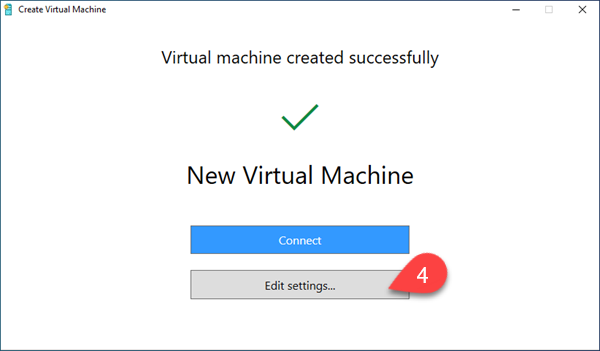
4. Select Edit settings when Hyper-V finishes creating the VM.
5. The VM needs to meet minimal resource requirements to run Windows 11. Select the memory item in the menu on the left side and ensure at least 4096MB of RAM has been allocated to the VM.
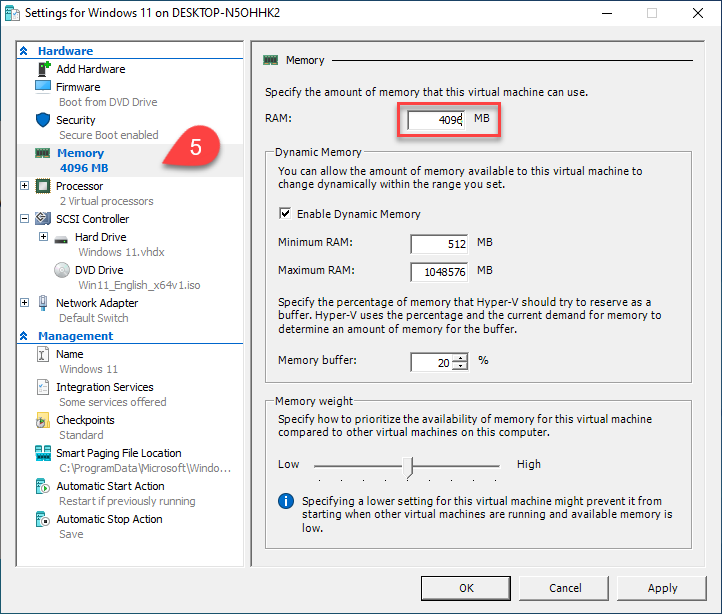
Click OK when you finish editing the VM configuration.
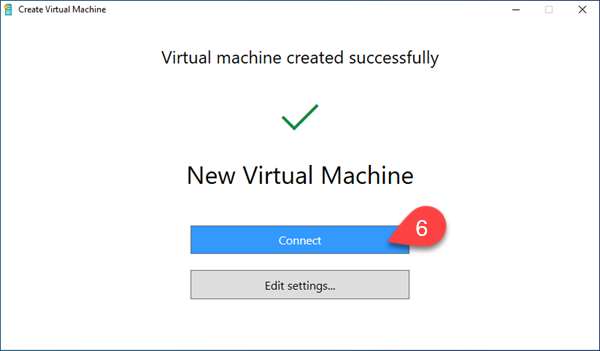
6. Select Connect to open the virtual machine window.
Note: Besides Windows, Hyper-V virtual machines can host many different operating systems. Learn how to install Ubuntu with Hyper-V.
Step 3: Install Windows
To start the Windows 11 installation process, turn on the VM by selecting the Start button.
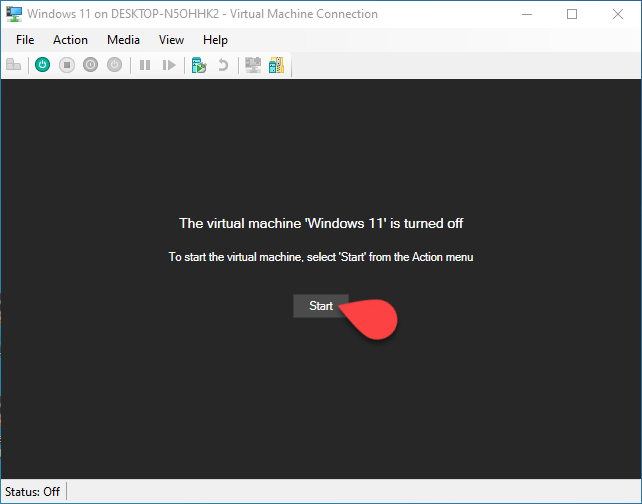
When you turn on the VM, Windows 11 Installer starts automatically. Follow the steps in the installer to complete the installation.
Note: If you need assistance with the Windows 11 installation procedure, read the comprehensive guide provided in the tutorial on installing Windows 11 on VMWare Workstation Player.
Conclusion
After completing this tutorial, you should know how to install Windows 11 on a Hyper-V virtual machine. As a native Windows solution, Hyper-V is a convenient way to safely set up and test other operating systems.


![Toni Kroos là ai? [ sự thật về tiểu sử đầy đủ Toni Kroos ]](https://evbn.org/wp-content/uploads/New-Project-6635-1671934592.jpg)


