
How to Find Your WiFi Password (Network Security Key) in Windows 10


We’ve all been there. A friend comes over, begging access to your WiFi network, but you realize you forgot your network security key. Often, the router is buried in a corner or in another room and you don’t have the energy to move. To indulge your laziness, we’re going to show you how to find the WiFi password in Windows 10.
What is a network security key for WiFi?
Your Windows 10 device may display a message telling you to “Enter the network security key”. This can cause some confusion, but it’s worth noting that the network security key, WiFi key, and WiFi password are interchangeable terms.
A WiFi password or network security key is usually WPA (Wi-Fi Protected Access) phrase that you chose at an earlier date. A password may have also shipped with your router, but for security reasons, it’s highly recommended you swap that out for a unique, personal one.
How to view saved WFi passwords in Windows 10
You can find the WiFi password in Windows 10 via a variety of methods without needing additional authentication. We’re going to show you how to do so via PowerShell, command prompt, the control panel, and a third-party Wi-Fi password revealer. Let’s get started:
How to Find WiFi Password in Windows via PowerShell
One of the fastest and most foolproof ways to view saved Wi-Fi passwords in Windows 10 is through a PowerShell command. It’s a long one, but you can simply paste it into the command line and press Enter.
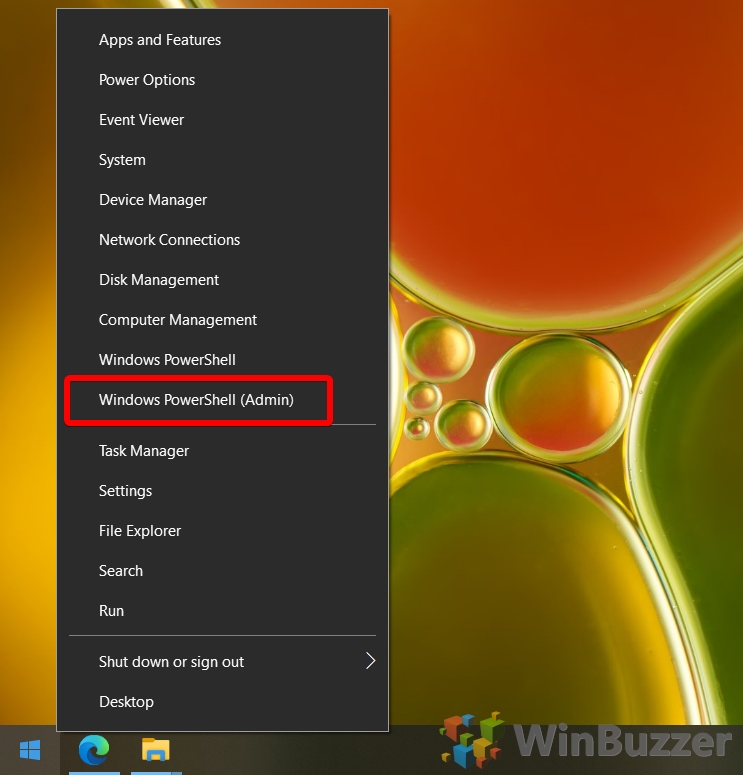
- Open PowerShell as Admin
Press “Windows + X”, then click “Windows PowerShell (Admin)”
- Run the WiFi password revealer command
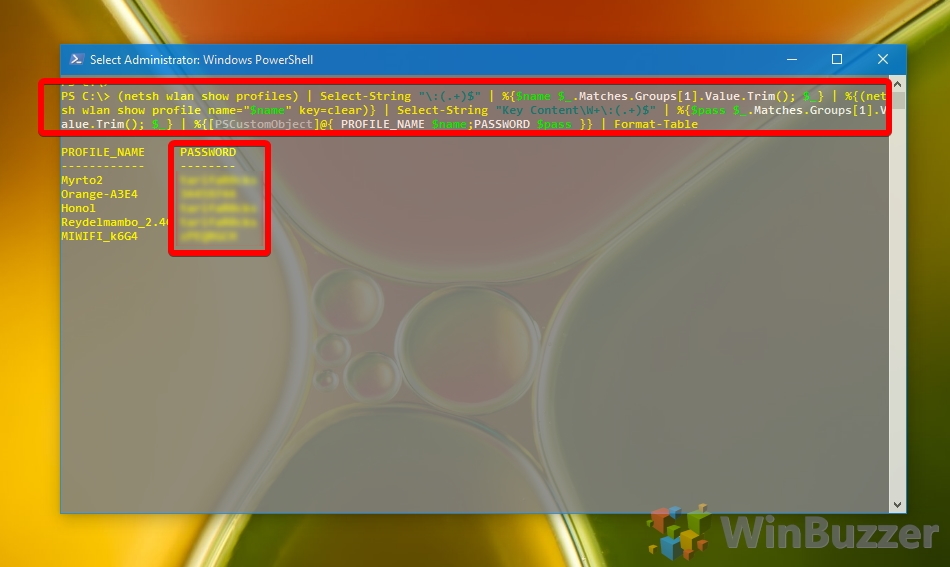
In PowerShell, enter the following by copying it and then right-clicking in the PowerShell window. Then press “Enter”:
(netsh wlan show profiles) | Select-String "\:(.+)$" | %{$name=$_.Matches.Groups[1].Value.Trim(); $_} | %{(netsh wlan show profile name="$name" key=clear)} | Select-String "Key Content\W+\:(.+)$" | %{$pass=$_.Matches.Groups[1].Value.Trim(); $_} | %{[PSCustomObject]@{ PROFILE_NAME=$name;PASSWORD=$pass }} | Format-Table -WrapPowerShell will output a list of network IDs and their saved passwords. Look for your network name and note the password down for later use.
How to Find Network Security Key via Windows 10 Command Prompt
If you don’t have access to PowerShell or your network didn’t show up in it, you can try Command Prompt instead. The commands here are also memorable, which is always useful for the future.
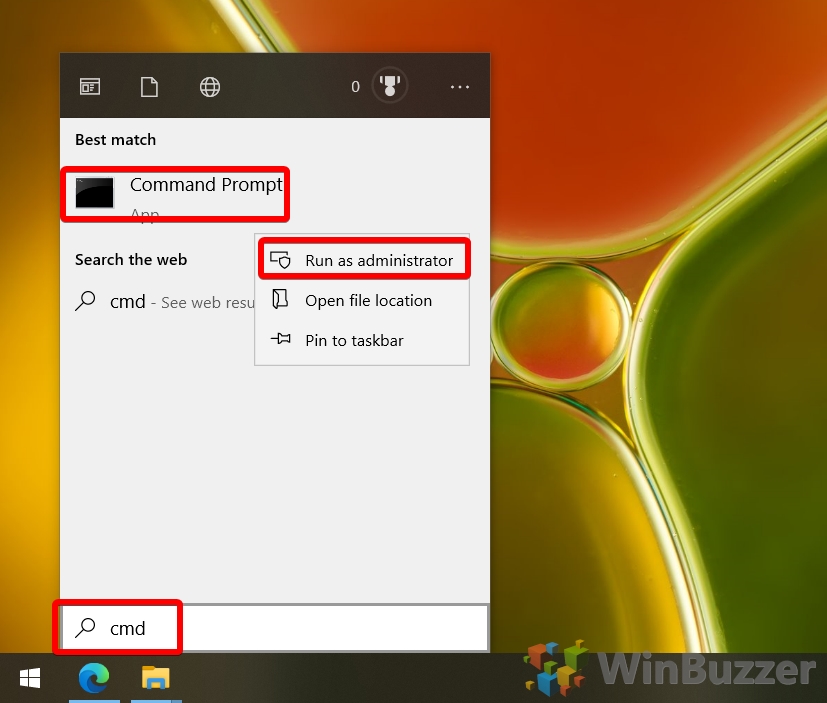
- Open Command Prompt as an administrator
Press “Windows” and type “cmd”. Right-click “Command Prompt” and choose “Run as administrator”.
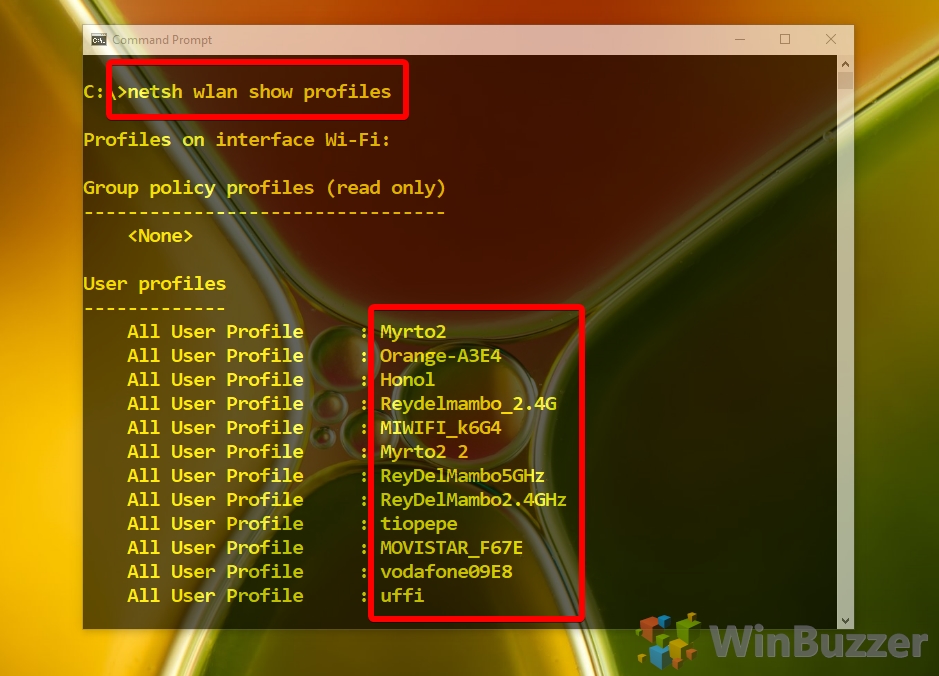
- Run the netsh command
Paste the following into command prompt and press “Enter”:
netsh wlan show profilesNote down the user profile name of your Wi-Fi network for use in the next step.
- Run the key command to find the WiFi password in Windows 10
Now that you know the network ID, you can type the following to return its password:
netsh wlan show profile name="NetworkName" key=clearReplace
NetworkNamewith your SSID and press “Enter”.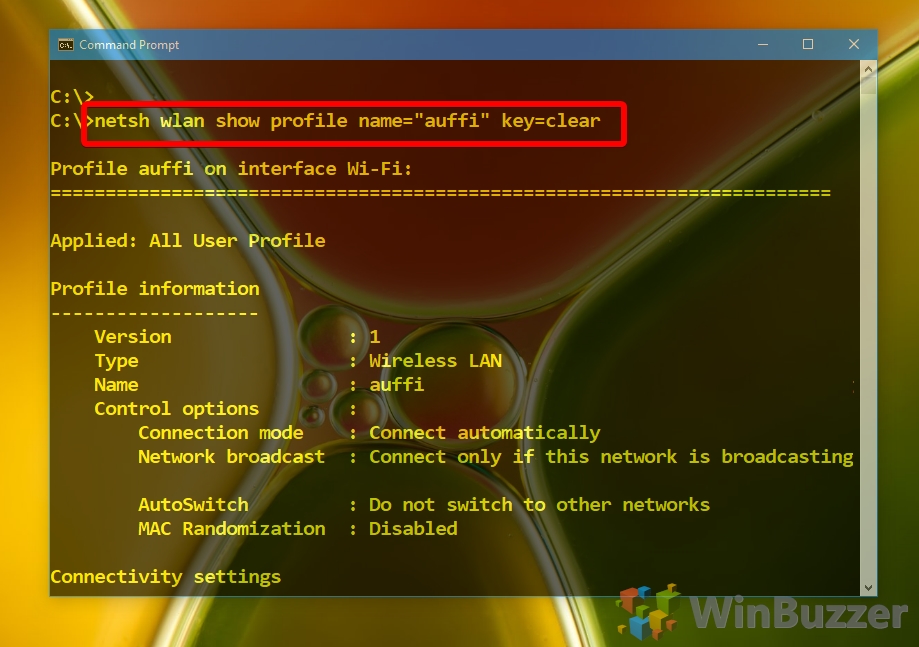
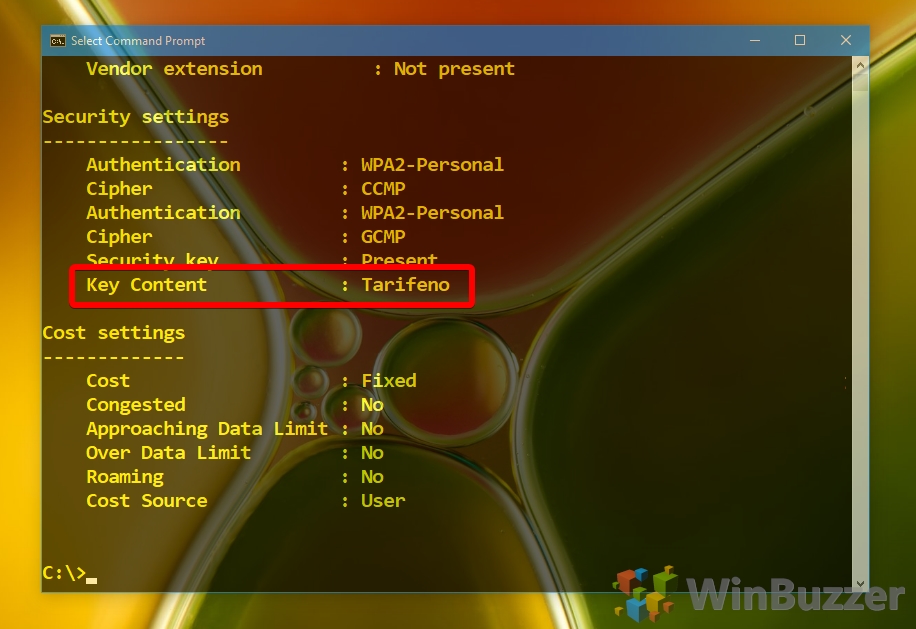
- Note down the Windows 10 network security key
Scroll down the page until you find “Security settings”, then look for the “Key content” field. Your network password should be displayed there.
Find WiFi Password in Windows 10 via Settings
For a more user-friendly route, you can use the Settings app to view the WiFi key in Windows 10.
- Open settings
Press “Windows + X”, then click “Network Connections” to open network settings.

- Click “Wi-Fi”, then “Network and Sharing Center”
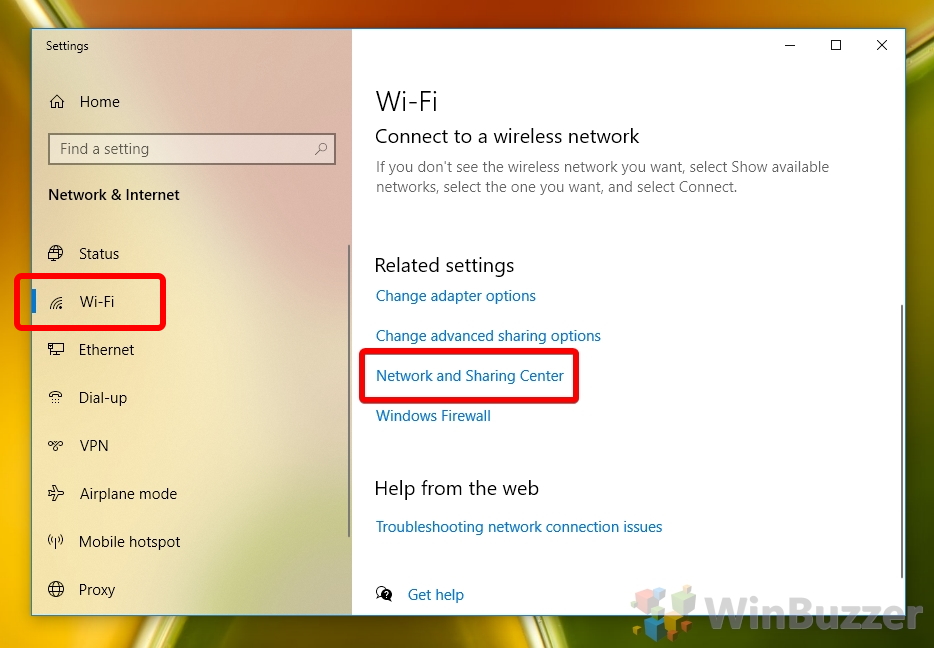
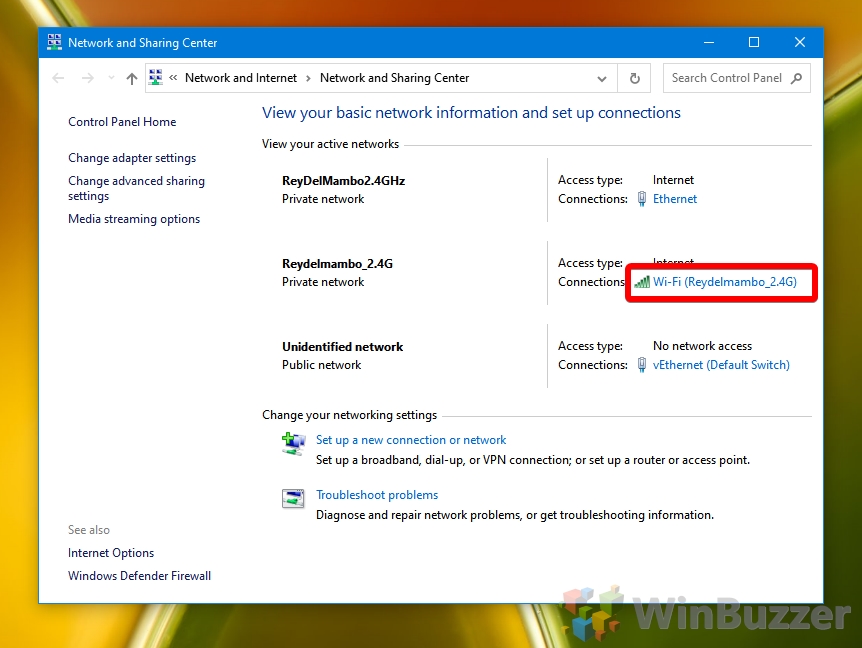
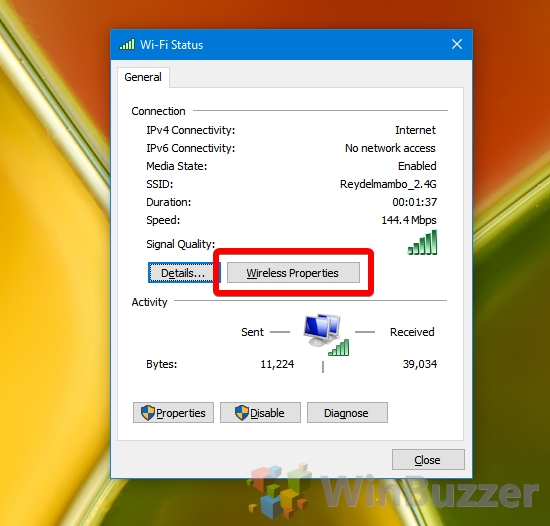
- Click your Wi-Fi network under the “Connections” tab
- Click “Wireless Properties”
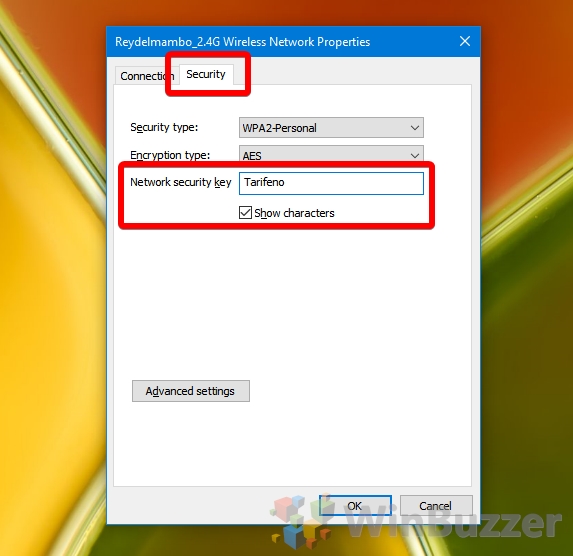
- Use the WiFi password revealer
Switch to the “Security” tab, then tick the “Show characters” button under “Network security key”. Copy the key down for later use and press “OK”.
How to Find The Network Key with the WirelessKeyView App
If the above methods aren’t doing it for you, one option is a free third-party tool, Wirelesskeyview.
- Go to the WirelessKeyView webpage
Go to the Nirsoft website and scroll down until you see the feedback section.
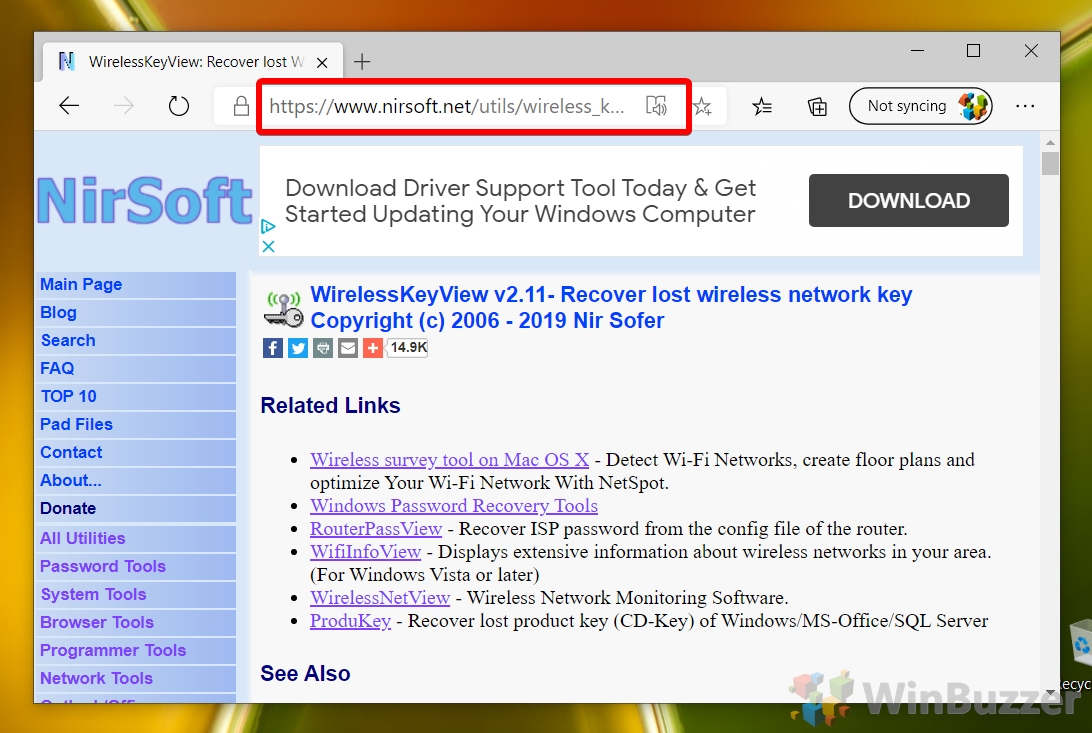
- Note down the Zip password and click “Download WirelessKeyView for x64”

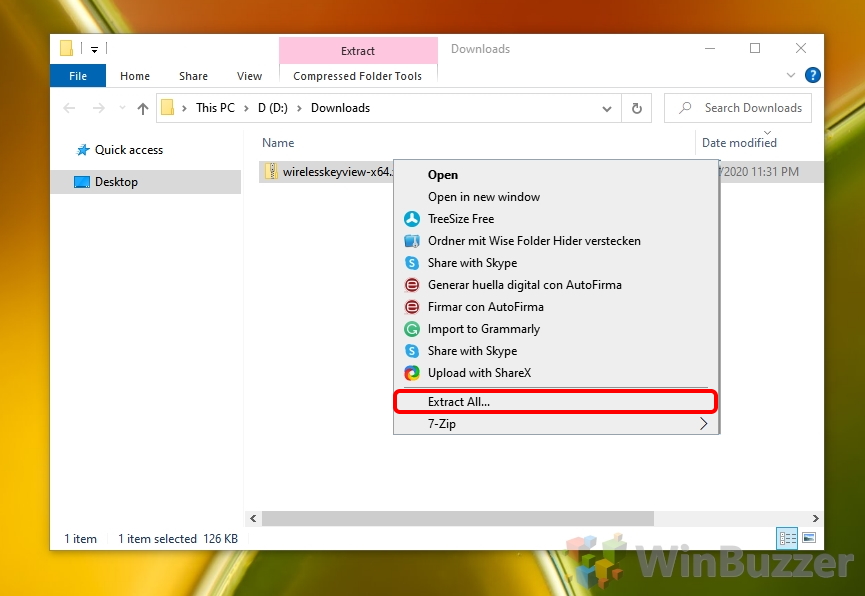
- Extract the WirelessKeyView zip files
In your downloads folder, right-click the .zip file you just downloaded and choose “Extract All”.
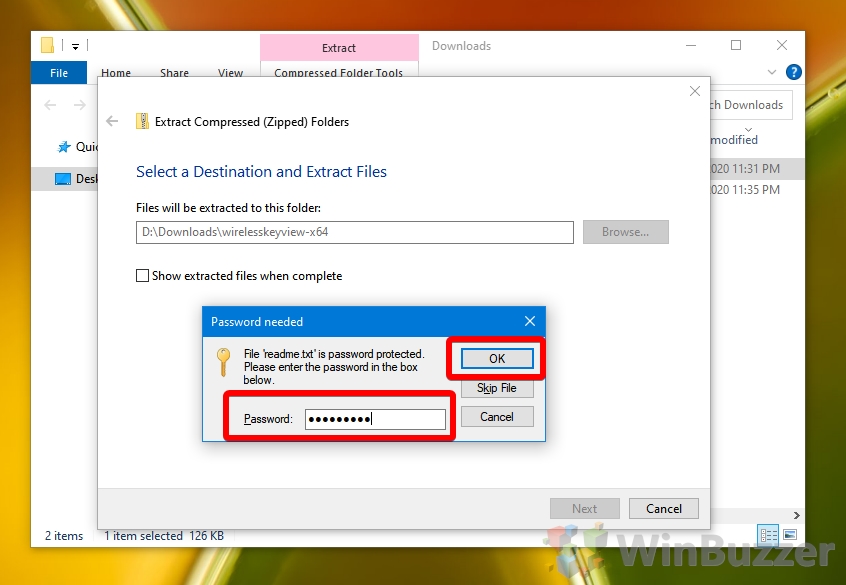
- Enter the zip password
At the time of writing, the zip password was WKey4567#. Enter it in the “Password:” field and press “OK”.
- Run the WiFi password revealer
It will be called “WirelessKeyView.exe”.

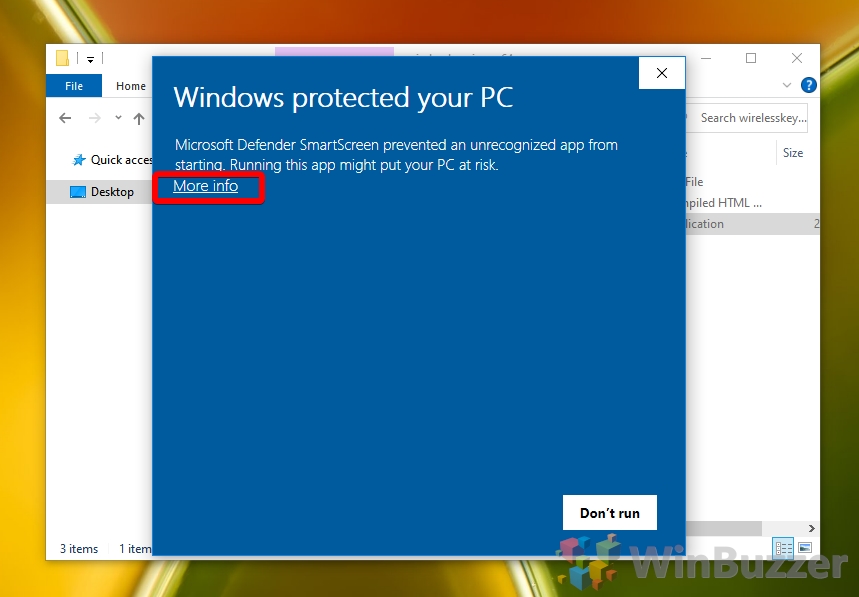
- Click “More info” to the warning dialog
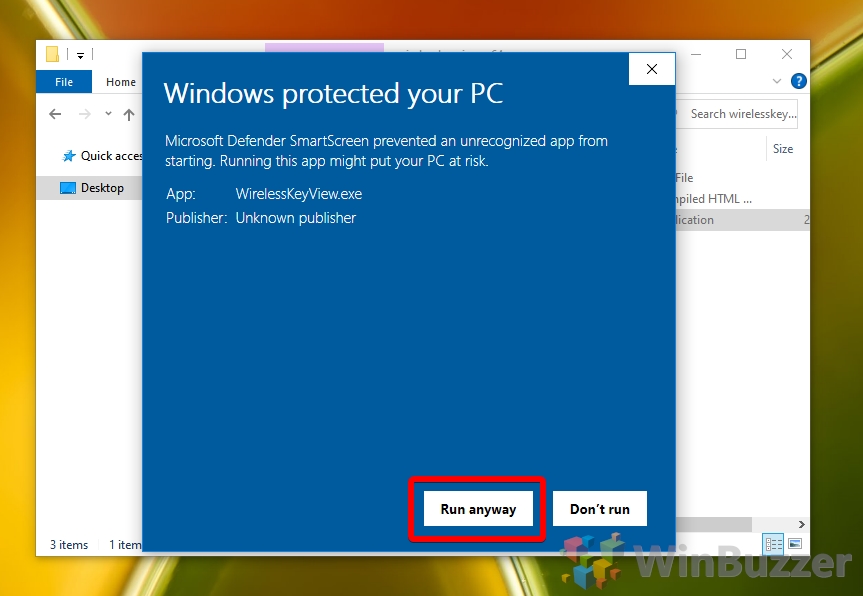
- Click “Run anyway”
- View saved Wi-Fi passwords in Windows 10
WirelessKeyView often spits out a more complete list of Wi-Fipasswords than Windows 10’s default tools. Search for your network name in the left-hand column, and its password under the “Key (Ascii)” column.

If you found this tutorial useful, you may also want to check out our guides on how to remove a PDF password and password protecting a folder.


![Toni Kroos là ai? [ sự thật về tiểu sử đầy đủ Toni Kroos ]](https://evbn.org/wp-content/uploads/New-Project-6635-1671934592.jpg)


