
How to Download and Install Eclipse on Windows? – GeeksforGeeks
How to Download and Install Eclipse on Windows?
Eclipse is a free open source platform, Integrated Development Environment (IDE) with the help of which applications are made using the Java programming languages and other programming languages are also used such as C/C++, PERL, Python, Ruby, etc.
It is composed of many plug-ins and is designed to be extensible using additional plug-ins. Eclipse IDE can be used for any programming language for which a plug-in is available.
Following are some plug-ins used in Eclipse IDE :
- The Java Development Tools (JDT) is a plugin that allows Eclipse to be used as a Java IDE.
- PyDev is a plugin that allows Eclipse to be used as a Python IDE.
- C/C++ Development Tools (CDT) is a plug-in that allows Eclipse to be used as C/C++ development.
- The Scala is a plug-in that allows Eclipse to be used as an IDE to develop Scala applications.
- PHPeclipse is a plug-in that allows Eclipse to be used as an IDE to develop PHP applications.
Installation of Eclipse IDE on Windows:
Follow the below steps to install Eclipse IDE on Windows:
Step 1: In the first step, Open your browser and navigate to this URL.

Step 2: Then, click on the “Download” button to download Eclipse IDE.

Step 3: Now, click on the “Download x86_64” button.

Step 4: Then click on the “Download” button. After clicking on the download button the .exe file for the eclipse will be downloaded.
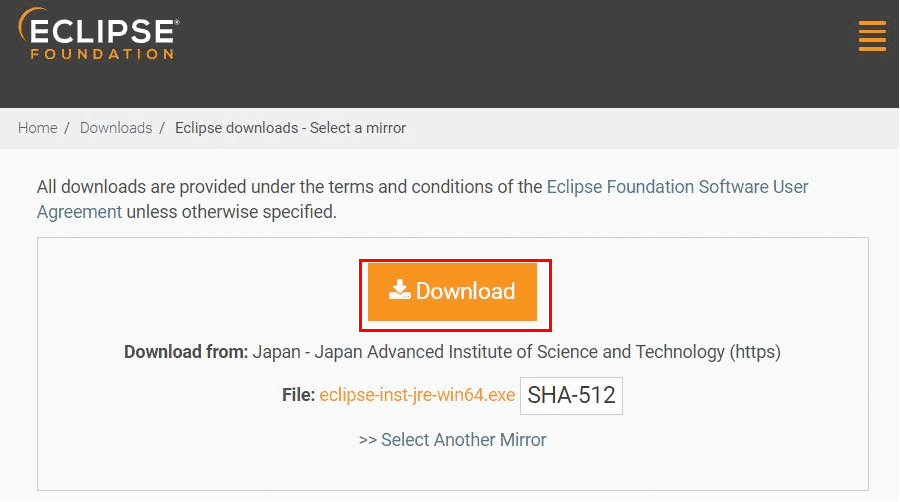
Step 5: Now go to File Explorer and click on “Downloads” after that click on the “eclipse-inst-jre-win64.exe” file to install Eclipse IDE.

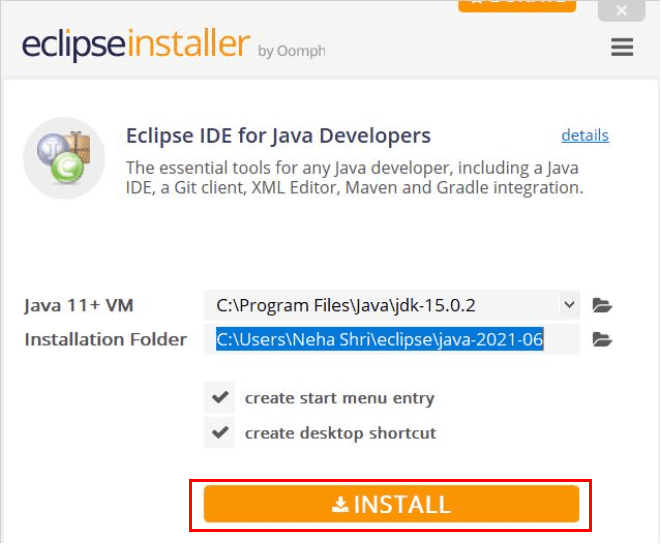
Step 6: Then, click on “Eclipse IDE for Java Developers”.

Step 7: Then, click on the “Install” button.
Step 8: Now click on “Create a new Java project”.

Now, you are ready to make new Java projects using eclipse IDE and the screen will look like this :

My Personal Notes
arrow_drop_up


![Toni Kroos là ai? [ sự thật về tiểu sử đầy đủ Toni Kroos ]](https://evbn.org/wp-content/uploads/New-Project-6635-1671934592.jpg)


