How to Create a Google Business Profile and Verify Your Business
If you own a brick-and-mortar store or a business that covers a specific service area, creating and verifying your Google Business Profile is critical in helping your customers find your business location, hours, and other updates.
Google Business Profile (formally known as Google My Business) is a free and easy-to-use tool that allows businesses to manage their presence across Google.
Why Create a Google Business Profile?
Having a Google Business Profile makes it easier for customers to find, learn about, and contact your business online.
In addition to customer ease, there are several other reasons why you should consider creating a Google Business Profile.
- Improve Local Visibility:
When you search for something on Google, Google will present you with results that aren’t only relevant to you, but also in proximity! Creating a Google Business Profile listing will help you rank for local results, and ultimately, get more your business more visibility.
- Competitive Advantage:
An optimized Google Business Profile is a ranking factor in the local search landscape. Fully optimizing your Google My Business profile gives you the opportunity to outrank competitors and have an advantage.
- Manage Your Reputation:
Google Business Profiles present business owners with the opportunity to directly respond to and engage with their existing customer base. You can respond to reviews (both positive and negative), answer questions, and even enable direct messaging.
What Do You Need To Create a Google Business Profile and Verify Your Business?
Creating a Google Business Profile account and verifying your business can be a breeze if you have these three items:
-
A Google account
-
Your business profile (aka the listing on Google that appears on Google Maps or the local results of a search!)
-
A Google Business account (if you already have an email associated with your business through Google, this will be a breeze to set up)
How To Create a Google Business Profile and Verify Your Business
1. Create a Google Account for Your Business
To keep everything organized, we recommend that the Google email you use to claim your business listing is geared toward your business.
Make Sure it’s a Business Profile!
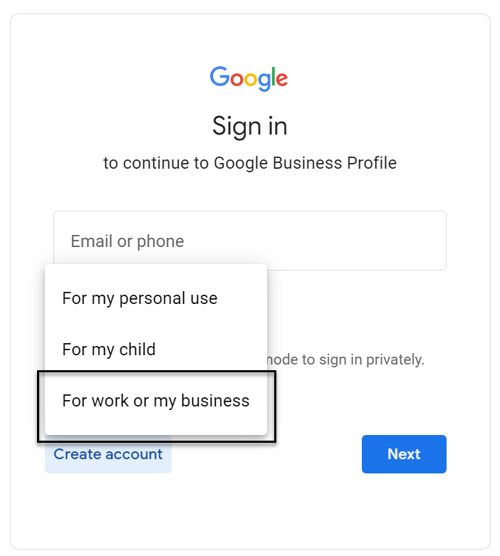
When you’re setting up your account for your business, make sure it’s a business profile. To do this, click the “Create Account” button on the Google sign-in screen.

Once you click that, a drop-down menu will appear. Click “To manage my business,” and follow the prompts to set up your business account.
2. Sign In to Google Business Profile
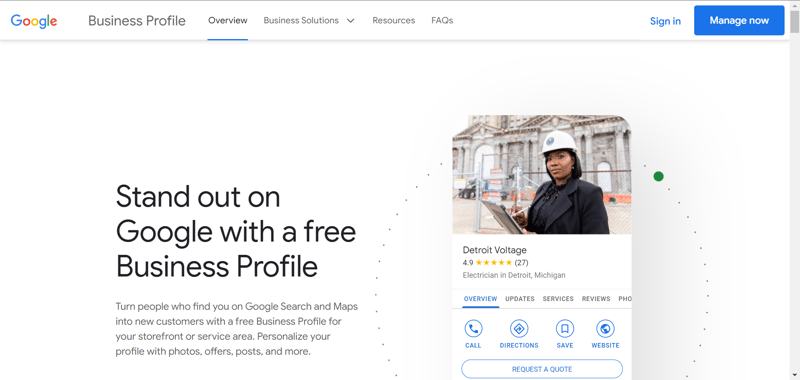
Being signed in under the Google Account for your business, navigate to google.com/business. Once there, you should see a screen that looks like this:

Click the “Manage Now” button. Once you click it, you will be asked to provide basic information about your business, including name, address, website, and phone number.
3. Make Sure Your Business Listing is Online
A business listing can exist on its own, without anyone claiming it with a Google Business Profile account. The problem with this is that business owners have no control over the information that Google has provided until they claim the listing.
To find your business listing, just search for the name of your business. If an address populates next to it, then you already have a business profile and can move on to step #4!
If Your Listing Isn’t Online
If an address doesn’t populate next to your business name, that means there likely isn’t a listing associated with it. To add a location, follow the following steps:
-
Sign back into Google Business Profile
-
Click Manage Locations
-
Select a location group
-
Click Add Location
-
Enter necessary business information
-
Follow the prompts to create a new listing
The great part about this route is that once you add the location in Google My Business, you are the claimed owner of the listing and can bypass the claiming process, though you will still need to verify the business.
4. Request to Claim Your Business Profile
Unfortunately, creating a Google Business Profile account does not automatically connect to your business listing. To connect your account to your business profile, you will have to claim your business listing.
Request from Search
Search for your business name and location on Google. On the right-hand side of the search results, you should see a panel with your business information (Business Listing). Within the listing, find the option labeled “Manage this listing” and select it.
After you select the option, you will be taken to a screen that includes a “Manage now” button. Click that and follow the prompts to claim your business.
Request from Maps
Go to google.com/maps and type in your business name. From there, you will click on your business profile and select the option “Claim this business.”
Once selected, a pop-up will appear that includes a “Manage now” button. Click that and follow the prompts to claim your business.
5. Verify Business Ownership
When you click the “Manage now” button mentioned in the previous step, you’ll be asked for information to prove that you are the owner of the business listing.
Depending on the business and if you’re signed in to Google Business Profile, you may be verified instantly and then will have access to your listing.
If you didn’t create the business profile, Google will provide you with a verification code to submit. This verification code can be sent via email, phone, or postal mail – depending on the business requirements, Google will provide the necessary option.
Once you receive the verification code, you’ll enter it into your Google Business Profile, and then you’ll have full access to your Business Profile!
Take the Time To Verify Your Business
Google Business Profile has changed the way customers find and engage with your business. If you want to effectively reach your audience and attract new customers, optimizing your business listing for local search is a great first step.
Learn more about the importance of investing in Local SEO with our Local Search Guide
Sign up for our newsletter for more posts like this – delivered straight to your inbox!


![Toni Kroos là ai? [ sự thật về tiểu sử đầy đủ Toni Kroos ]](https://evbn.org/wp-content/uploads/New-Project-6635-1671934592.jpg)


