How to Create a Facebook Business Page
What are the top benefits of using a Facebook business page?
- Multiple ways to easily engage with customers.
- Maximise your online reach with boosted posts.
- Gather online reviews.
- Increase the traffic to your website.
- Use Facebook’s insights to find your ideal customer.
Now, onto creating your page.
Firstly, you need to know there are TWO types of Facebook business accounts, and the one you want will depend on what you want to do with your posts. Let’s see which one you need:
A Facebook business page is just that—a page for your business where you can publish posts, maybe give them a boost to increase the number of people seeing your ads, and interact with your customers. For the smaller business just wanting to enter the world of Facebook gently, this will suit your needs for now.
If you’re running a larger business or running marketing on their behalf and you’re looking to create cutting-edge advertising campaigns, you’ll need a Facebook Business Manager account.
Today, we’re going to show you how to create the first option—your Facebook business page.
Still with us? Right, let’s get down to business. Before you setup your page, you’ll want to ensure you have decided on your business name, have a logo, a high-resolution image or two and know if you prefer being contacted by phone or email. Now you’re ready to roll.
Mục Lục
5 Steps to Creating Your Facebook Business Page
1. Create a personal Facebook page.
Before you try and setup your Facebook business page, you’ll need to create and sign in to your personal profile page. Some businesses choose to create an admin account if they don’t personally want to be on social media, so this is always an option if you’d prefer not to have your name online.
If you’re yet to create your personal page, head to www.facebook.com.au and enter your details on the homepage.
2. Create your business Facebook page.
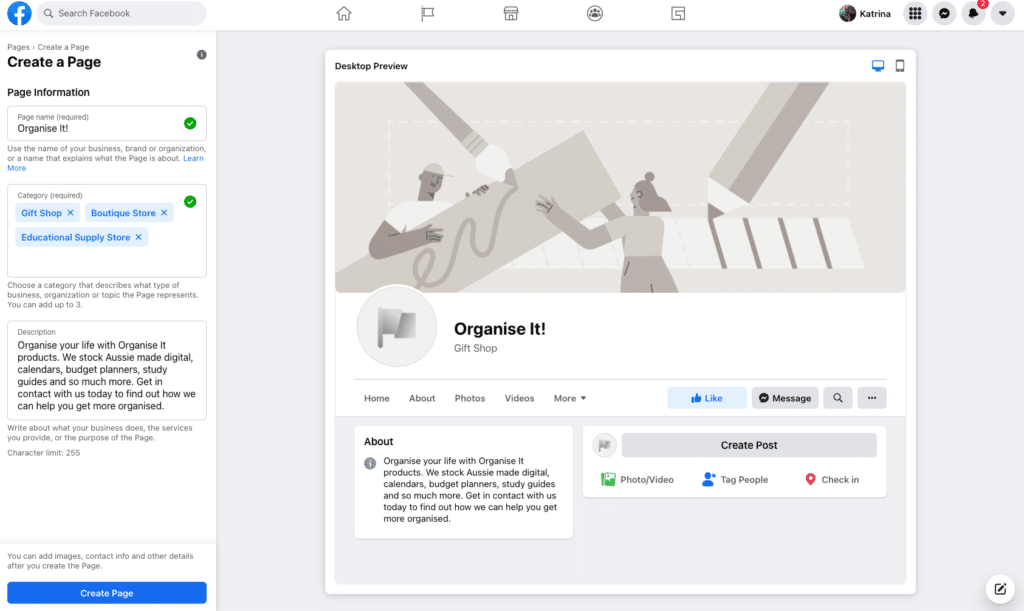
Now you’re logged into your personal Facebook account, head to facebook.com/pages/creation , or from the top right hand menu select pages, then create new page. Next, enter your page name (ensure it’s the same as your business name), select your category (you can select up to three) and add brief description of your business — think of this as your elevator pitch. The data boxes for your address and phone number will appear once you select your category.

Be sure to double check all the spelling and grammar is exactly how you’re displaying it on your other social accounts and listings, such as www.localsearch.com.au. Having different information in even one place can affect your search engine optimisation (SEO), and entering it correctly will save you plenty of time later. Using a listing management tool can help you keep on top of this in the future. When you’re done, select create page.
Step 3: Add your logo and cover image.
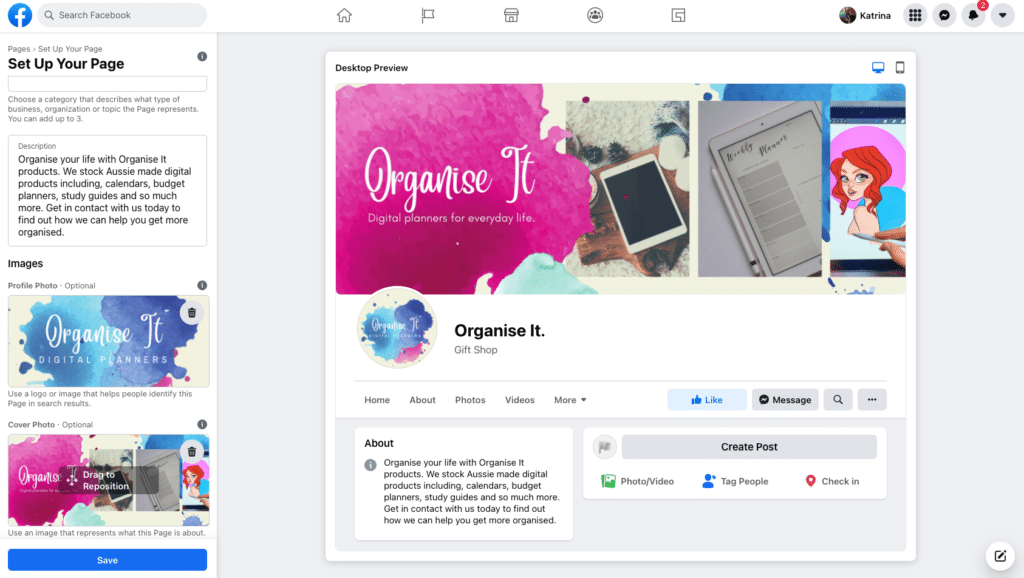
Congratulations, you now have a Facebook Page for you business — but don’t get too excited, you’re not done quite yet. It’s time to let your logo shine! We recommend using a logo you’ve used on your other listings, social accounts and marketing so people easily recognise your brand. Your logo should be clear, professional and capture the vibe of your business.
Once you’ve added your logo, you’ll be prompted to add a cover photo. Again, your cover photo should be clear and in high resolution. Not sure what to use? Try a photo of your shopfront, your favourite shop display, your latest ad or a stunning photo of your work. Facebook now lets you upload videos as a cover photo, which is great if you have a walk-through of your store or an online video ad you’re proud of.

Step 4: Customise your page.
Your page is now officially live — congratulations! If you leave your browser your page will be saved under the pages tab on the left hand side of your Facebook newsfeed.
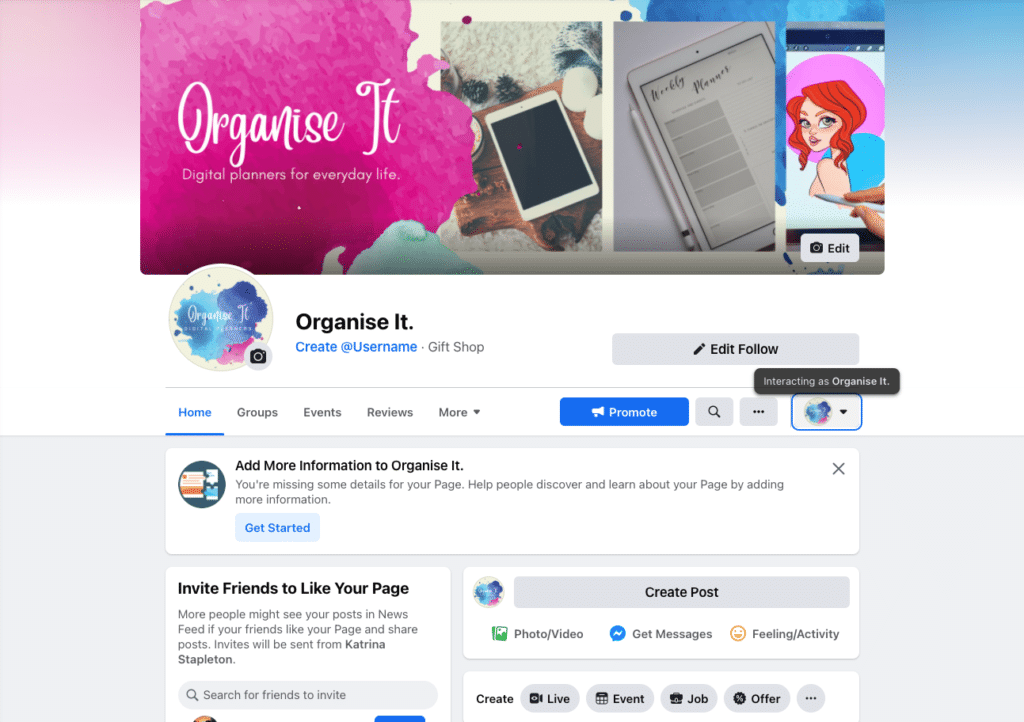
It’s time to make your page user friendly. First, create your @username, this will allow other businesses and your customers to tag your page. It’s very important if you’re planning on running cross promotions in the future. Select Create @Username and type your preferred name in the popup, click out of the text box and click Create Username to save. When creating your username make sure to use your business name, or something very close to it.
Next, set up your action button. Your action button is the blue button located at the top of your business page, it’s the very first call to action anyone visiting your page will see, so it is important to select the right option. Facebook provides you with plenty of options including, sign up, learn more and book now. Choose the one which works best for your business. If you aren’t sure the safest option is always follow or send us a message.
Scroll about half way down your page and you’ll find the about section. Fill this out asap and ensure to add your website, location and phone number.
Step 5: You’re good to go!
Add an autoresponder. Publish your first post. Give the post a boost. Invite your friends from your own personal Facebook account. Share photos. Go live with video. Receive and reply to messages. Answer comments. And watch your business grow.
Of course, the only way to grow your business online using a Facebook business page is to continue posting, boosting to improve engagement and monitoring your customers interaction with your page. For the busy business owner, this is just another thing to add to an already chaotic schedule.

Frequently asked questions about setting up a Facebook Business Page.
Why is my Facebook Business page not eligible to have a username?
Sometimes when go to create a username for your new business page Facebook with throw you an error saying your page is not eligible to have a username, but what does this mean? According to Facebook themselves, sometimes before a page can add a username they must meet the following requirements:
- Have at least one live post.
- Have more than 24 page likes.
Sometimes this error can be worked around by adding another administrator to the account, although the success rate with this seems to be hit and miss.
Is a Facebook Business Page free?
Yes, creating a Facebook Business Page is completely free. It is also free to post, gain followers and open a shop on the platform. If you want to run social media ads, it will cost you anywhere from $20 to $1000+ depending on your goal.
Does a Facebook Business Page have to be linked to a personal Facebook page?
Yes, in order to manage or set-up a Facebook Business Page you will require a personal page. If you do not want your personal page connected to a business page you may be able to connect it to a family members page, although this is not advised.


![Toni Kroos là ai? [ sự thật về tiểu sử đầy đủ Toni Kroos ]](https://evbn.org/wp-content/uploads/New-Project-6635-1671934592.jpg)


