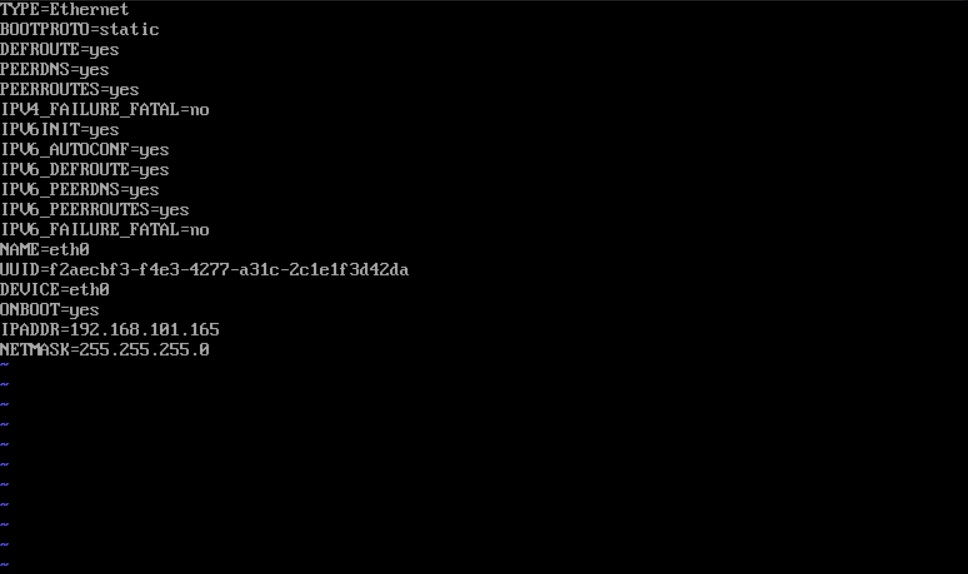
How to configuration network on CentOS 7
Step 1: Type the following command to access your system’s network configuration file. We will be using ethernet port eth0.
vi /etc/sysconfig/network-scripts/ifcfg-eth0

Step 2: Here you can configure it as you like, as an example though we are going to configure it into a server with static IP. Press “i” to enter Insert Mode and perform the following changes.
- BOOTPROTO=static
- ONBOOT=yes
Add in the following lines:
- IPADDR=<your-ip-address>
- NETMASK=<your-network-mask>

Press Esc and then type “:wq” to save and exit the network configuration file.
Step 3: Type the following command to edit your network gateway.
vi /etc/sysconfig/network
Then add in the following line: GATEWAY=<your-gateway>
Press Esc and then type “:wq” to save and exit the network configuration file.
Step 4: Add in DNS by typing the following command:
vi /etc/resolv.conf
Then add in the following lines to use Google DNS:
nameserver 8.8.8.8
nameserver 8.8.4.4
Press Esc and then type “:wq” to save and exit the network configuration file.
Note: To check your network configuration on CentOS 7, use the following command:
ip addr
This is because the previously used command “ifconfig” has become obsolete as of this version of CentOS.
Step 5: Type in the following commands to start your network settings.
service network start
ifup eth0
Try pinging any available sites (eg. google.com), if the connection works then the configuration is a success.
With the network now working, you can perform any updates of your CentOS with the command:
yum update


![Toni Kroos là ai? [ sự thật về tiểu sử đầy đủ Toni Kroos ]](https://evbn.org/wp-content/uploads/New-Project-6635-1671934592.jpg)


