
How to build an awesome Knowledge Base Wiki in SharePoint Online using modern pages | SharePoint Maven
From my experience implementing SharePoint Intranets, the most frequent request from companies (after document management) is the ability to create some sort of Knowledge Base Wiki in SharePoint Online. This totally makes sense, as companies accumulate large amounts of information – it is almost expected to organize it into some sort of logical and searchable repositories.
I actually did write a blog on Wiki capabilities of SharePoint back in 2016. But, that was well before the modern pages came along. And only recently we got a feature (page tagging) that took the new Wiki capability to a whole new level. So now that we have all the ingredients, let me describe the new, sleek way to create Wiki Knowledge Base in SharePoint.
Now, to be fair and clear, we did have the ability to tag Wiki pages in the past. But that required provisioning of an Enterprise Wiki site collection. I described this in detail in this post. The whole tagging and searching experience left a lot to be desired.
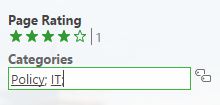
Example of Page tagging in old (classic) Enterprise Wiki
These days we no longer use classic Wiki pages. Modern pages are a way to go. So let me show you the steps you can follow to create a modern Wiki in SharePoint Online.
Mục Lục
Step 1: Get familiar with the Site Pages library
Just like in the past, we will utilize the Site Pages Library. It is a special type of library that stores pages. To navigate to it:
- Click Gear Icon > Site Contents
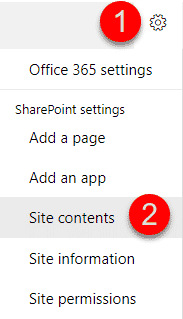
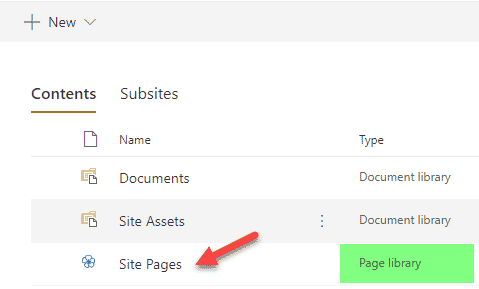
- Click on Site Pages library
Step 2: Create Metadata
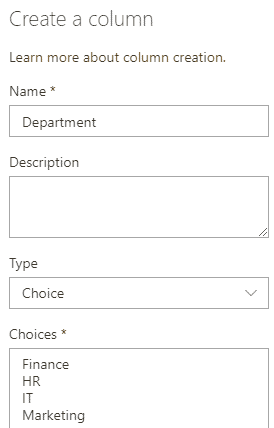
This is the new functionality I was talking about above. It is a game changer! In the past, we could only add tags to regular document libraries and lists, but now we can also add metadata to the Site Pages Library. To add metadata (columns):
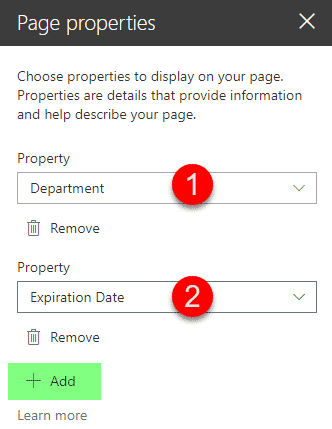
- Click Add Column and choose Column Type you want to add
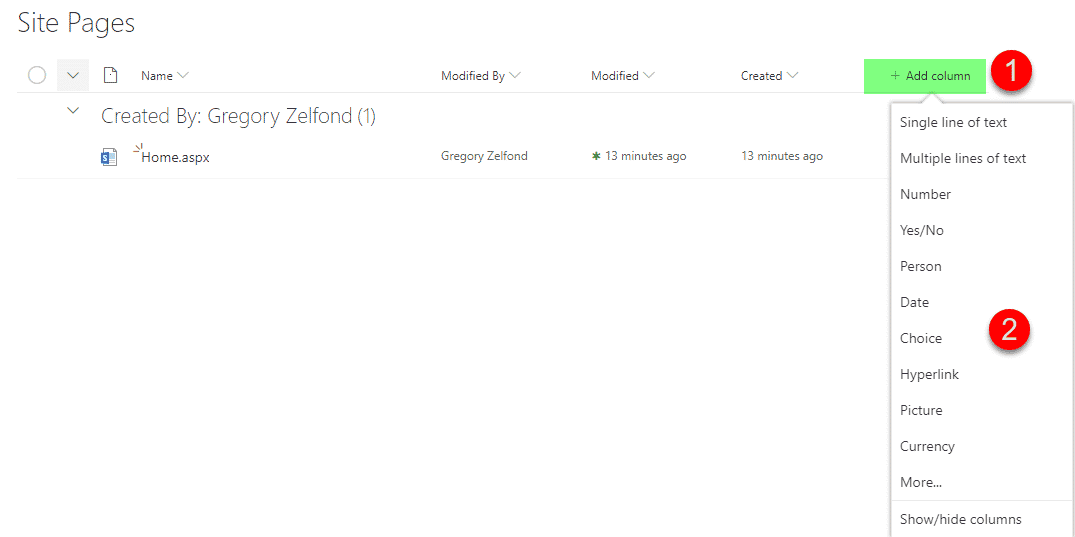
- In my case, I am adding 2 columns (Department drop-down and Expiration Date)
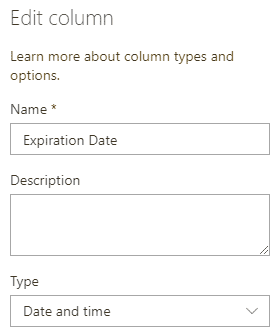
- Here is how it looks after I created the columns


Step 3: Create a page template
I assume you might want all the Wiki pages to have the same look and feel, so why don’t we create a basic page we will reuse for our Knowledge Base Wiki in SharePoint Online.
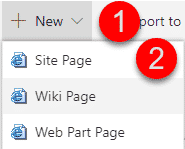
- Create a New Page (make sure to choose Site Page from drop-down – that’s the Modern Page!)
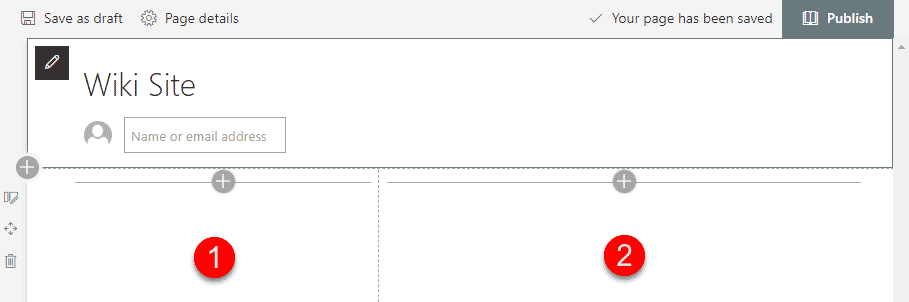
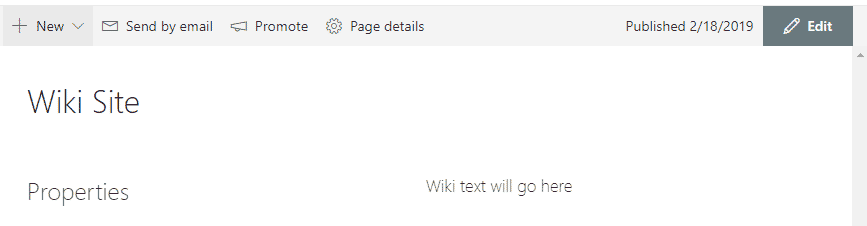
- Adjust the layout as you wish. I like to keep it simple, two columns, with the left section being reserved for article properties and the right section for the actual content of the article (Wiki)
- Add Page Properties Web Part to the left section

- Using the Add button, add the custom properties (columns) we added above. The idea is that each Wiki page will display the properties it is tagged against. For now, it is blank, since this is just a template page, but will make more sense later on as we create actual pages (honey, just be patient, OK!)
- This is what the page template looks like when finished
Step 4: Create a few real Wiki pages
Now we get to reap the benefits of creating a page template above. Let’s go ahead and create a first Wiki Page with real content.
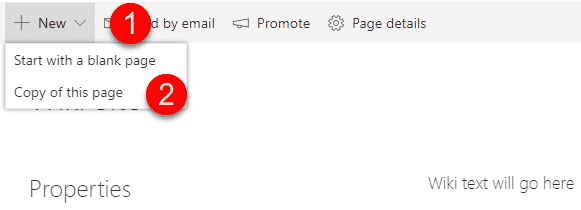
- From the Template Page, click New > Copy of this page
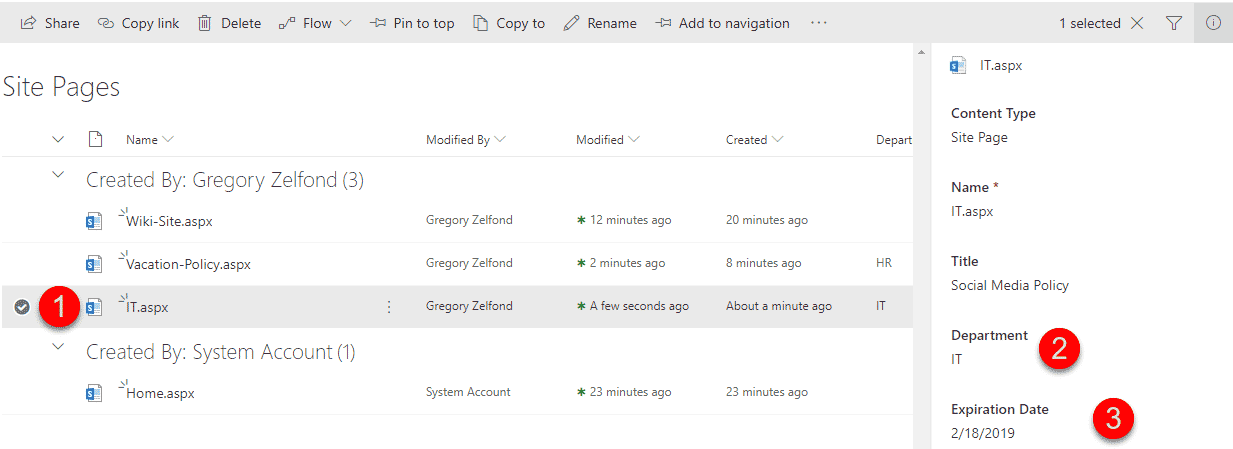
- Fill in the content for the page as necessary. Then, click on Page Details and fill in the metadata columns on the right. Notice, that once tagged, that Page Properties section we added above is automatically filled in with metadata. Makes sense now?
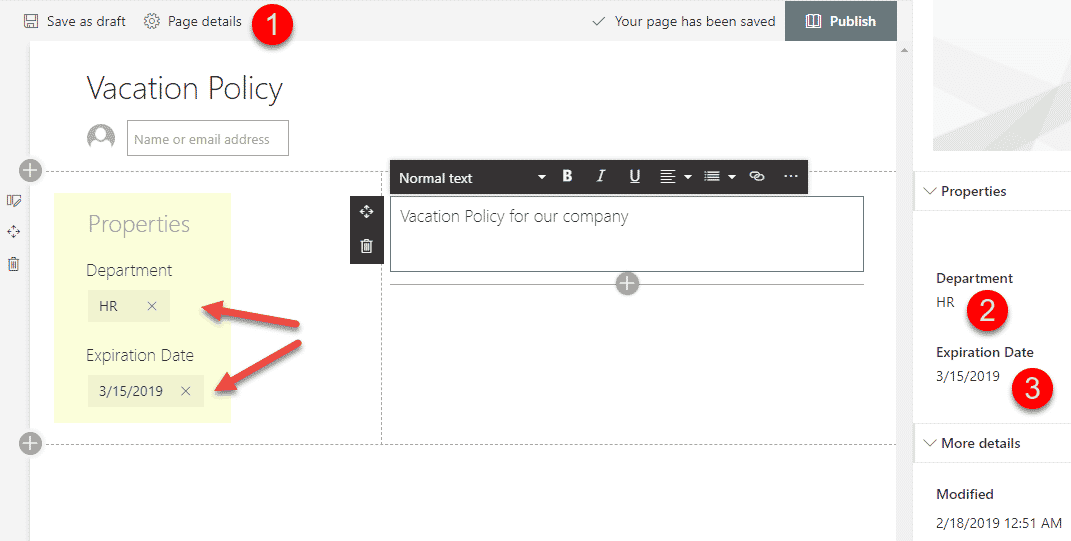
- Hit Publish when done and our first page is published! Mazel Tov!
- By the way, you can also tag pages from the Site Pages Library itself
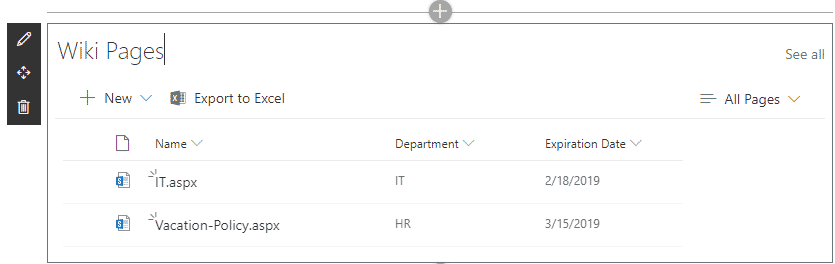
Step 5: Create views and filters on the Site Pages Library
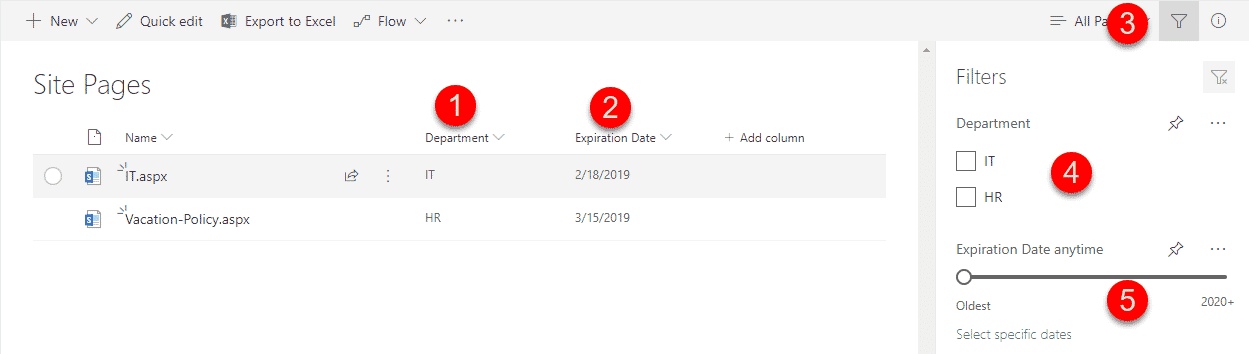
So now that we have established a template and metadata, you can create your own views for the library. For example, in the screenshot below, I hid all the pages that are not tagged and also positioned the metadata columns in the order I wanted. I also added metadata columns to the filter pane (pinned to the filter pane) for easy filtering by users.
Step 6: Start using the Wiki
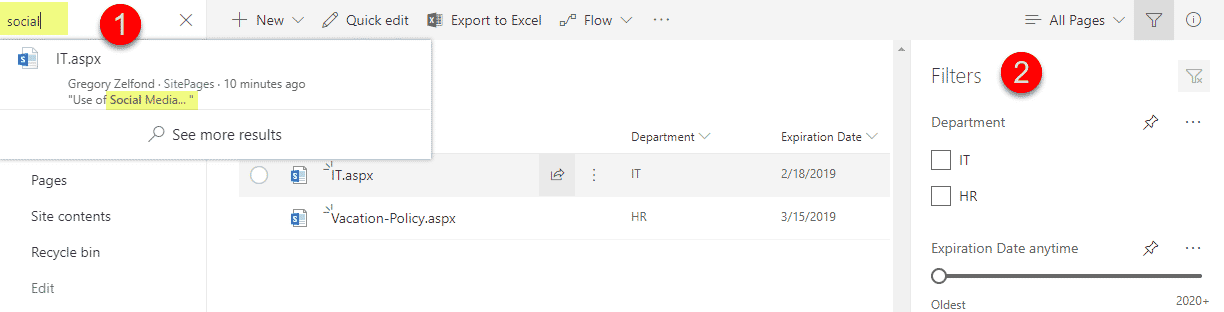
So the idea is that the Site Pages library essentially becomes your searchable table of contents, where users can navigate to and search using either by a keyword or filtering by metadata.

Step 7: Build the Main Wiki Page
It always helps to build a front-end for users to navigate to the pages you created above.
Create Quick Links to pre-filtered views
A great thing could be adding some Quick Links to pre-filtered or grouped views of the Site Pages Library.

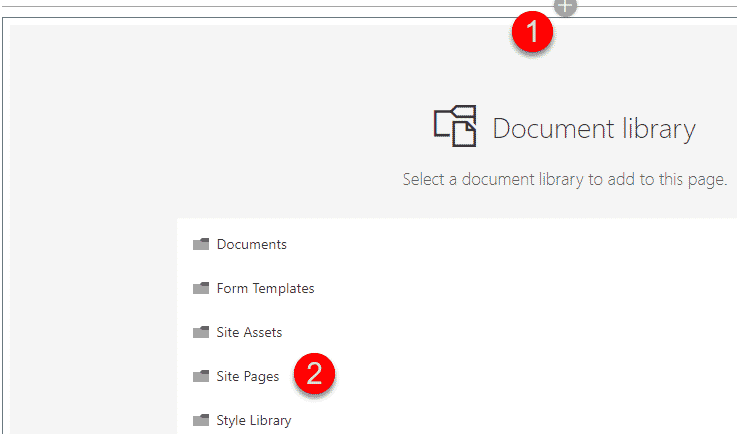
Embed the Site Pages Library on the main page
You can also embed the whole Site Pages library on the Main Page too, so that Wiki visitors will be able to see/access the pages right from the Main Wiki Page.
Aggregate pages using HCWP web part
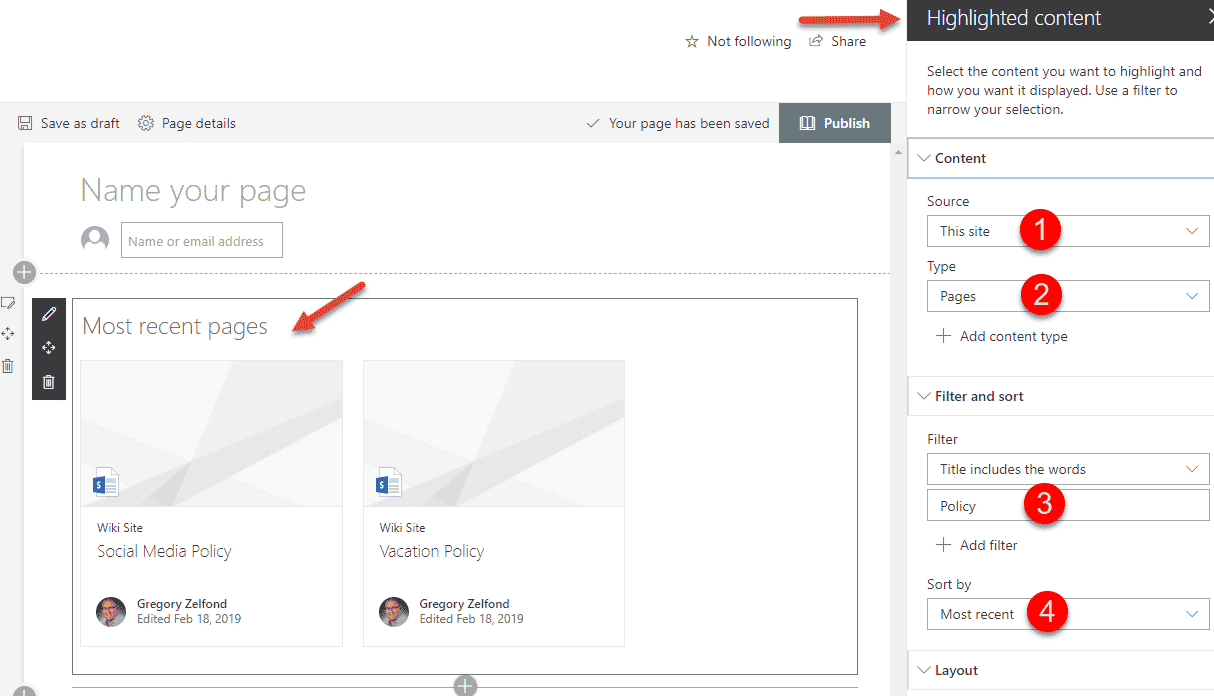
You can also get fancy with your Knowledge Base Wiki in SharePoint Online and use Highlighted Content Web Part (HCWP) to aggregate pages using keywords or date fields and embed results on the main Wiki page. For example, in the screenshot below, I am showing recently modified Wiki Pages (sorted by date added) + also happen to filter by a particular keyword in the Wiki Title.
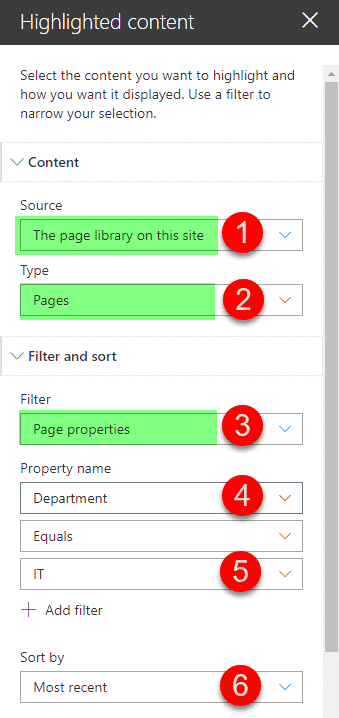
In another example depicted below, I use HCWP to only pull certain articles (Wikis) based on the Department Name metadata column we created. Powerful stuff!
OK, now it is your turn, my SharePoint brothers and sisters! Go ahead, give it a try, become a SharePoint hero in your organization, and make your boss proud!


![Toni Kroos là ai? [ sự thật về tiểu sử đầy đủ Toni Kroos ]](https://evbn.org/wp-content/uploads/New-Project-6635-1671934592.jpg)


