
How the Pros Use Procreate: 10 Tricks to Know | Skillshare Blog
You may have seen illustrator Mike Lowery’s work in best-selling children’s books, on classic greeting cards, or in his Skillshare class on how to draw a colorful travel map. . He’s been successfully navigating the illustration business for more than a decade. In all that time, just a handful of innovations have transformed his workflow. Procreate for iPad is one of them.
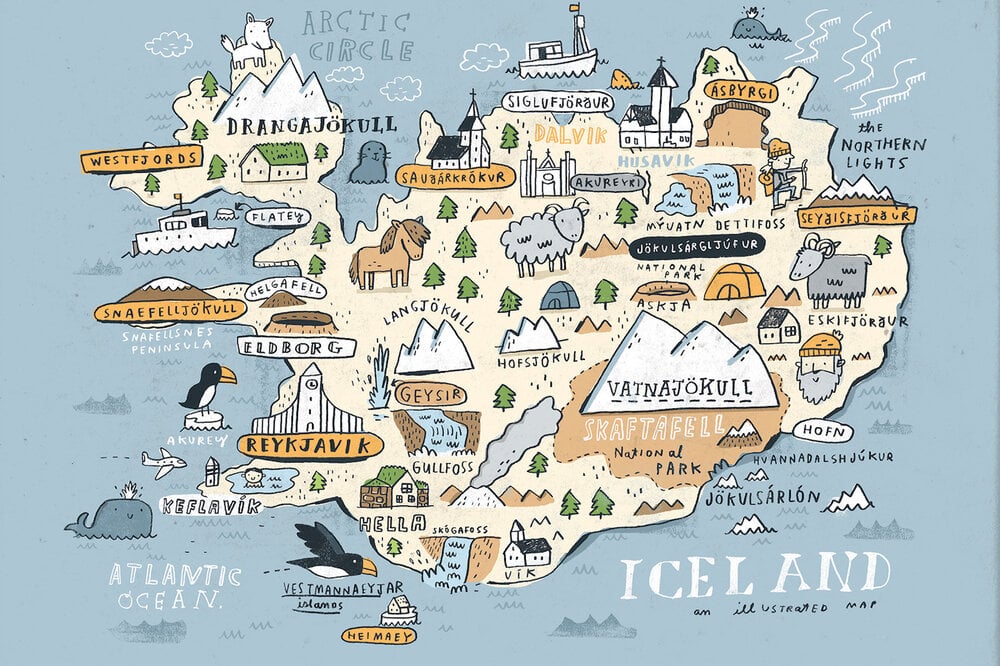
Image by Mike Lowry
“I didn’t think I’d end up liking drawing digitally, and I definitely didn’t think I’d end up using Procreate for client work,” Lowery tells us. “But now I use it every day.” He isn’t alone. The app has changed the way illustrators around the world approach and refine their work.
We interviewed a crew of talented illustrators from far-reaching corners of the globe to get their best tips for drawing and painting with Procreate. Whether you’re just learning how to use Procreate or have relied on it for years, these simple tricks will help you get the most out of the app.
Mục Lục
1. Make your own Procreate brushes…
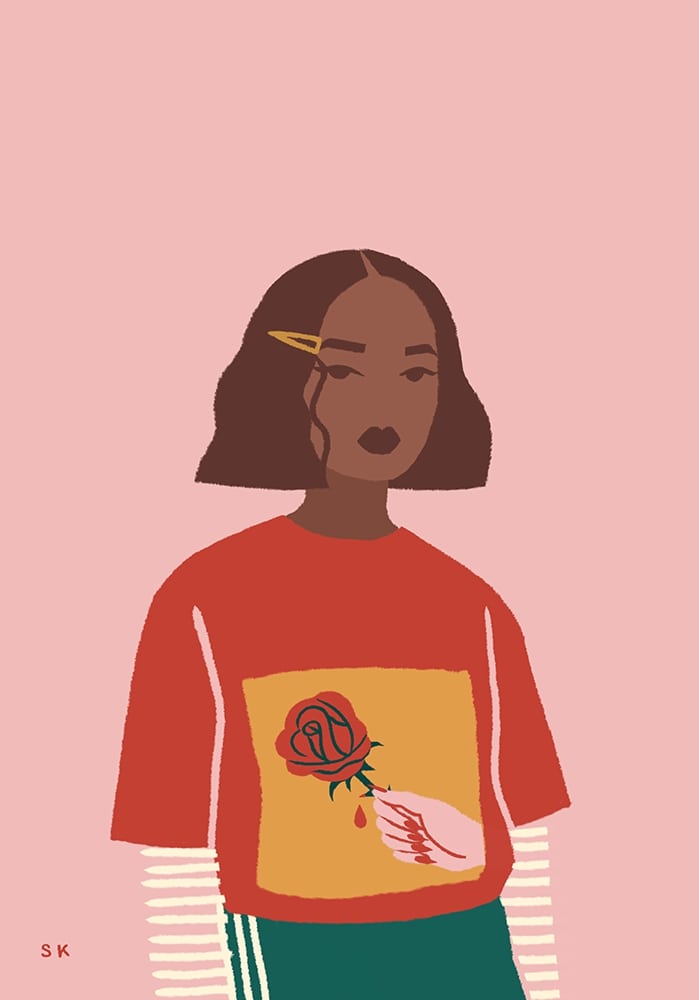
Image by Sabrena Khadija
“I think the most useful tool for my work specifically has been the ability to tweak and create custom brushes for my work,” NYC illustrator Sabrena Khadija tells us. “For someone new to Procreate, using the default brushes or downloading free Procreate brushes someone else has made may be the most obvious option for getting started. However, I find it so satisfying being able to create something that will help me create something else.
“I initially found this option early into using the Procreate app when a default brush was almost what I was looking for. But, instead of just using what was there or scouring the internet for the perfect brush, I simply sat down and made it!”
Follow along as Skillshare teacher Vashti Harrison walks you through how to start in Procreate.
2. Explore New Possibilities with Blend Modes
Procreate will automatically cover the content of one layer completely with another layer. But, there are tools you can use so that the shapes, colors and textures of different layers interact with one another. Blend Modes is an option with Procreate that can take your drawing in entirely new directions.
Access Blend Modes by opening your Layers menu. You’ll see the letter “N” on the right side of each layer – this stands for “Normal Mode”, which is the default Blend Mode setting. Tap on that letter, and you’ll open up your Blend Modes menu, which contains options to lighten, darken, control layer opacity, and much more.
3. Master basic gestures
Gestures are like keyboard shortcuts, but you use your fingers. For example, you can undo and redo your work by tapping two or three fingers on your canvas. To clear a layer, scrub your canvas with three fingers, or tap four fingers to hide the user interface and view your work full screen.
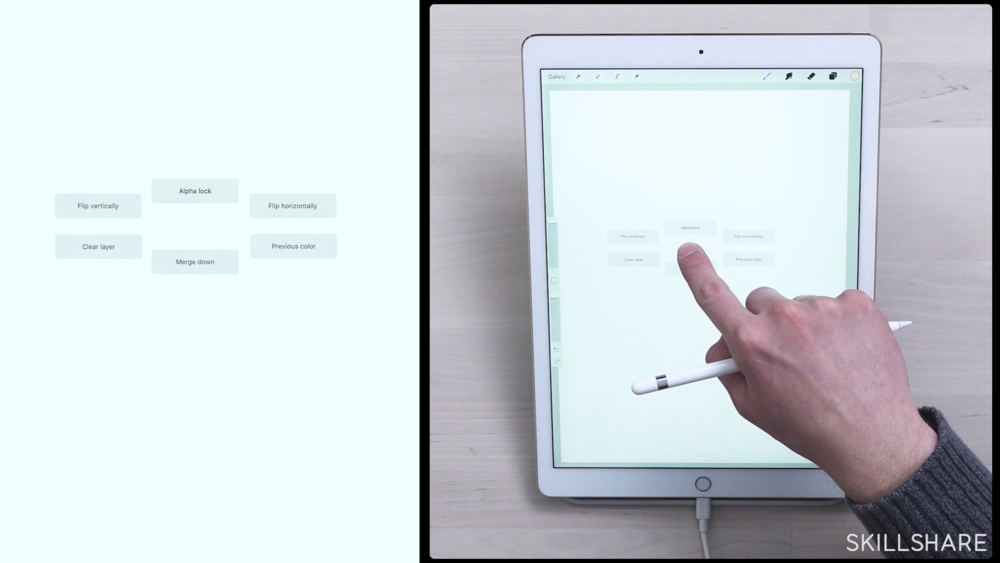
Another basic gesture: tap and hold anywhere on the canvas screen to bring up Quick Menu.
Jarom Vogel is an illustrator, designer and Skillshare teacher based in Portland. “I think that if you’re going to work in Procreate a lot, it’s worth your time to customize the gesture settings,” he explains. “Finding a setup that works well for you can really speed up your workflow.”
“I would also highly recommend reading the official Procreate handbook,” Vogel continues. “It’s really well done and covers both basic gestures, and lesser-known gestures and capabilities.”
4. Take Full Advantage of Alpha Lock
This tool is perfect for adding shadows, colors, and textures to your drawings. Here’s how it works: first, create your general shape. Then go into your layer menu and select “Alpha Lock” (or, use the shortcut and simply swipe right with two fingers). That way, any details you add will stay within the boundaries of your layer, meaning you won’t color outside the lines of your original shape.
“Alpha Lock is one of my secret weapons when using Procreate,” illustrator Jaye Kang tells us. “Everything looks much better when you have that level of control over what you’re creating.”
Wondering What To Draw Next?
10 New Procreate Projects To Inspire Your Next Design
Read Article
The clipping mask is similar to alpha lock, with some key differences. For one, you’ll be working with a totally new layer. That means you can edit your details without affecting your original shape, and vice versa.
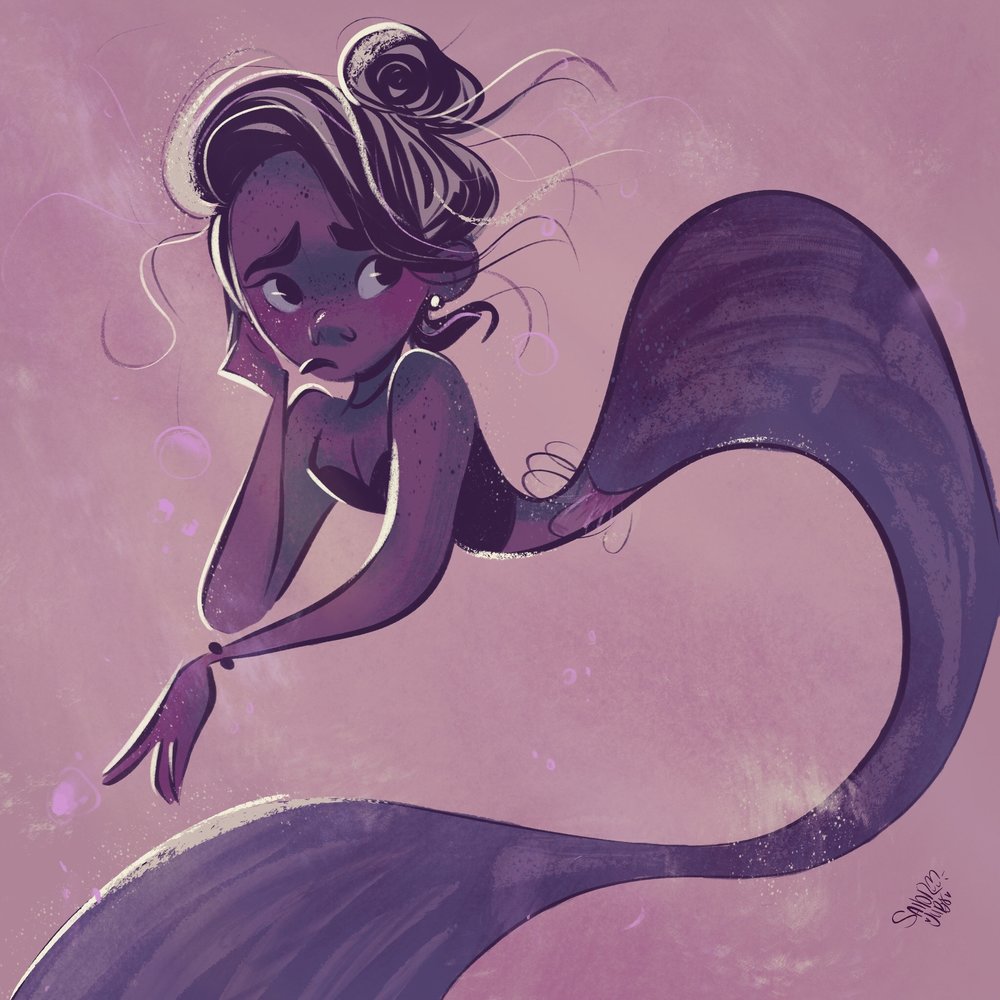
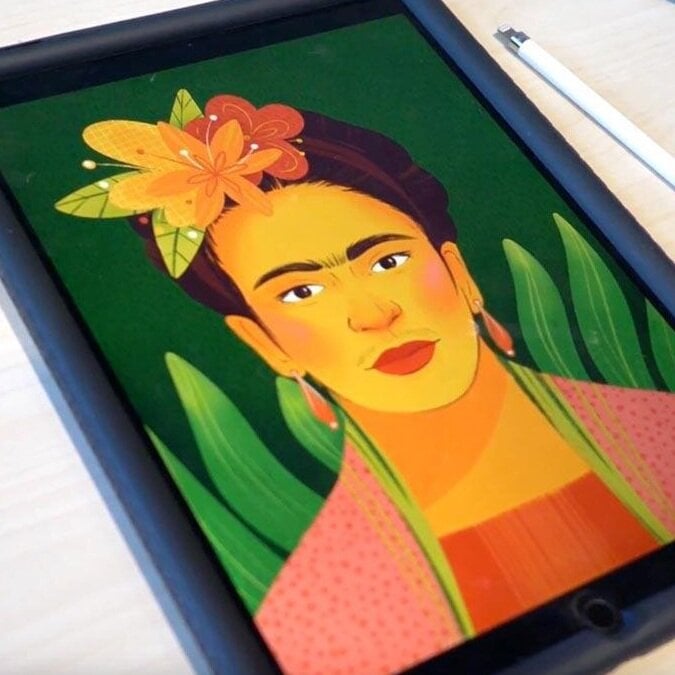
Image by Julia Mello
Simply add a new layer and select “clipping mask.” The base layer will then become a mask, and all your new details will conform to the pixels of the original shape while also remaining independent and easy to adjust.
Julia Mello is an illustrator and animator based in São Paulo, Brazil. “I started using Procreate last year, and it would have been easier if I had known how the clipping mask worked,” she explains. “It has sped up my process, allowing me to apply textures and effects to different shapes easily.”
6. Play Around with Recolor Methods
Interested in adjusting the colors in your Procreate drawing? The app comes with a variety of ways you can quickly, easily try out different colors:
Alpha Lock is great for staying within the lines of a particular layer, but it’s also a great way to change the colors within a layer. To try it out, simply turn on Alpha Lock, choose a color from your color menu, and begin coloring over your drawing. The color you’ve selected will stay within your current layer, so no need to worry about coloring outside the lines. You can also choose “Fill Layer” within your Alpha Lock menu to quickly fill the entire layer with a single color.
There’s also a tool in Procreate that’s literally named “Recolor”. To find it, open your Adjustments menu — you’ll see the name at the bottom of the list. Choosing the Recolor tool will automatically fill in wherever your crosshairs are on the screen with your chosen color. To change where the color lands, simply drag the crosshairs to a different area or shape on your drawing, using your Apple Pencil.
7. Use QuickLine and QuickShape
These tools are also easy to use and perfect for anyone who has difficulty drawing straight lines. Simply draw a line (or a geometric shape, like a circle or triangle), and hold your Apple Pencil on the screen after you’re done. The app will automatically perfect the lines and shapes for you.

Procreate commission by Jill Goritschnig
Jill Goritschnig is an illustrator and graphic designer based in Austria. “I wish I had known about the QuickShape feature from the beginning,” she tells us. “It’s so helpful for creating straight lines and smooth shapes. It changed how I paint and also the overall look of my paintings. I would recommend it to anybody, especially if you work in a graphic style.”
8. Create a Color Palette Using the Eyedropper Tool
Have you ever seen an image with a vibrant color that you’d love to use in your own work? Procreate Eyedropper tool makes it easy to grab and save hues directly in the app. To activate Eyedropper, simply tap and hold on the screen over the color you like. You’ll notice that the color dot in the upper right corner of your screen has changed to match it.
Watch Illustrator Maia Faddoul Create Her Own Color Palette
Illustrating Expressive Portraits in Procreate
View Staff Pick
You can take this one step further, using Eyedropper to create a custom Color Palette for your drawings. Open the color menu, click the plus sign to create a new palette, then tap on the brush icon to the left of your color menu. Now, use the same tap and hold technique to activate the Eyedropper, moving it around on the screen to pick up different colors. Every time you find a color you like, all you have to do is tap you Apple Pencil within your new palette to save it!
9. Export as PSD
Exporting your files as PSD allows you to keep your layers intact. Dream up things to draw on your iPad, and when you’re ready, send your work to your desktop computer for advanced editing.
Animator and designer Danni Fisher-Shin has been using Procreate for years now, and one thing she loves is how the app has evolved in just a brief time period. “I especially love using the Export to PSD feature,” she says.
“As a full-time freelance designer and animator, I can create and export Procreate files from wherever I can carry my iPad, then directly import them to my animation software. It’s a game changer. It means I can be a lot more mobile while still getting real work done!”
This suggestion comes from Valeria Frustaci, an Italian illustrator based in Brooklyn. “They share a lot of tips and tricks every week, and you can also ask questions,” she explains. “By checking in on Instagram, I have learned shortcuts I didn’t know before, and it’s helped me with my illustration process overall. Everything is easier and faster now.”
A tutorial from Procreate’s Instagram page.
Watch the highlights, too. “I would highly suggest checking out Procreate’s Instagram highlights,” Brooklyn-based graphic artist and lettering designer Walid Bukhari says. “They have clips for basic tricks and mini tutorials. I’ve learned a ton of features that way, and it has definitely helped my productivity.”
Want more Procreate tips and tricks?
Check out our video, compiling Procreate tips from a few more professional illustrators and Skillshare teachers:
The original version of this article was published on June 10, 2019. It’s since been updated.


![Toni Kroos là ai? [ sự thật về tiểu sử đầy đủ Toni Kroos ]](https://evbn.org/wp-content/uploads/New-Project-6635-1671934592.jpg)


