
How do I map a network drive in Windows?
Mapping a network drive is a method to connect to a shared network folder, such as a share on a ReadyNAS storage system. This article explains how to map a network drive using Windows 10, 8, 7, Vista, or XP. For Mac instructions, see How do I map a network drive in Mac OS X?
To map a network drive in Windows 10 or Windows 8:
- Click the
Start
button.
- In the search box, type
This PC
, then select
This PC
from the search results.
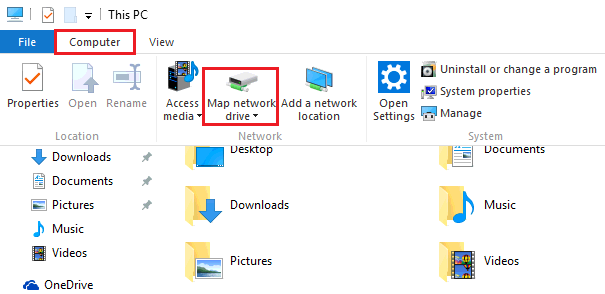
- Click
Computer
and then click
Map network drive.
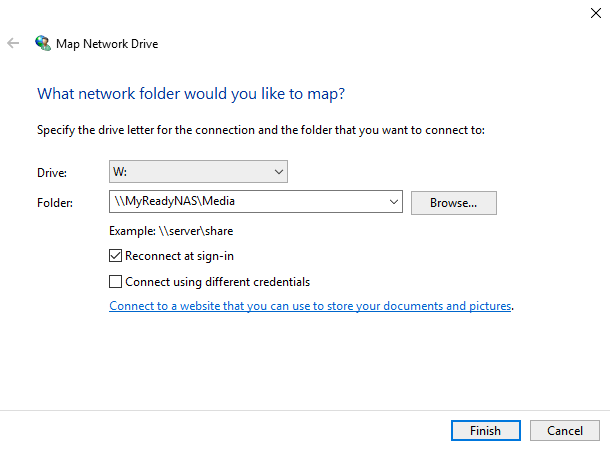
- In the window that opens, choose an available letter from the
Drive
list
.
- In the
Folder
box, type the path to the shared network folder (the format is \hostnamesharename, where hostname is the name or IP address of the network device and sharename is the name of the shared network folder).
You can also click Browse to find the folder you want to map on the network. - Click Finish.
Your mapped drive is now available under This PC.
To map a network drive in Windows 7 or Windows Vista:
- Click
Start > Computer > Map network drive
.

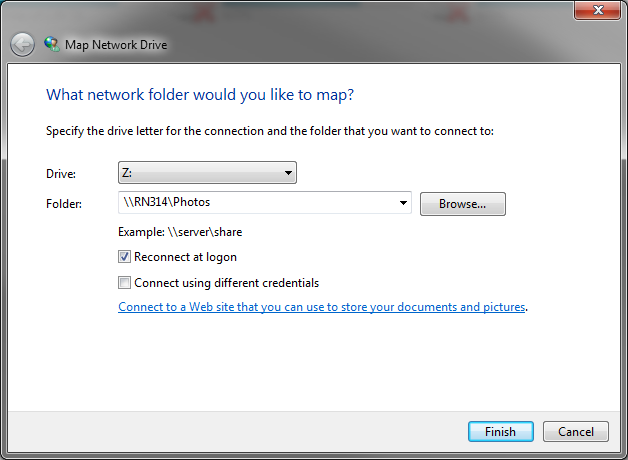
- In the window that opens, choose an available letter from the
Drive
list
.
- In the
Folder
box, type the path to the shared network folder (the format is \hostnamesharename, where hostname is the name or IP address of the network device and sharename is the name of the shared network folder).
You can also click Browse to find the folder you want to map on the network. - Click Finish.
Your mapped drive is now available under Computer.
To map a network drive in Windows XP:
- Click Start.
- Right-click
My Computer
and select Map Network Drive.
- In the window that opens, choose an available letter from the
Drive
list
.
- In the
Folder
box, type the path to the shared network folder (the format is \hostnamesharename, where hostname is the name or IP address network device and sharename is the name of the shared network folder).
You can also click Browse to find the folder you want to map on the network. - Click Finish.
Your mapped drive is now available under My Computer.


![Toni Kroos là ai? [ sự thật về tiểu sử đầy đủ Toni Kroos ]](https://evbn.org/wp-content/uploads/New-Project-6635-1671934592.jpg)


