
Home Recording Studio Setup for Beginners: 5 Essential Items to Own – Musicians HQ

Sometimes when Musicians HQ mentions gear, we’ll include our affiliate link & may earn a commission at no cost to you. This doesn’t impact the products we mention.
When you want to start recording music at home it can be frustrating especially if you are on a tight budget.
I have been lucky to get around this by gradually adding bits and pieces over the years and upgrading equipment when necessary (or when I actually have some money!).
But if you understandably don’t have the patience to wait 10 years before you can start recording your music. You will want to know what equipment is essential and how much you need to spend to get started.
In this detailed article, I will explain what I think you need as the bare essentials for starting to record music at home, how much you should be prepared to spend and finally some recommendations of equipment. Mainly stuff I have owned myself so I can vouch for its quality and performance.
Mục Lục
The Absolute Essentials!
I’m going to attempt to provide some kind of logic to this article by starting off with the most essential items. Eventually descending into the realms of things to buy if you’ve just won the lottery or inherited a large sum of money.
This first section will be filled with items that, in my opinion, are essential for recording music at home. They are the things you should spend money on first (as tempting as that weird analog synth on eBay might be, it won’t help you actually record anything).
In summary, the essential requirements for a home music studio for beginners should be:
- A good quality computer or laptop
- Digital Audio Workstation (DAW) software
- An audio interface
- Monitor Speakers
- Headphones
The Computer (or laptop)

In the modern day home studio, there is no getting away from the fact that your most important piece of equipment will be your computer (or laptop). It seems weird these days to even imagine a recording studio just a few decades ago that would have had no computer at all.
The computer is now at the center of every home studio. It is where your music is pieced together, stored and often actually composed.
I have written an entire article on what minimum specifications you need (here) and argued that now I am a big fan of using a laptop for recording at home for many reasons.
There was a time when there simply weren’t that many laptops at an affordable price, that could handle the heavy demands that music production places upon them. But that is no longer the case. I made the switch a few years ago from a desktop PC to a laptop and I’ve never looked back. For me, it’s about portability and space.
Mimimum specs for your laptop or computer in the home music studio
Here is a quick summary of the minimum specs I recommend for music production followed by a quick glossary of what all the numbers and nerdy terms mean:
- At least 2.2Ghz i7 quad-core processor
- At least 4GB of RAM
- At least 256GB of internal storage (HDD or SSD)
- 64-bit operating system
- At least a 15-inch screen.
Processor – The processor is basically the ‘brain’ of the computer or laptop. It is responsible for running software such as your DAW (more on that shortly).
Computers used to have just a single core. So performing multiple tasks at once was tricky. Now you can get dual or quad cores, I’d recommend at least a quad core for audio production.
The Ghz number that precedes this represents the frequency. Again, the higher the better here, no less than 2.2Ghz.
The ‘i’ (can be either i3, i5, i7) stands for the manufacturer name ‘Intel’ and is the model number. i7 has the largest ‘cache’ size which means increased performance. So with processors, the higher the numbers the better. But of course that comes at a price, stick with these minimums and you should be fine.
Random Access Memory (RAM) – Just like us humans; a computer has a long term and short term memory. RAM is the short term memory and is where data can be stored and accessed quickly.
4GB should give you plenty of short term memory for basic audio production, but I’d go for at least 8GB if you have the budget.
Internal storage – Music production takes up a whole lot of space and you will need somewhere to store all of it.
I would actually recommend storing audio files on an external hard drive, but even so in order to make sure your DAW runs smoothly with as many VST plugins as you desire, I’d go for at least 256GB of internal memory.
Either Hard Disk Drive (HDD) or Solid State Drive (SSD) will be fine. The truth is, the RAM is much more important when ensuring things run smoothly.
Operating System – You will get the choice of either a 32-bit or 64-bit operating system. 64-bit is newer and better, most new computers and laptops will run 64 bit operating systems. In order to have above 4GB of RAM (highly recommended), you will need at least a 64-bit operating system.
Windows or Mac – I am slightly biased on this one as I love Macs and swear by them now. I constantly used to struggle with latency (lag) issues with old windows computers and laptops and when I made the switch to apple a few years ago I have never had the issues again.
That said, they are more expensive and Windows computers and laptops have come on a long way since then. If you stick to the specs mentioned above you should be fine.
Screen Size – Definitely nothing less than 15 inches, if you are going for a laptop, but of course again the bigger the better. Trying to work with a DAW on anything less than a 15-inch screen is an absolute nightmare, trust me.
Even 15 inches is borderline and I would recommend using an external monitor with this laptop when you can to prevent yourself from squinting. In fact, having an external monitor and therefore two separate screens is very handy indeed for working in a DAW.
It is worth trying to keep your laptop pretty much exclusively for music production so it doesn’t lag or struggle. But in all honesty I use my MacBook Pro for other things too such as browsing the web and doing a bit of word processing etc, so don’t stress about it too much.
By getting something at least ‘new-ish’ you are less likely to come up against issues such as unsupported software or other issues. However, if you get any computer or laptop with the above specifications as a minimum you should have a great machine that will make a great centre for the beginner to build their home music studio around.
Recommended computers and laptops for audio production 2019
It is probably worth reading the full article (particularly the next section) before taking your pick here, as the decision between Mac and Windows operating systems may be affected by the DAW you choose. Some DAW software, notably Logic will only work on Mac for example.
Apple Laptop
As I always say, I will only recommend what I use myself or have at least tried out. I am currently using a MacBook Pro from around 2015 and it still runs great. It has a 2.7GHz quad-core i7 processor, 16GB of RAM and 512GB of internal storage.
You don’t necessarily need to buy new. There are plenty of high spec MacBook Pros on Ebay, virtually unused because someone simply wanted the newer model.
So although a new MacBook may be out of your price range. Don’t rule out getting an Apple before having a look. If you can afford a new one then, of course, new is better and you get a warranty and stuff.
The laptop or computer is the heart of the recording studio, this is where you as a beginner should spend most of your money. If you decide not to pursue the whole music production thing after your first EP doesn’t sell…..Well then you have an awesome laptop to game on or watch youtube videos of cats.
![]()
Windows Laptop
From speaking to friends, apparently the new Asus ViviBook laptops are meant to be pretty awesome for the money.
You get i7 processors, 8GB of RAM (16GB available) and a nice big 17 inch screen. I’ve seen one in the flesh and they look really cool too (if that bothers you), giving the stylish look of the MacBook a run for its money. I have owned Asus laptops in the past and they are very well built machines.

Digital Audio Workstation (DAW)
What is a DAW?
A DAW can be a physical piece of hardware. But for the purposes of this article when I talk about a DAW I mean a piece of computer software which you will use to record, edit, produce and master your audio files.
Even if you’ve never used a DAW yourself. You will probably be familiar with the layout which is fairly standard across them all. You can record multiple tracks which come together to form a final composition.
Do I need to pay for a DAW?
There are free DAWs available, these include Reaper, Audacity and Garageband.
Garageband comes installed on many Apple products but is only available on Mac (classic!). Whereas reaper and audacity are open-source and work on both Windows and Mac.
As you might expect though, because they are free, they have limited capabilities.
If you are just starting out or want a way to quickly record a few ideas and layer a few tracks, then they are a great starting point. Much of the terminology will be similar to more complicated software and you will get used to how things work.
I started off on Audacity many years ago and it got me familiar with the layout of a DAW and certain terminology. This made the transition to more complex software easier.
But in all honesty, I would recommend that you don’t invest too much time on one of these free DAWs. Dive in and invest your time in becoming a pro with one of the more complete pieces of software.
This will really pay off in the long run. But as with all these things, it depends on how much money you initially have to spend.
Which is the recommended DAW for a beginner’s studio?
The two DAWs that dominate the market are Pro Tools (produced by Avid) and Logic (from Apple). As you would expect, the later, being from Apple is only available on Mac (classic!).
If collaboration with other musicians is something you may be interested in. Then these two DAWs are good bets as they are so widely used in the industry. It will make the nightmarish task of sharing files not quite as nightmarish.
Then you have all sorts of other DAWs available, at various price points, doing various different things.
It might be tempting to go for one of these more niche, hipster DAWS. But I would say go for one of the big well-known DAWs when you are first starting out. Then you will have access to the most support in terms of videos, books and forums to help you when you get stuck. These resources will be harder to find for the lesser known DAWs.
So Pro Tools or Logic are good places to start for most musical genres.


I currently use Ableton Live and I’m a big fan. As you can tell from the ‘Live’ in the name Ableton is geared towards live performances but I really like it for music production and recording too. It really depends on what type of music you are making. If it is electronic music then Ableton is great because it is geared towards techniques such as looping.

The good thing is you can get 30 day free trials of most DAWs. Allowing you to give them a try before splashing out the cash and committing.
We all work differently. If you ask anyone what their favorite is they will probably opt for the one they have been using the longest and are thus most familiar with.
This is the reason I always recommend Ableton to friends. I’m biased because I’m most familiar with it, simple as that. You will be hard pressed to find people who have used all pieces of DAW software in equal measure.
Ableton Live Free Trial
Pro Tools Free Trial
Cubase Free Trial
Audio Interface
After your beginner’s music studio has a computer/ laptop with DAW installed. You can actually go ahead and create music. But if you want to use any external instruments such as guitars, keyboards etc. You need a way to get that music into the DAW somehow.
There are a few ways you can do this. But by far the easiest and most cost efficient way is to get a decent audio interface. Other options such as a USB mixer for example do work. But an audio interface will be a cheaper, easier option at the start.
Here is an article comparing audio interfaces and USB mixers.
What is an audio interface?

As I said before you don’t need to think too much about the complicated mechanics of an audio interface. Just think of it as a way to get music into the computer or laptop.
You could simply get an adapter and plug a keyboard straight into a computer’s microphone socket with an adapter. But this may cause several issues. The main issue is that most computers and laptops were not built with audio production in mind. Therefore they don’t come with high-quality built-in sound cards. So you are going to get latency and it just isn’t good practice.
An audio interface comes with built-in sound cards and is designed specifically to process audio signals. Most of them simply plug into the computer via USB or firewire and will be recognised by the DAW immediately so you are good to go.
Most interfaces have more than one input allowing you to record multiple instruments at once or record in stereo if you wish.
On top of this, most have the ability to take several connection types, standard ¼ inch instrument jacks, XLR microphone leads and even MIDI (check out this cable glossary if that made no sense).
Other handy features you get on most interfaces are things such as ‘phantom power’. This ghostly sounding feature is required by some microphones which require a boost in signal power.
An audio interface also has outputs as well as inputs, so you can plug your speakers or headphones directly in. This is very handy as you studio monitor speakers should be independent of one another and therefore each requires a separate output.
Most computers and laptops only have a single headphone output and so the using an audio interface makes plugging your speakers in much easier.
How much do I need to spend?
In the grand scheme of things, the audio interface won’t take up much of our overall budget but is definitely one of the best investments you can make. As with anything don’t go too cheap, but for a high quality, robust audio interface with enough features to get you going, there are loads of great options for under $200.
Recommended Audio Interface 2020
I spend so much time talking about Focusrite interfaces on this blog you might think I work for them. But the Focusrite audio interfaces are (in my opinion) the best when starting out. Check out this page for my detailed explanation of why.
The Focusrite 2i4 is the interface that I have been using for the past 4 years or so and it has never let me down for what I need in the home studio.
It connects easily via USB and has two instrument inputs which can take either 1/4 inch instrument jacks or microphone XLR connections.
It has 2 outputs, left and right, for connecting your monitor speakers (see next section).
Inside it has very nice sounding pre-amps and with the high sample rate, it should remove any latency issues.
On top of all that it looks awesome in metallic red, is sturdy and robust with a metal casing and is also lightweight. So when combined with a laptop, basically gives you a portable studio.

Monitor Speakers
You could, in theory, have a home recording studio setup without monitor speakers (you could just use good quality headphones).
But getting a decent pair makes a hell of a difference to the music making experience and mine are hands down my best investment I have ever made in my studio. Not only that, but it just makes the whole space look more professional and for want of a better word ‘badass’.
Now when buying speakers forget everything you were told when buying your surround sound system.
These are meant primarily for music production and therefore there are certain things you want but also things you want to avoid.
Many speakers you might buy for simply enjoying music may be biased towards low end sounds for instance. After all that is what you want when pumping out tunes at a house party.
The problem is, if you mix and master with speakers like this, the final sound will sound good on THOSE speakers. But try and play your new creation through a pair of laptop speakers or headphones and you will have no bass whatsoever.
So you want monitor speakers which give an accurate representation of the sounds you are recording. Which will translate well onto any speakers or headphones your listeners choose.
The speakers should be powered (i.e they each have their own power sources rather than having one plug for both or being powered from the computer). This means they are ‘active’ rather than ‘passive’ in jargon terms. Amongst the many advantages active monitors have. A big one in the beginner’s home studio where money and space are limited is that they have built-in amplifiers and so do not need a separate amplifier unit.
The speakers should also have separate inputs. It is easier to think that you are effectively buying two of the same speaker rather than a pair of speakers.
You then want to ensure that the speakers have a good frequency range. In order to hear all sounds properly, the speakers need to cover the range of human hearing which is roughly between 20Hz and 20kHz (20,000Hz). Cheaper low-end speakers which don’t have a subwoofer built in will struggle to get down to these lower frequencies.
Choosing the right monitors for you
When it comes to choosing studio monitors, bigger isn’t necessarily better.
It all depends on your room size and for most of us, you are going to be limited to a fairly small room (at least to begin with).
So don’t rush out and buy the biggest speakers you can afford and then squeeze them into a tiny room. The high response of lower frequencies caused by a bigger diameter subwoofer will likely cause echo and distortion.
I’ll explain this with a specific brand example below.
Recommended Monitor Speakers 2020
There are one pair of speakers that you see in a large number of beginner’s home recording studios, instantly recognisable with the distinctive yellow subwoofer.
These are the Rokit 5 speakers from KRK. They are popular because of the price point which is very affordable when starting out and they do sound great when listening to music.
But from my (admittedly quite limited) experience and from speaking to friends who own a pair of these guys, they do tend to exaggerate the low end. Which as I mentioned above, is something you want to stay clear of to avoid listening to your finished track on another set of speakers and being disappointed.

For a little bit more money you can get a pair of Yamaha speakers from the HS series. Either the HS5, HS7 or HS8 monitor speakers.
These are also extremely popular and with good reason. They are great speakers at an affordable price for a beginner. I have a pair of HS7s and I am still using them today!
When compared to the Rokit 5 Speakers, they give you a more realistic representation of the frequency spectrum. With a lot more of the mid-range coming out (something that is lost on speakers designed for listening rather than producing music).

Yes, the Yamaha’s have their limitations. But for someone starting out on a smaller budget they are well worth the money and will keep you happy for many years to come (I’ve had mine for around 6 and they still work great).
In terms of which one to go for (HS5, HS7 or HS8) that depends on how much you have to spend and what room size you have.
The HS5s are the cheapest and therefore the smallest. A smaller subwoofer means the low-end response isn’t as good as the larger HS7s or HS8s. But the HS8s will set you back almost twice as much money, so there is always going to be a trade-off.
The HS5s are also better suited if you have a smaller room.
If you have anything other than a very small room the subwoofer probably won’t cut it and the HS7s will be a minimum.
If you have a large room you will probably want the HS8s (I mean, if you can afford a large room, surely you can afford these ;)). But if you have a small room don’t just go for the HS8s because you have the cash to burn, the HS5s will actually be far more suitable. The HS8s are likely to cause sounds to bounce all over the place causing all sorts of echo and distortion issues.
Another nice feature that is handy when you are limited with space, recording in your bedroom for example as many of us are, is the room control function.
Yamaha has appreciated the fact that recording desks are often in the corner of the room up against a wall. Usually, this would cause problems as the sound bounces of the wall and amplifies bass frequencies. The room control function cools this exaggeration down slightly so you can still record in the corner of your bedroom no problem.
Check out the best price on the Yamaha HS5s here
Check out the best price on the Yamaha HS7s here
Check out the best price on the Yamaha HS8s here
Headphones
As with the speakers, when I say headphones, I don’t just mean any old headphones. Like the ones you got free with your iPhone. It is important to invest in headphones that are specifically designed for creating music and mixing.
This also means staying away from headphones like ‘Beats by Dre’ or whatever they are called. These are designed to make everything sound like the most bassy booming thing in the world.
As with speakers you want an accurate representation. Especially as you may be going between speakers and headphones.
I made the mistake of starting to mix on monitor speakers and then later tweaking on some random headphones, needless to say when I went back to the speakers to hear the final piece I’d ruined it!
A good pair of headphones won’t set you back anywhere near as much as your speakers. So if you are struggling for cash at the start then maybe start with the headphones and get the speakers later.
Closed or open backed headphones for recording and mixing?
Closed-backed headphones surround the entire ear and thus keep unwanted external sounds out.
So you may naturally think that closed backed headphones would be best for home studio use, but not necessarily.
You see, allowing some air in creates airflow and therefore a more open sound. This makes it easier to pick out certain instruments in the mix.
So closed backed headphones are best for recording and open-backed headphones are usually best for mixing.
There are also semi-open’ headphones for something in the middle.
What you end up going for will depend on a few factors. Firstly, what do you intend on using the headphones for most? Is it to wear whilst recording vocals or instrument parts? Well, in that case, closed backed headphones would be best. Or perhaps you intend to use them mainly for mixing in which case maybe you go for the open-backed option.
Recommended Headphones 2020
I use headphones mainly for recording, I like to mix with my monitors.
For this reason, I went for the closed backed beyerdynamic DT770s. These have become somewhat of an industry standard it seems.
Ever since buying them I keep seeing musicians sporting a pair on the TV and this makes me happy I made the right choice. For the price and the sound quality they really are amazing and would thoroughly recommend to anyone. They are also super comfy. I’ve worn them for hours in a row without any discomfort thanks to the soft ear cups and leather strap.
If mixing is your main requirement then berydynamic also do an open-backed alternative in the DT990 Pros which are only slightly more expensive. The reviews I’ve read seem to rave about these in equal measure so it seems that berydynamic are leading the way in this price bracket at the moment.
If you have a little bit more cash to spend, then Sennheiser makes amazing headphones which are the nice price band up from the berydynamics. The HD600s also have to be some of the coolest looking headphones I’ve seen in a long time.

The (Not Quite So) Essentials
The following items are not required to make music. But are probably going to be next on the list once you’ve got all of the above items in place.
Depending on the type of music you want to create some items may edge into the essentials category.
MIDI Keyboard
I almost put this in the essentials as it is essential to me. But you can start without one….I suppose.
It depends what kind of music you plan to make. But for many people, a MIDI keyboard is an essential item in the modern day home recording studio.
One of the best advancements when it comes to creating music in order to save you money, space and time is the addition of virtual instruments. This means you can download a large number of virtual keyboards, synths, strings…..well basically any instrument you can think of. All of these can then be controlled using a digital signal sent to the computer via MIDI.
Without getting into too much boring detail (you can do that with this article) MIDI is a digital signal, (rather than an audio signal from a guitar for example) a series of 0s and 1s that the tell the computer what to do.
MIDI can tell a computer:
- which note is pressed
- the moment a note is pressed and released
- the velocity (how hard it is pressed)
- after-touch (when key pressure changes)
- vibrato, and even;
- pitch bend.
You can add these notes using a computer keyboard, or even using a mouse. But this isn’t a very enjoyable process and if you are musical in any way will not feel great. For most people the best solution for inputting MIDI is therefore via a MIDI keyboard.
Modern MIDI keyboards plug into your computer or laptop via USB and come in all manner of shapes and sizes. From tiny 25 key ones to full-size piano 88 key.
Which one you decide to go for will depend on the amount of space you have and what you want to do with it.
If you simply want to add a few basslines or synth riffs, a small keyboard will be cheaper and will save you a lot of space. But if you want to start adding piano or orchestral parts parts to your music you are going to want at least 49 keys, preferably 61 or 88.
I wrote an entire article on this here if you want more information on what size to pick.
If electronic music is your thing then many new MIDI keyboards come with some pads which allow you to control ‘scenes’ in Ableton Live for example.
Recommended MIDI Keyboard 2020
You can actually use most new synthesizers as MIDI keyboards now and this is what I do most of the time.
When I do use a MIDI keyboard I have a 49 Key Novation Impulse. Which works great for what I need. 49 keys allows me to compose piano and strings just fine and also has a lot of other handy additions.
It has a few pads in the top right for adding drums or cueing scenes in Ableton and it also has a mixer in the top left which is very handy when doing EQ.
The screen means you can scroll through MIDI instruments without having to keep looking at the computer, which may be handy if you have your keyboard set up a little distance away.

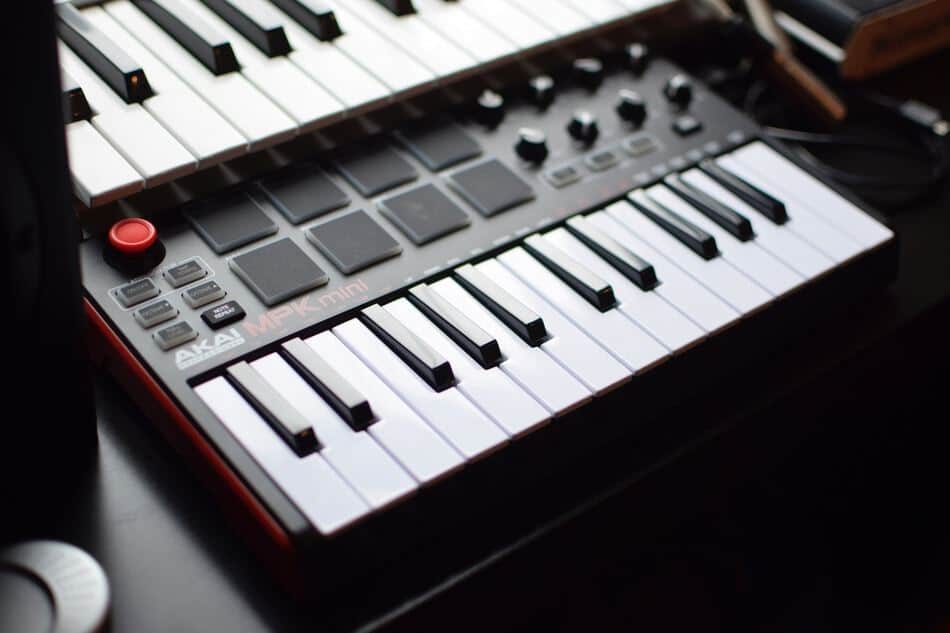
If you are after something a little smaller then something like the Akai Professional MPK Mini would make a good choice.

Cables
You won’t get very far in your home studio without a few cables.
The music recording world is filled with a huge array of different types of cable just to confuse us. But don’t go rushing out and buying hundreds of different types, you only need a few to get started.
1/4 inch shielded instrument cable or TS cable
This is probably the cable you will see most often. I used to call them guitar leads when I was in a band but have since realised they can be used for many more things.

1/4 inch TRS, Balanced Jack or Stereo Jack
This is virtually the same cable as the above but wheares the TS cable is Mono the TRS is stereo. The TRS stands for Tip, Ring, Sleeve (see image below)
You need a cable capable of sending stereo signals in order to get a balanced signal. This will help prevent unwanted noise creeping in which can happen with a standard TS cable.

XLR or Microphone Cables
XLR cables are special cables designed when minimal noise interference is desired.
This is why they are most often used to plug in microphones. You want a nice clean signal without noise from a microphone most of the time.
They have a male and female end (which is what you need) so don’t go accidentally buying male to male cables which do exist.

Microphones

You all know what a microphone is right?
Well in case you don’t: a microphone is used to convert sound waves, which can be created by anything from the human voice to a guitar, into electrical waves that a computer or other recording device can understand.
But even if you did know that, you might not know there are different types of microphone.
And even if you know that. You might not know which type you need for your home studio as a beginner.
I wrote a detailed article explaining all about microphones and the different types you can get here. However, if you can’t be bothered to read that essay I’ll try and quickly summarise what they are mainly used for and the pros and cons.
Condenser Microphone
Used for: quieter more complex sounds with a greater range of frequencies
Pros: sensitive, accurate
Cons: more expensive, more delicate, don’t deal well with very loud sounds
If you are looking to mainly record vocals, then a condenser microphone is probably your best option and out of the different types of condenser you want a large diaphragm condenser microphone.
Recommended large diaphragm condenser microphone 2020
You will see a lot of USB condenser microphones on the market. But they are mainly meant for quick plug and record musicians or podcasters etc.
I would always recommend going a for an XLR microphone that you plug into your audio interface.
This means the audio interface is converting the signal from analog to digital rather than the microphone itself and audio interfaces tend to do this much better.
You also have the option of different cable lengths to suit your needs, rather than being restricted to the USB cable length. And finally, you can use it live if you ever get that far.
So with all that taken into account. I would recommend the Samson C01 when you are first starting out as a great option. It has a nice bright sound quality to it and is great for vocals.

Dynamic Microphone
Used for: loud sounds, live instruments/ amps, drums
Pros: cheap, durable, doesn’t need a power source
Cons: not very sensitive to quiet or high-frequency sounds
Dynamic microphones are more primitive in their engineering. Which makes them less delicate and better for recording loud sounds. So guitar amps are a good example of when a dynamic microphone is more appropriate.
Recommended dynamic microphone 2020
It depends on what it is for.
Contradictory to what I just said I quite often use a dynamic microphone for vocals and also use the same microphone to record a lot of instruments.
This microphone is the Shure SM58 and it is a bit of a legend in the microphone world. It is meant mainly for live performances but I just love the warm tone you get from it so I had to mention it here.
For recording instruments I have to go with Shure once more and the SM57.
Just look at the reviews on Amazon alone and you will see what I mean. They are an industry standard and with good reason. Use on guitars, drums and even vocals too.

On top of dynamic and condenser, there are other more specialist microphone types such as a ribbon for example. But I would avoid even looking at those to start with.
Pop filter
Now, this is a cheap but essential item if you are using a microphone. A pop filter is very simply some semi-transparent nylon material in a round (usually) plastic frame. This sits between the vocalist and the microphone.
The purpose of this is to stop ‘plosives’. Plosives are caused when a singer uses the letter ‘p’ usually or similar sounding letters such as ‘b’. When sung, these letters, in particular, cause a jet of air to be forced from the mouth and onto the microphone, which will be very noticeable on the final track. To stop yourself having to turn away from the microphone every time you use one of these sounds, the pop filter acts like a little shield. A cheap and easy fix.

Conclusion
Hopefully, that has given you enough to be getting started. I’m sure you won’t have much money left after all that, I know I didn’t!
The key with building a home music studio as a beginner is not to get too carried away at the start. Spend a good amount of money making sure you have the essentials (laptop, DAW and speakers mainly). As those will always be the most important items. Then, later on, you can add more things drip by drip.


![Toni Kroos là ai? [ sự thật về tiểu sử đầy đủ Toni Kroos ]](https://evbn.org/wp-content/uploads/New-Project-6635-1671934592.jpg)


