Guide to Network and Sharing Center in Windows 7, 8, 10
The Network and Sharing Center in Windows 7, 8 and 10 is one of the more important and useful Control Panel apps that lets you see information about your network and lets you make changes that can affect how you access resources on the network.
Unfortunately, most people never mess around with network settings because they don’t understand what everything means and are afraid to mess something up. However, once you understand the settings, you can fix problems on your own, increase your privacy, and quickly setup file and printer sharing between multiple computers.
Table of Contents
In this article, I’ll walk you through the different aspects of the Network and Sharing Center and show you certain features you can use on a regular basis to make yourself more productive.
Mục Lục
Opening Network & Sharing Center
The first step is to open the Network and Sharing Center. The quickest way to get to it is by clicking on Start and typing in network and. This will instantly bring up the app in the list.
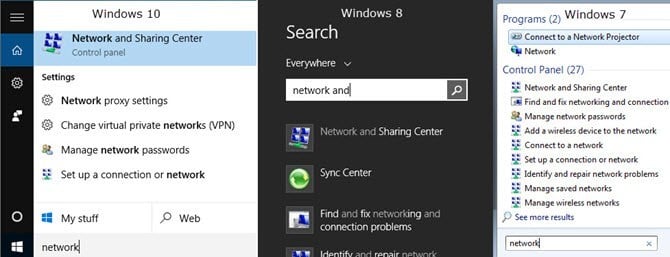
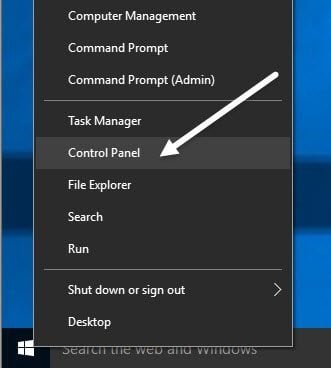
In all versions of Windows, the app is located in the Control Panel. In Windows 7, just click on Start and the Control Panel is listed on the right side of the Start Menu. In Windows 8.1 and Windows 10, just right-click on the Start Menu and choose Control Panel from the list.
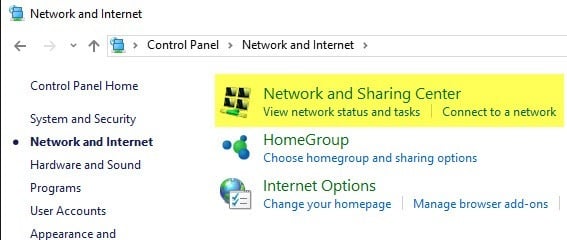
In the Control Panel, you can click on the Network and Internet category and then click on Network and Sharing Center. If you are in icon view, just click directly on Network and Sharing Center.
Private or Public Network
The first thing you’ll see when you open the Network and Sharing Center is your current connection to the network and to the Internet. Windows 7 has a little bit more information and also a couple of more options.
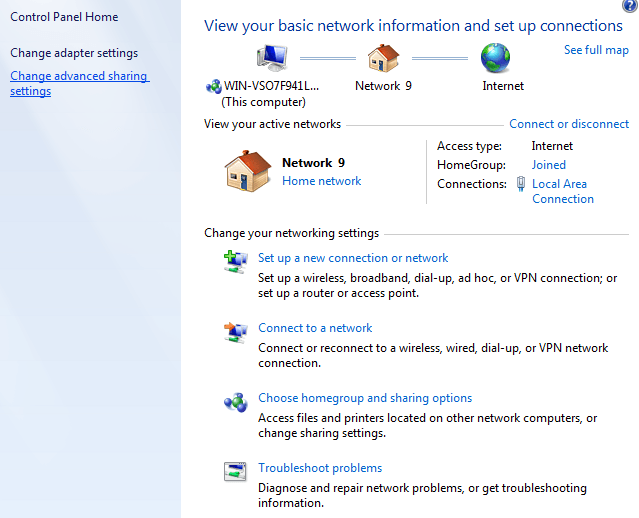
In Windows 8 and Windows 10, they cleaned up the interface by getting rid of a couple of items and combining other items.
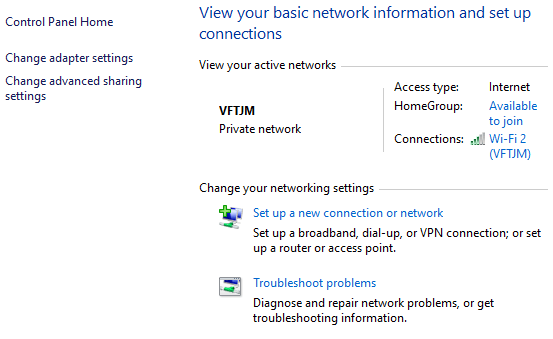
At the top, you’ll see the active network or networks, the network type, the type of access, HomeGroup info and the connection info. The first thing to understand about this info is the network type, which is listed directly below the name of the network.
In the above examples, one has Home network listed and the other has Private network listed. This is very important because when you are connected to a private or home network, there are a lot of sharing settings that are set by default to be trusting. This means others can find your computer on the network, possibly access shared folders, stream media from your computer, etc.
Windows will normally try to figure this out for you automatically so that when you connect to a public WiFi network, it will use the Public profile and not the private one. Sometimes, Windows will ask you if you want to enable sharing or find devices once you connect to a network and if you say yes, it will make the network private. If you choose no, it will make the network public.
You can also manually change the network type to Public or Private depending on what kind of privacy you want. This can be useful, for example, if you are visiting someone and you want to make sure no one can access any data on your computer while you are connected to their network. Change the network type to Public and no one will be able to discover your computer on the network.
You can read my post on how to switch between public and private for the currently connected network. So what exactly does switching do? Well, you can see all of the different sharing settings when you click on the Change advanced sharing settings link, which I explain in detail in the next section below.
To the right of the network name and network type, you’ll see HomeGroup and Connections. Next to HomeGroup, you’ll see a link that says Available to join or Ready to create depending on whether a HomeGroup already exists on the network or not. A HomeGroup allows you to easily share files, printers and more between computers. I talk more about it in the Advanced Sharing Settings section below.
Next to Connections, you can click on the name of the WiFi or Ethernet network to bring up the status info dialog for the current connection. Here you can see how long you have been connected, the signal quality for WiFi networks, the network speed, etc. You can also disable the connection and diagnose the connection if there is a problem.
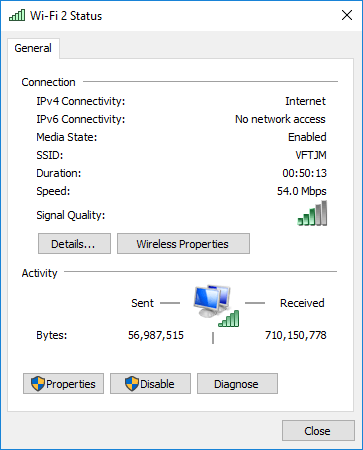
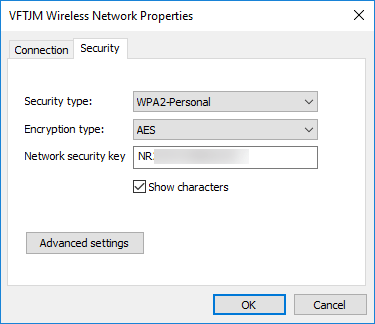
For WiFi networks, this screen is useful because you can click on Wireless Properties and then click on the Security tab and view the WiFi password. This is really useful if you have forgotten the WiFi password, but still have a computer that is connected to the network.
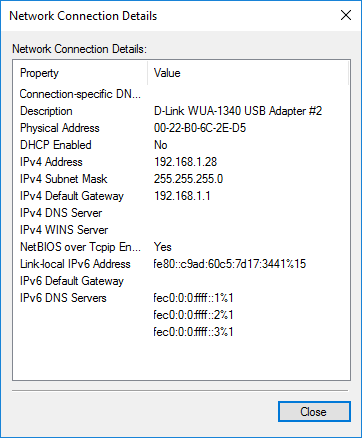
Lastly, if you click on Details, you can get more info about the current network like the Default Gateway (router IP address), MAC address, and computer IP address.
Advanced Sharing Settings
The advanced sharing settings dialog is main place for managing how your computer communicates with the rest of the network. In Windows 7, you have two profiles: Home or Work and Public. Only one profile can be active at a time. All the settings are the same and repeated under each profile.

In Windows 8 and 10, you have three profiles: Private, Guest or Public and All Networks. Basically, it’s the same settings as in Windows 7, but just split up more logically. Let’s go through the various settings:
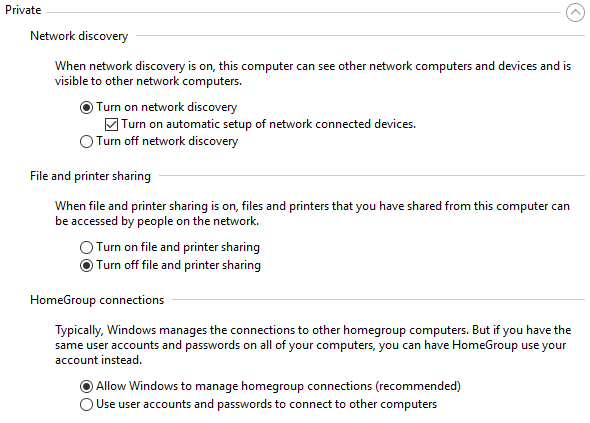
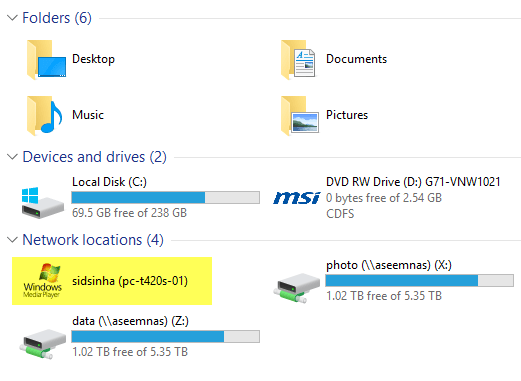
Network Discovery – This setting is turned on for private networks by default and it means that your computer can be seen by other computers and vice versa. What this means in practice is that when you open Windows Explorer, you might see the name of another computer connected to your network under Network Locations.
File and Printer Sharing – This setting will allow others to access shared folders and printers on your computer. I always turn this to Off even on private networks unless I need to use it in a specific situation. There are so many times when guests come over to my house, connect to the network and then could possibly browse my system. Only shared folders can be viewed, but you’d be surprised how folders can become shared without your knowledge.
HomeGroup connections – If you really do need to share files and folders, you should just setup a HomeGroup, which is more secure and a lot easier to configure. If you do run into trouble, just read my HomeGroup troubleshooting guide.
Now expand out All Networks if you are using Windows 8 or Windows 10. There are a couple of more settings here.
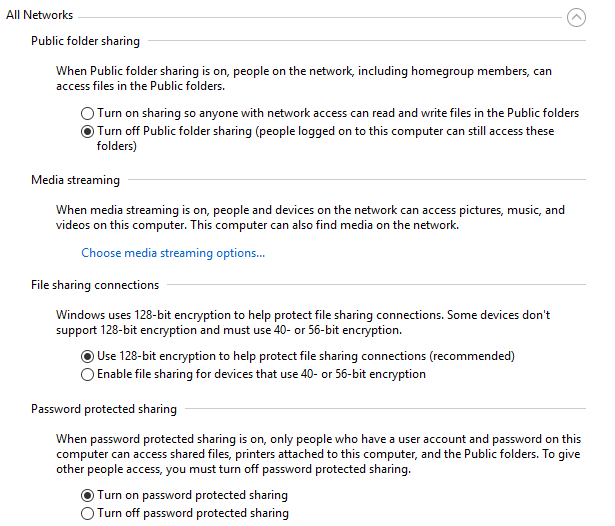
Public Folder Sharing – I recommend turning this off unless you specifically need to share data with another computer. The reason is that it’s very easy to accidentally save files into these publicly shared folders without realizing it, which will then be accessible by anyone on the network. A very useful feature when you need it, but a big privacy risk otherwise.
Media Streaming – This is another option you should keep disabled until you need to use it. This basically turns your computer into a DLNA server so that you can stream music, movies and pictures to other devices on the network like an Xbox One, etc. When enabled, it opens up quite a few ports in your firewall also.
File Sharing Connections – This should always be set to Use 128-bit encryption unless you need to share files with Windows 95, Windows 98 or Windows 2000 computers.
Password Protected Sharing – I highly recommend turning on password protected sharing because it will force users to enter a username and password for an account on your computer in order to access any data.
Setup New Network & Troubleshoot Problems
The next part I want to talk about is the section under Change your networking settings. In Windows 10, you can either setup a new connection or troubleshoot problems.
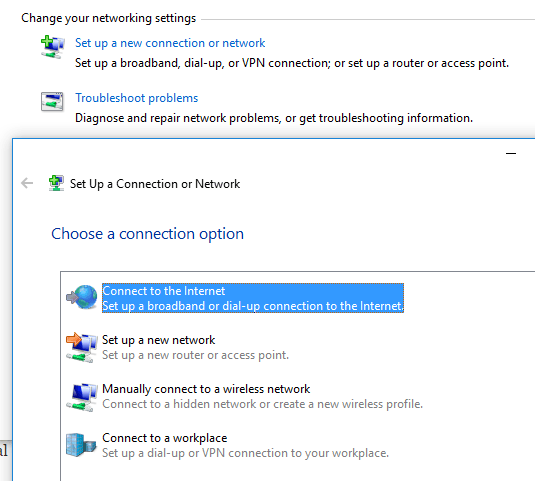
For setting up a new connection, you only have four options in Windows 8/10: Connect to the Internet, Setup a new network, manually connect to a WiFi network or connection to a VPN. Note that creating an ad-hoc network is no longer possible in Windows 10.
If you click on Troubleshoot problems, you’ll get a list of troubleshooting links for the Internet, network adapter, HomeGroup, Shared Folder, Printers, etc.
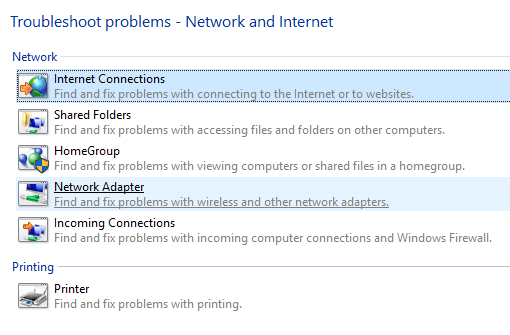
These are not just troubleshooting guides, they are actual programs that run and fix issues with various networking related services. I have found the Internet Connections and Network Adapter troubleshooting fixes to be the most useful.
Change Adapter Settings
Lastly, let’s talk about the Change adapter settings link on the left-hand side. You probably won’t use this too often, but it does come in handy when troubleshooting network problems.
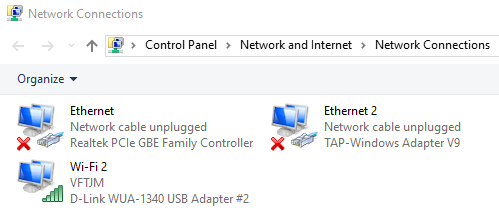
Here you will see a list of all the network adapters on your computer. If you have an Ethernet port and WiFi card, you’ll see both items listed. You might also see other network adapters, but they are usually always virtual, meaning they are created by a software application like a VPN client or virtual machine program.
If you’re having connection problems, you can simply right-click on the adapter and choose Diagnose. This will usually fix any problem with a misconfigured network adapter. If you right-click and choose Properties, you can configure your computer to use a static IP address rather than obtaining one from a DHCP server.
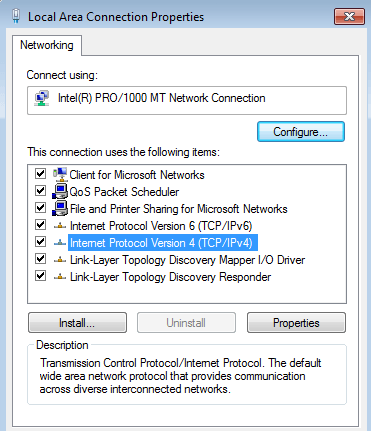
As mentioned, this is not something you’ll need to do often, but it’s good to know for troubleshooting purposes. For the technically savvy, there are a lot of other advanced settings you can modify here, but this guide is meant for newbies.
Hopefully, this article will help you navigate the Network & Sharing Center settings without feeling overwhelmed. It’s the easiest way to fix network problems and to make your computer more secure by disabling a lot of the automatic sharing enabled by default. If you have any questions, post a comment. Enjoy!


![Toni Kroos là ai? [ sự thật về tiểu sử đầy đủ Toni Kroos ]](https://evbn.org/wp-content/uploads/New-Project-6635-1671934592.jpg)


