Do More with Ping: Understanding the Results of the Ping Command
The ping command includes several options that add utility to your troubleshooting process, help you diagnose problems and check remote server status.
 Is there any more universal networking tool than ping? It’s been part of troubleshooting, information gathering and even cyberattacks since its initial release in 1983. One of the secrets to success in troubleshooting is to keep it simple, and it doesn’t get much simpler than ping.
Ping confirms that you have network connectivity between a source and destination node. However, it can do far more. Ping can help you determine the cause of network problems, check the status of remote servers and test name resolution.
Let’s go beyond checking basic network connectivity to see what additional information ping can provide.
Mục Lục
What Is Ping?
The ping utility relies on the Internet Control Message Protocol (ICMP) at the internet layer of TCP/IP. Its most basic use is to confirm network connectivity between two hosts. Ping sends out an ICMP echo request to which it expects an ICMP echo reply response.
You can perform this test by using either the destination node’s hostname or IP address:
ping remoteserver07
ping 10.1.1.42
If either of these commands returns ICMP echo reply messages, network connectivity exists between the two devices. However, when these commands fail, ping can tell us a lot about what might be wrong.
Check Name Resolution
You can check whether name resolution is functioning by first pinging by hostname, and then pinging by IP address. If the ping by name fails, but the ping by IP address succeeds, you have network connectivity – but name resolution is not working correctly. If both pings fail, you have a network connectivity problem — perhaps a failed switch or network cable.
This information helps determine the next step in troubleshooting. If the ping by name succeeds, you probably don’t need to check the physical network or the DNS configurations, and you can move on to other areas, such as service or OS misconfigurations.
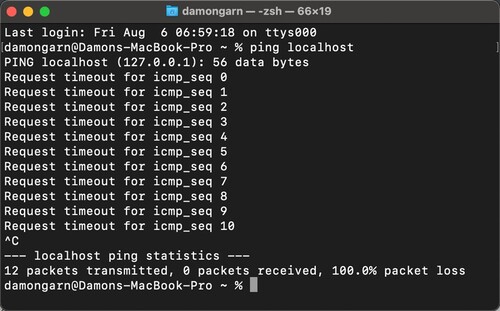
Some administrators will also check the local host computer to confirm that TCP/IP is functioning correctly. You can do this by pinging the local host name or the loopback IP address 127.0.0.1.
ping 127.0.0.1

Figure 1: Checking the local host to confirm that TCP/IP is functioning correctly.
Using Ping in the Field
There are a couple of different strategies for using ping to troubleshoot connectivity. I’ve seen plenty of classroom advice recommending an inward-out approach, but I prefer the outward-in method. Let’s consider these two strategies.
The inward-out approach suggests using ping to test network configurations in the following order:
ping 127.0.0.1
ping 10.1.1.42
ping server42
ping 10.1.1.254
ping routerA
ping 192.168.1.10
ping remoteserver10
In this example, your device is server42 with an IP address of 10.1.1.42, your router (default gateway) is routerA at 10.1.1.254 and the destination is remoteserver10 at 192.168.1.10.
With this approach, you ping your local device to confirm its configuration and then ping outward toward the router and remote destination. At each step, begin with the IP address and then continue with the hostname. Notice that it requires seven steps to confirm connectivity to the remote destination.
I prefer the opposite approach, as do many other experienced troubleshooters. I ping the remote destination by hostname. If that succeeds, I’m done using ping, because I already know every other step in the process will succeed. This saves time because I can move on to other troubleshooting tools higher in the TCP/IP stack. Furthermore, pinging the loopback address or your local adapter will rarely illuminate any problems. Chances are the issue is further on the network somewhere.
It’s likely the outward-in approach will contain just one (or maybe two) steps:
ping remoteserver10
ping 192.168.1.10
In the event of a failure to reach the remote server, work your way backward toward the local device to narrow the scope of the problem on the network.
Use Ping with Linux, macOS and Windows
It’s worth noting that by default, Linux and macOS send continuous pings, while Windows sends only four ping requests at a time. This behavior can be manipulated, of course.
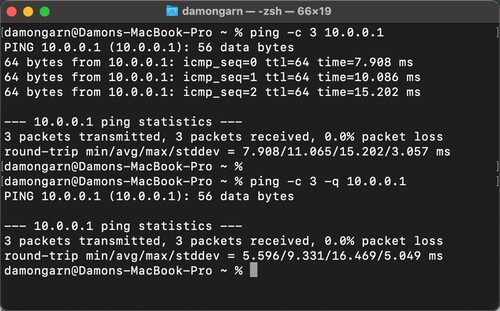
To send five ping echo requests in Linux or macOS, type:
ping -c 5 remoteserver42

Figure 2: Sending five ping echo requests in macOS.
To conduct continuous pings in Windows, type:
ping -t remoteserver07
I think one of the best ways to use continuous ping is when rebooting remote devices. I’ve used this simple trick many times over the years. Just set up a continuous ping to a remote device and then restart it. When it starts responding to the pings again, you know the reboot process is complete. You can then reconnect and continue whatever administrative tasks you were working on.
You can also try adding the -a option to ping to establish an audible prompt. Of course, in some cases, this could be very annoying.
Ping also has a quiet mode to allow you to control the level of output in the results. It’s most useful for displaying just the final connection statistics rather than the results of each individual echo request.
ping -q remoteserver42

Figure 3: Quiet mode is helpful to confirm basic connectivity without consuming much screen real estate.
Understand What Ping Failures Tell You
Ping sends a request and expects a reply. If that reply is received, the network connection exists. But what about when the request fails? There are two common failure messages, and each of them can help you figure out where the problem resides.
The first is ”destination host unreachable.” This message indicates that your local machine attempted to send a request, but it was unable to determine the destination to send it to. Usually, this indicates a configuration problem on your end of the connection. It could also point to a router issue, where the router doesn’t have a route to the destination network. This information allows you to confirm that the local settings are correct because the request couldn’t even be sent.
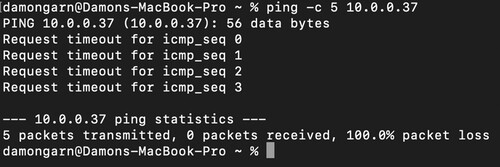
The second response is “request timed out.” It suggests that the problem is out on the network beyond your local system. Your system sent the request, but a reply was not received back within ping’s wait time.
Since your system could send, the misconfiguration is more likely to be at the remote destination’s end, or perhaps a network device between the two endpoints.

Figure 4: Ping failure due to request timed out.
A GUI Ping
Figure 4: Ping failure due to request timed out.
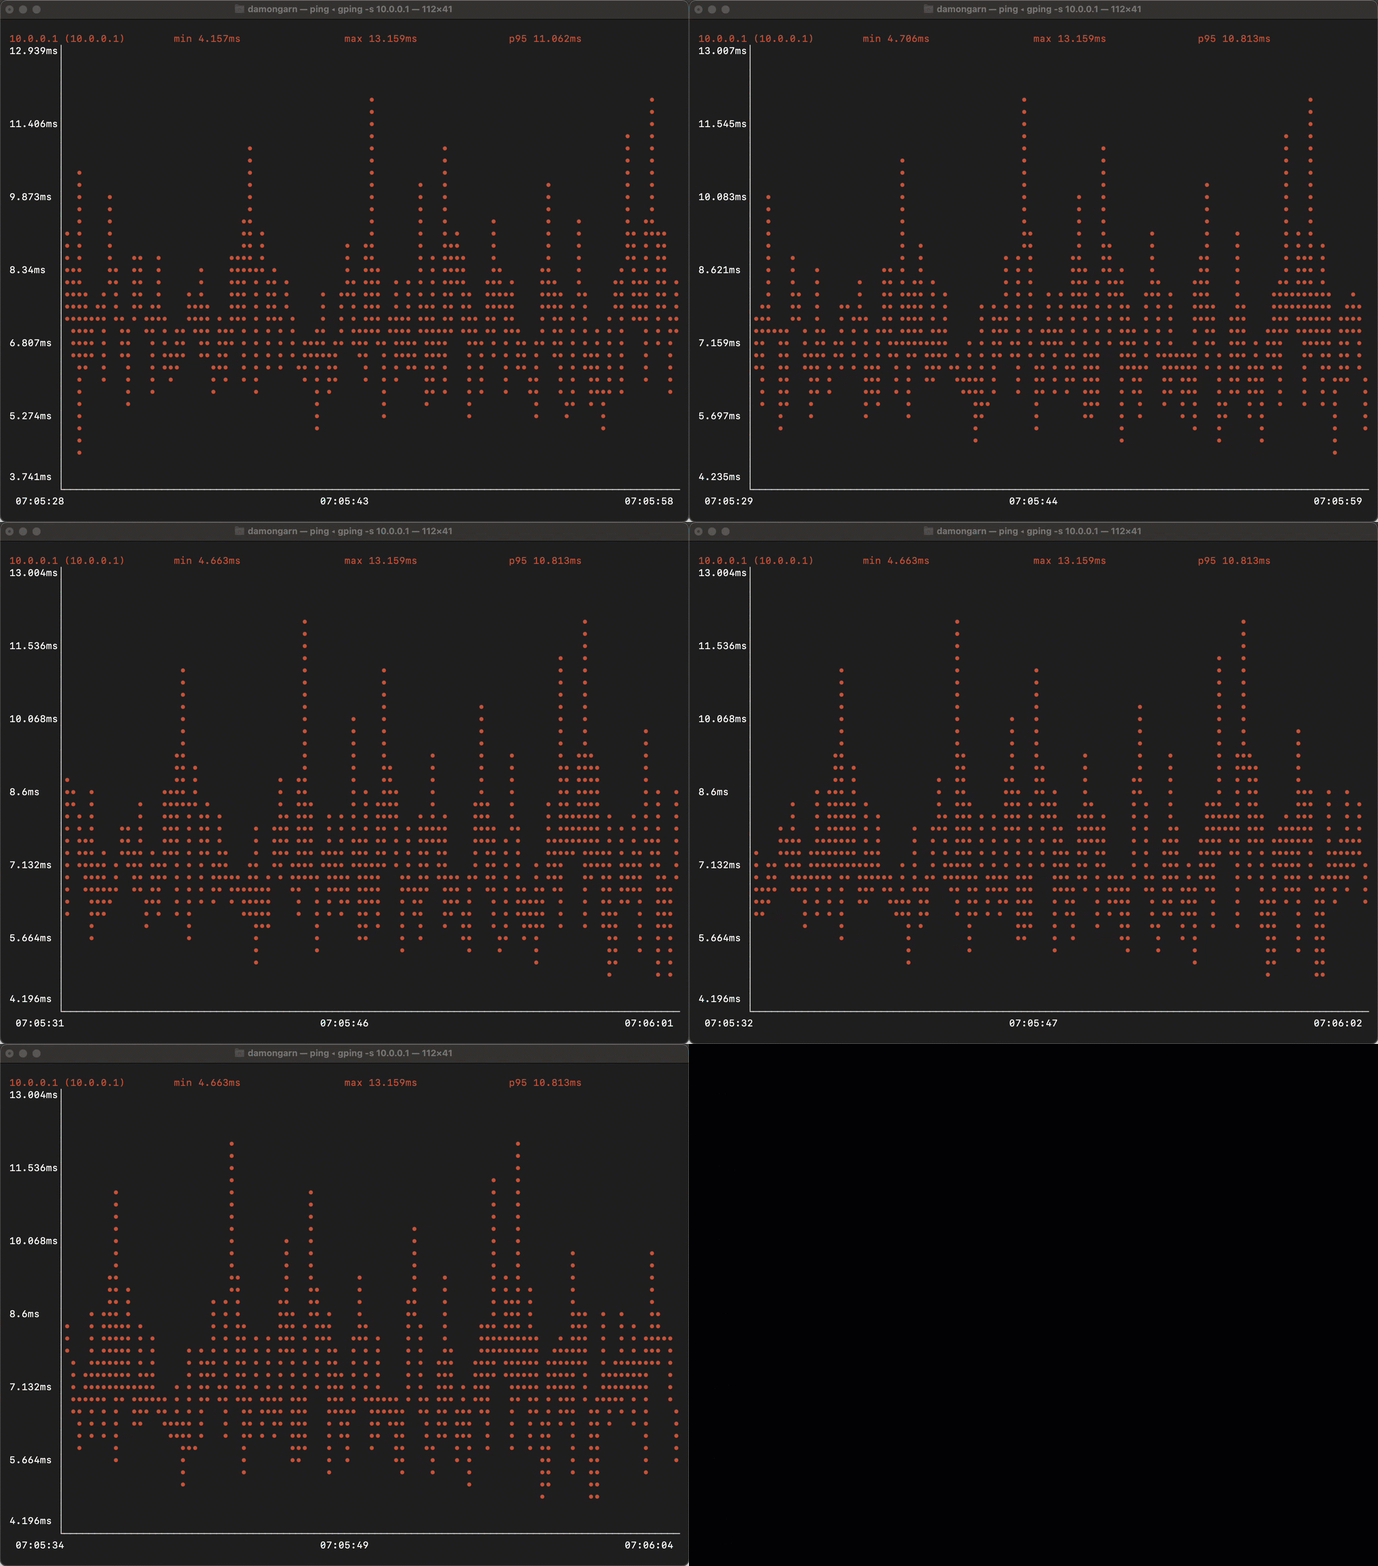
While most of us are pretty comfortable working at the command prompt, a graphical user interface (GUI) can certainly be handy. If you’d like to try a graphical version of ping, take a look at gping. There’s certainly nothing wrong with a nice visual representation of ping results, especially when they can be read from across the room.
When you’re ready to use gping, simply type the command and destination hostname or IP address:
gping 10.1.1.42

Figure 5: A GUI representation of ping results.
What’s Next?
I’m sure most of us will continue to use the basic ping by name approach that simply confirms we have a connection from the local node to the remote one. However, some of these tips may save you some time or provide you with information when other tools aren’t readily available. I suggest you take a few minutes to try out some of these commands and then get in the habit of integrating them into your troubleshooting and information-gathering routine.
The ping command is covered by CompTIA Network+ (N10-008). Learn more with CompTIA CertMaster Learn for Network+. Sign up for a free trial today to get started.


![Toni Kroos là ai? [ sự thật về tiểu sử đầy đủ Toni Kroos ]](https://evbn.org/wp-content/uploads/New-Project-6635-1671934592.jpg)


