
DIY Server Rack Plans
This article represents my own opinion and may contain affiliate links. Please read my disclosures for more information.
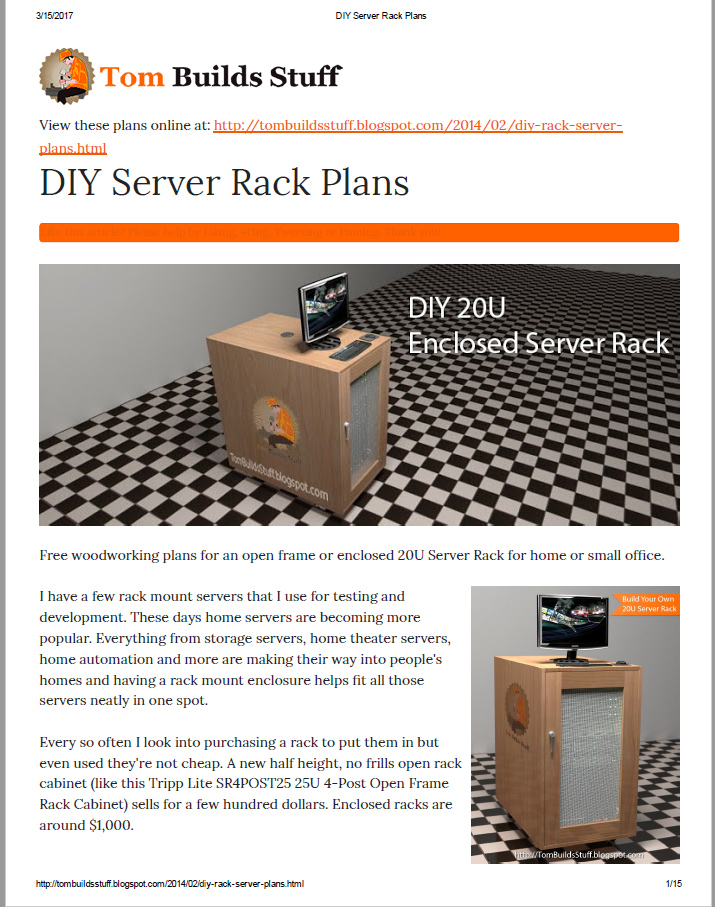
Free woodworking plans for an open frame or enclosed 20U Server Rack for home or small office.
Every so often I look into purchasing a rack to put them in but even used they’re not cheap. A new half height, no frills open rack cabinet (like this ) sells for a few hundred dollars. Enclosed racks are around $1,000.
Out of curiosity I wanted to see what it would take to build my own so I designed and priced out a 20U server rack. 20U is more than most people will need for a home server rack but I chose that height because it puts the top at a comfortable position as a standing desk. You can place a monitor, keyboard and mouse hooked up to a KVM switch to have direct console access.
Pricing wasn’t too bad. Materials for an enclosed 20U server rack came out to just under $400. For an open rack it was only about $100 including casters. Much cheaper than buying a server enclosure. Here’s what I came up with if anyone is interested.
If you’d like to help support the site you can purchase a printable PDF of this article for only $4.95.
Mục Lục
What You’ll Need
Materials
Tools
- Drill
- Circular saw and guide or table saw for cutting plywood
- Miterbox or power miter saw for making square cuts in boards
- Kreg Pocket Hole Jig
- Square
- Pilot hole bits
- Clamps
- Tape measure
- pencil
- Finishing tools
Preface
These plans can be customized to suit your needs. Instead of coming up with a cut list and cut plans I’m writing these steps in a way that should make it easy for you to build the rack to your specifications by measuring and marking as you go.
You can save a lot of time by prefinishing the wood before putting everything together.
Step 1: Attach Rack Rails to Side Supports
Measure and cut 4 pieces of 2×4 to the exact height of your rack rails. Drill pilot holes and screw them to the side of the stud as shown.
The rails will have holes on each side of the angle. The side that has the variations will be where the equipment gets mounted. The side with the more standard spacing screws into the stud. Space screws ever 2-3″ with 1″ wood screws. A typical 1U server weights about 10-15lbs. You probably won’t fill the whole rack with servers but it’s still a good idea to make sure the rails are securely attached.
Step 2: Attach Horizontal Width Boards
According to the specs, the rails should be mounted 19 1/8″ apart. This might vary if you’re using different types of rails. An easy way to get the exact spacing you need is to install a 2U blank to the top and bottom so you can know the exact spacing you need.
Make sure the 2 sides are square. Might be a good idea to make sure some of your rack mount equipment fits too just in case the blanks are off. Once you have everything adjusted and square. Mark the length for the top and bottom 2×4 pieces. Cut to size and secure with wood glue and pocket hole screws for 1-1/2″ material as shown.
You should have 2 of these rail frames. One for the front and one for the back.
Step 4: Attach Boards For Rack Server Depth
There is no
- Dell 28 7/8″
- HP 29 1/8″
- IBM 28 1/2″
- Sun up to 32″ (if I remember correctly)
You can choose a mounting depth that suits your needs. Just make sure there’s plenty of space in the back for any cables that stick out or future expansion.
Once you’ve determined the depth of your cabinet, calculate the desired rack depth, subtract the width of 2 2×4’s (7″) and cut 4 lengths of 2×4 for the verticals. Secure with wood glue and pocket hole joints as shown.
Step 5: Cut and Attach Additional Support Boards
For additional strength, mark and cut, then glue and screw additional 2×4 boards to the sides, top and bottom as shown.
Depending how much you plan to load up the rack you may also want to consider adding additional support such as metal L brackets at corners.
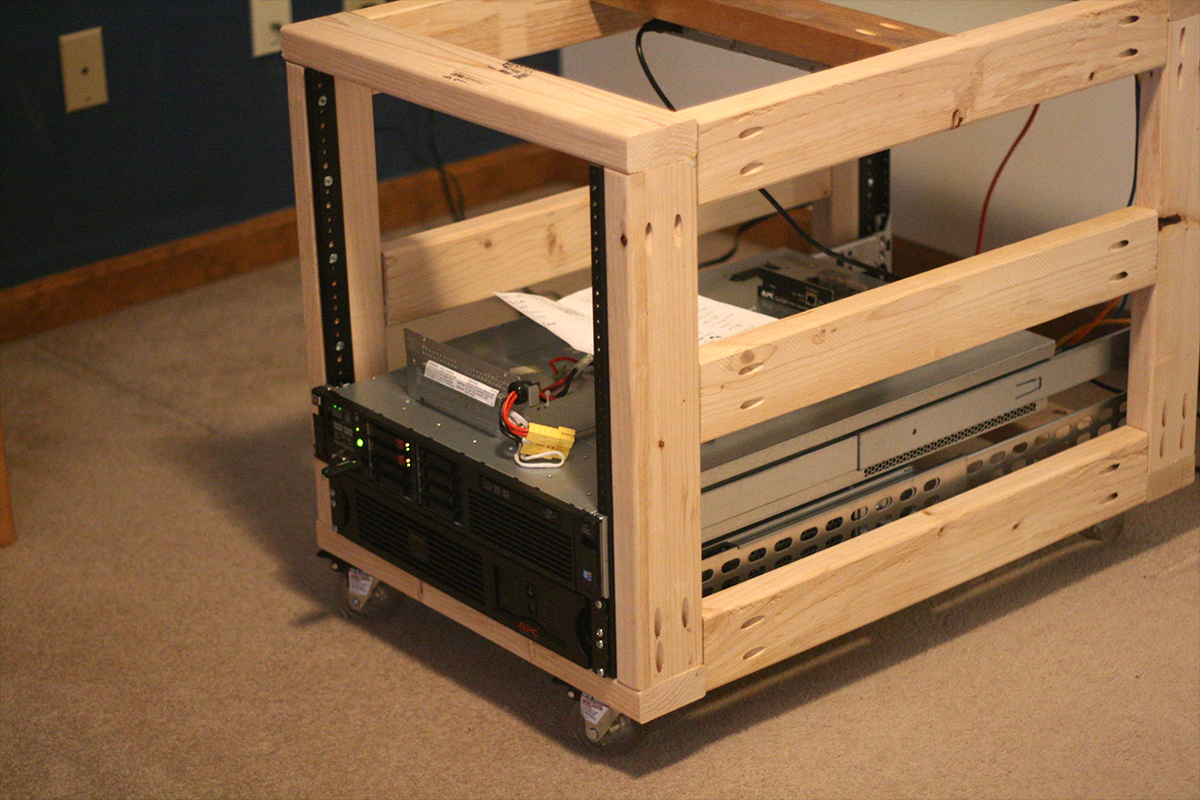
Step 6: Completed Open Rack
Just securely screw the casters to the bottom of the server rack frame you just built and you’re good to go.
Place the rack where you’d like and start adding your servers.
An enclosed rack however does have some benefits such as the ability to keep dust and other debris out. Things like bugs. For some reason house centipedes seem to love electricity. I’ve found them in computer cases as well as electrical panels.
Dust can build up on the internal components of your servers making cooling less effective. We’ll go with that reason instead of being creeped out about having to vacuum up dead bugs. 🙂
Step 7: Cut Cabinet Panels
Measure and cut the top and bottom for the server rack enclosure. The sides will be flush with the width of the open rack. The front and back overhangs 5″ so add 10″ to the depth of your open rack.
Measure and cut the sides as well. The depth of the sides will be the same as the depth of the top and bottom. The height of the sides will be the height of the open rack plus 2x the thickness of your plywood.
Don’t secure anything yet. Just get it ready. Apply edgebanding to the front and back of the top and bottom and to the top, front and back of the sides.
Step 8: Attach Cabinet Top and Sides
Drill the appropriate pocket holes for 3/4″ material into the underside of the cabinet top spacing the holes every 6-8″. Attach the sides to the top as shown.
Now place the upside down open frame rack in the partial cabinet centering it. There should be 5″ of plywood overhanging the front and back. Secure the plywood top and sides to the 2×4 frame from the outside using 1-1/2″ flat top wood screws. Drill pilot holes and countersinks deep enough to fill the holes with wood filler before finishing. You may want to measure and mark the locations of the screws for a more uniform look.
Step 9: Attach Cabinet Bottom
Drill holes for pocket screws on the underside of the cabinet bottom spacing them every 6″ and attach the bottom to the cabinet sides. Also drill and countersink 1-1/2″ wood screws into the 2×4’s.
Step 10: Attach Casters
With the server rack cabinet already upside down it’s a good time to install the casters. Position the casters so that they are over 2×4’s, drill pilot holes and secure them with 1-1/2″ to 2″ wood screws.
Optional: Insulation
At this point you might want to consider adding some 1″ or 1-1/2″ foil backed rigid insulation to the spaces between the 2×4’s in the open rack (not in the 5″ in front or behind it). Rack servers are loud (especially 1U servers) and it may help muffle some of the fan noise. Not much since the front and back will be open. If you plan on keeping this where noise is an issue consider larger form factor servers that can accommodate 80mm or 120mm fans which don’t make as much noise.
Step 11: Build Door Frames
Measure the front and back openings and subtract 1/4″ from the width and height. This will give you the right size for the width and height of your door with a 1/8″ gap all the way around.
Cut the 1×4 boards to the appropriate length, drill pocket holes, glue and screw together as shown after making sure everything is the right size in the opening.
Step 12: Attach Screen
Good ventilation is important so the center of the door will be aluminum window screen. Stretch and staple the aluminum screen on the inside of each door and trim away the excess.
For a more finished look you can cut and screw some screen molding around the edges of the screen.
Step 12: Add Filter Foam To Front Door
Dust can be a real problem for computers so we’re going to add a removable foam filter to the front door to help catch some of the dust. A filter isn’t necessary on the back door because air flows from front to back through servers.
Cut the foam filter material so it’s larger than the aluminum screen already installed on the door. Cut a piece of hardware cloth about 1/2″- 1″ wider and longer than the piece of filter foam.
Lay the filter foam on the back of the door over the aluminum screen. Lay the hardware cloth over the filter foam and screw the hardware cloth into the door around the edges using 3/8″ or 1/2″ small wood screws.
The hardware cloth will keep the filter foam from sagging or otherwise losing it’s shape. When the filter gets full of dust simply unscrew the hardware cloth then rinse and dry the filter foam then reinstall.
Step 13: Attach Doors To Cabinet
Follow the instructions for the hinges to attach the doors the cabinet. Be mindful of which way you want them to swing out and make sure you have an even 1/8″ gap between the door and the cabinet.
The doors are inset meaning the front of the door is flush with the front of the cabinet.
After adjusting the hinges install the door handles.
Step 14: Door Stops and Weather Strip
To prevent dust (and nasty house centipedes) from entering the cabinet through the gap around the door, door stop molding gets installed 7/8″ back from the opening. It will need to be cut to accommodate the hinges and door latch hardware.
On the front of the door stop molding (the side that faces the door) apply the self-adhesive D-shaped weather strip.
Do this for both doors.
Other Thoughts
Here are some other thoughts on accessories and equipment that can make your home server rack a little better.
KVM Switch
KVM stands for Keyboard, Video and Mouse. Most of the time you’ll be connecting to the servers remotely but from time to time you may need to access them directly. A KVM switch allows you to hook up one monitor, keyboard and mouse to multiple computers. A rack mount KVM switch like the is an affordable choice. You could get an integrated KVM with a slide out monitor and keyboard built in like the
but they’re very expensive.
Mount the KVM switch in the first rack space in the front of the cabinet. You can place a regular monitor, keyboard and mouse on top of the cabinet. Drill a hole in the top of the cabinet just behind the back of the rack mounted KVM switch and use a
Power
It would be best if you can keep this on it’s own circuit. A dedicated 20 Amp circuit if you plan on using a lot of hardware.
You can mount a 1U power strip on the back of the rack cabinet for your PDU (power distribution unit). Something like the this
Networking
Get a rack mount network switch and mount it to the back of the rack mount cabinet to attach your servers to. That way you only have to worry about one network cable coming into the rack cabinet.
Cable Management
Underneath your switch mount a 1U Horizontal D-Ring cable organizer to help keep the network cables neat. Also mount some D-Rings on the sides of the cabinet in the back (between the rails and the door) to channel network and power cables through to keep them out of the way.
Drill a hole on one of the sides and use a grommet to be able to run the power cable for the UPS/PDU and network cable to the switch.
Blank Panels
Fill up any unused space with blank panels. This improves airflow. Probably not as important when not in a properly set up server room but they do help.
Reader Submitted Photos
Thomas Kangas built a slightly modified version of this open server rack using these plans. It came out pretty nice.
I can’t figure out who built the enclosed version shown below but I found them on

Here’s one more from


I can’t figure out who built the enclosed version shown below but I found them on Imgur and he said he used my plans. Came out pretty nice whoever you are.Here’s one more from Imgur . Just the frame without cabinet and shorter. Chris used my plans to build an enclosed server cabinet and added some Roxul insulation for soundproofing and added fans on the top for cooling. He got a decent amount of noise reduced.
Nice pics sent by Derf that include a plexiglass door glass with fans.
I have a few rack mount servers that I use for testing and development. These days home servers are becoming more popular. Everything from storage servers, home theater servers, home automation and more are making their way into people’s homes and having a rack mount enclosure helps fit all those servers neatly in one spot.Every so often I look into purchasing a rack to put them in but even used they’re not cheap. A new half height, no frills open rack cabinet (like this Tripp Lite SR4POST25 25U 4-Post Open Frame Rack Cabinet ) sells for a few hundred dollars. Enclosed racks are around $1,000.Out of curiosity I wanted to see what it would take to build my own so I designed and priced out a 20U server rack. 20U is more than most people will need for a home server rack but I chose that height because it puts the top at a comfortable position as a standing desk. You can place a monitor, keyboard and mouse hooked up to a KVM switch to have direct console access.Pricing wasn’t too bad. Materials for an enclosed 20U server rack came out to just under $400. For an open rack it was only about $100 including casters. Much cheaper than buying a server enclosure. Here’s what I came up with if anyone is interested.The design of the enclosed cabinet is based on the open server rack so you can use this as a guide to build an open rack if that’s all you want.These plans can be customized to suit your needs. Instead of coming up with a cut list and cut plans I’m writing these steps in a way that should make it easy for you to build the rack to your specifications by measuring and marking as you go.You can save a lot of time by prefinishing the wood before putting everything together.Measure and cut 4 pieces of 2×4 to the exact height of your rack rails. Drill pilot holes and screw them to the side of the stud as shown.The rails will have holes on each side of the angle. The side that has the variations will be where the equipment gets mounted. The side with the more standard spacing screws into the stud. Space screws ever 2-3″ with 1″ wood screws. A typical 1U server weights about 10-15lbs. You probably won’t fill the whole rack with servers but it’s still a good idea to make sure the rails are securely attached.According to the specs, the rails should be mounted 19 1/8″ apart. This might vary if you’re using different types of rails. An easy way to get the exact spacing you need is to install a 2U blank to the top and bottom so you can know the exact spacing you need.Make sure the 2 sides are square. Might be a good idea to make sure some of your rack mount equipment fits too just in case the blanks are off. Once you have everything adjusted and square. Mark the length for the top and bottom 2×4 pieces. Cut to size and secure with wood glue and pocket hole screws for 1-1/2″ material as shown.You should have 2 of these rail frames. One for the front and one for the back.There is no standard rack mounting depth (distance from front of front rail to back of back rail) and racks can be anywhere from 19″ to 30″. Different manufacturers use different rack mounting depth.You can choose a mounting depth that suits your needs. Just make sure there’s plenty of space in the back for any cables that stick out or future expansion.Once you’ve determined the depth of your cabinet, calculate the desired rack depth, subtract the width of 2 2×4’s (7″) and cut 4 lengths of 2×4 for the verticals. Secure with wood glue and pocket hole joints as shown.Make sure your box is square. If you have some sliding rack rails for your servers you can attach them to the front and back rails to help line everything up.For additional strength, mark and cut, then glue and screw additional 2×4 boards to the sides, top and bottom as shown.Depending how much you plan to load up the rack you may also want to consider adding additional support such as metal L brackets at corners.If you don’t care about having an enclosed rack cabinet you can stop here.Just securely screw the casters to the bottom of the server rack frame you just built and you’re good to go.Place the rack where you’d like and start adding your servers.An enclosed rack however does have some benefits such as the ability to keep dust and other debris out. Things like bugs. For some reason house centipedes seem to love electricity. I’ve found them in computer cases as well as electrical panels.Dust can build up on the internal components of your servers making cooling less effective. We’ll go with that reason instead of being creeped out about having to vacuum up dead bugs. :)Measure and cut the top and bottom for the server rack enclosure. The sides will be flush with the width of the open rack. The front and back overhangs 5″ so add 10″ to the depth of your open rack.Measure and cut the sides as well. The depth of the sides will be the same as the depth of the top and bottom. The height of the sides will be the height of the open rack plus 2x the thickness of your plywood.Don’t secure anything yet. Just get it ready. Apply edgebanding to the front and back of the top and bottom and to the top, front and back of the sides.Drill the appropriate pocket holes for 3/4″ material into the underside of the cabinet top spacing the holes every 6-8″. Attach the sides to the top as shown.Now place the upside down open frame rack in the partial cabinet centering it. There should be 5″ of plywood overhanging the front and back. Secure the plywood top and sides to the 2×4 frame from the outside using 1-1/2″ flat top wood screws. Drill pilot holes and countersinks deep enough to fill the holes with wood filler before finishing. You may want to measure and mark the locations of the screws for a more uniform look.Drill holes for pocket screws on the underside of the cabinet bottom spacing them every 6″ and attach the bottom to the cabinet sides. Also drill and countersink 1-1/2″ wood screws into the 2×4’s.With the server rack cabinet already upside down it’s a good time to install the casters. Position the casters so that they are over 2×4’s, drill pilot holes and secure them with 1-1/2″ to 2″ wood screws.At this point you might want to consider adding some 1″ or 1-1/2″ foil backed rigid insulation to the spaces between the 2×4’s in the open rack (not in the 5″ in front or behind it). Rack servers are loud (especially 1U servers) and it may help muffle some of the fan noise. Not much since the front and back will be open. If you plan on keeping this where noise is an issue consider larger form factor servers that can accommodate 80mm or 120mm fans which don’t make as much noise.Measure the front and back openings and subtract 1/4″ from the width and height. This will give you the right size for the width and height of your door with a 1/8″ gap all the way around.Cut the 1×4 boards to the appropriate length, drill pocket holes, glue and screw together as shown after making sure everything is the right size in the opening.Good ventilation is important so the center of the door will be aluminum window screen. Stretch and staple the aluminum screen on the inside of each door and trim away the excess.For a more finished look you can cut and screw some screen molding around the edges of the screen.Dust can be a real problem for computers so we’re going to add a removable foam filter to the front door to help catch some of the dust. A filter isn’t necessary on the back door because air flows from front to back through servers.Cut the foam filter material so it’s larger than the aluminum screen already installed on the door. Cut a piece of hardware cloth about 1/2″- 1″ wider and longer than the piece of filter foam.Lay the filter foam on the back of the door over the aluminum screen. Lay the hardware cloth over the filter foam and screw the hardware cloth into the door around the edges using 3/8″ or 1/2″ small wood screws.The hardware cloth will keep the filter foam from sagging or otherwise losing it’s shape. When the filter gets full of dust simply unscrew the hardware cloth then rinse and dry the filter foam then reinstall.Follow the instructions for the hinges to attach the doors the cabinet. Be mindful of which way you want them to swing out and make sure you have an even 1/8″ gap between the door and the cabinet.The doors are inset meaning the front of the door is flush with the front of the cabinet.After adjusting the hinges install the door handles.To prevent dust (and nasty house centipedes) from entering the cabinet through the gap around the door, door stop molding gets installed 7/8″ back from the opening. It will need to be cut to accommodate the hinges and door latch hardware.On the front of the door stop molding (the side that faces the door) apply the self-adhesive D-shaped weather strip.Do this for both doors.Here are some other thoughts on accessories and equipment that can make your home server rack a little better.KVM stands for Keyboard, Video and Mouse. Most of the time you’ll be connecting to the servers remotely but from time to time you may need to access them directly. A KVM switch allows you to hook up one monitor, keyboard and mouse to multiple computers. A rack mount KVM switch like the TRENDnet 8-Port TK-803R is an affordable choice. You could get an integrated KVM with a slide out monitor and keyboard built in like the Belkin F1DC108H but they’re very expensive.Mount the KVM switch in the first rack space in the front of the cabinet. You can place a regular monitor, keyboard and mouse on top of the cabinet. Drill a hole in the top of the cabinet just behind the back of the rack mounted KVM switch and use a brush grommet to pass cables to the KVM while keeping dirt and dust out.It would be best if you can keep this on it’s own circuit. A dedicated 20 Amp circuit if you plan on using a lot of hardware.You can mount a 1U power strip on the back of the rack cabinet for your PDU (power distribution unit). Something like the this Trip-Lite RS1215-RA but a better option would be to have a rack mount UPS (uninterruptable power supply) like this Cyberpower CPS1500AVR mounted to the front of the rack cabinet. A UPS provides temporary power for short periods of power loss and also helps make sure the power coming in is clean. Much better than a surge suppressor.Get a rack mount network switch and mount it to the back of the rack mount cabinet to attach your servers to. That way you only have to worry about one network cable coming into the rack cabinet.Underneath your switch mount a 1U Horizontal D-Ring cable organizer to help keep the network cables neat. Also mount some D-Rings on the sides of the cabinet in the back (between the rails and the door) to channel network and power cables through to keep them out of the way.Drill a hole on one of the sides and use a grommet to be able to run the power cable for the UPS/PDU and network cable to the switch.Fill up any unused space with blank panels. This improves airflow. Probably not as important when not in a properly set up server room but they do help.Nice pics sent by Derf that include a plexiglass door glass with fans.


![Toni Kroos là ai? [ sự thật về tiểu sử đầy đủ Toni Kroos ]](https://evbn.org/wp-content/uploads/New-Project-6635-1671934592.jpg)


