
Dip dye hair | How to get the edgy look at home.
There are a lot of hair trends out there. Sometimes it can be hard to keep up with the latest and greatest, but one trend that is not going anywhere anytime soon is dip dye hair.
Today’s blog post will give insight into what makes this hairstyle so trendy as well as why it works so well for everyone, no matter their style or personality type!
Colouring your hair is a commitment. It’s not as simple as going to the salon for an hour and coming out with a new look. You have to be careful about what kind of hair dye you use, how long it will last, and if it will damage your hair in any way.
For those who want to experiment with colour but don’t want to commit or spend a lot of money on their hair, this could be the perfect solution!
This guide breaks down everything you need to know about dipped ends – including how much time each process takes, what products are best for each step, and which colours work best together. Let’s go!
As an Amazon Associate, I earn from qualifying purchases.
What is a dip dyed hair?
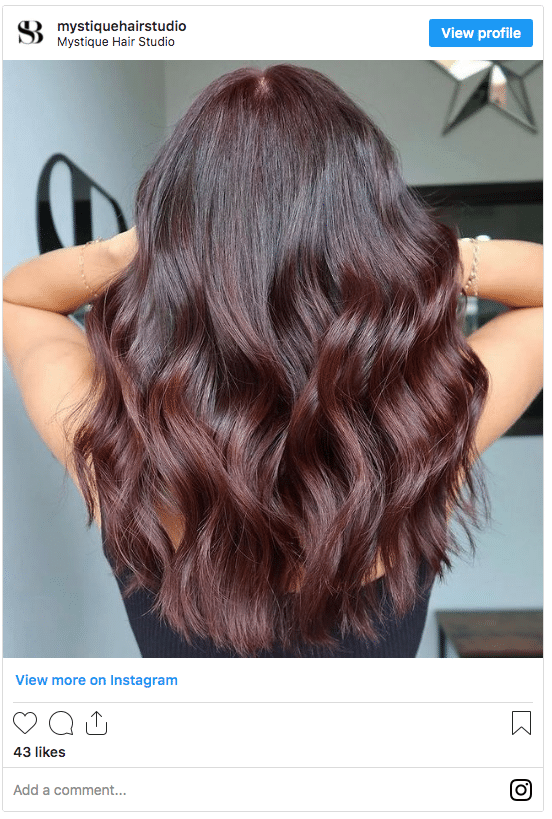
This is a technique where hair is when you colour the tips of your hair a different shade to the rest.
The dip dye method has been around for ages but it’s only recently that celebrities such as Rihanna, Miley Cyrus, Alexa Chung and Kendall Jenner have made us really want this look.
It works best with natural hair colour and a bright pop of pastel, neon or strong, vibrant colours to create contrast and wow factor!
It’s an easy way to add some flair and personality to your look without going all out with a full head of colour. And it looks great on everyone!
This trendy look has become increasingly popular within the past year. It’s a great way to change up your look without going too drastic.
It’s an easy way to experiment with different colours without committing fully.
If it doesn’t suit you as much as expected, simply stop there and wait for it all to fade away before trying something else next time around. The possibilities are endless!
It’s also easy and inexpensive, so you don’t have to spend hours at the salon or break the bank on expensive products. You can even do it yourself! And if you decide that this isn’t for you after all, no problem – just let it fade naturally and go back to your usual colour, or get it trimmed off! Simple!
If you’re looking for a simple, low maintenance way to change up your style, this is definitely something you should try out.
Check out the latest looks for ideas and inspiration.
What’s the difference between Balayage and dip dye?
The difference between Balayage and dip dye is in the placement.
Balayage uses lightener or toner to create a sweeping, blended effect. The result is a much more natural look, where you see strands of hair that are much lighter than others.
-
BALAYAGE HAIR
-
DIP DYE HAIR
What’s the difference between dip dye and ombre?
While they are both colouring techniques where colour gradually gets lighter towards the tips of your hair, each have their own distinct characteristics.
Ombre hair is a gradual colour transition that usually starts dark on top and gradually fades into light ends, while dip dye is a sudden colour transition. Ombre has a more natural look with a blend of complementary colours.
-
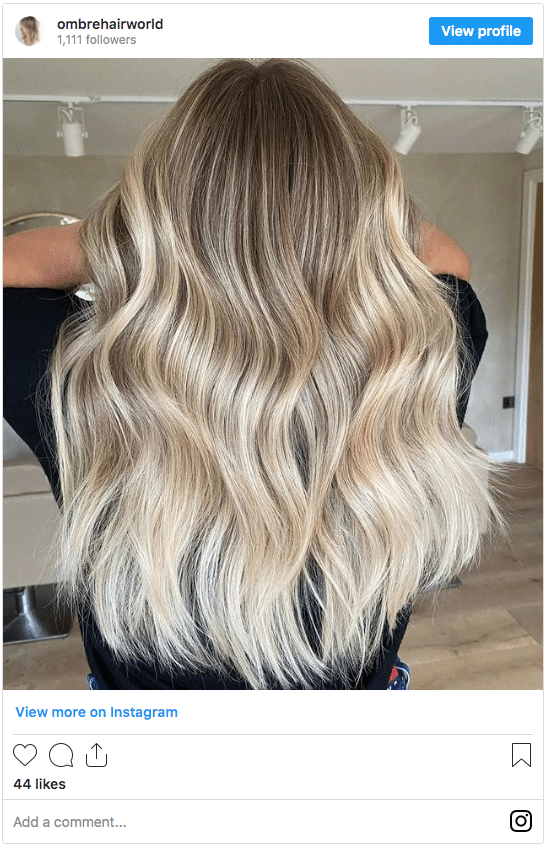
OMBRE HAIR
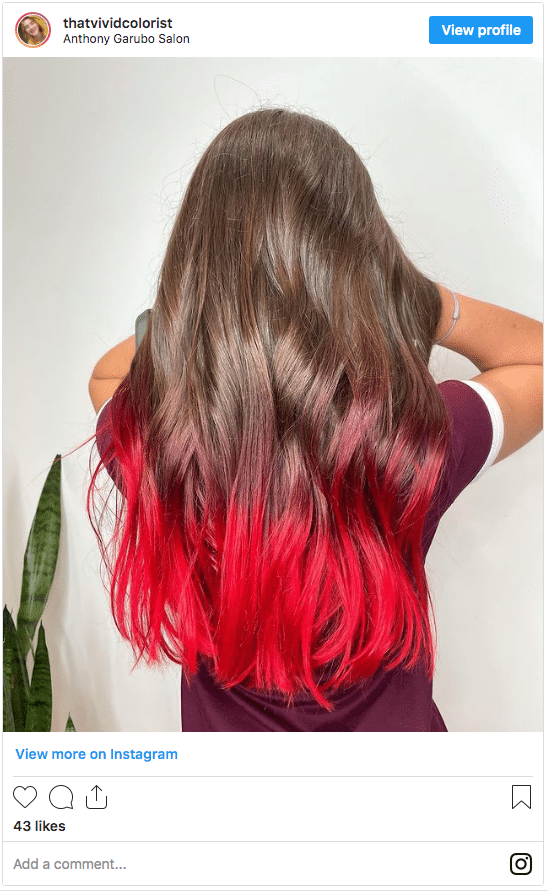
-
DIP DYE HAIR
Do you have to bleach your hair to dip dye it?
Because this on-trend look works best with bright, vibrant colours, it is best to bleach your hair first to get the right base for the colour.
If you have light hair – like ash blonde or platinum blonde, you might be able to get away with tinting your ends with hair dye. Opt for bold colours like black hair, blue and pillarbox red.
If you have dark hair – you will need to lighten your hair first with bleach. You can buy an off the shelf lightening kit and follow the instructions carefully.
How do I get dip dye hair?
There are so many variations of this colouring technique that there’s really no right or wrong way, just personal taste.
There’s everything from reverse dips to ombre dip dyes where the colour starts dark at the roots and fades into a more vibrant tone, almost like an ombré look.
It can be hard to find time to head back to your stylist for touch-ups every 4 weeks or so, which means you might need some solid advice on how to re-do your own dye job at home.
And while dipping may seem like an easy ‘do’ technique, there are some mistakes you can make that will leave your hair looking like a hot mess.
Is dip dyeing bad for your hair?
If you need to bleach your hair first, then yes it will be damaging!
Unfortunately, the ends of your hair are most prone to split ends, dryness and damage.
The best way to look after your hair is to give it lots of TLC before, during and after the process.
In the run-up to bleaching or dyeing your hair, make sure you use plenty of deep conditioning treatments to lock in moisture and keep your hair supple.
If your ends are looking tatty, get them trimmed AFTER you colour your hair. (You’ll need to take this into account and paint a longer strip to allow for it to be cut).
This will get rid of any dead ends and keep your style looking fresh.
What colours are good for dip dye?
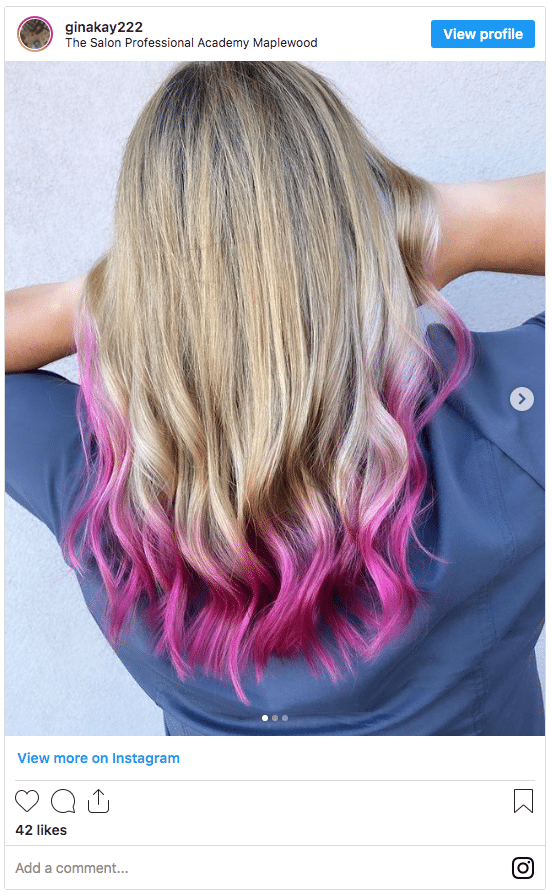
For light hair
- Electric blue
- Vibrant pink
- Lilac
- Lavender
- Black
- Copper
For dark hair
- Pastel blue
- Rich Red
- Plum
- Apple green
- Copper
- Silver
Can I dip dye my hair at home?
There are two paths you can take here.
You can either dye your hair yourself at home or alternatively go to a salon and have them do it for you.
This is often the best option if you’re blending light and dark shades together as they’ll be able to mix it exactly to your exact colour desires! If that sounds like too much of a hassle then we recommend DIYing the job!
Getting this look is actually really easy and doesn’t require much work at all. All you need is some bleach, developer, hair dye, gloves, bowl and brush (or tinting applicator).
If done correctly, the colour will last up to 6 weeks before fading away gradually over time.
It’s a great way to test out colours before you commit to the full head of dye.
It’s an easy way for anyone at any skill level to get edgy colourful streaks or ends.
So now that you know how easy it is to do yourself at home without any professional help needed – just follow these simple steps below…and enjoy!
What kind of dye should I use?
There are tonnes and tons of products on the market right now and it can be really confusing trying to decide which one is best for you.
If you’re going for a bold pop of colour, we’d recommend using semi-permanent dyes as they tend to last longer than temporary ones.
It’ll mean more time commitment from you, but it’ll be worth it!
We’d recommend something brighter rather than pastel shades because of how quickly they wash out – no one wants stylish wannabe hair if it’s faded by the end of the week!
Check out The best at-home hair dye you should use for some great guidance.
How to dip dye hair at home.

Getting it right at home is easy. Just follow our step by step guide for the best results!
Step one: Get prepared
It’s easiest to wear your hair down for this. So you’ll need to protect your clothes with a hairdressers cape or old t-shirt.
You’ll also need:
- Your chosen hair bleach kit
- Your hair dye colour
- A hair dyeing bowl
- A tinting brush
Step two: Bleach your hair tips
First, you need to bleach your hair at the end to make the best possible base for the hair colour.
Follow the instructions where you can use our guide to DIY hair bleaching here.
Remember you are only bleaching the bit at the bottom tips of your head you will be dying.
We’d recommend to bleach around three or four inches but you really can die as much or as little as you want!
Follow the directions on the hair bleach kit for how long to leave the bleach in your hair before rinsing. Check on it as you go to make it’s developing at the right rate.
Once you rinse it all out, do not apply conditioner as it may form a barrier between your hair and the colour.
Don’t worry if your hair is looking warm or has orange tones. The hair dye will cancel those out.
Now you’re ready to apply the colour mixture!
Step three. Mix up your hair dye
Make up your hair dye according to instructions on your box. Do this into the bowl and mix it with your tinting brush.
Step four. Apply the hair dye
Saturate your bleached ends with the formula. Make sure it covers everywhere you have bleached.
Some guides will tell you to dip your hair into the bowl. We find it’s more accurate to use the tinting brush to really saturate the ends.
If you need to, use your hands (which should be covered with gloves!) to really work the colour and developer in.
Once all the ends have been thoroughly saturated. Leave the hair dye on for as long as the package instructions – up to 45 minutes.
You can check it as you go to make sure it’s developing the right amount.
Step five: Rinse out the dye
Rinse the colour out until the water runs clear so you know all the ingredients have been removed thoroughly.
Moisturize your hair with a good colour-safe conditioner. Don’t use shampoo at this point it may rinse some of it out!
Step six: Style and admire!
Style your hair as usual. Make sure you use a good protectant spray before using any hot tools.
Congrats! You have gorgeous looking hair!
How long does dip dye last?
The thing with using vivid colours is they just don’t last as long as ‘regular’ colour.
Why? Because vivid colours have larger colour molecules that sit on top of your hair to stain it.
It makes them really easy to remove which is awesome but not so awesome if washes after one week!
Because of this, and because your hair ends are more prone to damage, you may find yourself changing up your dip dyed ends more than any other style.
When done by a professional at a salon, the colour can stay in between 4-12 weeks depending on how fast your hair grows.
If done at home, you’ll get about 2 weeks or so of vibrant colour before it starts to fade and wash out and you’ll be able to re-dye within the week to avoid looking washed out.
By hey, we say that’s half the fun!
How do I care for dip dye hair?
Keeping up with the touch ups will keep your locks looking good but remember that this style needs a lot of care too.
Make sure you apply some nourishing serum after washing so strands don’t get dry and brittle from all the dyeing!
To stop your colour from fading fast, use colour-safe shampoos and conditioners and avoid washing your hair too often.
Colour-treated hair goes through a lot of chemical processing so it’s good to cut down on how much heat you put on it too!
Always use a good heat protecting spray to keep your hair soft and supple.
With these tips in mind, you’ll be on your way to having colour-popping hair in no time!
Parting words
If you’re looking for a new hairstyle to try out, why not consider this one. It’s perfect for giving your hair some much-needed flair!
With that said, it is important to remember that there are many factors that can affect how long the colour lasts so be sure to consult with your stylist before making any decisions.
We hope we’ve given you some insight into what makes this style so trendy and why it works well on everyone no matter their personality or personal style. Now go get those tips dyed today!


![Toni Kroos là ai? [ sự thật về tiểu sử đầy đủ Toni Kroos ]](https://evbn.org/wp-content/uploads/New-Project-6635-1671934592.jpg)


