
Cupcakes 102: How to Frost the Perfect Cupcake
This post is part of my Cooking 101 Series!
Welcome to Cupcakes 102: All About Frosting! This is part 2 of my 3-part series all about cupcakes. If you haven’t seen them yet, check out our tutorials on tips to bake perfect cupcakes, cupcake decorating ideas, or how to freeze cupcakes. Now that we’ve mastered the cupcakes themselves, it’s time to move on to frosting! Which is probably the best part of the whole cupcake experience.
Pictured: Lemon Vanilla Cupcakes
There are SO MANY OPTIONS when it comes to frosting your cupcakes. Personally, I have three go-tos: Vanilla Buttercream, Chocolate Buttercream (as seen in our chocolate stout cupcake recipe), and Chocolate Fudge Frosting. If it’s a special cupcake, like my Pumpkin Ale Cupcakes, I’ll switch up the frosting and add fresh fruit, maple flavoring, or a bit of liquor (WOOT).
With any frosting, it’s important to pay close attention to consistency. If you’re planning on piping the frosting onto cupcakes, your frosting needs to be stiff and able to hold its shape. When you mix, take a spatula and pull it through the frosting to form some stiff peaks. If the peaks hold without falling over, the frosting is probably thick enough to pipe. Fix too-thin frosting by mixing in more powdered sugar a bit at a time.
Is your frosting ready? Good. Let’s start piping those cupcakes!
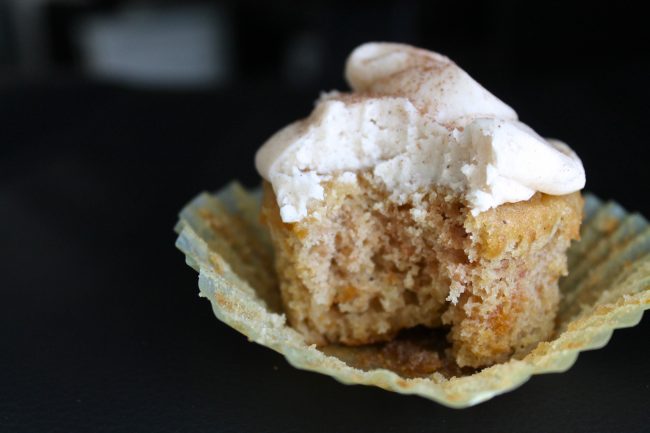
Pictured: Roasted Peach Muffins. With frosting.
How to Frost a Cupcake Like a Pro:
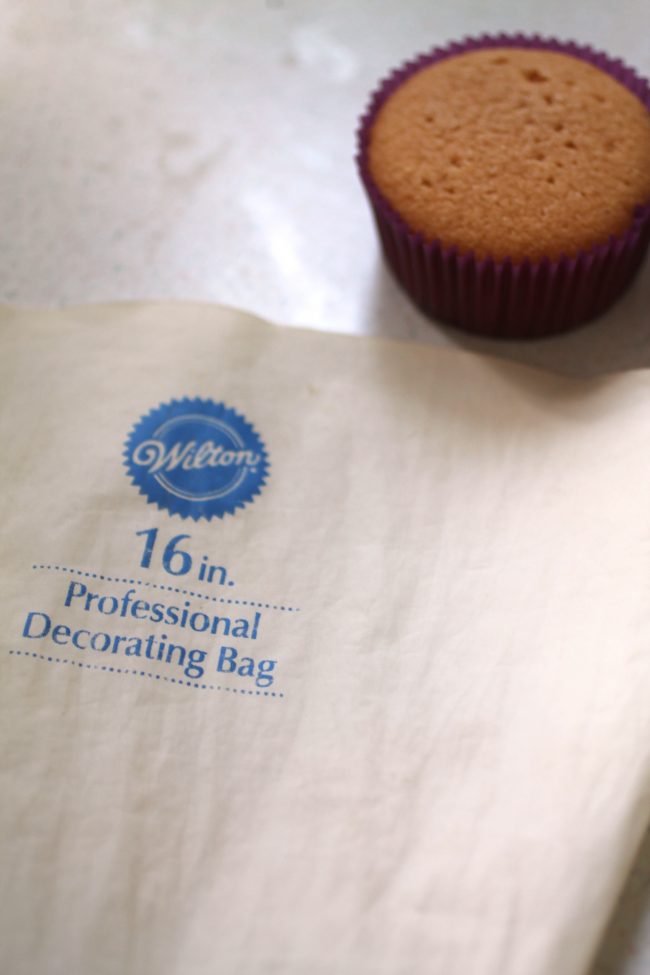
The first (and super-duper important!) step to achieving professional-looking cupcakes is to master the art of frosting them. I use Wilton equipment for all of my baking and decorating – in my experience, the price and quality just can’t be beat. (I’ve also heard great things about Ateco products, though I’ve never used them myself). I use my favorite Wilton 16 Inch Pastry Bag for all of my cupcake frosting. It’s big enough to hold a substantial amount of frosting without being full to the brim (which results in a giant mess/frosting explosion. No fun).
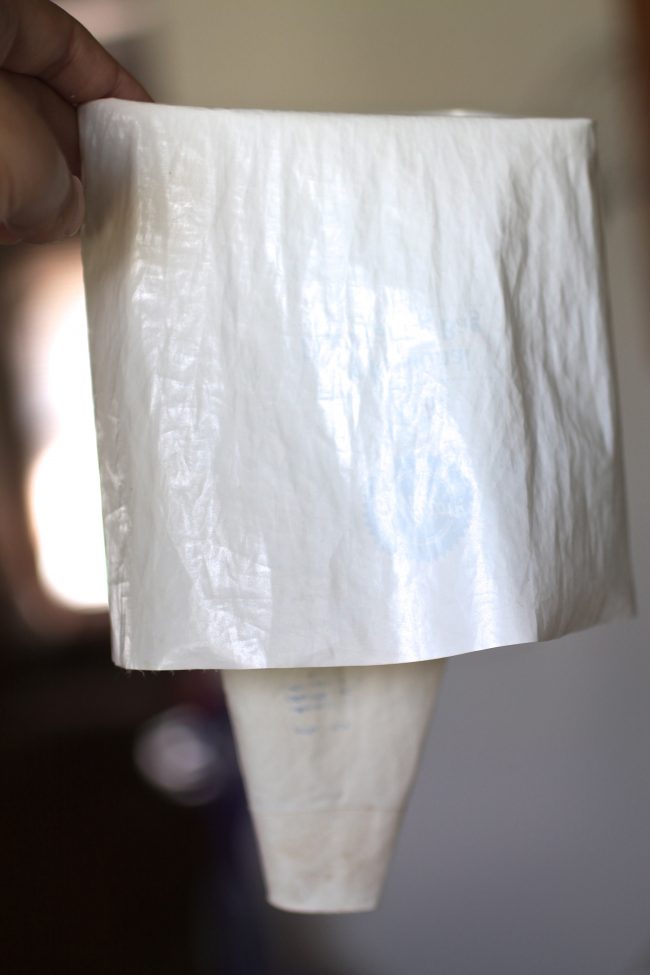
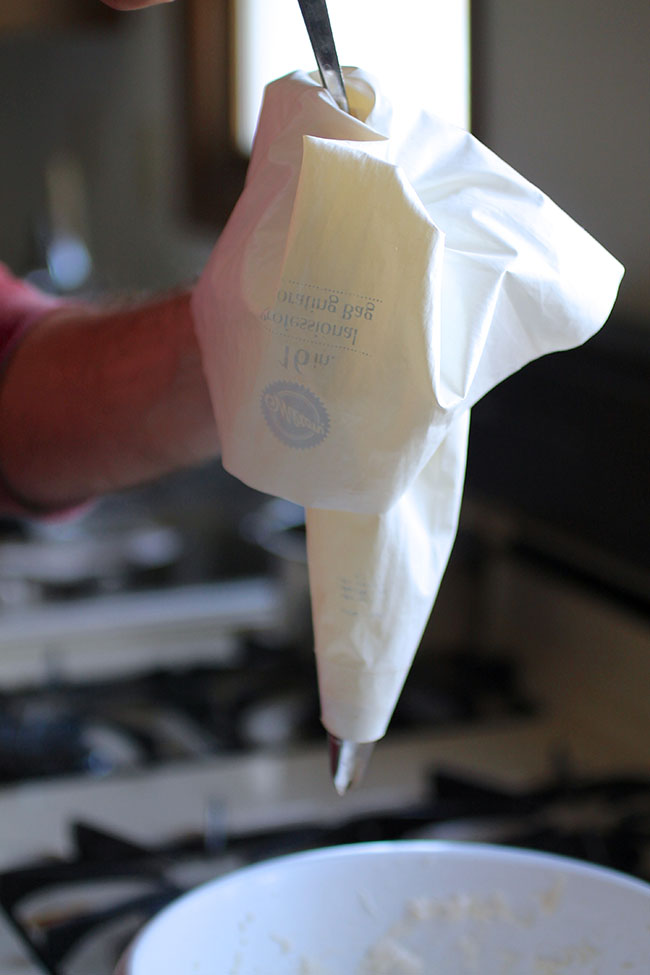
To fill the pastry bag, fit it with your pastry tip of choice (I used a Wilton 1M in these photos) and bend the upper half inside-out down over the lower half, like this:
Hold the bag in your hand at the fold – this will give you the best support when you spoon your frosting into it! Attach your frosting tip of choice and you’re ready to fill your bag with frosting! (I used my lemon vanilla buttercream in these photos).
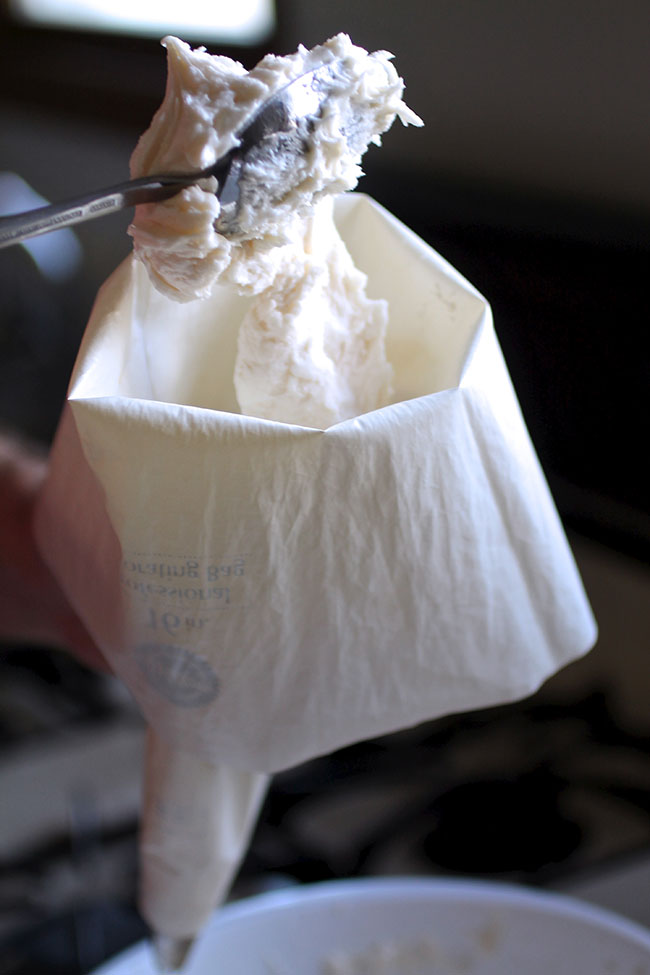
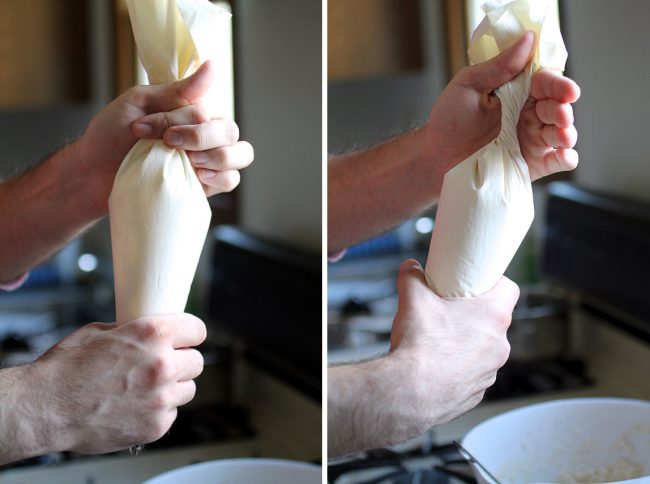
Scoop up a heaping spoonful of frosting, and use your spoon or spatula to push it all the way down to the tip of the pastry bag.
Then, use the hand holding the pastry bag to squeeze the bag around the spoon and pull, to make sure all of the frosting gets into the bag.
Pull the spoon out and repeat until the bag is full up to the fold.
When you’ve filled the pastry bag up to the fold, pull the top half back up and run your hand down the bag to squeeze out any air bubbles between clumps of frosting. Then twist the top tightly so that no frosting will escape when you apply pressure to the bag.
To frost cupcakes, point the tip of the pastry bag on an outer edge and apply even pressure to the frosting-filled part of the bag with one hand while using the other hand to keep the top of the pastry bag tightly twisted. Move in a circle around the outer edges and work your way to the center of the cupcake, releasing pressure gently when you reach the center to leave a nice frosting peak.

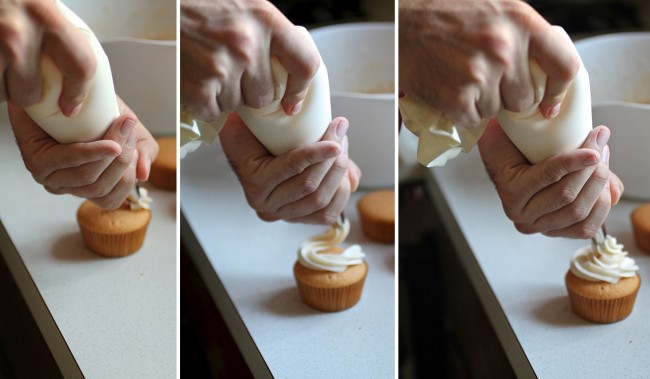
Ta-Da! A beautifully frosted cupcake. Looks super profesh, no? And it took all of thirty seconds. Pastry bags are great for beautifying your cupcakes, but they are also the unsung heroes of cupcake time-saving: a pastry bag makes it SO easy to frost a large amount of cupcakes quickly and prettily.
Frosting Tips:
There are so many frosting tips available now that it can be hard to tell which one does what. When I frost cupcakes, I have three go-to tips:

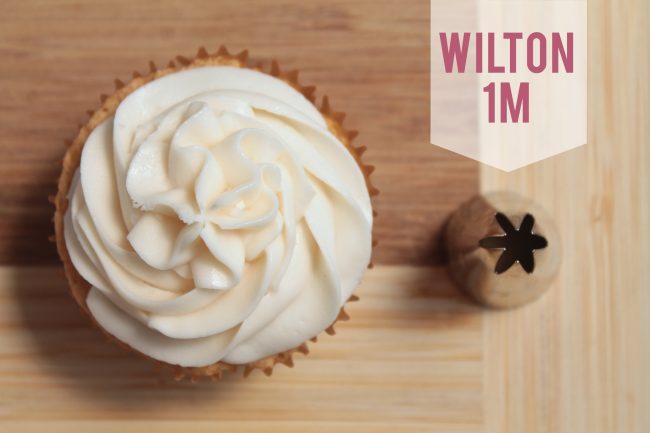
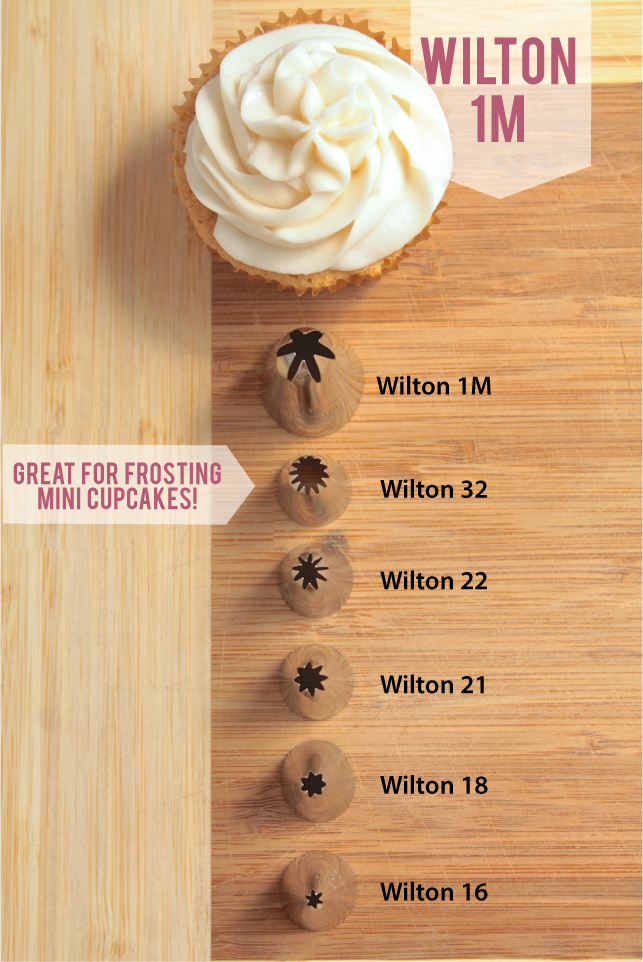
The Wilton 1M (Used in the frosting how-to photos above) is my most-used tip for cupcake frosting. It creates a nice, thick swirl and looks very uniform (read: mistake-free) no matter how quickly you are frosting.
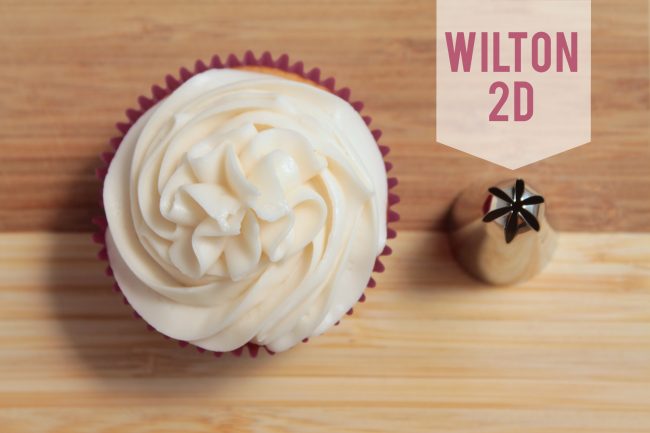
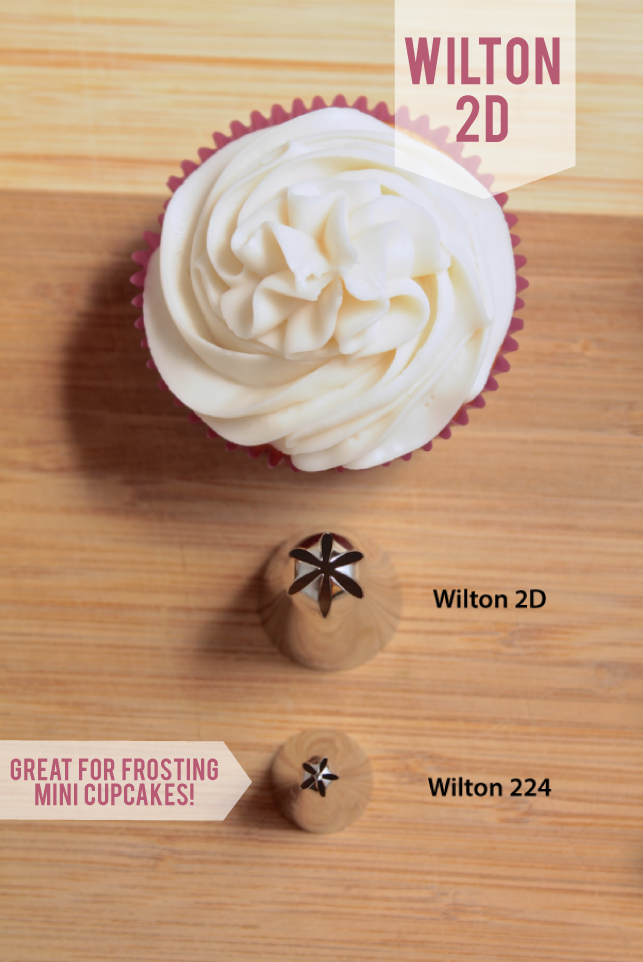
The Wilton 2D tip is very similar to the 1M, but it is a little more sensitive to the pressure you apply while frosting and can create a few different thicknesses of swirl. Using the same amount of pressure as the photo above, I got a slightly thinner, tighter swirl with the 2D:
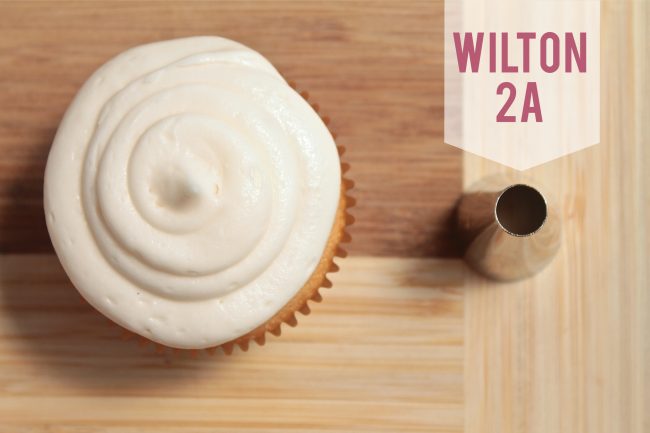
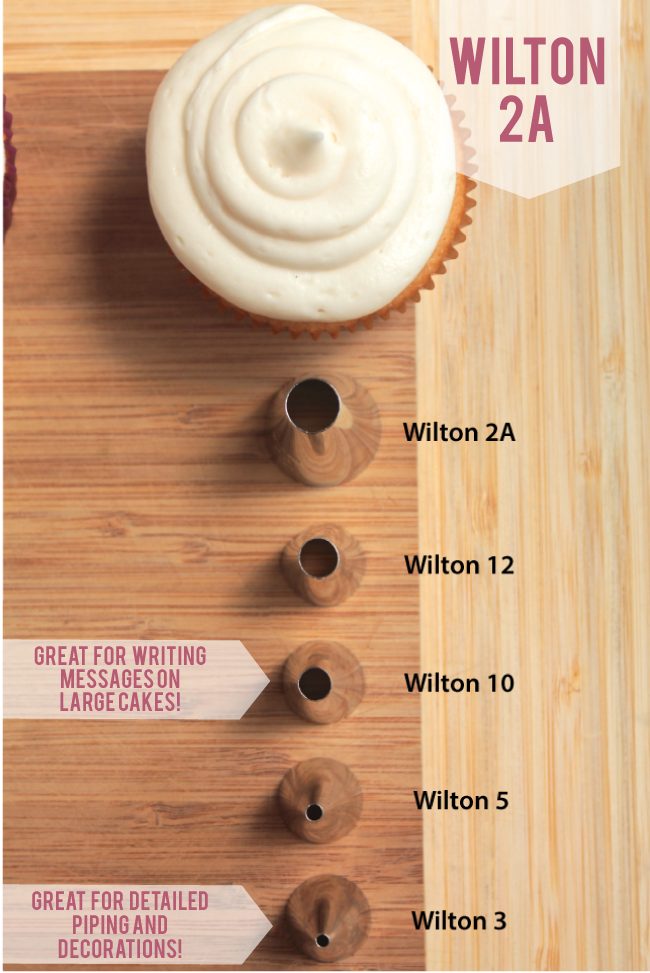
The last tip I use for cupcake decorating is the Wilton 2A. This is a very standard tip – just a large, round shape – and it’s great for using with elaborate toppers and ganache that would overpower swirly frosting.
The great thing about these three frosting tips is that Wilton makes similar shapes in a variety of sizes, so you can achieve the same effects on almost any scale. For example, all of these tips will create a shape like the 1M:
And many Wilton tip sets also include a mini version of the 2D:
As well as several tips in the 2A-tip shape family:


![Toni Kroos là ai? [ sự thật về tiểu sử đầy đủ Toni Kroos ]](https://evbn.org/wp-content/uploads/New-Project-6635-1671934592.jpg)


