
Connecting to Secure Wireless Network in Windows 7 – Information Technology Services
1. Select the wireless icon found in the bottom right-hand corner of the screen.
2. Once the wireless tab has opened, select the link marked “Open Network and Sharing Center”.You may notice that the “TrumanSecureWireless” network has been found, but due to specific settings needed for a complete connection to the Truman Network this will not allow a proper connection. Please continue to follow the steps below.

3. Once the “Network and Sharing Center” windows opens, select the link marked “Set up a new connection or network”.
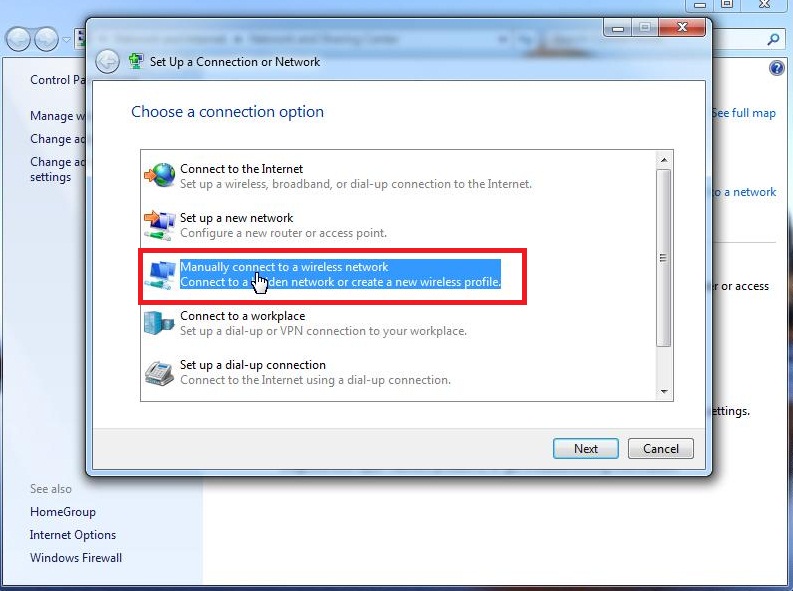
4. As the “Set Up a New Connection or Network” window pops up select the option marked “Manually connect to a wireless network” and select next.
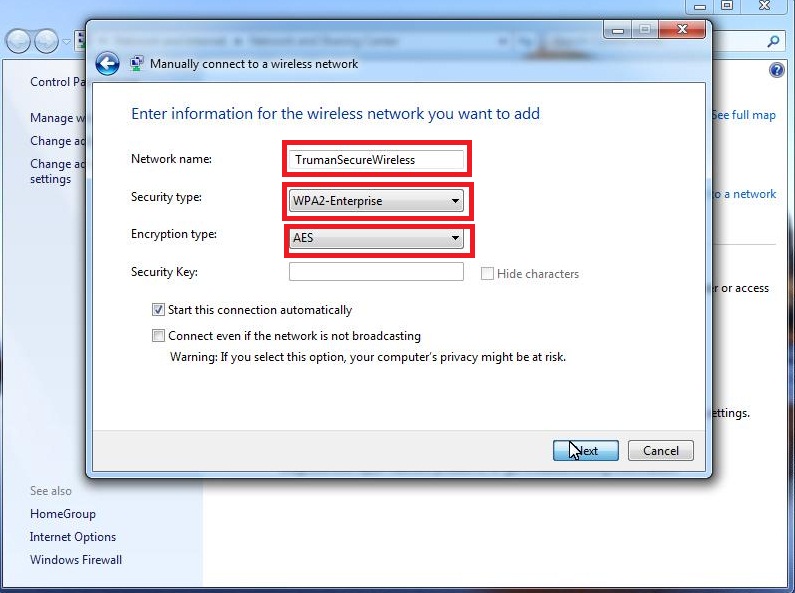
5. In the window now shown, input the following and select next:
-
Network Name
: TrumanSecureWireless
-
Network Type
: WPA2 or WPA Enterprise (
WPA-2 Enterprise
is preferred)
-
Encryption Type
: AES
-
Start this connection automatically
: checked
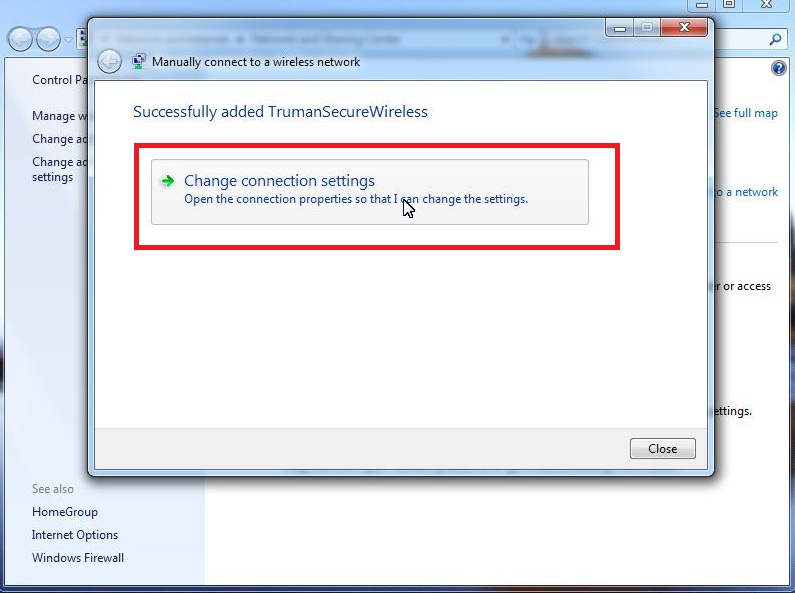
6. After the network has been successfully added select the “Change connection settings” link.
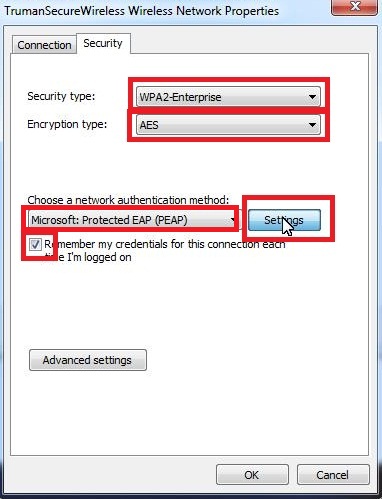
7. Once the wireless properties window has popped up select the “Security” tab and confirm the following:
-
Security Type
: WPA-2 or WPA enterprise (same as prior selected on step 5)
-
Encryption Type
: AES
-
Network Authentication
: “Microsoft: Protected EAP (PEAP)”
-
Remember my credentials for this connection
: checked
Once finished confirming settings click on the “Settings” button
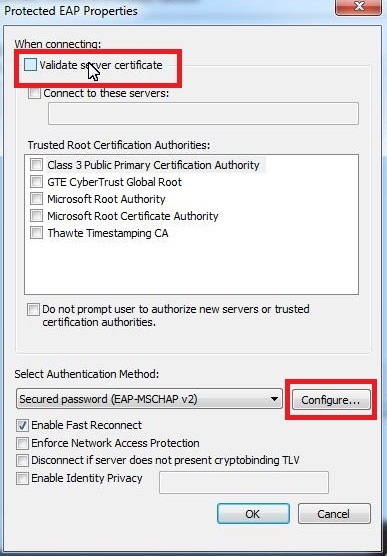
8. In the PEAP connection window make sure to uncheck the “Validate server certificate” and then click on the “Configure..” button
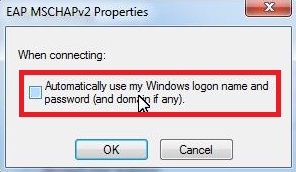
9. As the window “EAP MSCHAPv2 Properties” window pops up make sure to uncheck the “Automatically use my Windows logon name and password” selection and then select ok.
- Select
ok
on the “PEAP Connection” window.
- Select
ok
on the “Network Properties” window.
- Click close at the bottom of the “Manually connect to a wireless network” window.

10. If everything has been done correctly and closed, a pop-up on the bottom right-hand corner of the screen should pop up requesting additional information. Click on this pop-up.
ok
. Connection should complete successfully and the wireless icon at the bottom right-hand corner of the screen should show connection status.* Additional installation of Cisco Clean Access and a Anti-Virus Program of your choice will be required before connection can fully complete.- Information on Installing Cisco Clean Access can be found
– A free virus program courtesy of Truman State can be downloaded not be prompted for your username and password or to validate the server certificate every time you connect. These are only needed when you first setup the wireless connection.If you change your password in the future your wireless connection will prompt you for the new password.
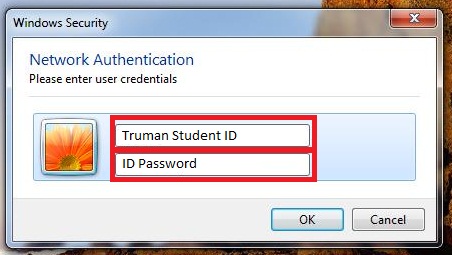
11. A “Windows Security” window should pop-up. In this window type in your Truman Student ID and then the Password that correlates with this ID (this id and password are also used for campus computers login and TruView) and select. Connection should complete successfully and the wireless icon at the bottom right-hand corner of the screen should show connection status.* Additional installation of Cisco Clean Access and a Anti-Virus Program of your choice will be required before connection can fully complete.- Information on Installing Cisco Clean Access can be found here – A free virus program courtesy of Truman State can be downloaded here .* You willbe prompted for your username and password or to validate the server certificate every time you connect. These are only needed when you first setup the wireless connection.If you change your password in the future your wireless connection will prompt you for the new password.


![Toni Kroos là ai? [ sự thật về tiểu sử đầy đủ Toni Kroos ]](https://evbn.org/wp-content/uploads/New-Project-6635-1671934592.jpg)


