
Configure CentOS 7 Network Settings Using GUI & Terminal
When you install CentOS 7 on your bare metal server, one of the first things you should do is to configure network configuration to ensure network connectivity.
You might also have to jump into CentOS 7 network config when you change network adaptors so that your CentOS 7 network config files have the correct information to ensure continued connectivity and avoid downtime.
Mục Lục
Important Changes in CentOS 7 Network Config Files
If you’re coming from CentOS 6, you should know that the network interface naming convention has changed in CentOS 7. In CentOS 6, the network interfaces were numbered, starting from 0. So, for instance, the first interface would be eth0. In CentOS 7, the naming convention has changed. Now, the first network interface is enp3s0.
This short tutorial will show you how you can easily customize network interface configuration. First, we’ll show you how you can use network manager to set up a static IPv4 address on your bare metal server. Then, we’ll show you how you can easily change these settings using the command line and GUI utility.
Process Prerequisites
To change CentOS 7 network config files, you need the following:
Bare metal, Cloud VPS, or Dedicated server running CentOS 7
CentOS 7 Network Config Through Command Line
Since many sysadmins prefer the terminal, we’ll start by discussing how you can edit CentOS 7 network config files.
Configure a Static IP Address
You can easily set up a static IP address by making changes to the network script used by the network interface. This involves the following steps.
Step 1: Find the Right Network Interface
Before changing anything, you need to find the correct network interface. This is important because a bare metal server could have multiple network interfaces connected to different internal or external connections. That’s why you need to find the name of the network interface that you wish to modify.
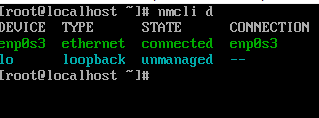
For this, we’ll use the # nmcli d command. This will list all network devices and relevant details in the terminal.
Step 2: Access Network Configuration
Use the following command to access the network configuration for the network interface.
# vi /etc/sysconfig/network-scripts/ifcfg-[network_device_name]
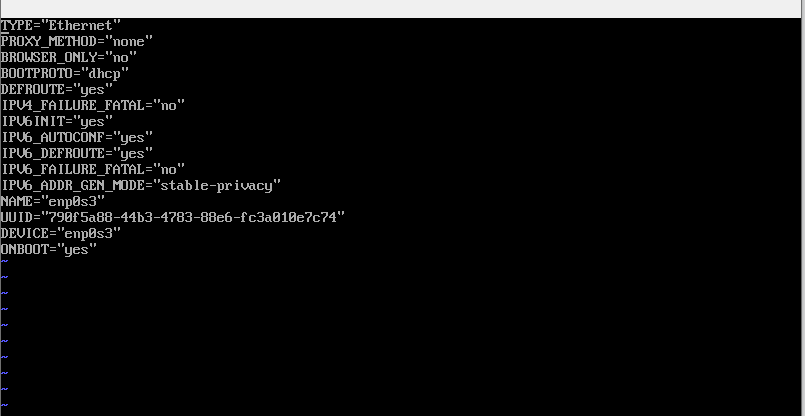
Step 3: Make the changes in the Network Interface Configuration Details
Now, to set the static IP for the network interface, change the following values:
BOOTPROTO to “static” to change boot protocol to a static IP address
ONBOOT to “yes” to enable the network interface at the system startup.
Next, you need to add information about the IP address and the DNS:
- IPADRR (The static IP address assigned to the network interface)
- NETMASK (The network mask)
- GATEWAY (The gateway information)
- DNS1 (The primary DNS server IP address)
- DNS2 (The secondary DNS server IP address)
Important: You can get information about the gateway and DNS by using the command
# nmcli dev show [network_device_name]
Save the file and exit the text editor.
Step 4: Restart the Network Interface
While the information you added is saved to the network configuration file, the changes are not in use because the network interface is still on the old settings. Therefore, you need to restart the network for the new settings to take effect.
Restart the network interface with the following command in the terminal:
# systemctl restart
CentOS 7 Network Config Through the GUI
If you want to use the GUI to change the CentOS 7 network config files, you can use the Network Manager utility. The major details of the process are similar to what we mentioned earlier.
Configure a Static IP Address
The essential steps of configuring a static IP address via the GUI are similar to what we discussed earlier.
Step 1: Open the Network Manager
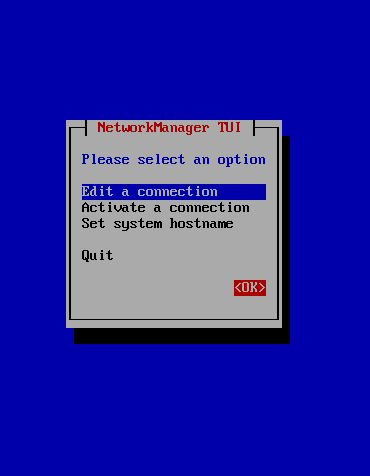
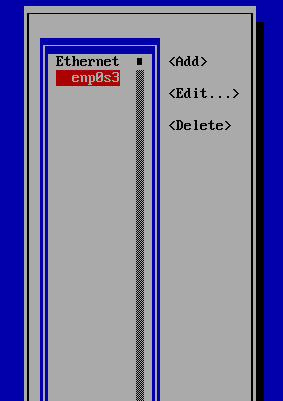
In the terminal, type nmtui to launch the Network Manager. Next, in the NetworkManager TUI screen, select Edit a Connection.
This will open the list of all available network interfaces. Next, select the network interface you wish to modify.
Step 2: Make Changes to the Network Configuration
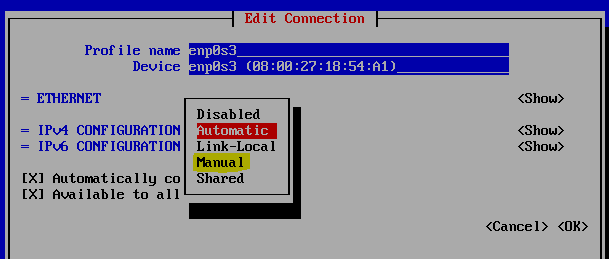
To set a static IP address for the network interface, select Modify. This will lead you to the Edit Connection screen, where you can see the information about the network interface. Since we wish to set IPv4 static IP, we’ll open the dropdown menu. You’ll find that Automatic is selected by default. To add the changes, change this to Manual.
Next, select <Show> to go to the network configuration options screen. Here you can set the values for the static IP address, gateway, and DNS servers. After that, enable the options for Require IPv4 addressing for this connection and Automatically Connect.
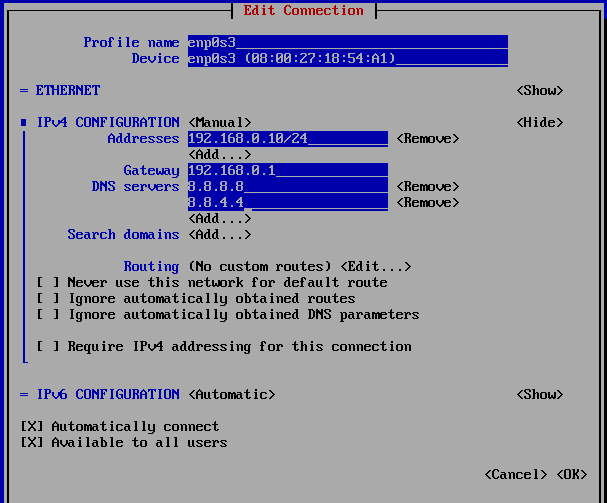
When done, select OK to go back to the previous screen. Go to the main screen and quit the NetworkManager utility to return to the terminal.
Step 3: Restart the Network Interface
Restart the network interface by using the # systemctl restart command.
Validate The Network Settings
After making the changes and restarting the network interface, it is important to check if the new settings are in force. For this, you need to check the current information by using the command:
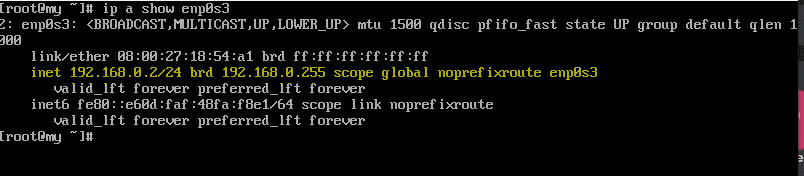
# ip a show [network_device_name]
This will display the current settings of the network interface.
Conclusion
This short tutorial demonstrated how you could easily change the CentOS 7 network config files. While we showed how to set a static IP address for a network interface, you can use the process to set other options, such as a DHCP configuration or setting the system’s hostname.


![Toni Kroos là ai? [ sự thật về tiểu sử đầy đủ Toni Kroos ]](https://evbn.org/wp-content/uploads/New-Project-6635-1671934592.jpg)


