
Pi Network KYC Verification: Steps To Success KYC In 2023 – MoneyBinds
Having a KYC verified account gives you more privileges in the Pi Network.
KYC (identity verification) is a prerequisite for Pi Network users to begin transferring their Pi tokens to the mainnet. KYC verification is, in fact, the sixth step on the Mainnet checklist to transfer your Pi coins to the Mainnet. As a result, individuals who haven’t completed their KYC should do so as soon as possible in order to benefit from their earned Pi coins in the future.
The KYC process is not very difficult to comprehend. However, a significant number of users are experiencing problems and have doubts about the Pi KYC system, such as how to get the “Pi KYC Verification” option, what type of ID document is required in the Pi KYC, and more.
Don’t worry if you are also suffering. We will walk you through everything you need to follow to successfully complete your KYC verification in this extensive tutorial.
Mục Lục
Comprehensive guide to complete Pi Network KYC verification
For obvious reasons, KYC verification requires a few legal documents, and the applicant must fulfill certain criteria. Therefore, it is essential for you to know the requirements before proceeding. Here are those:
Requirements and eligibility criteria to apply for Pi Network KYC
- Government-issue ID (any one): You must have the original copy in hand as you will be asked to capture the picture of the ID, instead of uploading an already saved ID image.
- Passport (recommended)
- Driving License
- National ID
- You must be 18 years old or over
- Be ready for a liveness check: In this, you will be asked to take your phone’s camera in front of your face and the system will automatically capture your face. This photo will be required to verify that you are the one whose ID has been submitted. Therefore, make sure your face is clearly visible and matches with that on your ID before starting the verification process.
- Approximately 5 minutes: It takes about 5 minutes to complete the KYC application.
Note: The eligibility, requirements, and availability for Pi KYC verification may differ from what is shown in this article according to your country or location.
Previously, KYC for the cryptocurrency platform was being carried out via a third-party application called “Yoti.” The identity verification was only available to a limited number of users.
However, now Pi Network has its own platform called Pi Browser for verification, Mainnet, and more features and services. The developers have created a KYC solution that enables a larger number of users to complete their KYC.
Now, let’s move on to the steps you need to follow to pass your KYC handily.
Video guide on how to complete KYC in Pi Network
Steps to complete the KYC verification process
Step 1: Install the Pi Browser app (it is available on the Google Play Store and the Apple App Store). Or proceed to step 2 if you already have it on your device.
Step 2: Open the Pi Network app and head to the Mainnet section. You can find the Mainnet option in the side menu.
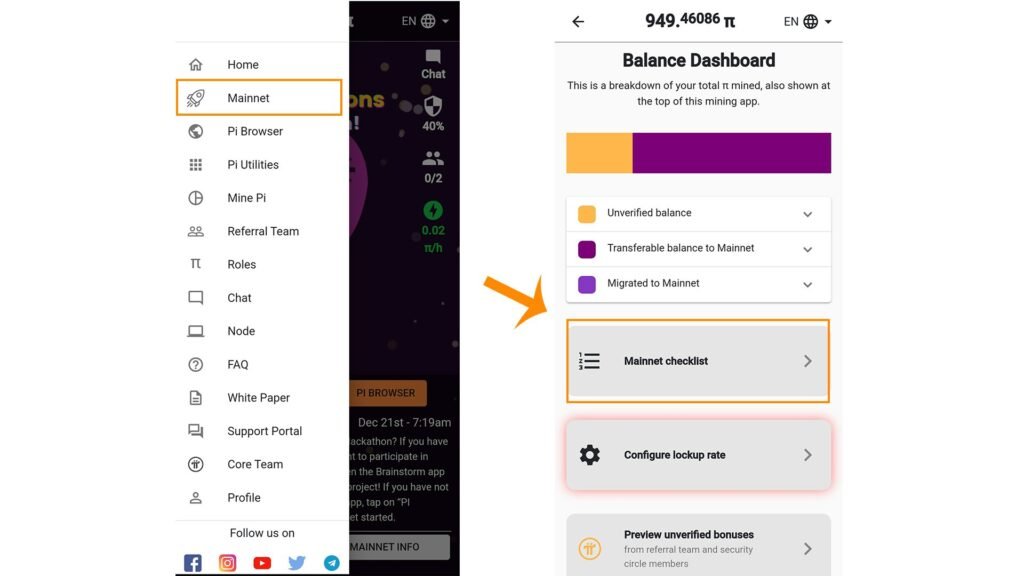 Image via Moneybinds
Step 3: Subsequently, tap on the Mainnet checklist and complete all the tasks up to the KYC verification task.
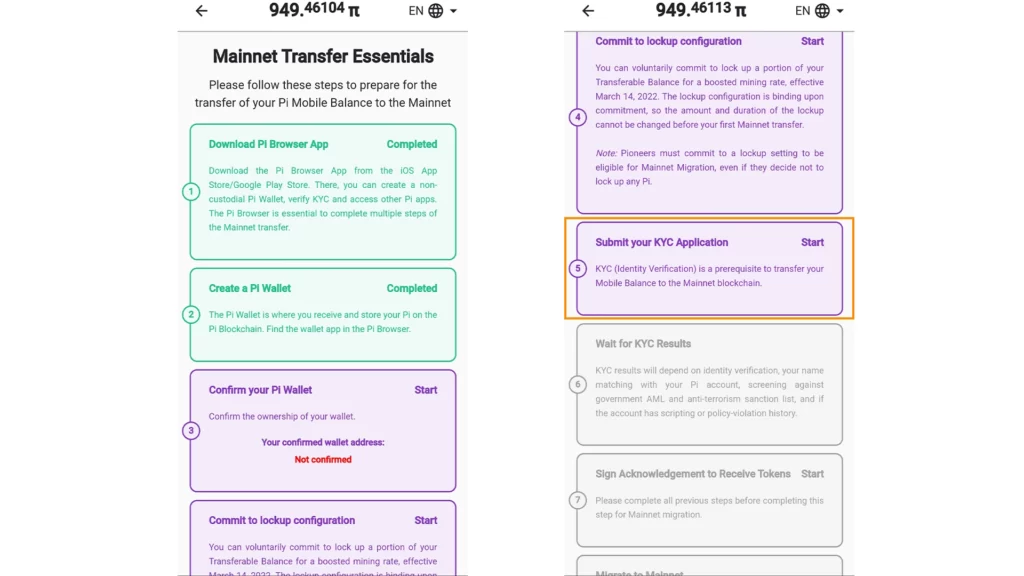 Try to make all tasks before the KYC green (Image via Moneybinds)
Step 4: Tap the start button in the KYC area once you have finished the tasks listed before the KYC verification. If it doesn’t work, manually enter the “kyc.pi” area in the Pi Browser app to launch the application process.
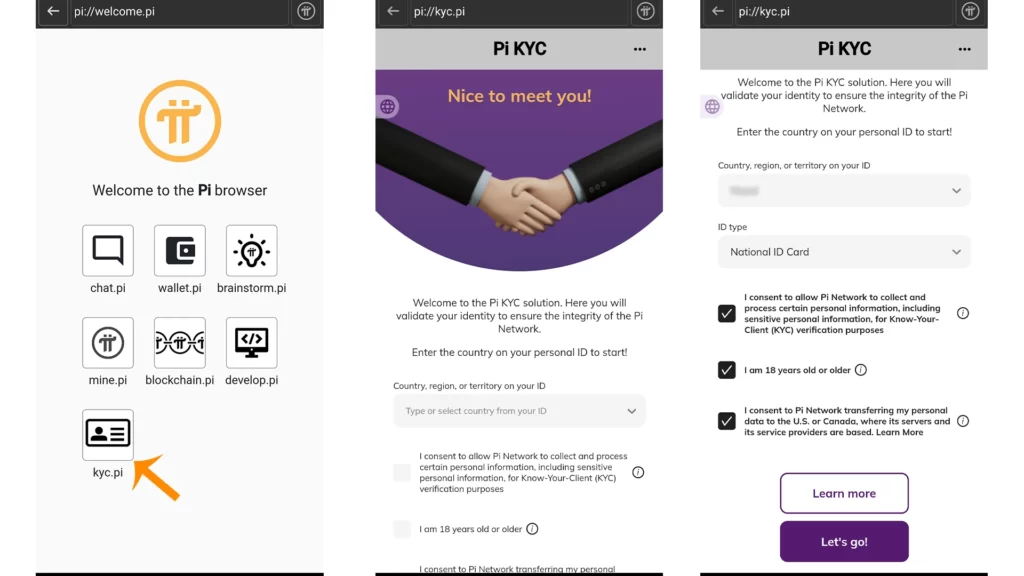 Image via Moneybinds
Step 5: On the first screen after entering the KYC section from the Pi Browser app, you will be asked to choose the country from the drop-down menu. Select your country as mentioned on the government-issued ID.
Step 6: Subsequently, you will have to choose the type of ID document that you want to use for the verification.
Step 7: After this, you will see four slides, providing you with instructions on how to use the ID and how to proceed properly. You should tap the next button while reading them carefully.
Step 8: Now, you will spot an “Add front photo” option on the screen. Tap on it, and the camera will turn on. Simply capture a clear image of the front of your ID. If your ID also has a back with the necessary information, then also add a back photo.
 Image via Moneybinds
Remember to capture the image or save it in a horizontal position.
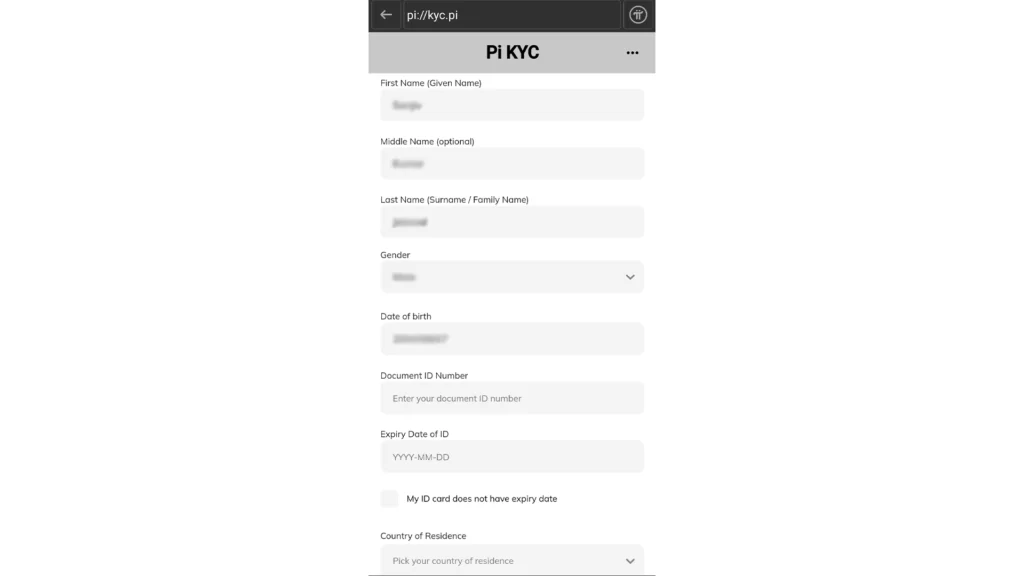
Step 9: After submitting the ID photo, you will be redirected to a form that you need to fill out with the same information as on the ID document.
 Fill out the form carefully (Image via Moneybinds)
Step 10: After you submit the form, it’s time for a liveness check to confirm that you are a real person. Simply click on the “I’m Ready” button, and the front camera will turn on automatically. You need to hold the camera in front of your face so that your face is clearly visible.
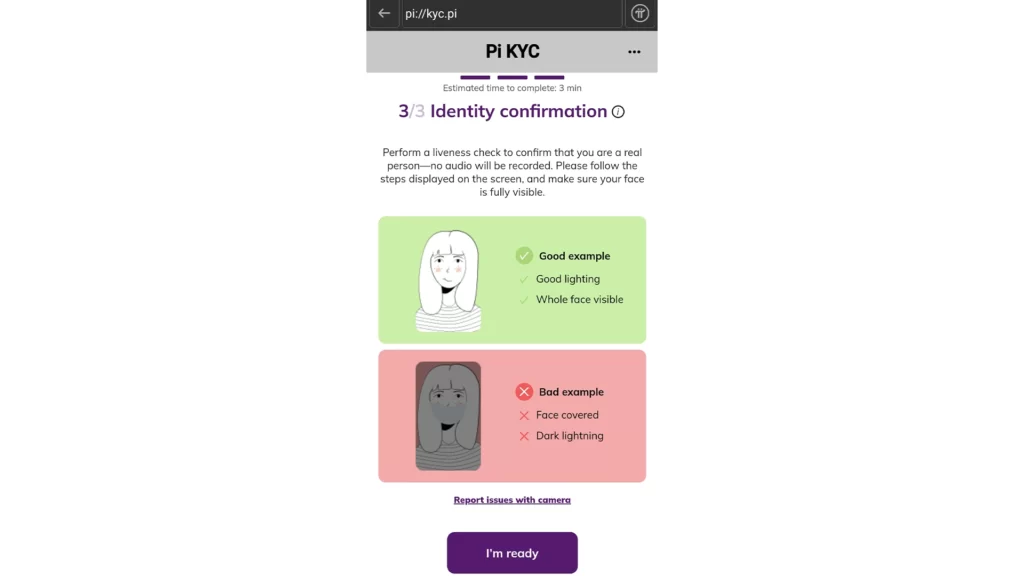 Liveness check confirms that you are a real human and also helps in verifying you (Image via Moneybinds)
This is all you need to do to verify your KYC on the Pi Network.
How much time does it take to be KYC verified in Pi Network?
After you submit your application, it can take a few days or even months for a response about your KYC application. All you need to do is wait for a change in your application status. It will either be accepted or refused. In case your document is not clear and the automated machine is not able to scan key details from your ID, you may be asked to capture your ID again.
How to check Pi Network KYC status?
To check the status of your KYC application, you can visit your profile in the Pi Network app. You will see a green checkmark alongside the identity verification (KYC) label, indicating that your KYC has been verified. If it shows a loading animation, then your application has not yet been reviewed and is pending.
Alternatively, you can also know whether you passed the KYC by going to the Mainnet checklist section. If the “Wait for KYC results” tab is green, this means your KYC is verified.
How does the Pi Network KYC application review process work?
Due to the tremendous size of the Pi community, it is highly impractical for the developers to perform identity verification for each Pioneers. As a result, they developed a KYC verification system whereby those who have already verified their KYC assist in the verification of others.
Once your documents are submitted successfully, the application goes to someone who is already KYC-verified. After being reviewed by the said person, the application is passed on to another KYC-verified person. If your application passes both of the verifiers, you will pass the KYC.
In fact, the verifiers will be citizens of your own nation, making the verification process considerably simpler and quicker.
Disclaimer: This article solely reflects our personal experience, research, and opinion.


![Toni Kroos là ai? [ sự thật về tiểu sử đầy đủ Toni Kroos ]](https://evbn.org/wp-content/uploads/New-Project-6635-1671934592.jpg)


