Import your WordPress blog into HubSpot with WordPress connect
The WordPress connect feature is the easiest way to import a WordPress blog into HubSpot. All you need is the URL of your blog’s homepage. The WordPress connect feature uses the open WordPress REST API to gather your blog content for import quickly, easily, and accurately.
Before you get started
- When you create your HubSpot account, there will be a new default blog in your account you can use to import your blog posts.
- You’ll use your blog homepage URL to import your WordPress blog in HubSpot.
- The WordPress connect feature isn’t compatible with custom post types in WordPress.
- If you run into any problems using the WordPress connect feature, review other methods for importing your WordPress blog into HubSpot.
Import a WordPress blog
- In your HubSpot account, click the
settings
settings icon in the main navigation bar.
-
In the left sidebar menu, navigate to Website > Blog.
-
In the Current view section, click the first dropdown menu and select Import blog.

-
On the import overview page, click Import new blog in the top right. If you’ve already imported a blog, click the Start new import dropdown menu instead and select Blog posts.
-
Select the WordPress connect option, then click Next.
-
In the Blog homepage field, enter the URL of your blog’s listing page.
Please note: if you see the message “This blog is not compatible with WordPress Connect” it means we cannot get a successful API response from your WordPress blog. You can import your WordPress blog with an XML file instead. The most common reasons you may see this error message are:
- The blog you are attempting to import isn’t a WordPress blog.
- You are using one or more WordPress security plugins that restrict access to the WordPress API.
- Other server configuration issues prevent us from reaching the site (e.g., an expired SSL certificate).
- HubSpot blog dropdown menu and select the blog where the imported posts will be hosted. If you need to create a new blog, click Create new blog instead. Learn more about
Click thedropdown menu and select thewhere the imported posts will be hosted. If you need to create a new blog, clickinstead. Learn more about creating a blog in HubSpot
- In the lower right, click Copy blog posts.
The import process can take some time, depending on the amount of information being imported. The blog importer tool will collect the following elements from each blog post:
-
- Title: the title of your blog post.
- SEO title: the title that appears in the browser title bar and in search results.
- Author: your blog post author.
- Publish date: the date your blog post was published.
- Featured image: the thumbnail image featured when your blog post is shared.
- Categories/Tags: the categories and tags applied to your blog posts.
- Meta description: the short description of your blog post that appears in search engine results.
- Post body: the main content of your blog post.
Please note: only blog posts with a title and post body set in WordPress can be imported.
While your blog posts are being retrieved, the import status will read: Preparing posts for import.
Review imported blog posts
After the tool has finished scanning your blog posts, the import status will read: Posts ready for import.
After import status changes to Posts ready for import, you can review your posts and complete your import.
- Navigate to the blog importer tool.
- In your HubSpot account, click the
settings
settings icon in the main navigation bar.
-
In the left sidebar menu, navigate to CMS > Blog.
-
In the Current view section, click the first dropdown menu and select Import blog.
- In your HubSpot account, click the
- Click
Review results. You’ll see a listing of blog posts, and any other pages collected from your WordPress website.
- To preview a specific post, click Preview to view the page and see a listing of all values the tool identified for that post.
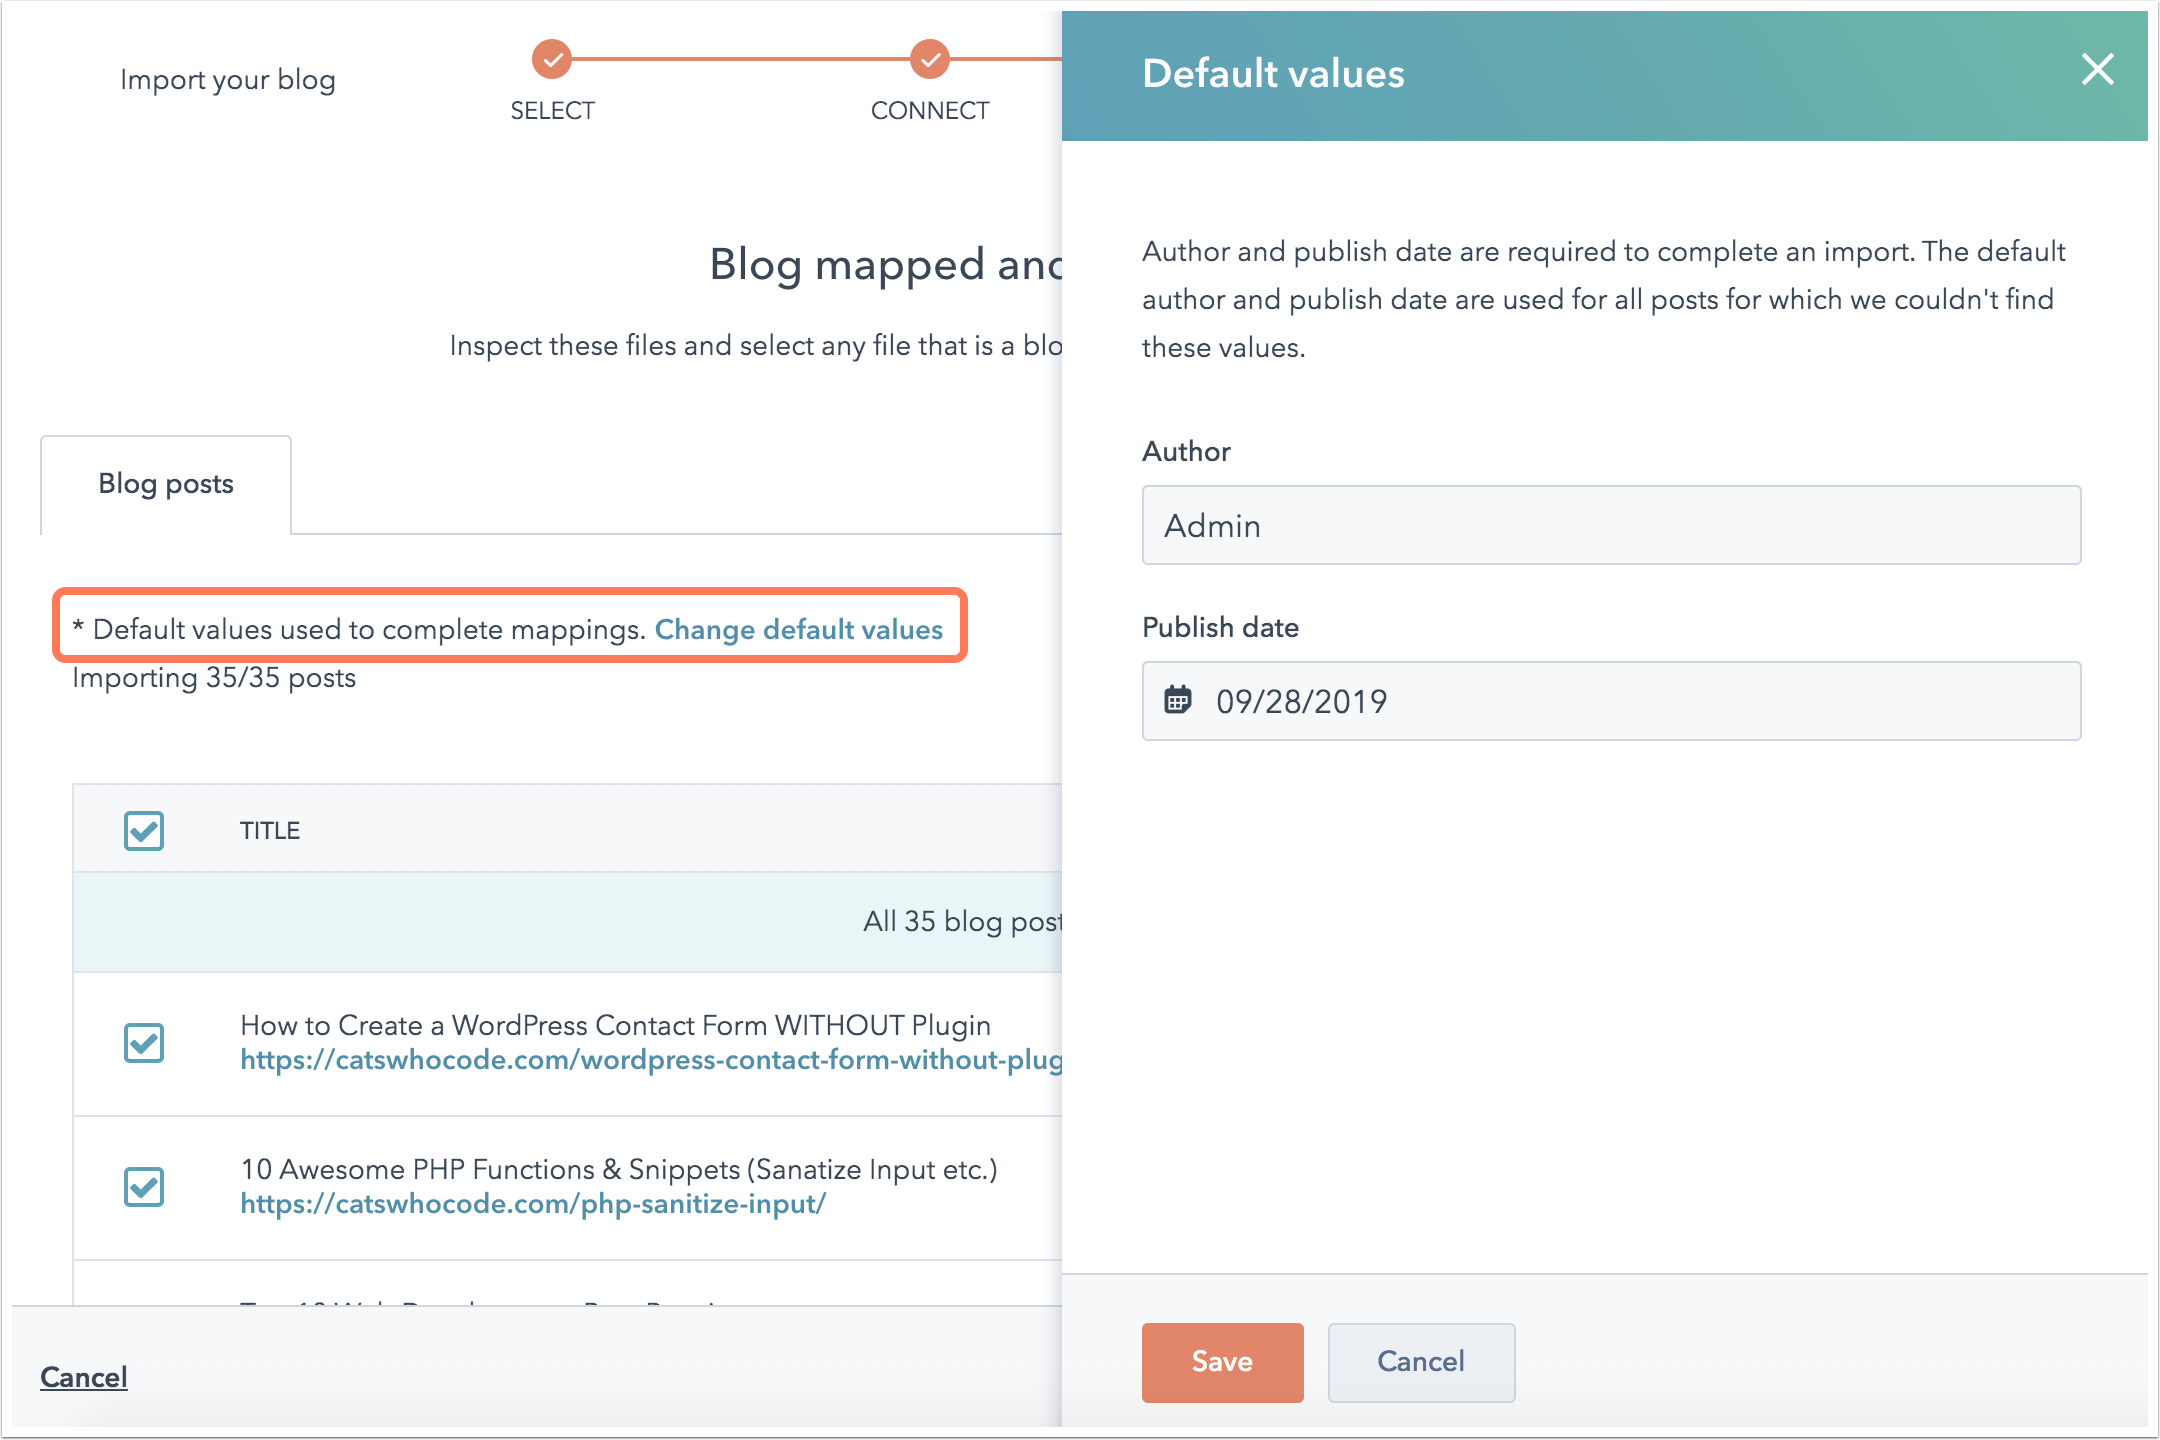
- If any default values were applied to your blog post features, you’ll see a note that reads: Default values used to complete mappings.
- To review the default values, click Change default values.
- In the slide in panel, review the default values for any blog features that couldn’t be mapped for every blog post. In this example, there’s a default value populating for the blog Author and blog Publish date.
- Update the values in the text field to the desired values.
- Click Save to apply these values to all blog posts.

- All blog posts are selected for your import by default. Deselect the
checkbox
on the left for any blog posts or pages you want to omit from your import.
- After you’ve finalized your selection, click Import.
- In the Publishing status
dialog box, select whether to import these blog posts as drafts or as live published posts. Then click Save.
Your blog import will update to Import in progress status. Once the import is complete, the status will update to Import completed.
If there are any errors during the import process, the status will update to Import succeeded with some errors. You can review the details by clicking More > View details.
Next steps: set up your blog in HubSpot
After you’ve imported your blog posts, finish setting up your blog in HubSpot:


![Toni Kroos là ai? [ sự thật về tiểu sử đầy đủ Toni Kroos ]](https://evbn.org/wp-content/uploads/New-Project-6635-1671934592.jpg)


