
How to Start a WordPress Blog in 2022 (Easy & Free)
Creating beautiful products, customizing site’s and making money with them at the comfort of your home is no longer a benefit only professional developers can enjoy. WordPress is a great platform that gives you the opportunity to start a blog.
In this article, we want to teach anybody to make the best use of WordPress. There are about 70 million posts being published each month by WordPress users.
We will explain to you some essential steps on how to start a WordPress blog without coding knowledge.
Your site needs to be online for others to be able to access it. That’s why you need a place to host the WordPress blog. This place is called a server. In the server are stored all blog files and data.
The speed and security of your site will depend on the server quality. So take the time to find a good server before launching.
So, are you ready to create your WordPress blog for free? Let’s begin.
How to start a WordPress blog: Step-by-Step Instructions
If you do not feel very secure yet that this blog will be great and produce its own money (at least) and you want to test the waters first, then you may think to start a blog free of charge is a safer bet.
Yes, that’s right.
There are two types of WordPress platforms that you can use to create a free blog: WordPress.com and WordPress.org.
The WordPress.com is an online platform administrated from others. You can buy a domain there, install a theme from the available ones, and upload your content. The blog will instantly be online from the start.
The WordPress.org can be downloaded on your computer and installed in any host. Like installing WordPress locally or online hosting service. In this case, you can control server requirements and install any type of theme you want. Be it a premium or free theme.
As tempting as it is to not pay for blogging platforms like WordPress.com, you need to keep in mind that nothing good is ever free.
So these platforms contain limitations which will definitely become a burden as your blog grows and starts to pour in money:
- You cannot install premium themes, so you are left with only the choices WordPress.com has for you.
- It also restricts the displaying of ads in addition to important widgets, like the ones for party links and giveaways.
- Switching to another platform will not be an easy process. Something that seems so small and insignificant at the start, can become a great burden later on.
So, even if you are not sure how this blog will go but have started with the desire to make it grow, then the best route is the self-hosted WordPress.org.
Some of the most notable sites you use every day are built with self-hosted WordPress platform.
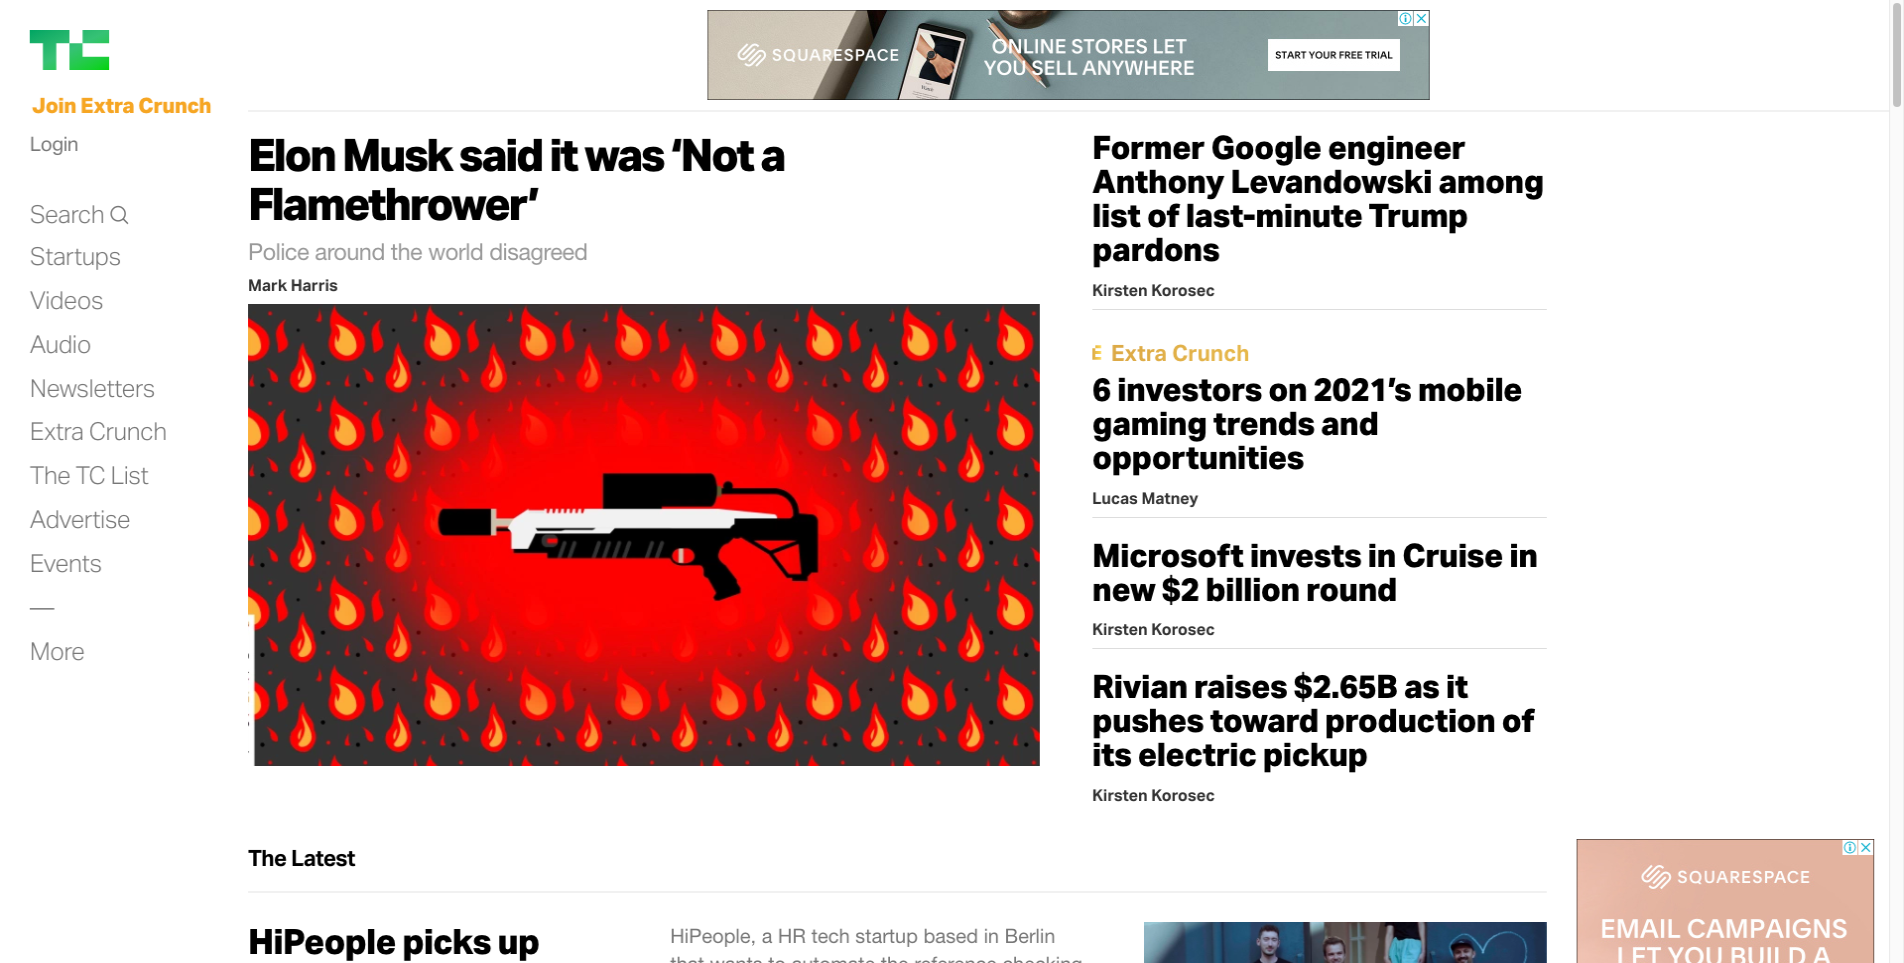 Techcrunch – built with WordPress
WordPress.org has a large community supporting and building more and more useful tools for it. Some of which you will need to make use of later on:
- Countless plugins (that help you add many great features)
- Professional blogging themes
- Ecommerce Add-ons
- Marketing, security and many more.
WordPress is like playing with legos!
You get separate blocks (that someone else builds, isn’t it great?) attach them to one another and create a unique piece.
Next step, create a WordPress blog!
Mục Lục
Step 1. Choose your blog name
Do you already have the name? If no, read the next section. If yes, read the next section..again. You may want to reconsider your chosen name.
The name is maybe the most important part of your blog. It needs to be easy to remember and at the same time reflect the main content (purpose) of the blog.
In the best case, it will transform into a brand name so be careful when choosing it. Take your time and do research.
When trying to register the blog name as URL in the domain, you may be surprised to find out it could be already taken. And even if you change the domain suffix (to example .org/.co/.net etc), that’s still not enough.
If another site with your name and the .com suffix exits, all visitors intended for your blog will pass first to that site and no one can bet they will make it to yours after.
Since the .com is the most commonly suffix used, it’s best to find a blog name that is free and can be used with .com.
If you have difficulties on choosing the best domain registrar, consider these tips:
- Use a .com domain if possible. As mentioned before, people’s first search online is done with .com. So it’s better to be right there, in their google/yahoo/bing search list first.
- Use only characters. Avoid numbers and hyphens in your domain name. They are often confusing to people and harder to remember.
- Short names are preferable over long and descriptive. Think as if you are finding the name of a brand instead of a blog. Since it will also be incorporated in the site’s logo, it’s better to be as short as possible.
Your domain name needs to stuck on people’s mind easy so they can find you fast and frequently.
To help you with ideas and keyword combinations, there are some sites:
Bust A Name – Here, you can type in some keywords that best describe your blog, and it will come up with available combinations using those words.
Google – In my preference, i’d like to not have to google a site first, in order to find it’s right url.
KnowEm – Use a social media profile checker app like So you’ll find out what social media profiles are available with your name. Even if the exact name may not be available on many social networks, you can still create a profile with a slightly modified name.
Step 2. Setup WordPress blog hosting
The hosting is where WordPress will be installed and from where all site’s administration will happen.
Purchase hosting
The host is a place online, where all your site’s files and data are stored. The hosting company owns servers online that allow you to make use of this space.
A good and reliable company for hosting is vital for starting a blog. Your host is actually a place where your blog nourishes. It’s the place where all the content and files related to your blog will be kept.
If the host is problematic than surely your blog will face problems. Therefore, make sure that your host is helpful and offers outstanding services and customer support.
Our recommendation: Bluehost (Get Bluehost with our discounted price).
WordPress recommends very few hosting companies and Bluehost is one of them. It charges on per month basis and only costs $2.95. They provide one of the best customer support, hosting services and reliable yet inexpensive hosting. Another great hosting option is Siteground. If you are unsure which one to choose check our detailed review Siteground vs Bluehost.
If within 30 days of subscription, you feel unsatisfied with their services, you can cancel your subscription with full refund.
How to start & setup a WordPress blog on Bluehost
Follow the steps below to setup and configure your Bluehost account. These are very detailed steps, however more informations are also available in the host’s Knowledge Base. As well as their support.
Step 1 – Direct to Bluehost. The affiliate link on our website will navigate you to Bluehost. Signing up with this code have extra perks for you. (Thank you for trusting us!) Click “Get Started” button.
Step 2 – Select a plan that suits you the best. Most of the people choose the basic plan for starting out. So instead of starting in a free host and when the site’s grow, take on the burden to move all theme files and data to a complete new host, you can simply upgrade your hosting plan.
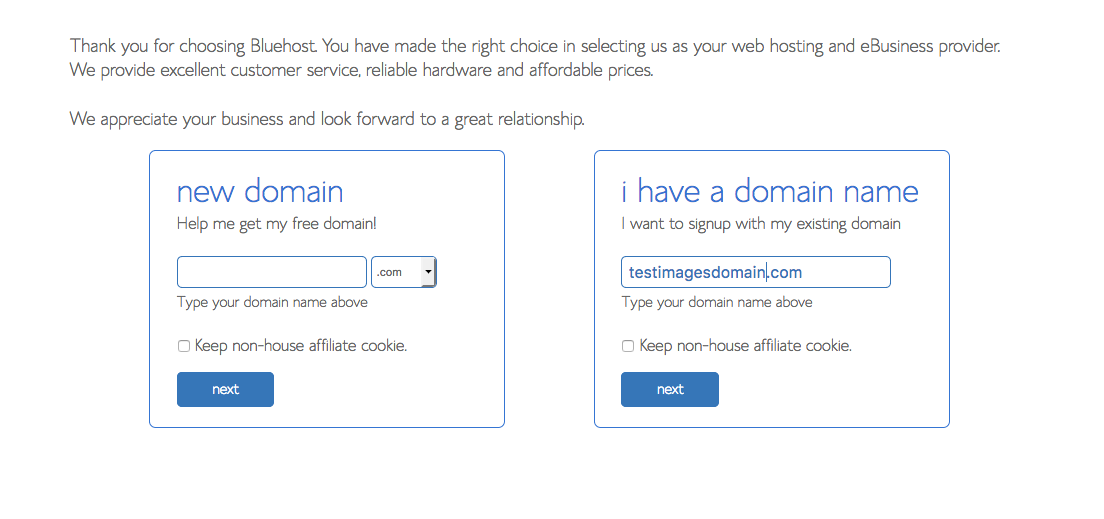
Step 3 – Now, you already have a domain name. New Bluehost accounts can register your domain name for free. To register new domain name go to the box with “new domain” then choose “next.”
To register with a domain name already registered, go to the options, “I have a domain name” and add it here.
Notice: If you still haven’t decided on a domain name by the time you are here, don’t worry. You can still proceed with other steps and come back here in a later time. To skip domain name registration, move the mouse pointer as if you’re about to leave current page (but you’re not actually leaving!), in this way, a window will pop-up, with the notice: “Can’t decide on a domain name? Choose later” Select this option and Bluehost will allow you to select the domain name at a later stage. For this, Bluehost will credit your account.
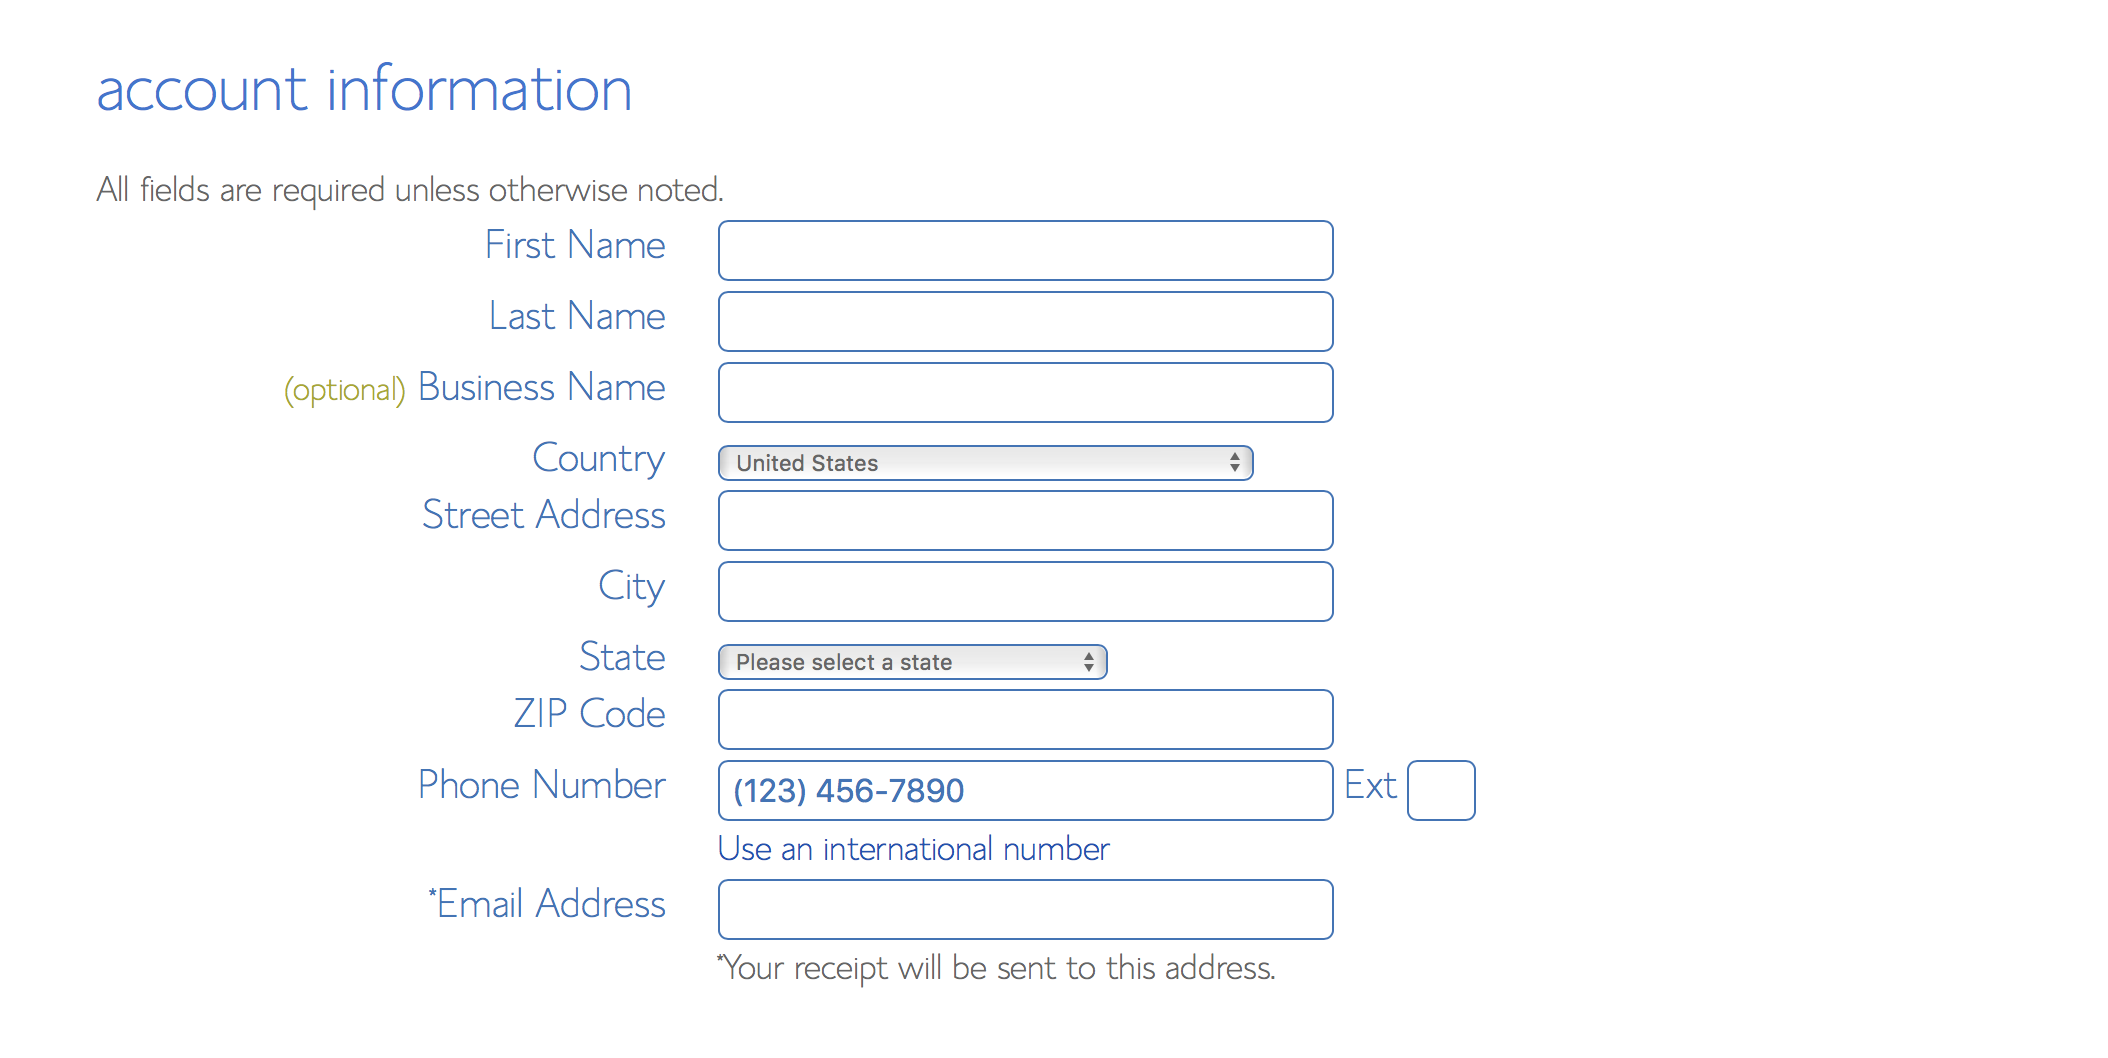
Step 4 – Enter the contact and account information.
Step 5 – Find the section of “Package Information”. You will find some payment plans to choose from. When you select 36 month, you will get the cheapest rates for monthly plans.
For this plan, you save in each month payment but you have to pay in advance for all 36 months. This is hosting prepayment. Full refund is possible within first 30 days.
However, if you find that the upfront price is beyond your affordability, you have another option, like pre-paying only 12 months.
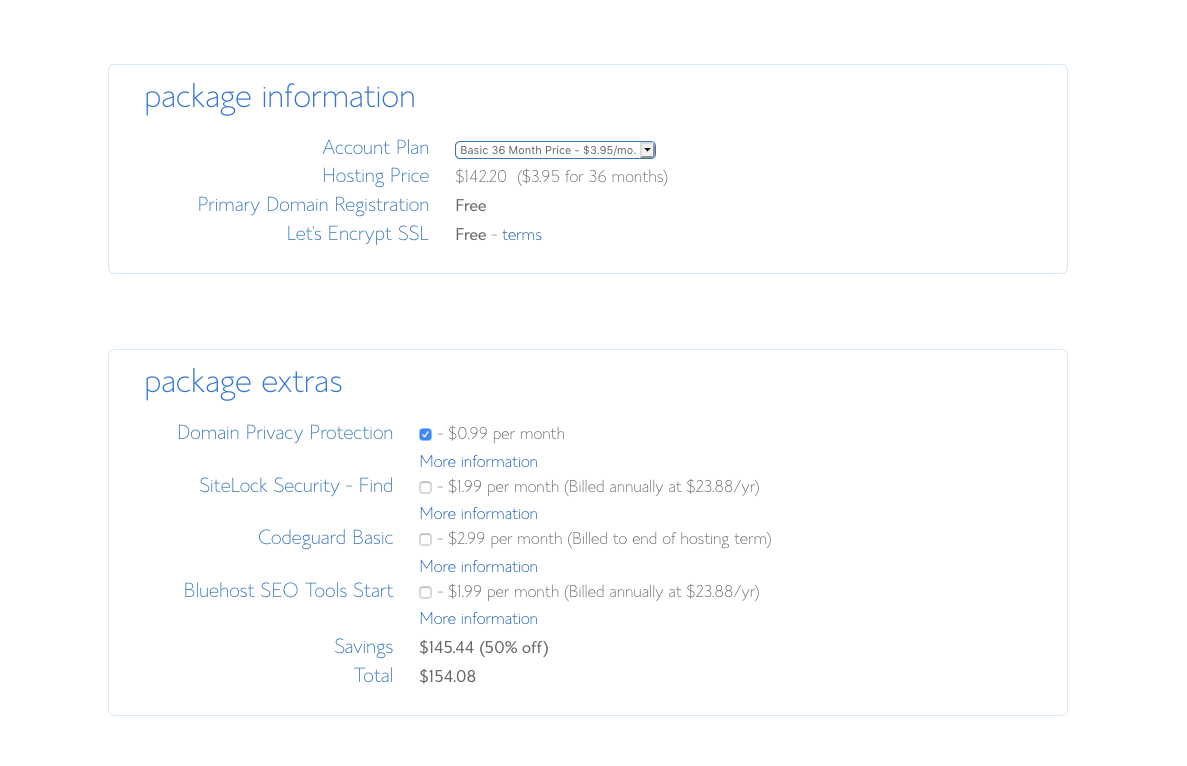
You can purchase some more useful services along with hosting space.
The most recommendable one is the privacy service, “Domain Privacy Protection.” It’s important because it secures all your information like phone number, address and name from public access.
This list can be accessed even later on. In case you decide to add some more services to your account.
Note: The most important side-services you must have are backup and security of data. It is strongly recommended setting up a backup system somewhere else rather than within your host. So whatever happens to the host, you can always access a backup of the site from another location.
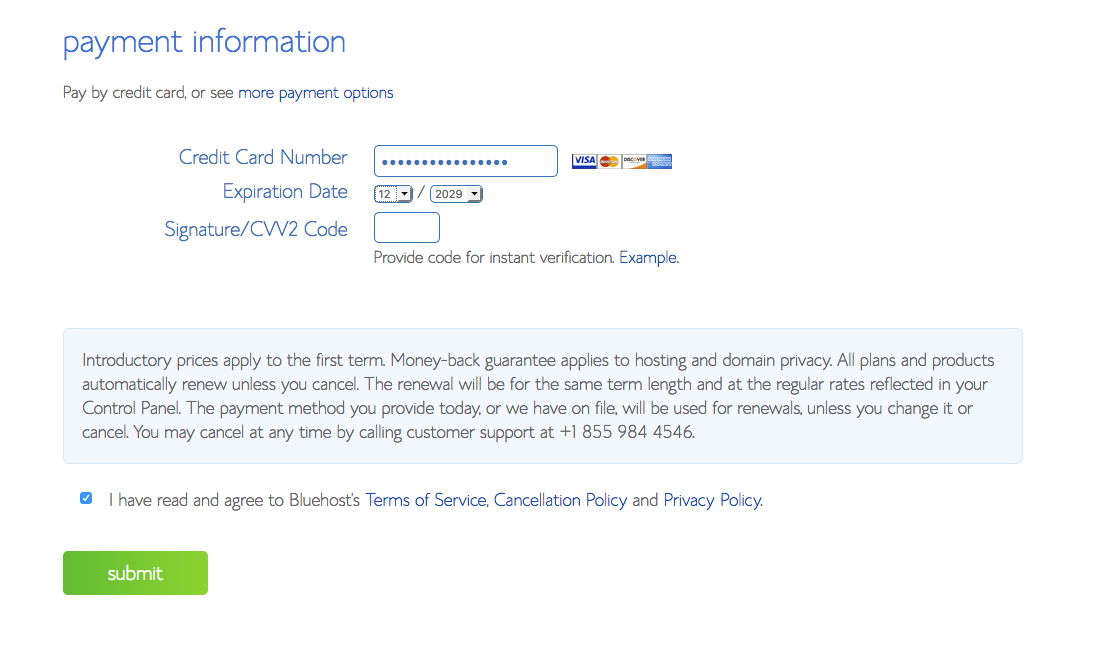
Step 6 – Enter information for billing and then agree to Terms and Conditions and click submit.
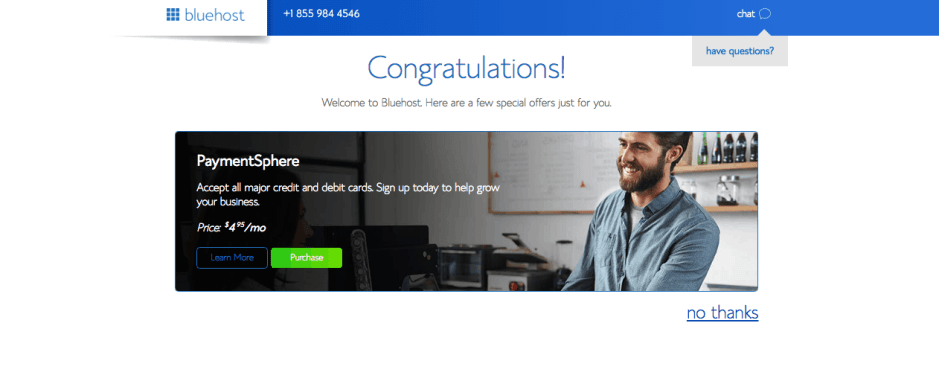
Step 7 – In this phase too, you can purchase some more services here, but these are not relevant for now and you can always add them later. Proceed with clicking “No thanks.”
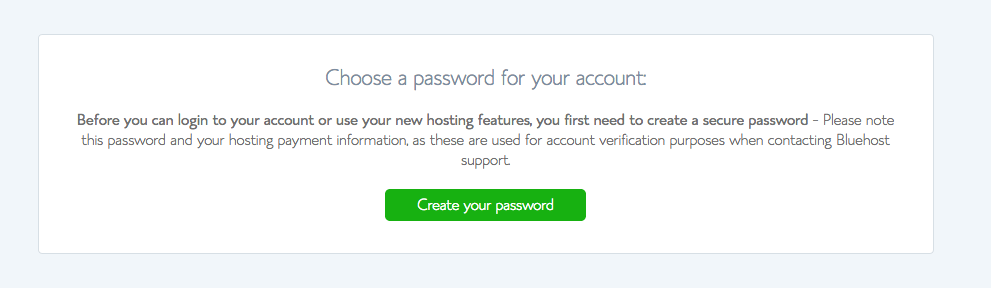
Step 8 – All done! Now you have your own Bluehost account officially. Next, set a password.
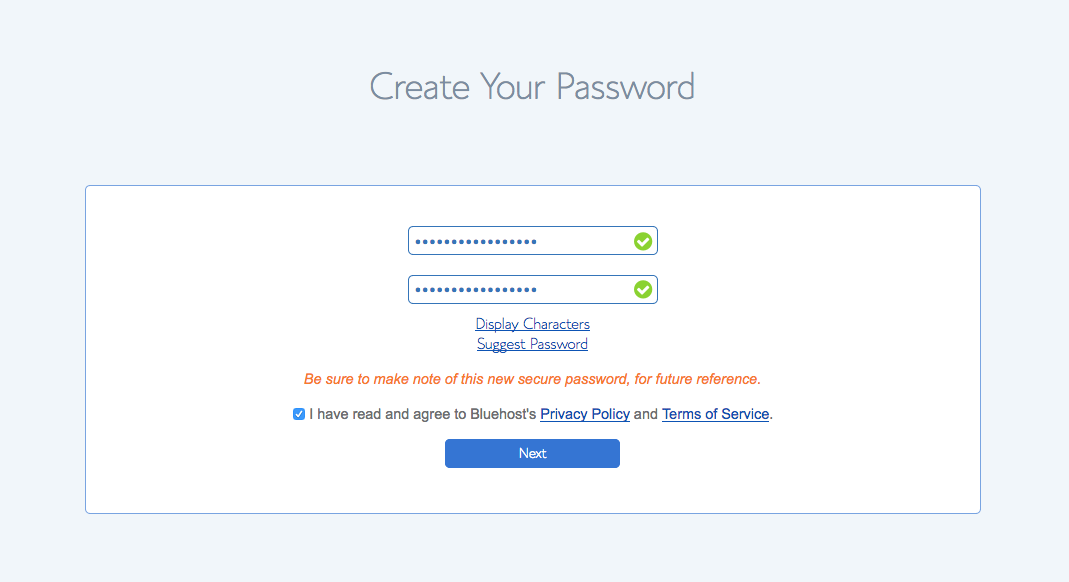
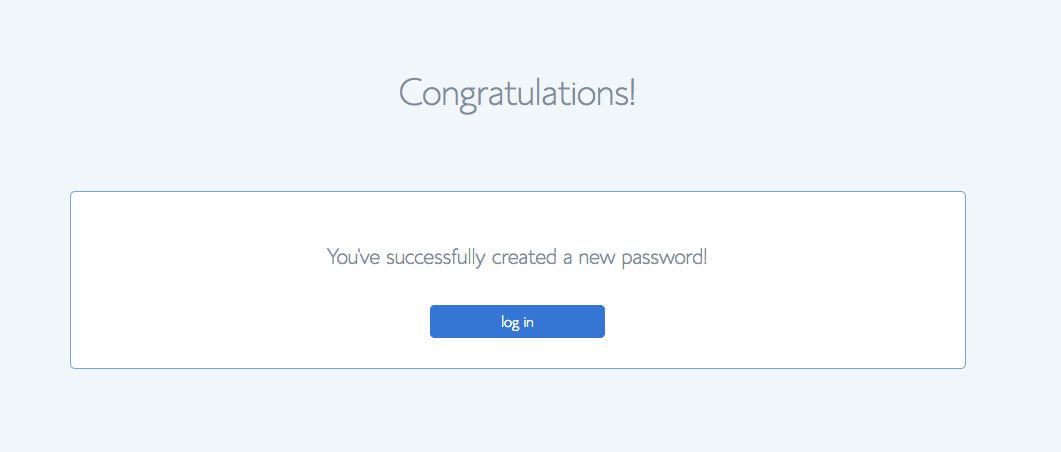
Step 9 – Set your password for Bluehost account. The password should be strong, including symbols, capital letters and numbers if possible so your site is as protected as possible. Tick mark “agree” on “Privacy Policy and Terms of Service” then click “Next”.
Step 10 – With the recently created password, login to your account. Next, click on button, “log in” in blue.
It will automatically direct you to the Bluehost portal, where you can administer the account. If it doesn’t just move to log in with the tab, “hosting” instead of “webmail, as pictured in the screenshot below.

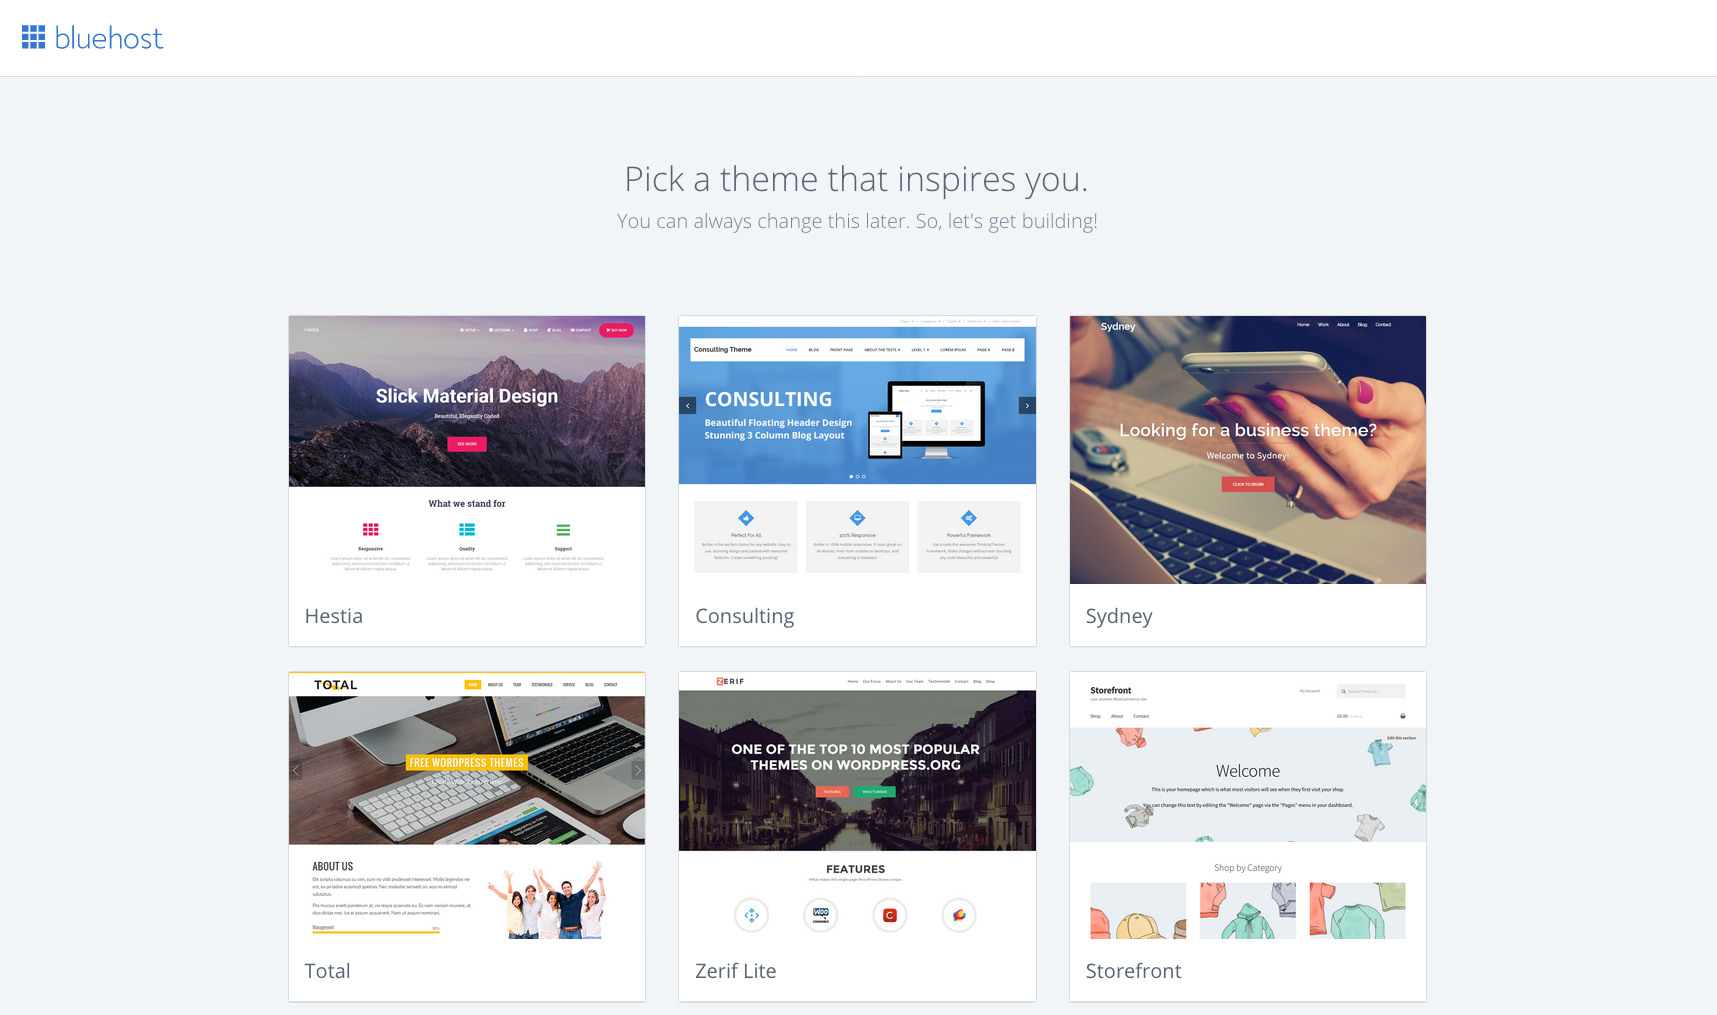
Step 11 – The first step when logging in is creating a website using WordPress is of course, installing a theme.
Then you can build on top of it. Customizing the demo content. Bluehost will offer you to choose from a bunch of free themes, when you first open the account.
However, this is an optional step and you can totally skip it. You may install a theme in a later time or import a premium theme of your own choice. Click the “Skip This Step” to skip choosing a theme at this time.
Step 12 – Bluehost will automatically install WordPress for you. This is WordPress.org that is being installed. This means you have total control of your site and themes.
Excluding, of course, the server limitations of your hosting plan. When the install is finished, this is what you will see:
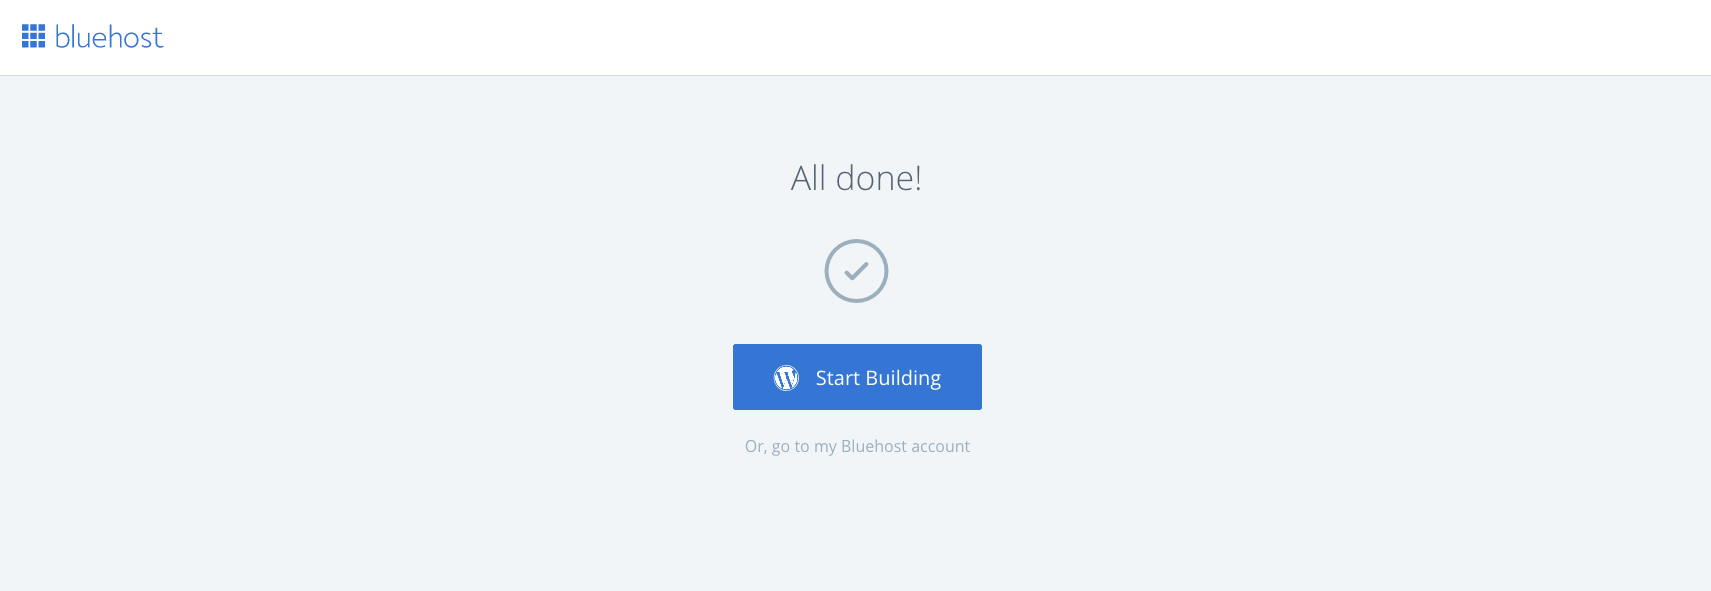
Step 13 – Tap on to the “Start Building” button in blue. Here, you will find this screen next. This is Bluehost admin site.
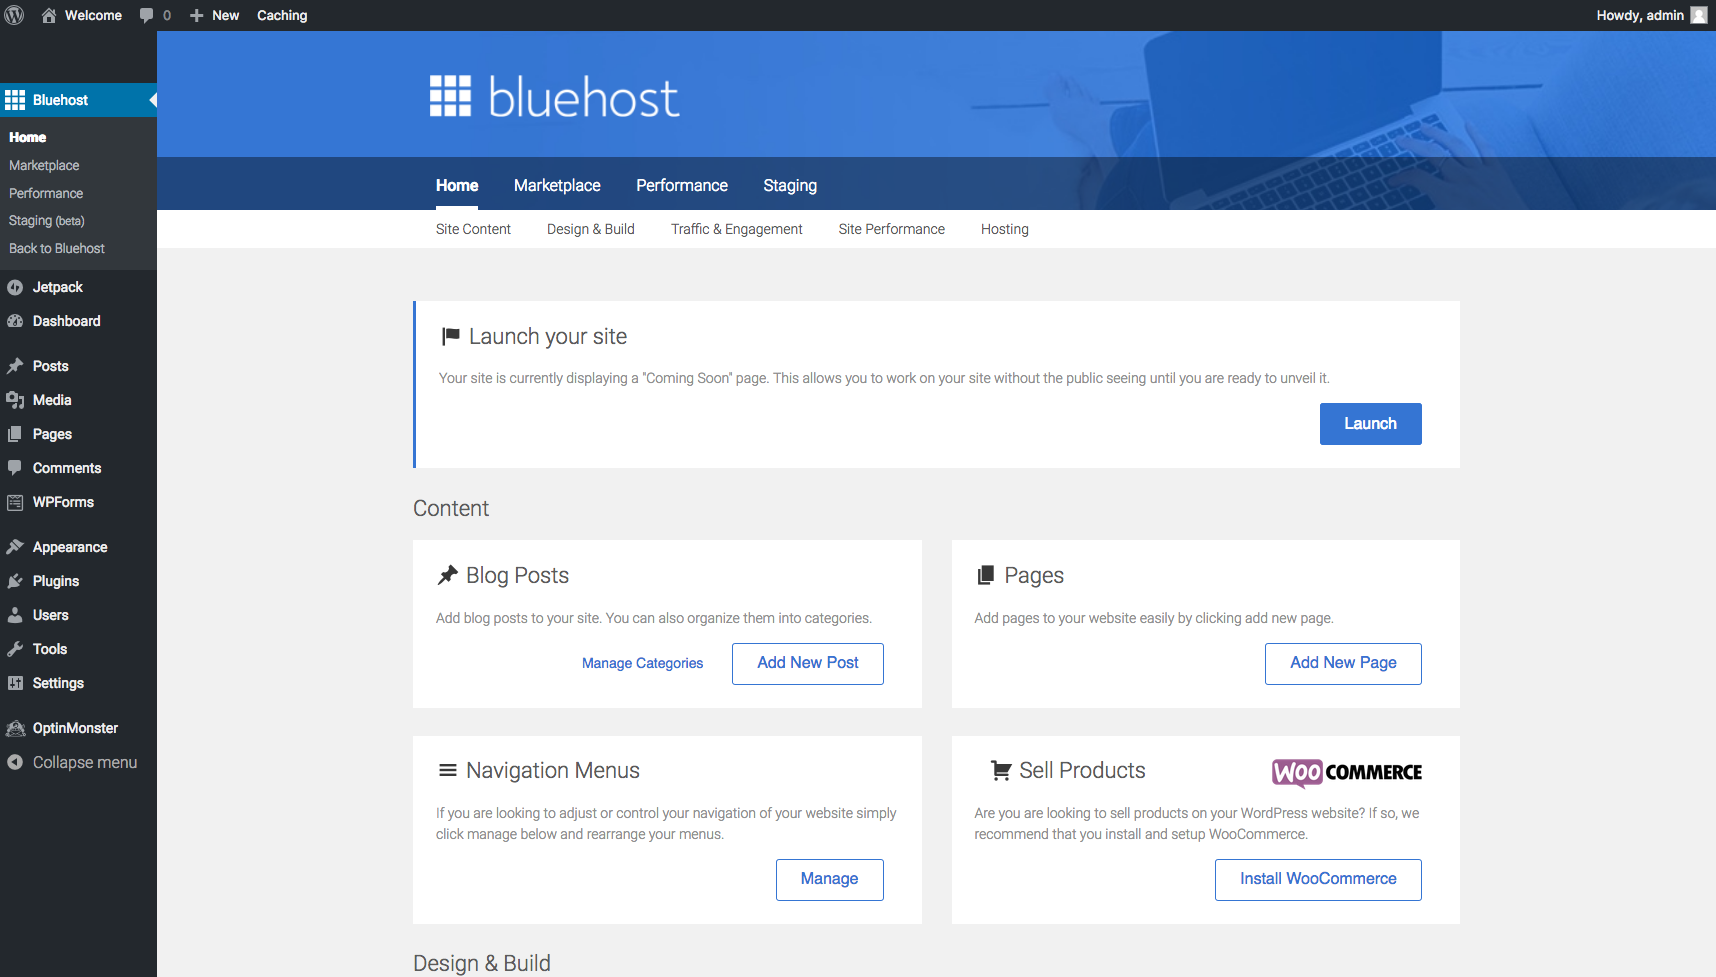
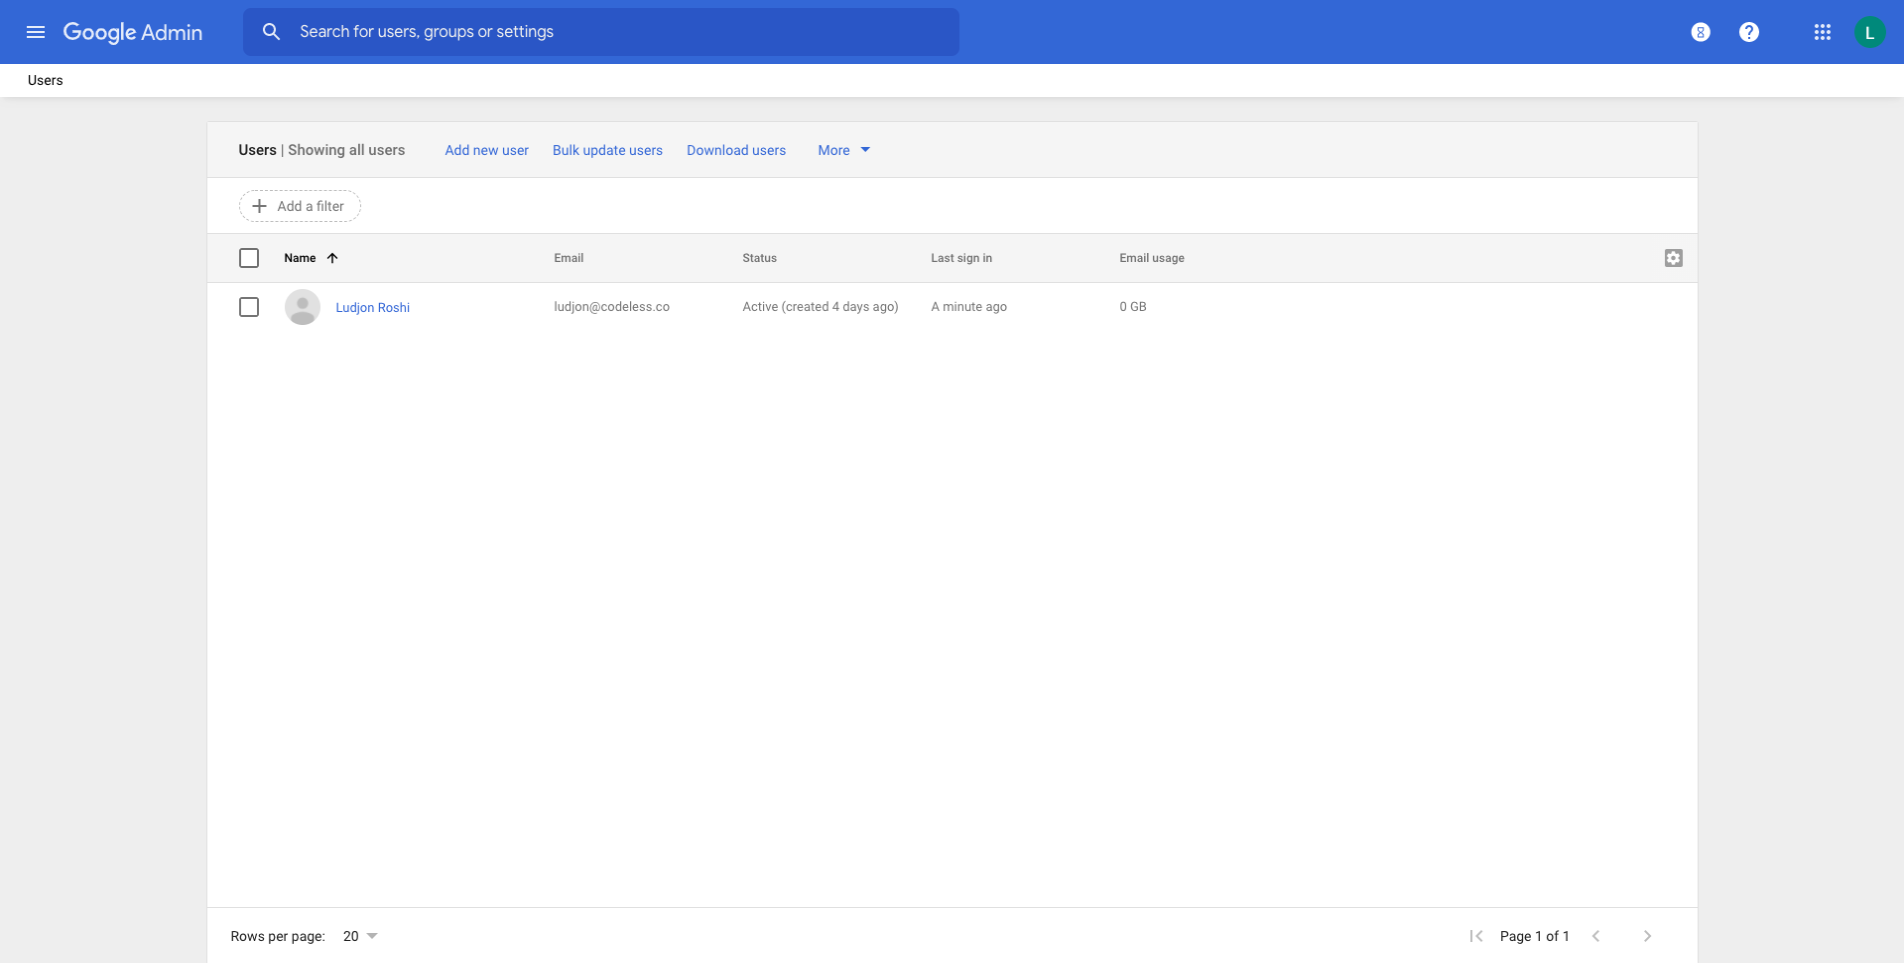
Step 14 – In the left sidebar menu, go to the “Users” menu item. Hover over it with your mouse to choose the option, “Add New”.
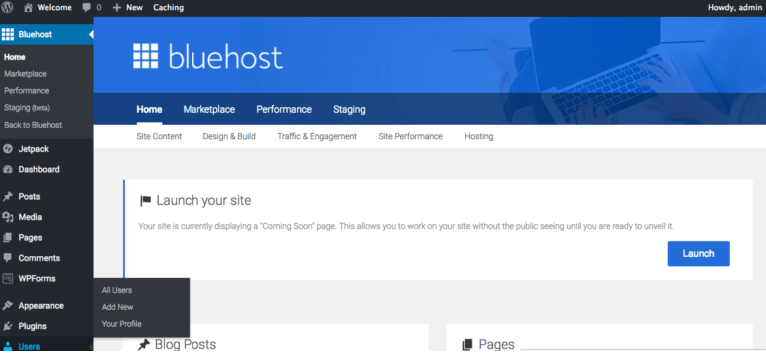
Step 15 – Add a new user. Insert all required information and set up user role as administrator. This will be your new user. This is done to avoid using the ‘admin’ username for security, as it’s the first target for hackers. It’s best to not use it.
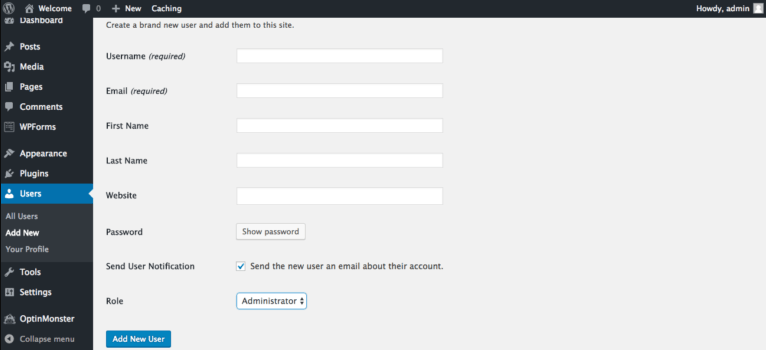
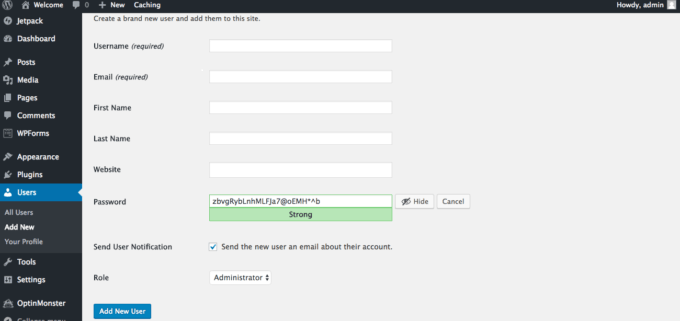
Step 16 – To auto-generate a strong password, just click on “Show password” button. Copy and paste (and/or screenshot) it and save it somewhere else. Make sure to have it stored somewhere safe and accessible for you.
Use this password to log in to your WordPress site. These credentials can be changed later if you want. Just go back into your User Settings and change your password later. After inserting all needed information, click the “Add New User” button at the bottom of your screen.
Step 17 – Follow the link: http://your-site-url-here.com/wp-admin) if you want to log in to your WordPress account. This will open the login form. Enter the username and password of the user you just created.
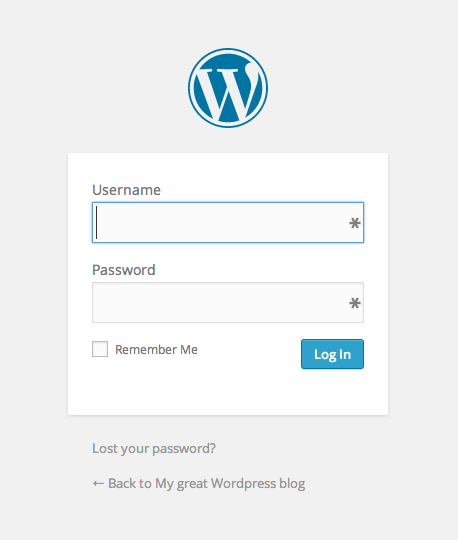
Step 18 – After logging in to your WordPress account, you will be directed to WordPress Dashboard. From here you will control (users, themes, plugins, settings etc) and build your WordPress site.
As time goes by you will understand it better and realize how easy it is to work thru this dashboard.
That’s it! You have successfully selected the hosting, installed WordPress, and for the first time logged into your WordPress dashboard. Also, you can also look for other free web hosting alternatives
Note: the look or the order of Bluehost setup screens may change from update to update. But the functionality and menu items (processes) remain the same. So it will be in no time till you can get familiar again. For anything, just contact Bluehost support and they will assist you asap.
Step 3. Basic WordPress configurations
The WordPress dashboard is the administration panel from where you will build, control and customize your site. All theme elements can be customized from here. If you will need additional features, then you will add them by installing plugins.
The basic components parts of a site are pages, posts, portfolio items and media. For each of these custom types, there are menu options to add/delete and edit items.
The same logic will follow every other element you will add in the site by adding additional plugins. This dashboard will become a very familiar place and very easy to work with, sooner than you think.
Another good news about WordPress is that it’s one of the biggest platforms nowadays, so the online community and support is overflowing.
There are hundreds of video tutorials on it and every possible plugin you may add in the future. So don’t be afraid because you are covered 😉
Let’s get into some important features of WordPress Dashboard.
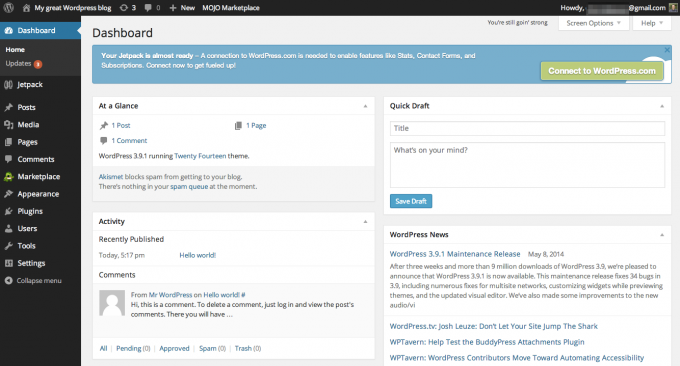
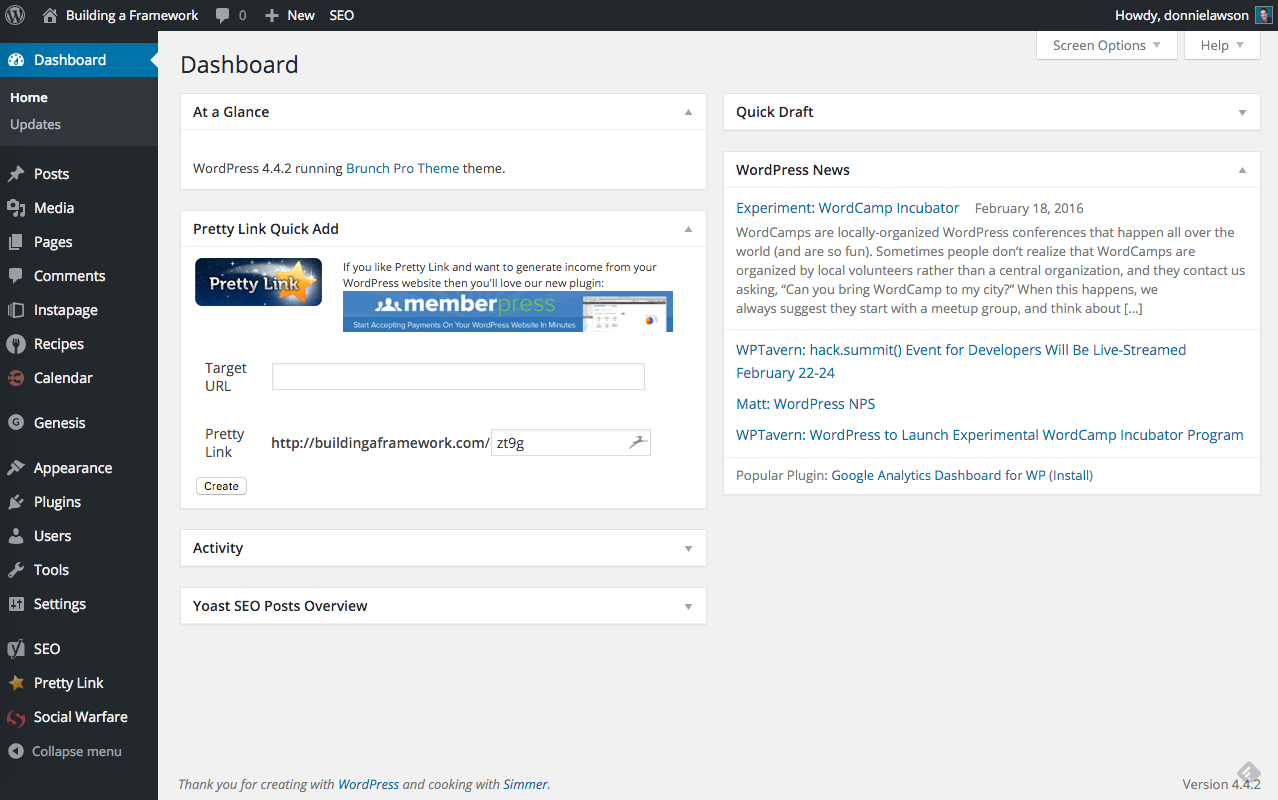
The image below shows the home screen. You can customize this simply by selecting the “Screen Options” at the top-right corner in this screen.
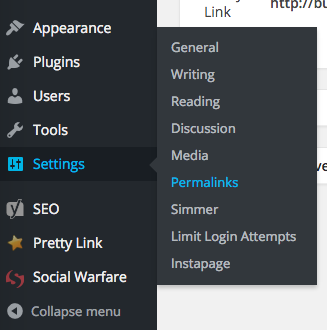
The priority is to change the structure of Permalinks from settings. You can find the option to customize this in Settings > Permalinks.
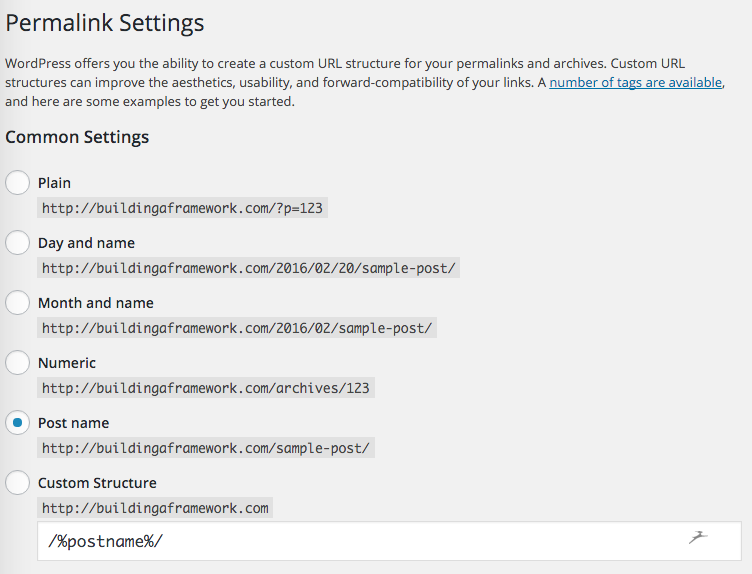
From the list of pre-build structures you will see the ‘Plain’, ‘Day and Name’, ‘Month and Name’, ‘Numeric’, ‘Post name’ and ‘Custom’. We strongly recommend the option of “Post Name”.
Having links use their post names will not only make it easier for users to understand the post they are reading but it’s good for SEO as well.
It’s best to change permalinks prior to starting publishing posts. Because if you have a lot of content created and decide to change permalinks, there will be a lot of links to change then. And some of you posts will initially show a “Post not Found” notice.
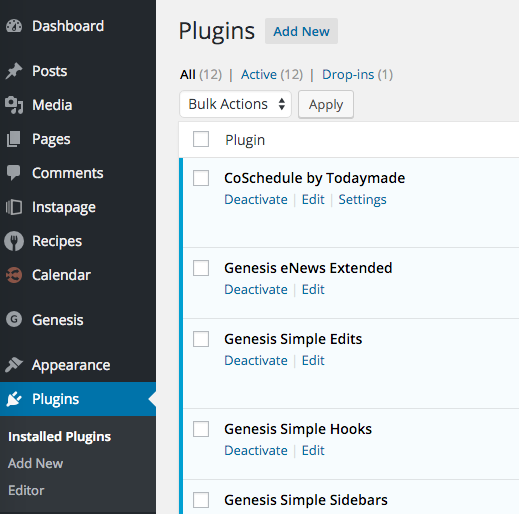
WordPress Plugins
An important section are the “Plugins”.
Plugins are essentially chunks of code attached to your theme code that add a new feature to the site. Even the best premium themes can not offer every possible option you want so that when plugins come in and do that for you.
Fortunately there are an unlimited number of plugins (both premium and free) for you to use. SO almost nothing is impossible with WordPress.
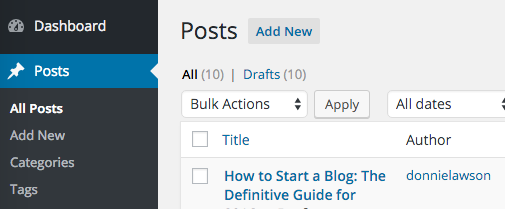
Managing Posts
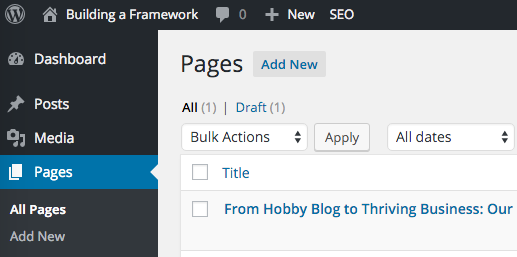
Managing Pages
The “Pages” menu is where permanent and static pages are created. The pages and posts are different as pages do not have dates but posts do that show up in blog feed.
While pages do not have dates and so they are not shown in the blog page.
For more detailed info or if a video works best for you, a comprehensive walkthrough video is published at WordPress.tv on the WordPress dashboard. Check it out if there is still more to know asap.
Step 4. Setup & customize WordPress theme and plugins
The next step is to select the theme to use.
A theme is a collection of templates and stylesheets used to define the appearance and display of a WordPress powered website.
They can be changed, managed, and added from the WordPress admin area under Appearance » Themes.
There are several free and paid WordPress Themes available.
Choose a Premium WordPress Theme
WordPress itself has a few themes already included. These are very simple basic themes, one of which will be auto-activated when first installing WordPress.
Additional to these, you can find countless free themes and even premium themes for free via pirate streamings. But as normally nothing good is ever free, these too have limitations. I do not recommend using them!
The included themes are secure but in order for your site to stand out in a sea of beautiful and unique WordPress sites, you will need to make a lot of customizations to the CSS and code. Even for a professional, this is waisted time.
The premium but pirate themes, are not often secure. They can come with malware and no one will take responsibility if your site/server gets attacked. Updating it will be an adventure too as you can never know if the uploader will keep uploading the updated versions of that theme.
If a theme doesn’t get the necessary updates, it will break at some point in time.
On the other hand, buying and working with a premium theme from the start, it will make your site look great right from the beginning. You will have access to lifetime updates and also ask for support from the ones that created it. Isn’t this great?
Using Folie WordPress Theme
We will use Folie – WordPress Theme from Codeless, for this article.
The main theme package, that you download from Envato, have included a child theme and some important premium plugins as well.
The child theme is widely used when you want to make additional changes to theme files. By adding the changed files to the child theme, you are independent from all future theme updates.
Watch this video tutorial to get a first live presentation with this great theme:
A great advantage for beginners is that most themes nowadays (Folie too) come with many demos pre-built.
This means that the developer of the theme has created several versions of how this theme can be customized, in form of complete websites. So you can simply choose which demo you like and install it.
In a few minutes, you will have all the necessary data and customization already set up in your own WordPress installation.
Now you only need to change the demo content and that’s it!
Your blog has been finished! ..ok, well the majority of it 🙂
If you wish to change to another demo in the future, all there is a need to do is import that demos again. No need to change the theme or make additional changes to the code. Can it get more Codeless than this? 🙂
Other features-rich WordPress themes
Some other extraordinary and beautiful themes you may check out are the listed below:
We always recommend purchasing from a known and trusted source.
Believe the numbers! Codeless author has more than 12 000 satisfied buyers. And is a certified secure author from Envato.
Install necessary WordPress plugins.
Plugins are great to add certain features to your blog without having to deal with any code yourself.
Be careful, however try to not overdo it. Because plugins are extra code added to the site’s code, the more plugins you add, the more potential issues (site speed, security, etc) arise.
Try to keep only plugins you absolutely need.
Note: This restriction does not include the plugins that are bundled in the theme package. These plugins are added because they are necessary for a theme or some because they add core functionalities that you would have gotten one way or another (like for example the sliders). Also, the included plugins are tested and controlled by the theme developers so they are completely safe.
Plugins can be administered directly from the “Plugins” tab within your WordPress dashboard. Here are a few great plugins you will want to check out:
What to do after you create a WordPress blog? 19 Useful Tips.
1. Protect your site
Here, we will discuss some analytical and security-related elements. This step is crucial and we advise you not to skip! You will thank us later.
Some of the essential yet boring Google tasks that need to be considered come when you start the blog. The first among these is signing up an account on Google Analytics.
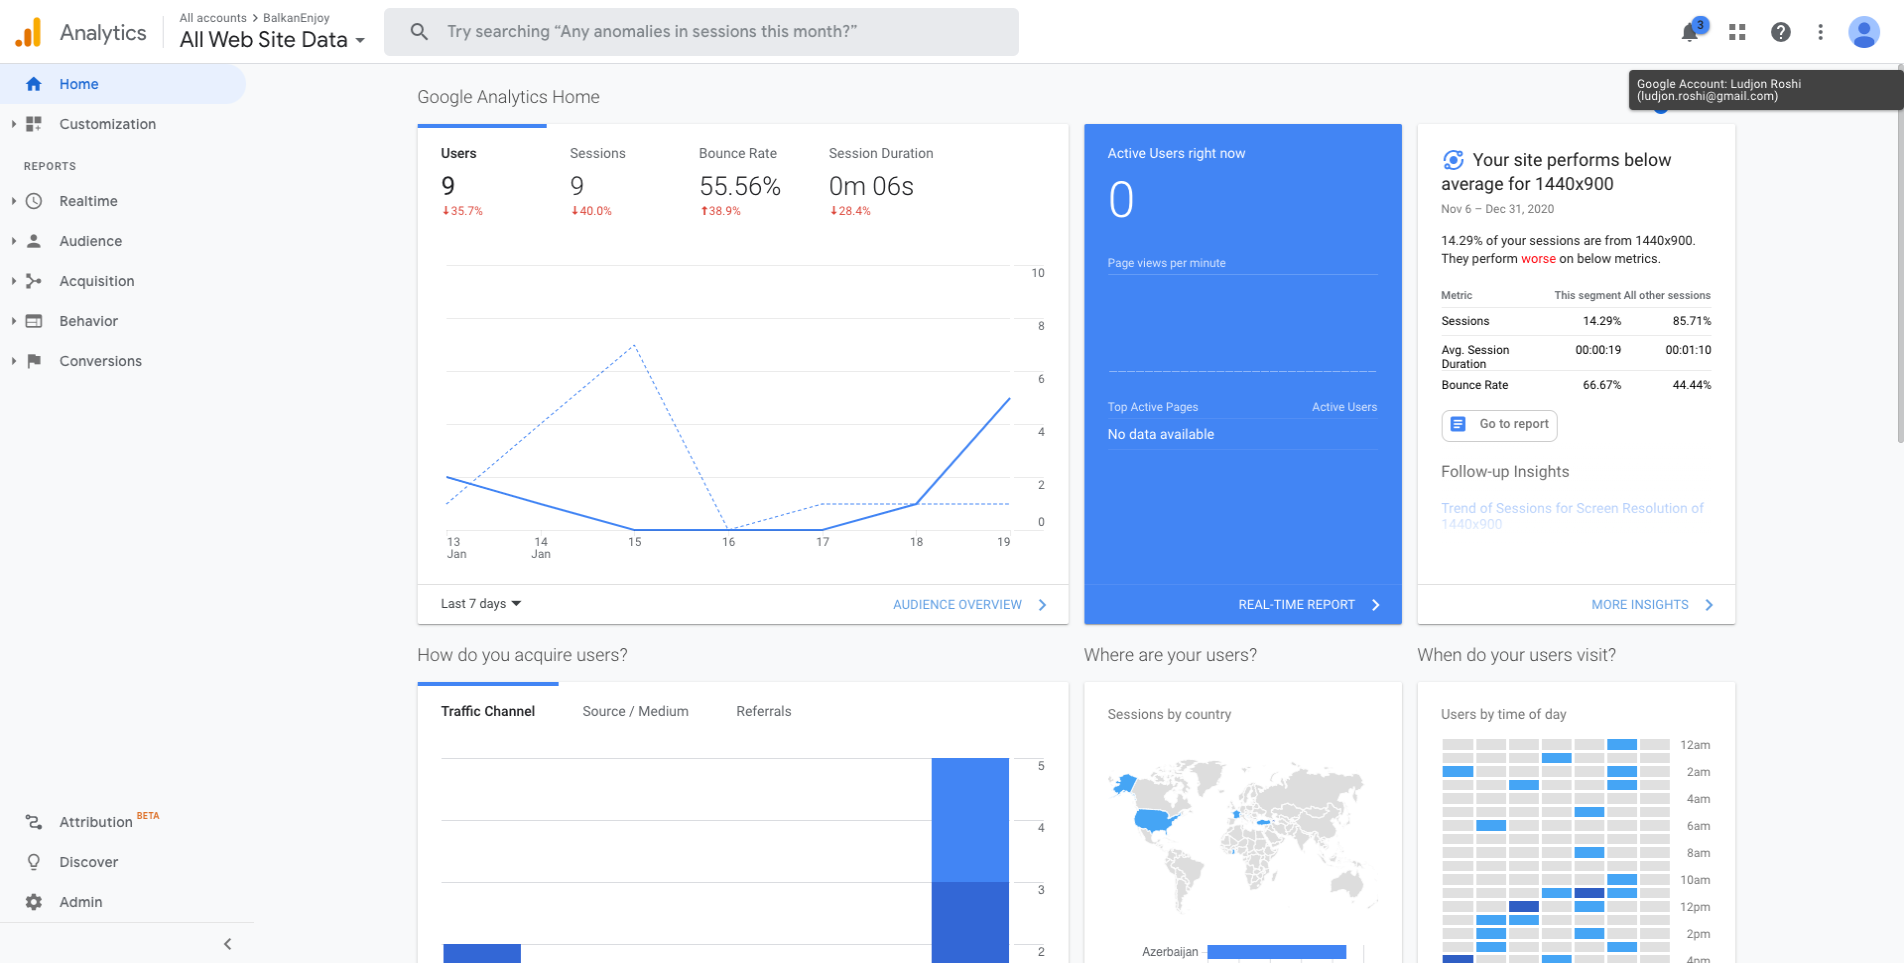
Google Analytics is one of the most popular digital analytics software to report blog and website traffic. It offers the tools to get insights into your blog traffic and activity.
It won’t take up much time, just create your account and start tracking your page views.
Don’t skip this — brands and potential advertising partners will routinely request your stats, and they’ll want to see data specifically from Google Analytics as a trusted source.
You can register with a custom email address with Google Apps, we recommend using that account with Google Analytics as well.
Otherwise, you can create a Google Analytics account with your Gmail login information.
Once the account is set up, you’ll receive some tracking code to insert into your website. This is just a copy-paste action. No coding knowledge is required so don’t worry!
The next Google setup is creating a Google Search Console account and adding your site there. This is done to tell Google to recognize your website.
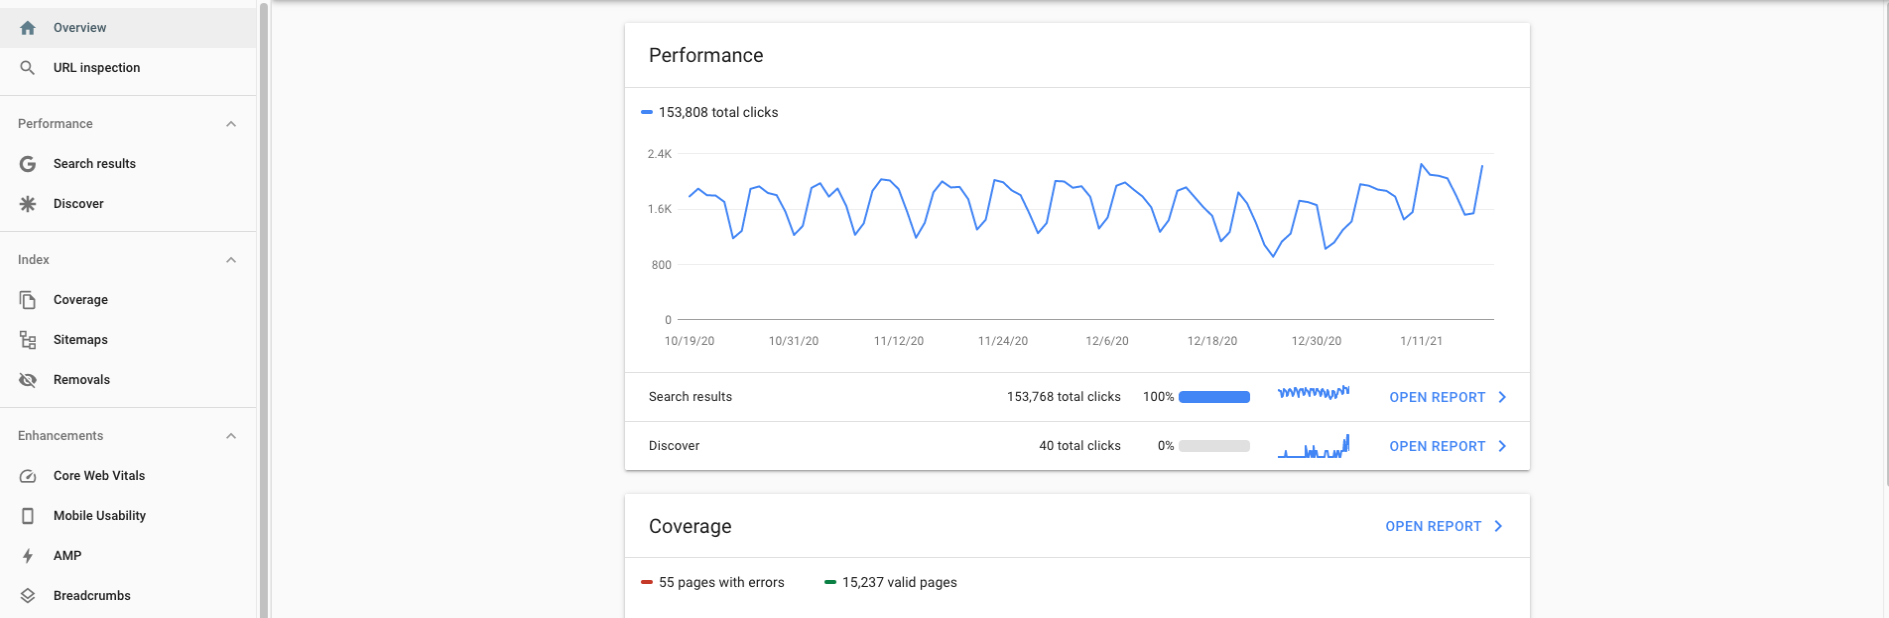
Pay attention to its content so that when visitors search for keywords present on your site, Google ranks your blog in the search list as up as possible.
With time your Google search rank will improve bringing more and more visits to the site. Make sure to set up a SERP tracker so you can check the rank position of your website keywords.
One basic setting in Webmaster tools is setting up a sitemap to your account.
A sitemap is an .xml file that will help Google index your site’s content easier. An easy way to make a sitemap is using the Yoast SEO plugin. The URL of your sitemap will look like this: codeless.co/sitemap_index.xml). Add this URL to the sitemap section of your Google Webmaster tools account.
Prioritize Blog Security
For new bloggers, the main focus is the blog posts’ content and the site’s look. They tend to focus on what’s their specialty and are afraid to go deeper into blog administration.
But for a website, what the visitor sees is just the tip of the iceberg.
There are other back-end actions you MUST take care of before launching the blog. That’s the site’s backup and security.
Backup your site and secure it from the start so that when disaster strikes, you won’t lose any of your work.
Why Backup your WordPress Blog?
For blogs with daily posts, a daily backup is absolutely required. While it may be rare to experience a server issue, it’s pretty common to be a victim of hacking attempts and malicious code infecting your site and all the thousands of various files.
The most recent the backup of files and content, the less you will lose while recovering the site.
Valuate WordPress Security
To improve the security of the site, consider investing in a CloudFlare account.
CloudFlare is great to improve site’s security and other areas. To learn more details on all its perks of it, follow this link: CloudFlare security feature.
Pro CloudFlare account costs $20/month. But a free account is also available and it has nearly the same security features.
Make sure to start with this free account from day one of your blog. Another perk of CloudFlare is improving the site’s speed.
Read more about improving site speed in this other article here.
2. Start WordPress Blogging (Add Standard Pages)
There are some pages you want to have built before starting out with posts, these are: Disclosure, Privacy and Comment Policy.
Such pages have content that is specific to each company/activity so they are mostly not available in the demo content. Before starting to monetize your blog, you’ll need to declare some of these standard policies.
These are important and Google requires them as part of their Adsense program. More examples of “disclosure” page can be found here: Add privacy disclosure policy blog/
After this, you can start writing posts and publishing them frequently. It is recommended to keep a steady posting pace. So your blog will be active and out there all the time.
The more present you are online, the more traffic it will attract.
3. Setup & configure the blog’s email address
You will need to set up a custom email address with your business name.
It’s not very professional to reach out to possible customers and site visitors with your personal email. For marketing purposes, you will need to gather email addresses and build up a list.
There are free google services for this as well.
Create a custom email address with Google APPs
Don’t be lazy and tempted to use your personal email account for your blog. Email is an important part of your new blog. Sooner than you think, you’ll be exchanging work emails with brands, companies or other bloggers.
You’ll want to address them as a company, not an individual so it’s important to have a professional dedicated email address.
There are two options:
The easiest and fastest that comes to mind it is to create a free Gmail account with your blog name. For example: [email protected].
This will do the job but when you’ll start collecting an email list and sending out emails, you may want to have a professional and custom address to match your company name.
The second option and most recommended is to create a custom email address matching your domain name. An example would be [email protected].
Usually, the mail servers interface is slightly different from the Gmail(yahoo mail) interface you may be used at.
However, you can still have the custom email address and still use the familiar Gmail interface. Google Apps for Business does that for you. Just know that this is not a free option, and you will have to pay a $5/month fee.
To get your custom email address, go to google.com/apps and start from there. It walks you through the setup process.
The next step may sound a bit confusing for most, but it’s actually not: verify your domain and add the MX records.
One method for verifying the domain is adding a txt record to your DNS (Google will show you how). Cloudflare users will have to change a few things in the Cloudflare account. For others not using Cloudflare, just log in to your hosting account and edit the DNS zone file. At the same time, add some MX records to your DNS zone file.
Ask your hosting service to walk you through the process.
Related: How to Set Up a Custom Domain Email Address with Gmail
4. Start collecting email addresses.
Growing an email list is more important than it may look at the beginning stages of your blog.
Why do you need it?
- Traffic – Email is a direct and reliable way to direct traffic to your site. You can notify new and current readers of your best old posts and present the newest posts. By notifying potential readers thru email addresses, they’re much more likely to turn from a one-time visitor into a regular reader. Outsources like Pinterest and Google play both important roles in driving traffic into your blog, but they can not be controlled. While the email list is yours.
- Marketing – Email goes straight to the reader’s eyes. There can not be a more secure way to be sure you are being seen, than emails. Including social media.
Set up the email list.
Instead of the WordPress Jetpack plugin that has an email subscriber option, I recommend opening a MailChimp account (free up to your first 2,000 subscribers!).
This plugin allows you to create a subscribe form that automatically styles itself to match your blog’s design.
If the email will be your primary approach to possible site visitors, then we strongly recommend you find out the best email marketing software for your business.
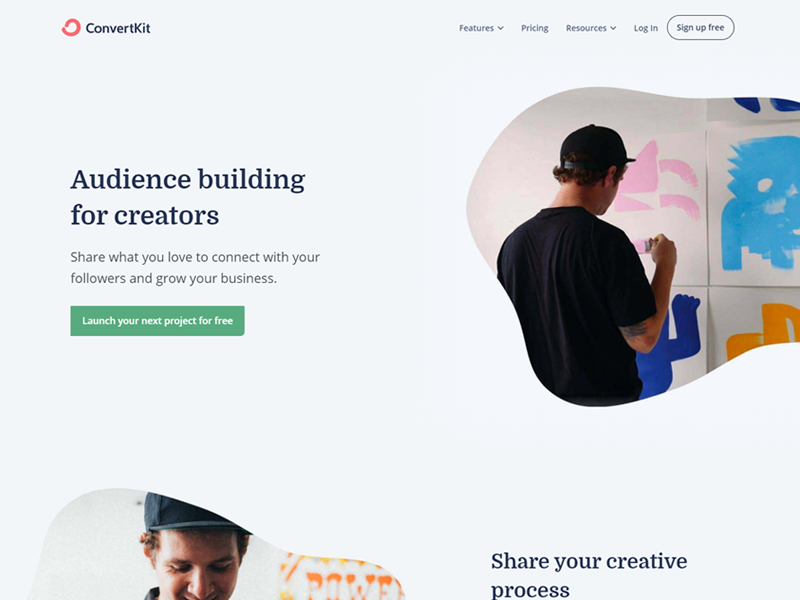
ConvertKit has been described by professionals in the field as “the power of Infusionsoft with the simplicity of MailChimp,” and you too will agree with that statement as soon as you start seeing its benefits!
While working with email templates and trying to find ways to compel people to subscribe, you will notice this: “Sign up to my free newsletter” is not a good enough, if the worst incentive nowadays.
Your offer needs to be so good and compelling that they won’t think twice to register!
This is done by approaching the possible readers with something they need and having the interest to keep on looking.
Check out some of the posts on this site to get an idea of what forms and incentives you could use on various posts and pages to earn email subscribers.
5. Connect blog to social media accounts
Social media is quite a work by it’s self. It needs it’s own time to create posts and captions that are appealing to visitors. Add tags that drive in the right audience.
So at the beginning of your site’s life, social media as useful as it is, it can also be a big distraction.
Instead focus first on the real content of your site and only add up one or two social channels at a time before spending time growing a presence everywhere else.
6. Set a fixed blog posting schedule
This step is the core function of your blog. All other steps are to support and help blog being seen. But creating original content is the most important work of all!
Most of your time will go to writing and posting high quality content. Especially at the beginning!
This is crucial and also the hardest part. Getting into the right, creative mindset to write and publish even when you don’t feel like it, it’s the same (if more) as having a full-time job.
Publish your content on a regular schedule.
As mentioned somewhere above in this article, it’s very important to keep a steady and (as fast as you can) pace of posting.
Make a schedule and stick to it no matter what. Just like being in a full-time job, you can not miss a day just because of being distracted or just “Not feeling like working”.
That’s the same attitude you need to keep while posting. Sharing content regularly will keep you on top of the search engine and at the front of the eyes of current and possible readers.
7. What is the ideal blog posting schedule?
Some may start out in a rush and then slow down too much down the road. This is not a good attitude. The moment you build up an audience and they are interested to your content, you do not want them to get tired of waiting or even forget at all about your blog.
It’s best that they have something new to read whenever they open your site.
When you first start your blog, you’ll want to ad up content as quickly as possible so that readers can browse when they land on your site. This will keep their interest alive.
Once you have 10-15 solid posts created, you can now slow-down a bit and start following the assigned schedule.
Being consistent with your posts is much more important than the frequency of post per week.
By posting at the same days and time each week, you become part of your readers’ routines. They will voluntarily come to your site, expecting to see your new posts. This makes it easier for you to create and keep those loyal followers.
There are sites that post one post per week and some who post every day. The frequency is not that defining as it it the steady pace of posting. So that’s up to you to decide how much can you post per week.
Do not underestimate the blog’s quality. It need to be absolutely high quality! Just like writers can not publish a book in one go, but need time to polish it, edit it until it’s perfect in terms of syntax and comprehension.
People are appealed to posts that are helpful and relatable. So focus on having essence before learning to beautify your content. Blogging as all things in life, takes practice!
You can only learn while failing. Don’t lose faith and stick to it so you can keep learning and improving. Success will definitely follow!
Since you are here reading on how to create a blog, we assume you already have something in mind. On what your blog will be about. To improve your approach to the content, please consider the below:
What makes a blog post high quality?
Be helpful. The primary goal of your post is to discuss a topic and give useful instructions/ advice. You can add some personal insight but be careful to not overdo it.
People will click on your post to know more after reading the title. Not know more of your life. So when writing, ask yourself if it is useful enough and if it can help at least one person!
Give a clear Answer. In the pool of topics, you will discuss in your blog, target the hot topics and try to give a clear answer at the end of it. Remember all the posts you have read and bookmarked to reference later. You will want to be a helpful resource for your own readers as well.
The goal is to create at least a few posts good enough for readers to come back and read them time after time. These posts will keep on getting traffic month after month.
Solve problems. Track the most common issues mentioned from your readers in the comments or on social media. Issues they struggle the most with. Then come with a response to solve those problems. Interested readers will find you soon.
Write long descriptive posts. When a topic is interesting we want to learn more. You can not learn much from a short post. So try to write abundantly to satisfy the thirst of your readers.
You do not have to uselessly add words just to meet a certain number of words, but if the topic can be elaborated on, don’t refrain from writing some more. You can use content optimization software to make your content more readable and optimized for search engines.
Eyes on the Headlines. Headlines are very important for two main basic reasons. First, they are the first thing that will attract visitors and convert them to readers.
Second, in headlines, you can add keywords and make your posts rank higher in Google Search. So don’t take 5 minutes to find a good title. Spend 20 minutes and you won’t regret it.
Note: Be careful not to create click-bait type of headlines. They are misleading and feel like cheating a visitor. If visitors feel like that the first time, they may not return back to your blog. You must create trust along with good content!
Visuals. Another eye-catching element of the blog post is the featured image. beautiful and high-quality post images are important for social traffic. Pinterest is a major Spend time making eye-catching Pinterest-sized images for each post. You don’t have to have Photoshop to do this!
Look at free options like Canva and Pixlr. Original photography is great in certain niches, but you can also use free stock photos as the starting point for great post images.
Where to get topic ideas:
This is something you may be full of in the beginning but soon ideas will be harder to find. So whenever you are inspired, write down the post ideas in a regular notebook, Evernote, your phone’s notes app, a Google Doc or spreadsheet etc.
You may create a QA section in social media and ask your followers to request what they want to read next in your blog.
This will add up a pool of new ideas to your current list of topics. That you can use in moments of deserted creativity.
8. Spread the word / Start promoting your WordPress blog
In the beginning, you will spend more time creating content but after some time, when you have built up a library of 100+ posts, half of your time will be spent on promoting it.
Promoting your content is the way to direct interest to your site, but good and useful content will turn the casual visitor into a loyal follower.
It’s important to follow some strategies for effective promotions. The sooner you start the better.
1. Present yourself to other bloggers.
Make a list of some successful bloggers and commit to being active on their sites by reading their posts, sharing, and commenting. You will get noticed over time if you really invest in helping them.
Over time, some of them may reciprocate the effort you put in by promoting one or some of your posts to their audience. Although after some work, this still can be considered a free commercial.
Who knows, you may even make some new friends 🙂
2. Join a group of like-minded bloggers.
Join a Slack or Facebook group of bloggers making similar content to yours. It will take effort and time but you will be able to get close to them. In these groups, ideas and changes to collaborate are discussed. So you have some great opportunities to find bloggers that may want to do a collaboration with you.
3. Pinterest
Pinterest is by far my preferred place to be. You may be surprised to know the impressive source of traffic it gets day in and day out. Pinterest works by pinning a post to a picture and only showing that picture to Pinterest dashboard. The most eye-catching element of a post are the images.
That’s why if a picture is captivating, it will catch the visitor’s eye and in no time they will discover your blog. Set up a Pinterest account for your blog as soon as possible and start pinning high quality pins that are descriptive to your blog’s content.
Visiting the Pinterest profiles of other bloggers, look at the group boards that they are part of. Group boards allow more than one Pinterest account to add pins in the same board.
As you get to showcase your posts to a larger audience than just your followers.
4. Take care of SEO.
SEO (Search Engine Optimization) is the process to highly optimizing your posts so that they display near the top of Google search results for various keywords and phrases related to the post.
To improve the SEO for your site, there are some practices used for post formatting, keyword usage, and headline tags. They go in line with the correct structure of high-quality posts.
Usually, SEO-friendly posts and easy-to-read posts have the same structure. To automatize the SEO setup comes to help a free plugin such as “Yoast SEO” plugin for WordPress and other SEO Tools.
Install it and 80% of the work will be done!
9. Start earning (Monetize the blog)
The major phases of blog creation are creating content, promoting it and lastly monetizing it! This is where all the works start to pay off. The list below teaches you all the ways you can profit from your blog.
1. ADs Revenue
The most popular way to display ads on a site is to use Google Adsense. The income is in rapport with the views of the post. So to earn significant income, the traffic must be high.
Affiliate links are links to purchase a product originally sold on another site. If the clicking comes from your site, and the purchase is finalized, you get to keep a percentage of the value. You can promote as many products as possible on your site.
Another way of promoting other companies’ products is to write about them. Companies team up with popular bloggers and pay to have them write about their products.
The good thing about this type of promotion is that you instantly get paid by creating a post. You are not tied to that product sales. As far as the post is published, your work is done.
4. Digital Products
These are your own products. Products that can be shared/bought online. Such as eBooks, courses, printable, paid webinars, and email courses.
This is the hardest and most time-consuming as you have to spend additional time creating, advertising, and selling your own products. But it is also the first step if you want to create your own brand.
You can mix & match these strategies to your convenience. Start with the leaser one and as the traffic in site grows, go to new strategies that produce more in more build-up sites.
10. Recognizing market metrics for the successful build & execution of your blog on WordPress
Do you identify what it takes to stand still in the market? OR what it takes to retain the market value you have achieved? There are so many things to work on, that people don’t know in the beginning.
Achieving a good market value is crucial for any blogger to retain his/her place. But do you think that you have put forward the right formulations of success?
Do you think it is enough to hold a valuable comment from people? Such questions are the base of refurbishing your blog and making it even better.
While looking at the marketing tactics people use to build a strong and firm accommodation, we came across some of the amazing tricks that you must know when setting up a blog on WordPress. It is very important to know what audience you are targeting on. This will help illuminate the tactics even more.
Marketing is not an easy task to do and especially when it is done through your blog. People that are following you, will be looking forward to what you will bring next for them.
It gets even harder and struggling when you don’t know things very well. So before starting a blog on WordPress you must be well aware of all these tactics
We think that bringing about reality through your blog can surely catch up people’s attention. But when there are no loopholes in your strategy, content, and resources.
For that purpose, we have designed a list of important tips and tricks that you must know before starting a blog on WordPress.
Ok. So, let’s get started.
11. Driving tons of leads through SEO content
SEO is a simple process to do with your content. There are a few steps that you need to look upon in order to drive leads. You can use SEO best practices tools like Ahrefs, Semrush, and Google keyword Finder for keyword volume and length.
With a few basic steps, you can get hundreds of thousands of people connected to your blog. The steps are discussed below,
Find keywords that are not complicated for your audience
Search Engine Optimization is a sunshade of all those marketing tactics that are used to rank your content on Google. We suggest you dig deeper into the keyword volume to find one that isn’t difficult to rank in your niche.
You can do link building, keyword research, and on-page and off-page SEO in order to bring the most readers attracted to your blog.
Optimized content is better to be ranked on Google than content that doesn’t involve SEO.
Create unique content
Your content quality is very crucial to the better execution of your blog. Keep up the pace high for optimizing it using SEO best practices. You can enrich your content with custom infographics
Don’t do stuffing with keywords
Most people overload keywords thinking that it will help them reach the top of Google ranking. But it isn’t true. You got to play really well with your keywords in order to have a top google ranking.
Make sure the keywords are not stuffed. The key to it is not to put two keywords in a single sentence.
12. Put equal efforts into promoting your content
Not only creating quality content will help but you need to put effort to promote it too. So, this doesn’t mean sharing your blog on social media and other platforms.
It requires some other in-depth strategies as well. The strategies involve paid promotion like Facebook ads and Quora promotion. Consider approaching your audience through email and you can boom your outreach.
Another highly important point to note is to know which strategy is legit and which is not. I personally suggest you people work on White-hat SEO as newbies. The reason behind doing that is, that it is according to the Google terms and conditions and will not harm your site anyhow
On the other hand, there is black-hat SEO which is an illegal tactic and can ban your website. So, try doing the legit tactics to avoid any mishap
13. Link Building: Another important pillar of SEO-best practices.
Link building is essential for having top rankings on Google. It is an important aspect of your content quality. There are internal and external linking, and both are important.
But when you are starting a new blog, internal linking in your content is highly important for organically ranking your blog on Google.
It is just a link of one page to your website to a page on another person’s site.
It is a great way to grab new readers and also their appreciation. Internal linking also helps to let the readers stick to your blog
14. Do guest blogging increase traffic with well-versed SEO
It is actually authoritatively taking someone else’s clients which helps you to grow. Advantageously if you have got one industry-leading inspiration who’s running a blog that is of your niche.
Write a guest post on the same topic and add backlinks to it. This will eventually attract a lot of traffic to your website/blog.
Keep being particular about your niche and write authentically. Providing good quality content is crucial for organic ranking.
15. Bring out your A-player on top, Social Media
Blogging and social media are like the two tires of the bicycle, you can’t ride the bicycle if you don’t have both aligned. But it is not like promoting your blog on social media platforms and not getting that much attention.
It is the game of paid promotion.
Okay, so what you are going to do is, post something on social media through which you want to attract your audience. And tag some of the industry leads relating to that topic.
This way their influencers will also check on your blog and eventually you have a rise in traffic.
16. High-Resolution Images for a better viewpoint of your blog
In this modern world, things are caught up more with images rather than heavy content. So, create high-quality images for your blog that will better attract the audience.
There are free tools also in the market that will help you out if you are a beginner. It is a fast yet easy task to do but is very crucial for engaging the audience.
High-quality images and infographics are meant to stick the user on your blog more than any other thing. Because nowadays people are more attracted to videos and graphics than taking a minute or two to read the content. So, it is a great way to deliver your message through images.
17. Formating is a key to giving a start with your WordPress blogging posts
What could be more specific than being professional with your blog? Which will eventually grab people attention and appreciation as well.
A messy structure is always skipped but if you keep your blog sorted and organized, it is going to be read by many.
So, what take to be an expert in formating blog content? Let me share with you some of the important points to stay at a professional pace.
- Don’t keep a flock of words, divide your content into headings and subheadings.
- Use bullet points where necessary to have a better understanding of your content.
- Include intriguing images which will engage the user and ultimately stick to your blog.
- Using bold and italic font styles is necessary but not at the same time.
- Keep the quality of the content sorted, give your content a structure.
- A step-by-step procedure is always easy to understand and worth giving time to.
These were a few points to format your blog like a professional piece even when you are a newbie.
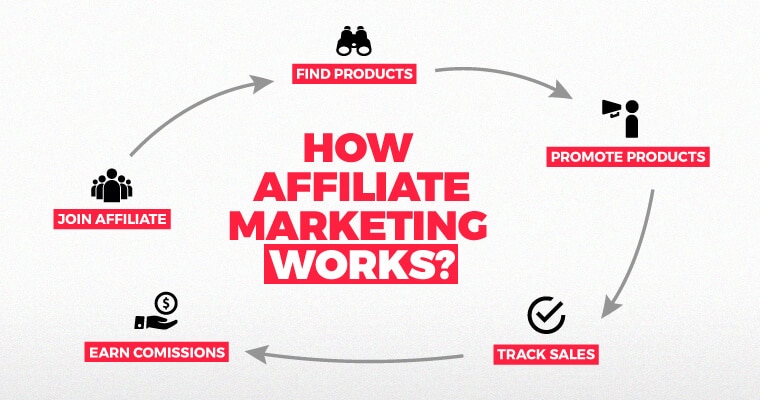
18. Affiliate Marketing
Well, it sounds cool when you think of earning tons of money through your blog, but it takes a lot much of you. Affiliate marketing is one of those monetary strategies that you can use to increase your customer outreach.
Basically, in affiliate marketing, what you do is recommend a tried and tested product or service to your customers and, in return, get more customer engagement. It is better to search always for high ticket affiliate programs so you can earn more with fewer clicks.
WordPress offers you various premade plugins and tools for affiliate marketing as well.
19. Transforming to an online store
Well, if you aim to earn money, then this is what will help you do that. Many bloggers that are intending to make more money from their blog, create it as a fitness, fashion, or travel blogging site, food, music, art, or digital library and some may create it as a consultancy site.
Bump your WordPress blog while you professionally employ this useful trick.
Also, WordPress mostly supports WooCommerce in its themes, which is the best-selling platform online. So, follow these instructions and start earning today.
FAQs
How much does it cost to start a blog?
It is tough to estimate the exact amount required to set up a blog from scratch. However, the average cost ranges between $50 to $200 for all the initial processes. The spending does not stop here, and you would also have to spend a monthly amount of $20-$60 on maintaining the blog further.
How to choose a good blog name for my site?
There are several ways to find a catchy name for your blog. For example, you can read a book or article related to your niche or even dive into the vast vocabulary bank of a dictionary or thesaurus to find a phrase or word that catches your attention and can be a perfect identity for your blog.
It is also recommended to alliterate the blog name to create a unique and stylistic outcome like Dunkin Donuts, Lois Lane, etc. You can also insert a pun in the name, which is a quite popular strategy in the blogging industry; it makes your name unique and popular.
You can also use your name if managing a general lifestyle blog. You can apply several strategies to create a creative blog name and stand unique in the virtual world, of which we have mentioned a few of them.
Can I create a blog without WordPress?
Yes, you can create a blog without WordPress through a popular network medium.com specifically designed for writers who want to share their artwork on the web without spending money.
It has a straightforward interface with a few similar attributes to WordPress, like the ability to upload images and videos, etc.
Similarly, many such networks allow bloggers to post their content for free. However, you won’t be able to earn anything, as is the case with WordPress-optimized blog sites.
Can I design a blog with no coding skills?
Designing an attractive and highly functional blog without familiarity with coding and programming through web-building platforms like WordPress is possible.
WordPress and other similar platforms are highly optimized with premade templates, simple drag and drop editors, and several plugins that combine to establish an outstanding blog in no time and hassles of coding.
How can I create a professional email address for my blog?
Creating a professional email address for a blog through a web hosting provider is quite simple. All you have to do is follow the simple steps mentioned below:
1. Navigate to the control panel
2. Go to email sections and click on email accounts
3. Here, fill in the required information
4. Now click on create account
5. Finally, a blog specific email account is generated
Summing Up
Well, getting started with your first blogging experience can be startling, but it is fun first to learn and then earn through.
We hope this guide helps you to build a successful WordPress blog and do its marketing and start earning from it. The best choice to create a WordPress blog is using a self-hosted WordPress platform.
With the right website, tool, and resource, you can never go wrong. Also, it helps to outspreads your concepts to the world within seconds if done rightly. Let us know if it helped you or not.
Want to Learn More?
Check more specific blogging guides that can help you to start blogging today:


![Toni Kroos là ai? [ sự thật về tiểu sử đầy đủ Toni Kroos ]](https://evbn.org/wp-content/uploads/New-Project-6635-1671934592.jpg)


