
How to Set Up Meta Business Suite and Business Manager for Clients : Social Media Examiner
Need to collaborate with clients on Facebook or Instagram? Wondering if there’s an easier way to manage multiple accounts?
In this article, you’ll learn how to set up Meta Business Suite and Business Manager for multiple accounts, including how to onboard your team and begin scheduling content.

Mục Lục
Meta Business Suite vs. Meta Business Manager: What’s the Difference?
Meta Business Suite and Meta Business Manager (formerly Facebook Business Suite and Facebook Business Manager) are platforms that you can use to manage Meta accounts and tools for businesses. Both platforms let you keep professional tasks separate from personal Facebook use and allow you to collaborate with colleagues and clients.
Although both platforms offer many similar features, there are a few key differences between the two:
- Business Manager launched back in 2014, making it significantly older than Business Suite, which began rolling out in 2020.
- Business Manager is accessible on desktop only, while Business Suite has both desktop and mobile apps.
- Business Suite allows you to manage all Facebook and Instagram business accounts, while Business Manager focuses on Facebook pages and ad accounts only.
How Do You Get Access to Business Suite?
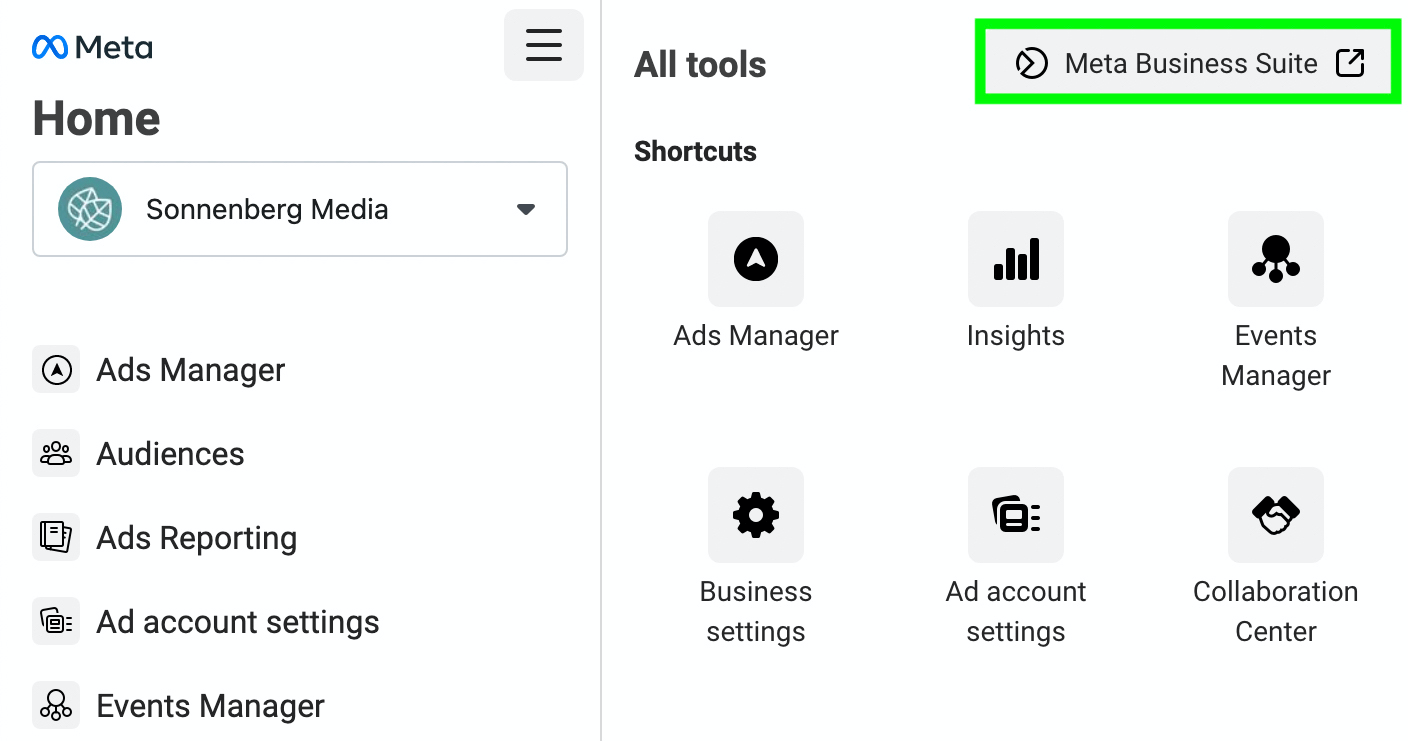
As of May 2022, Meta is still rolling out access to Business Suite. You can visit business.facebook.com to see if the platform is available to you. If that URL takes you to Business Manager instead, open the menu and look for a Meta Business Suite button. If you don’t see one, unfortunately, the only option is to wait for access.
In some cases, Meta grants Business Suite access to all users of a Business Manager account at once. In other cases, it’s on a per-user basis. That means team members may be using two different tools so it’s important to understand how to use both.
Can You Use Business Suite and Business Manager at the Same Time?
Meta has introduced the newer Business Suite as a replacement for the older Business Manager so the platforms aren’t intended to be used at the same time. Once Meta gives you access to Business Suite, it’s best to start using the newer platform.
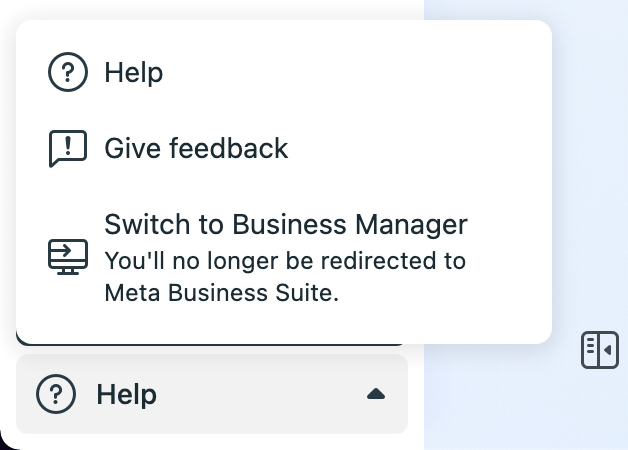
If you need to go back to Business Manager for any reason, however, Meta does allow you to switch. In Business Suite, click the Help icon at the bottom of the left menu. Then click Switch to Business Manager to revert to the older tool. Note that if you switch, you won’t be able to manage any content scheduled in Business Suite but the posts will still publish as planned.
How to Set Up Meta Business Suite to Work With Clients
First, let’s look at how to set up and manage Business Suite for clients.
Onboard Your Team in Business Suite
Start by adding employees or colleagues to Business Suite. Click Settings in the lower-left corner and open the People tab. Click the Add People button in the upper-right corner and enter your team members’ email addresses.

Plan to assign admin access to at least two people on your team. Assign employee access to everyone else to retain more control over the accounts they can use.
Give Your Team Access to Client Accounts in Business Suite
Once you’ve added your team in Business Suite, you can start assigning access to client accounts. In Business Suite settings, click the Business Assets tab to manage client accounts.
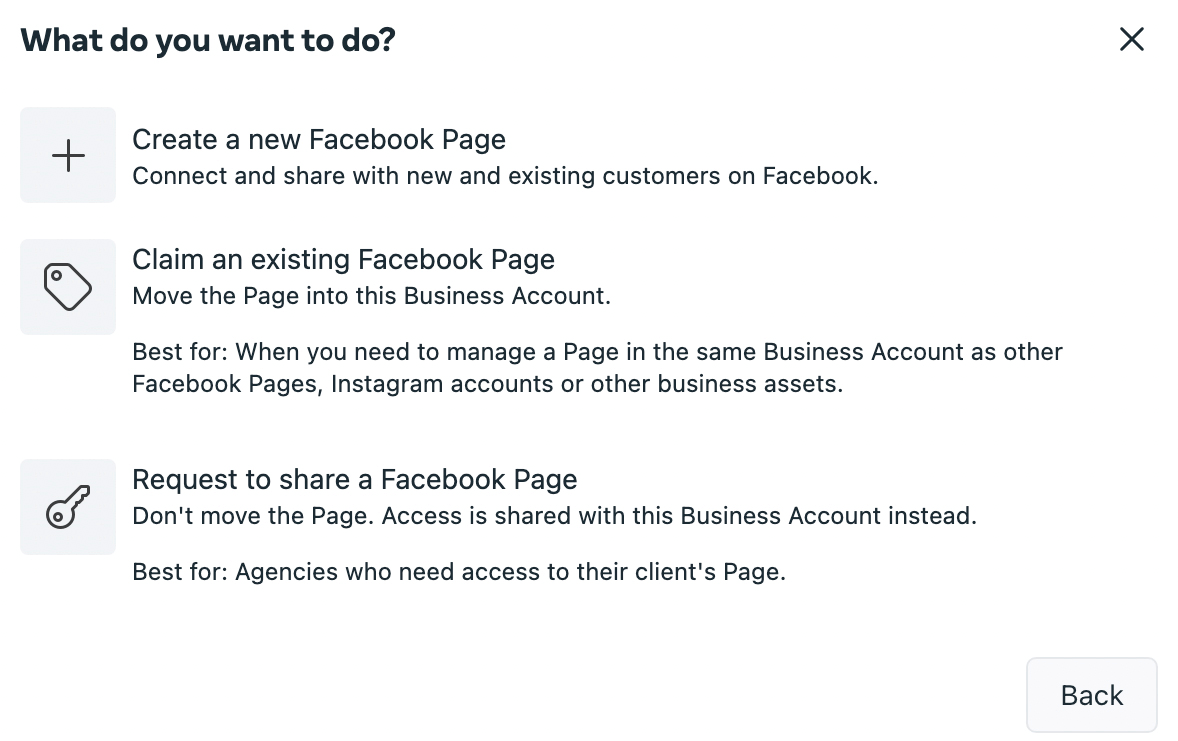
To add new client accounts, click the Add Assets button in the upper right. Then choose the type of asset you want to add. Business Suite lets you manage:
- Facebook pages
- Instagram accounts
- WhatsApp business accounts
- Meta ad accounts
- Meta pixels
- Conversions API
- Custom conversions
- Offline event sets
- Commerce accounts (for Facebook and Instagram shops)
- Catalogs (for advertising and shops)
- Apps
- Business creative folders (for advertising)
The workflow depends on the type of asset you select. You can request access to some assets in Business Suite, but for others, you’ll be rerouted to Business Settings, which is integrated with Business Manager.
The Conference You’ve Been Waiting For
As a small business marketer, you can probably only pick one or two events to attend each year. Get back into the game with an unbeatable conference experience and expert training at Social Media Marketing World in sunny San Diego, California—from your friends at Social Media Examiner.
🔥🔥 As a valued reader, you can save $100 if you act now! Sale Ends Tuesday!
CLICK HERE TO LEARN MORE
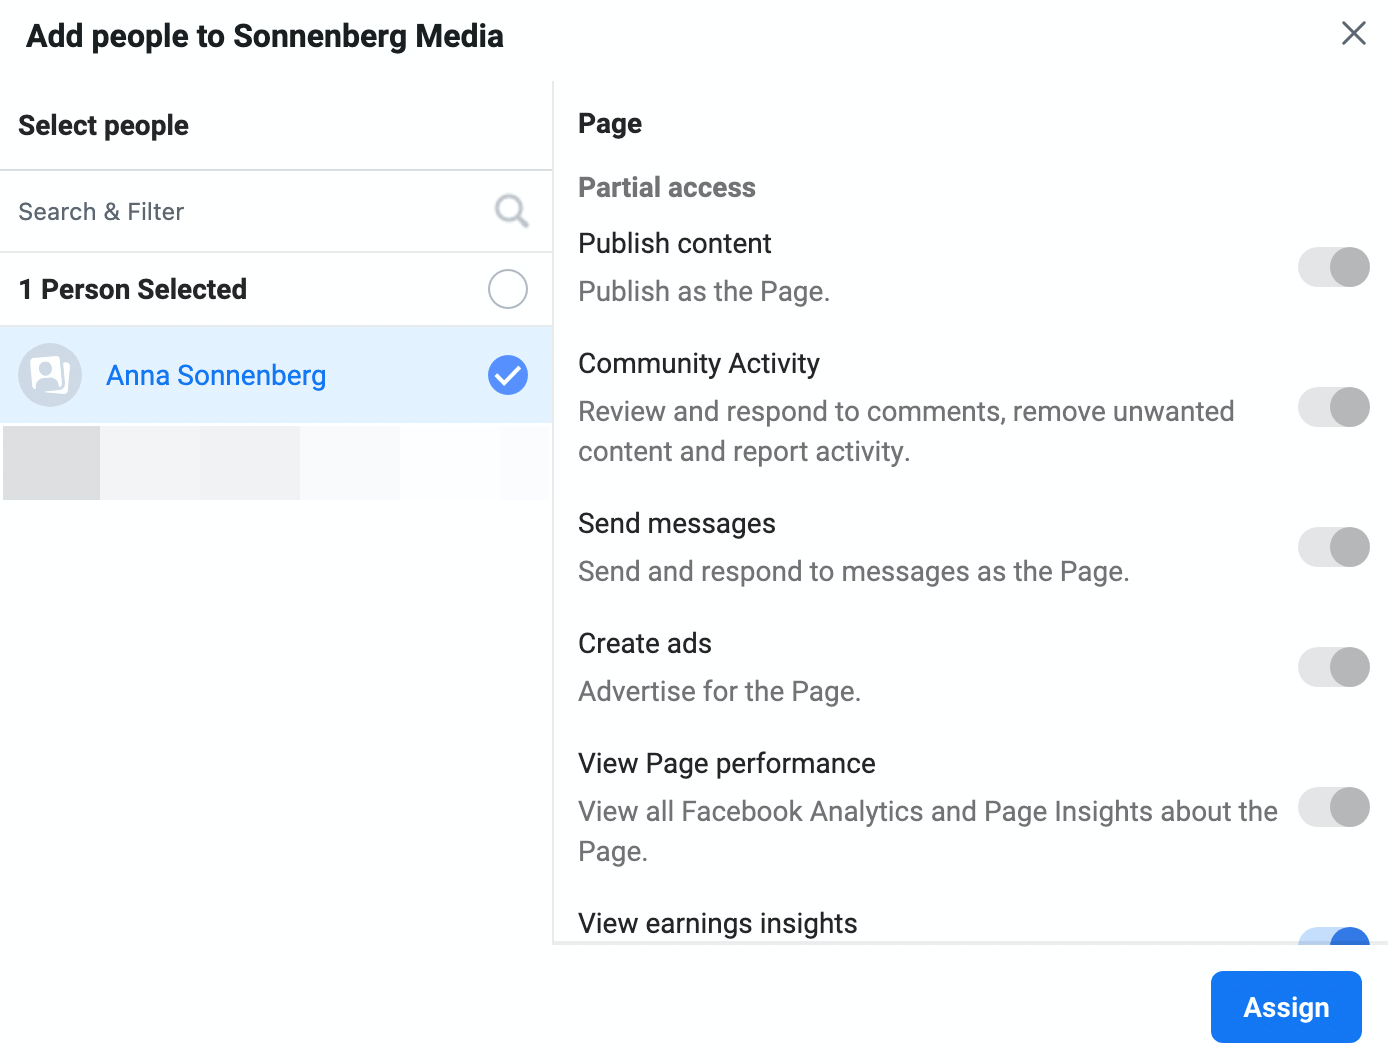
After getting access to client assets, you can assign them to the team members who need to use them. Select an asset and click the Page Access tab. Then click the Add People button and select one or more people to add. Review the options carefully to give enough access without giving team members permission to manage unnecessary tasks.
Schedule Facebook and Instagram Content in Business Suite
One of the biggest perks of Business Suite is that you can schedule social media content in collaboration with clients and colleagues. You can also work with clients to get social media content approved without having to rely on external tools.
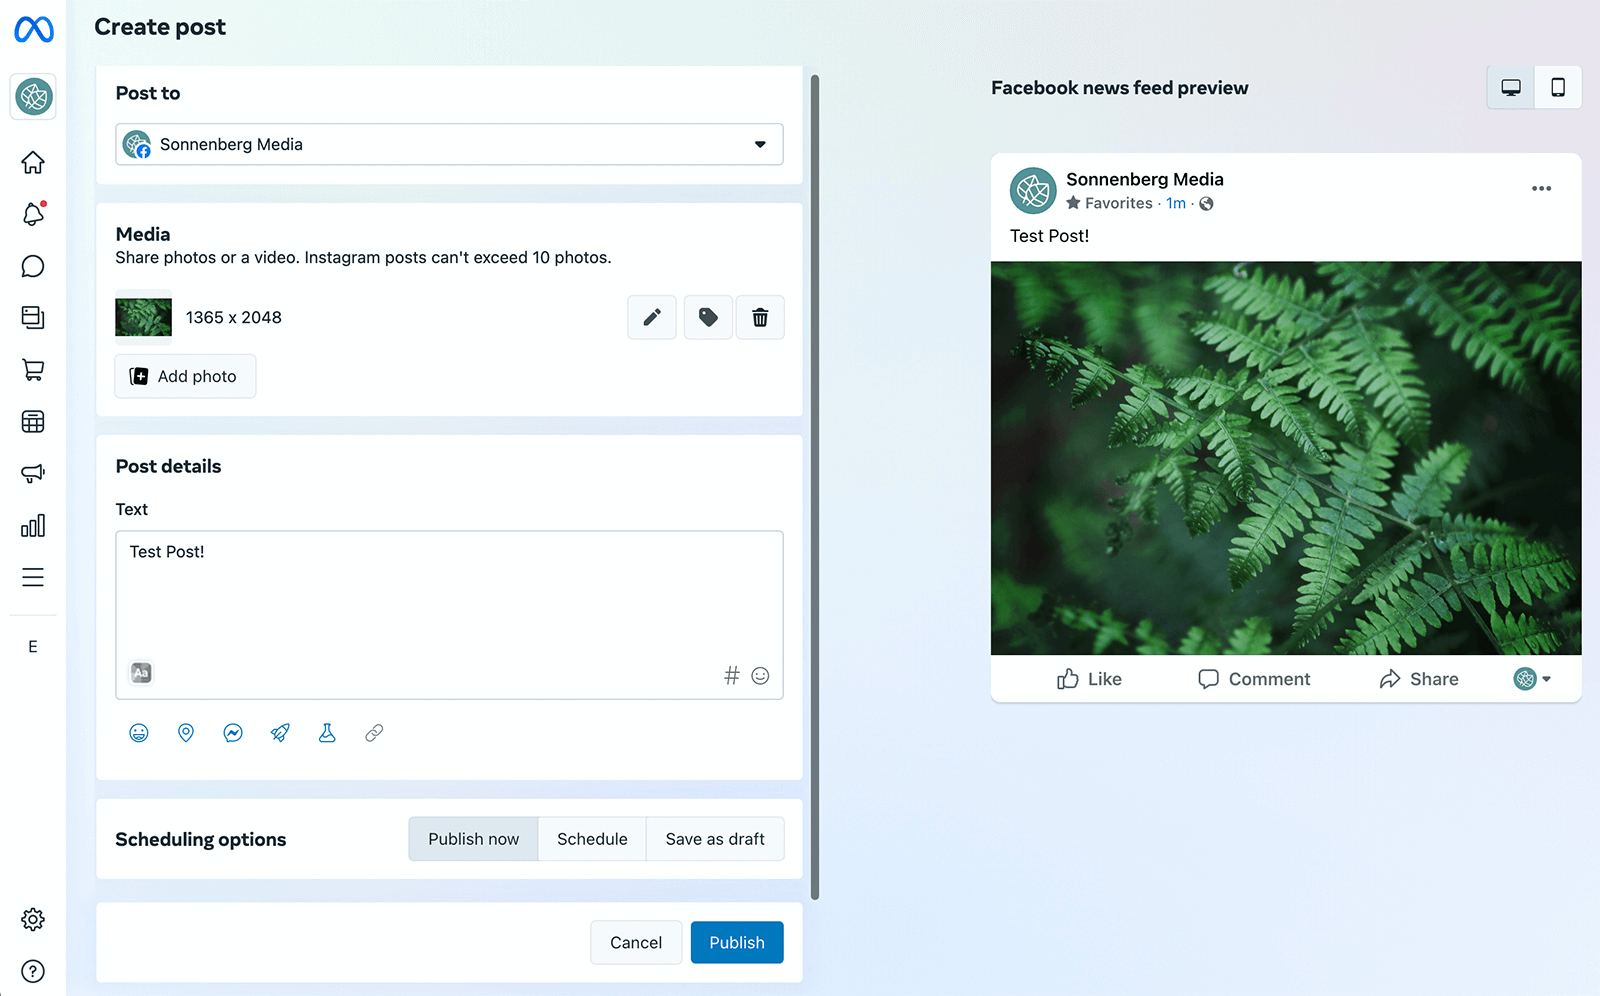
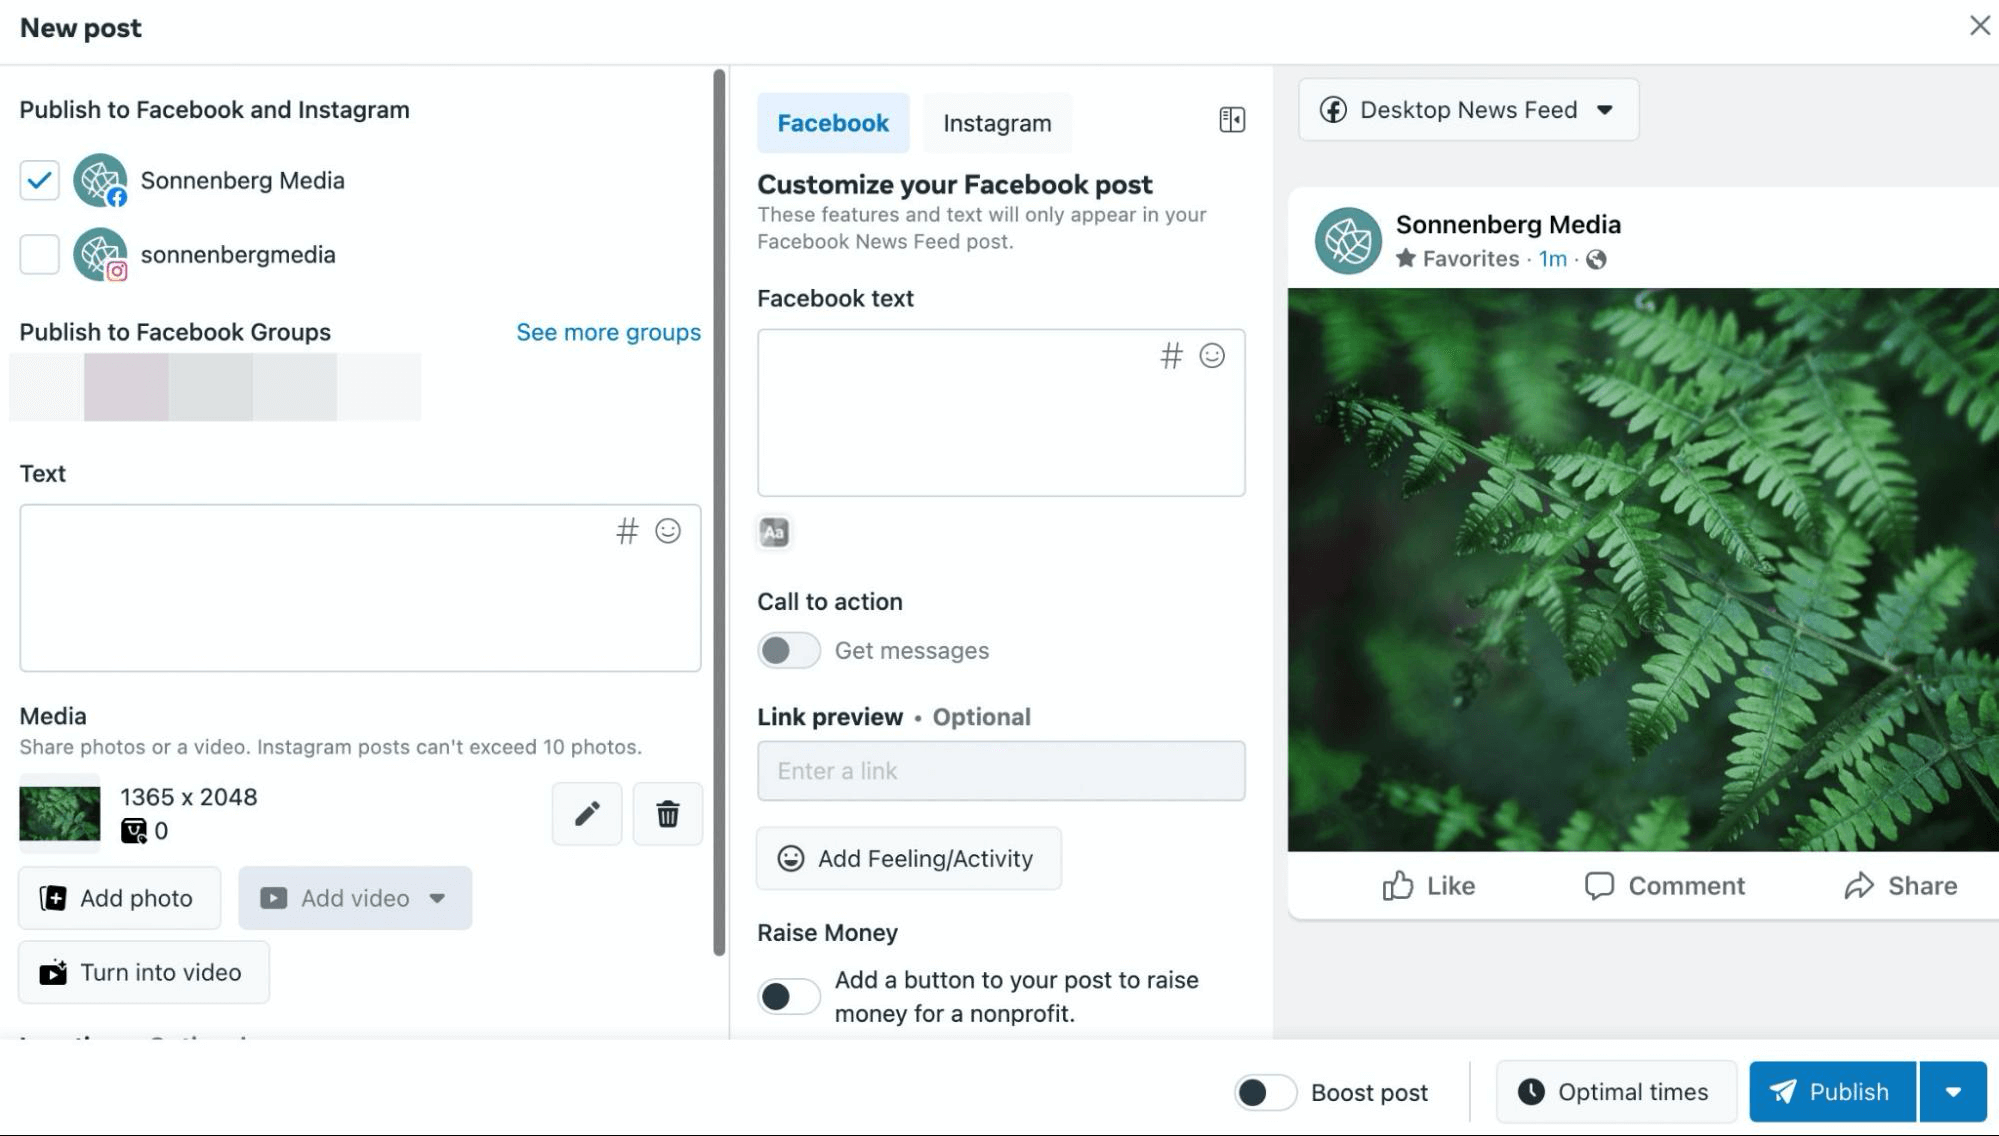
To create content, open the Posts tab in Business Suite. Click the Create Post button and select the accounts where you want to post. You can choose your client’s Facebook page, Instagram account, or both.
Then you can publish right away, schedule for later, or save as a draft. Anyone with access to the account in Business Suite—including clients—can see what you’ve scheduled, drafted, or published.
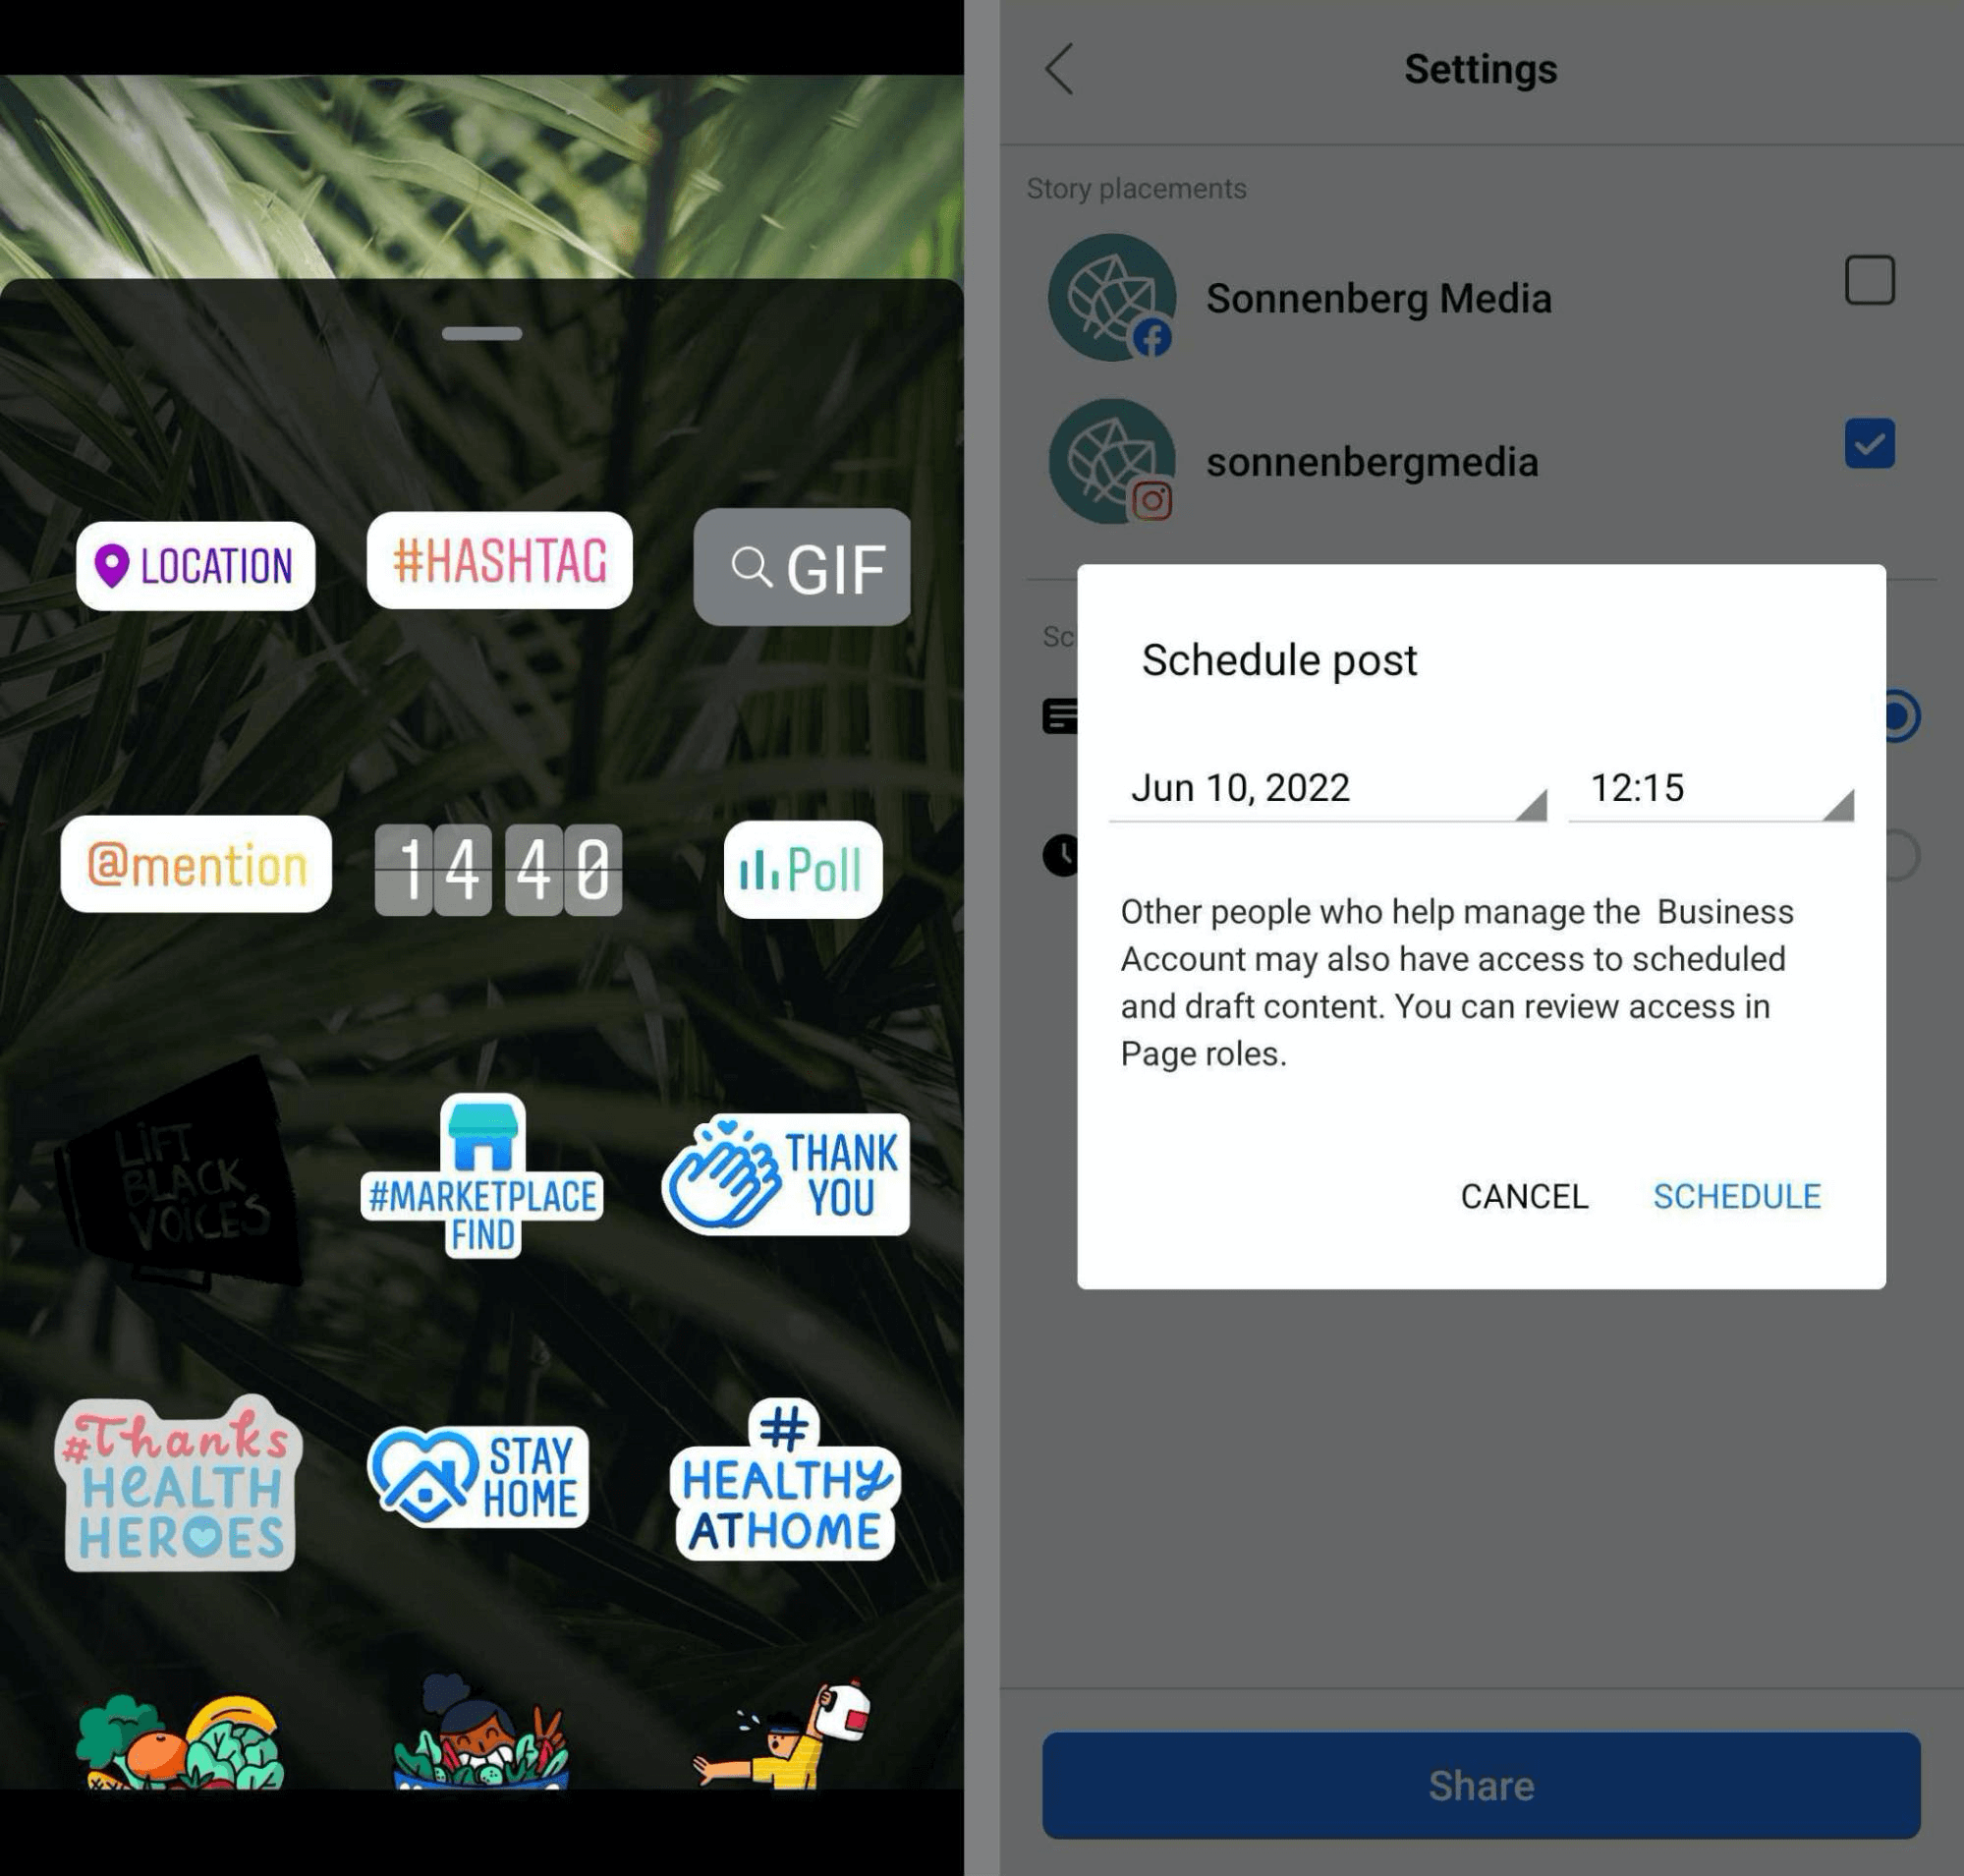
You can use a similar workflow to create stories for Facebook and Instagram. But it’s important to note that some functionality isn’t available on desktop, especially when it comes to stickers.
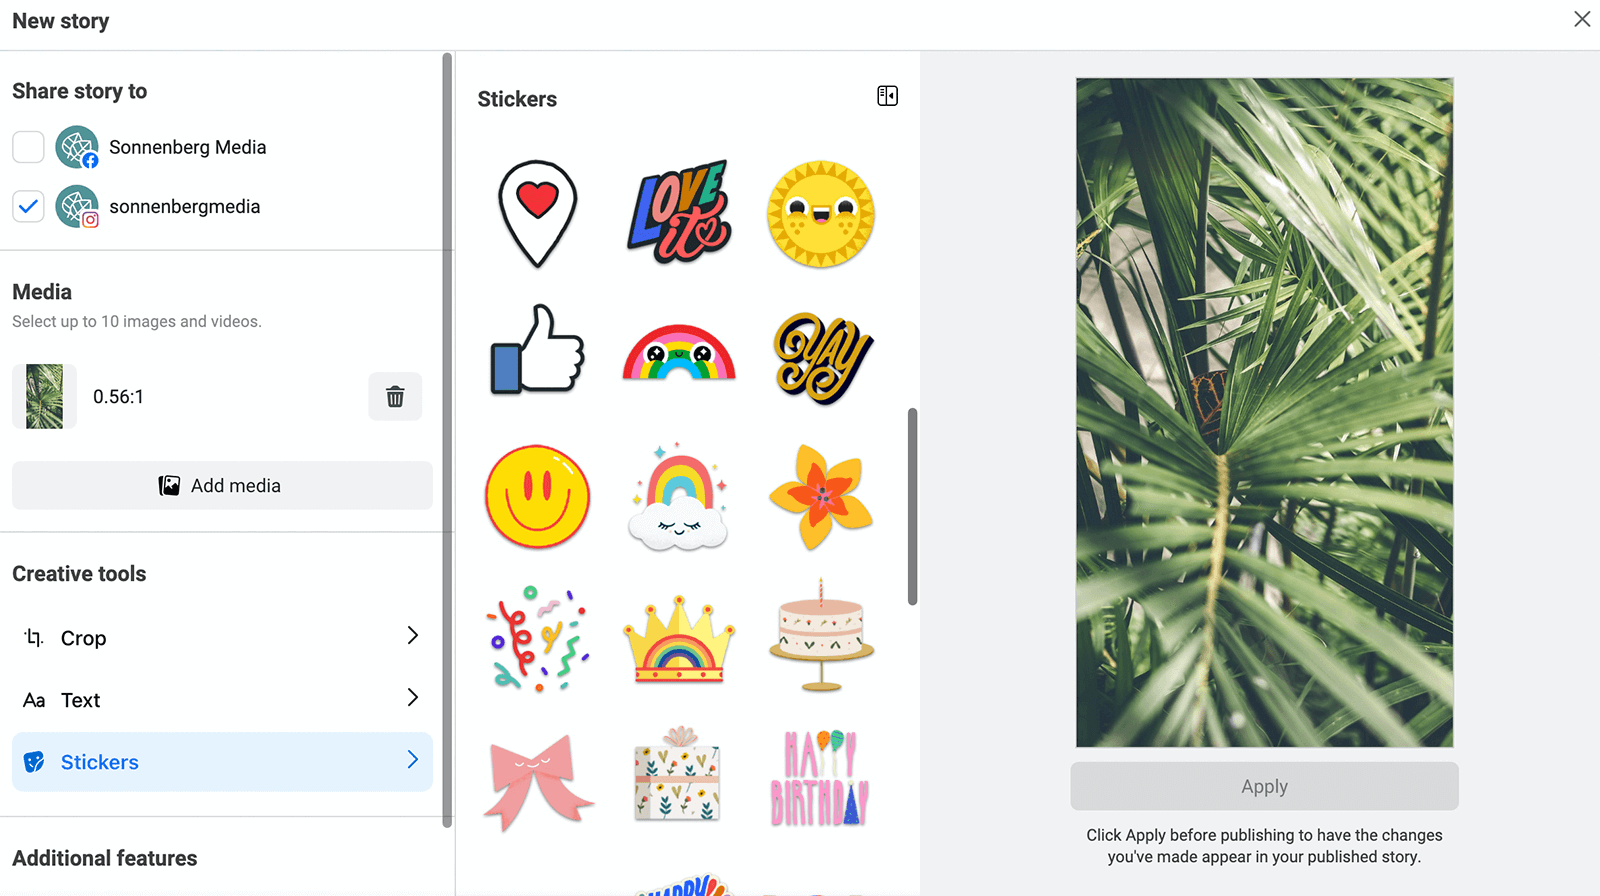
Fortunately, you can use the Business Suite mobile app to access more story options for Facebook and Instagram. You can also use the mobile app to draft content for clients to approve.
Upload Client Creatives to Business Suite
With Business Suite, it’s also easy to manage client creatives so you can post content efficiently. In Business Suite, open the All Tools menu and select File Manager. Here, you can set up folders to organize client content for organic campaigns.
Start by adding a folder for each client. Since your company’s Business Suite uses a single File Manager for all connected accounts, it’s important to keep the content separate. Note that you can set permissions for each folder so only select team members can access them.
Next, upload approved creatives in each client folder. Your team members can click to turn any creative into a post or story.
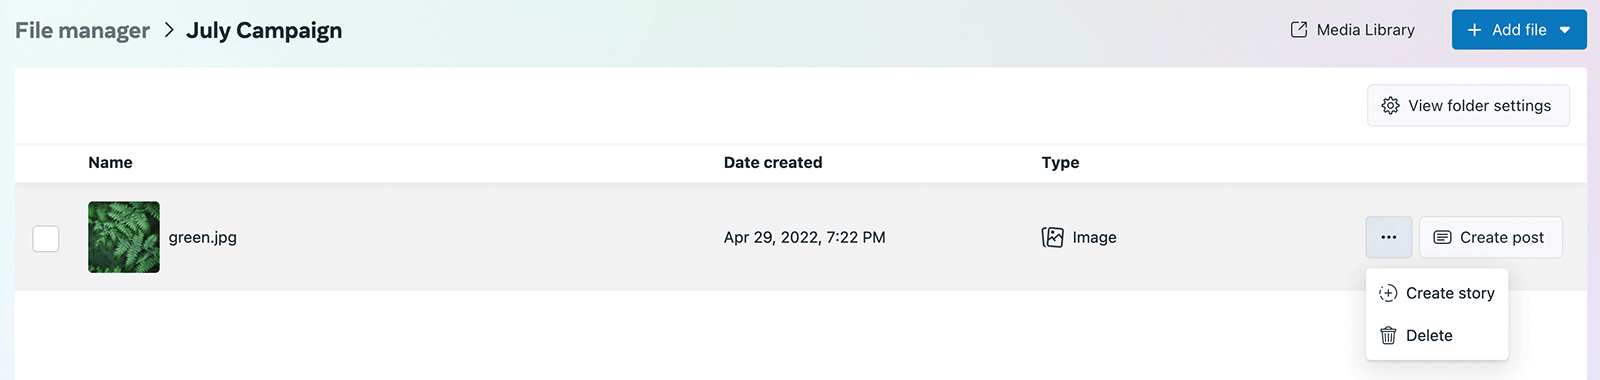
From there, you can schedule content, publish it right away, or save as a draft.
Create To-Do Lists in Business Suite
Anytime you create draft posts in Business Suite, they’ll appear on the Home tab as reminders to finish publishing. You can add other items to your shared to-do list by expanding the task menu. Give the task a name, add relevant details, and put it on the to-do list.

Keep in mind that everyone who has access to the Business Suite can see the tasks. If you use this feature, add as much detail as possible to the tasks, including client or account names, to make them easier to track and complete.
Set Up Inbox Automations in Business Suite
If your team manages client engagement, Business Suite makes it easy to stay on top of engagement across Meta channels. In Business Suite, go to the Inbox tab to manage Facebook and Instagram engagement.
You can tackle comments and DMs across channels in the aggregated All Messages tab. Or you can manage Messenger messages, Instagram Direct messages, and Instagram and Facebook comments in their own tabs.
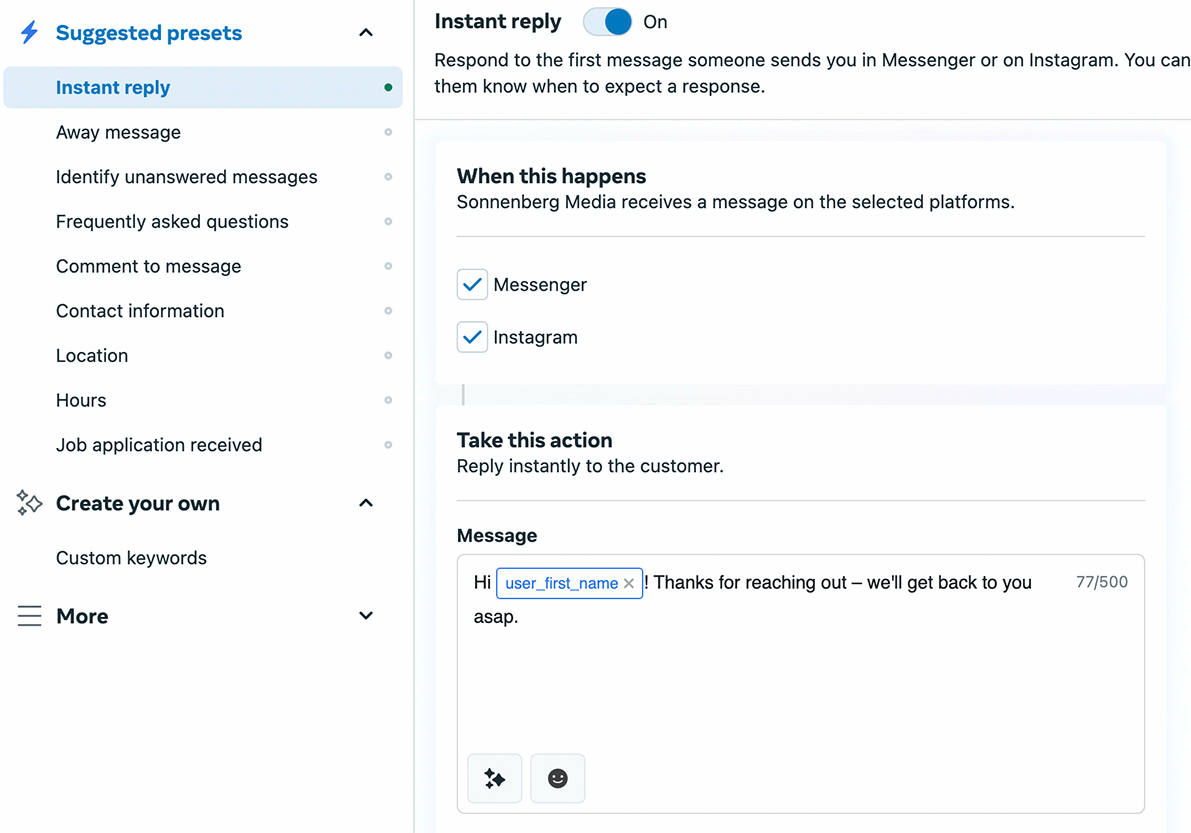
If your clients get a lot of engagement, it’s helpful to automate part of the process. Click the Automations button in the upper-right corner and set up workflows for each account.
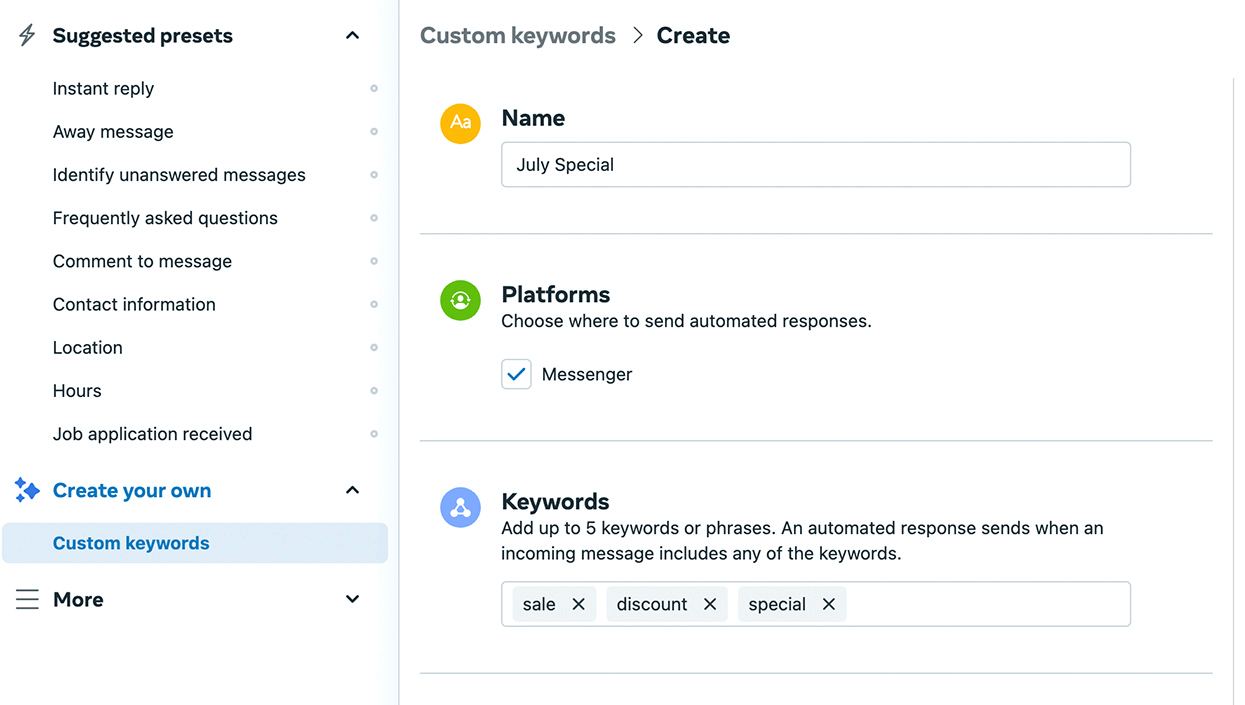
For example, you can set up instant replies to greet people who message your clients for the first time. You can also add keyword triggers that send automated replies when people ask about specific terms like sales and discounts.

Looking for something to make your life easier?
Discover the tools we recommend to drive engagement, save you time, and boost sales across your entire marketing funnel or business.
Whether you need help planning content, organizing social posts, or developing your strategy, you’ll find something for every situation.
FIND YOUR NEXT FAVORITE TOOL
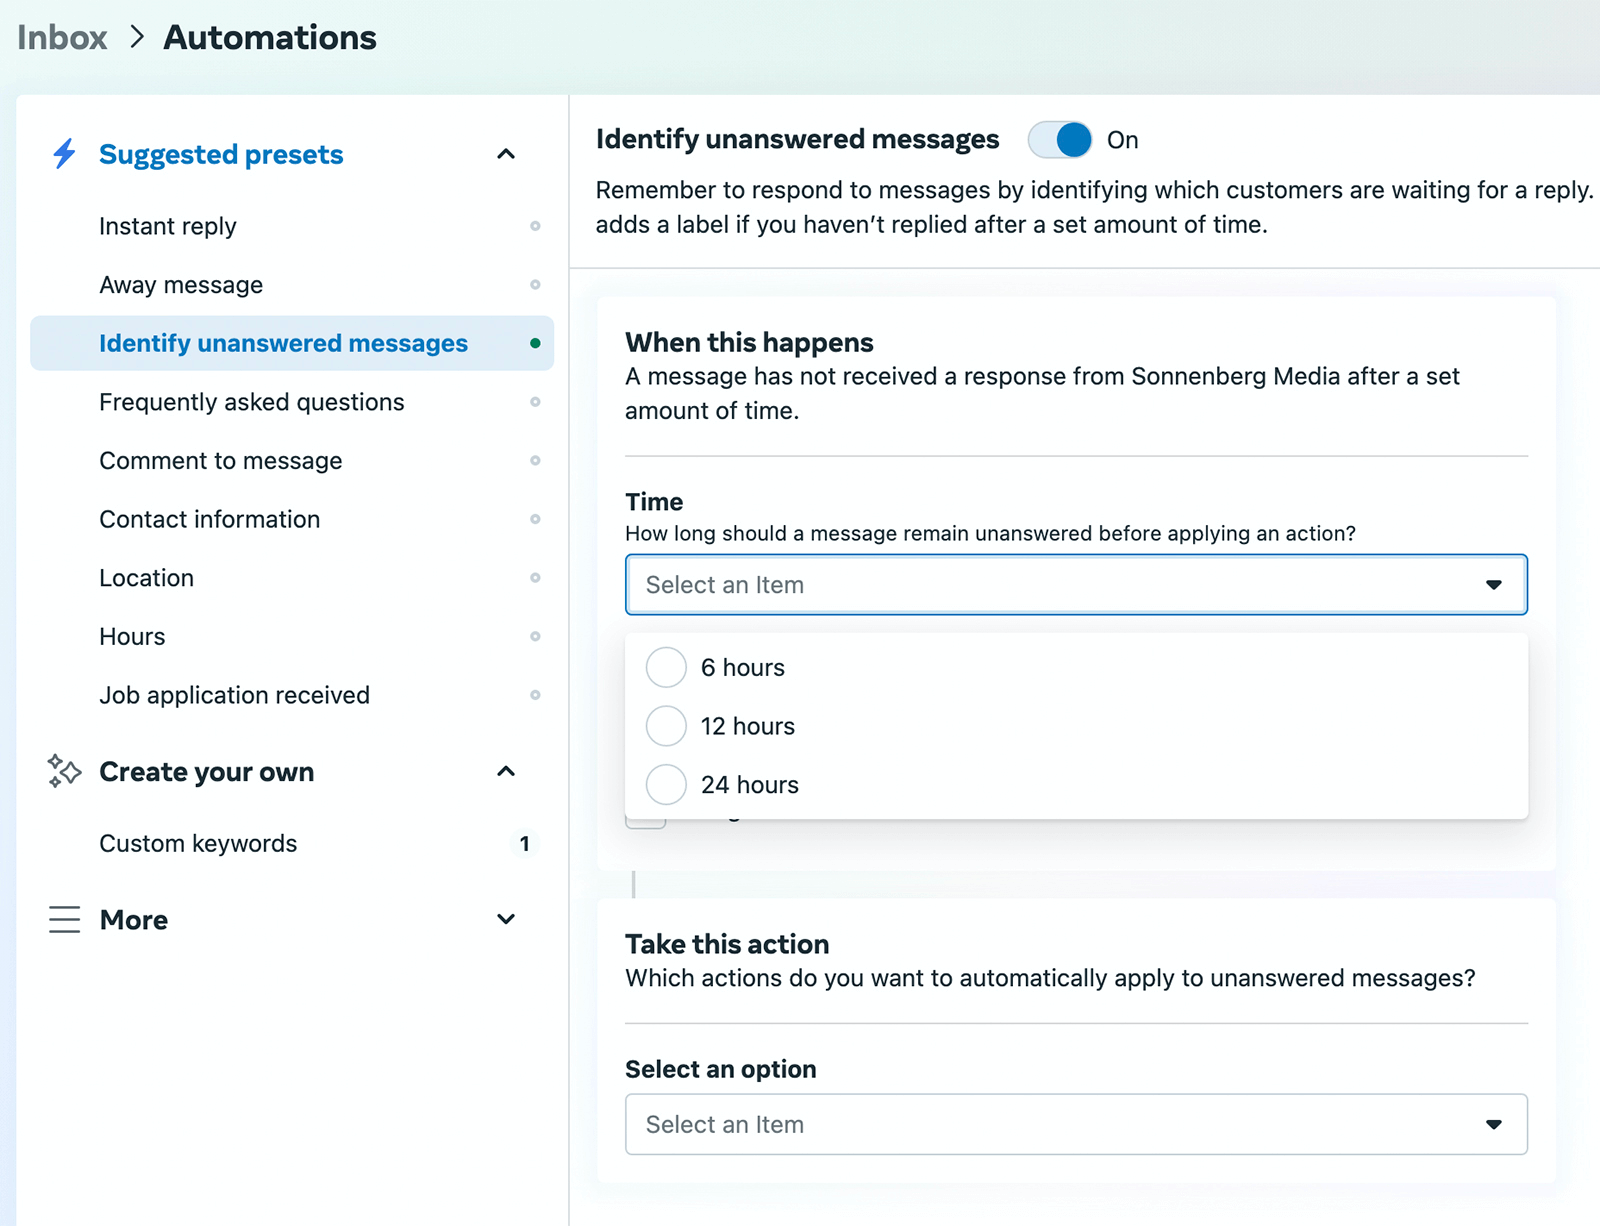
If your team wants to manage engagement more efficiently, it’s also helpful to use Business Suite’s automated prompt.
You can set up additional prompts to remind you when you have unanswered messages to address. For example, you can flag DMs for follow-up if you haven’t responded to them within 6 hours.
Create Goals for Client Accounts in Business Suite
Your team can also use Business Suite to manage social media marketing goals for clients. In Business Suite, open the Insights tab. Then click the New Goal button in the upper-right corner. You can set reach or audience growth goals for Facebook or Instagram, with unique objectives for each client.
Choose from starter, intermediate, or advanced options, each of which has preset goals based on the account’s past metrics. You can also enter your own custom goal to align with the results your client wants to see.
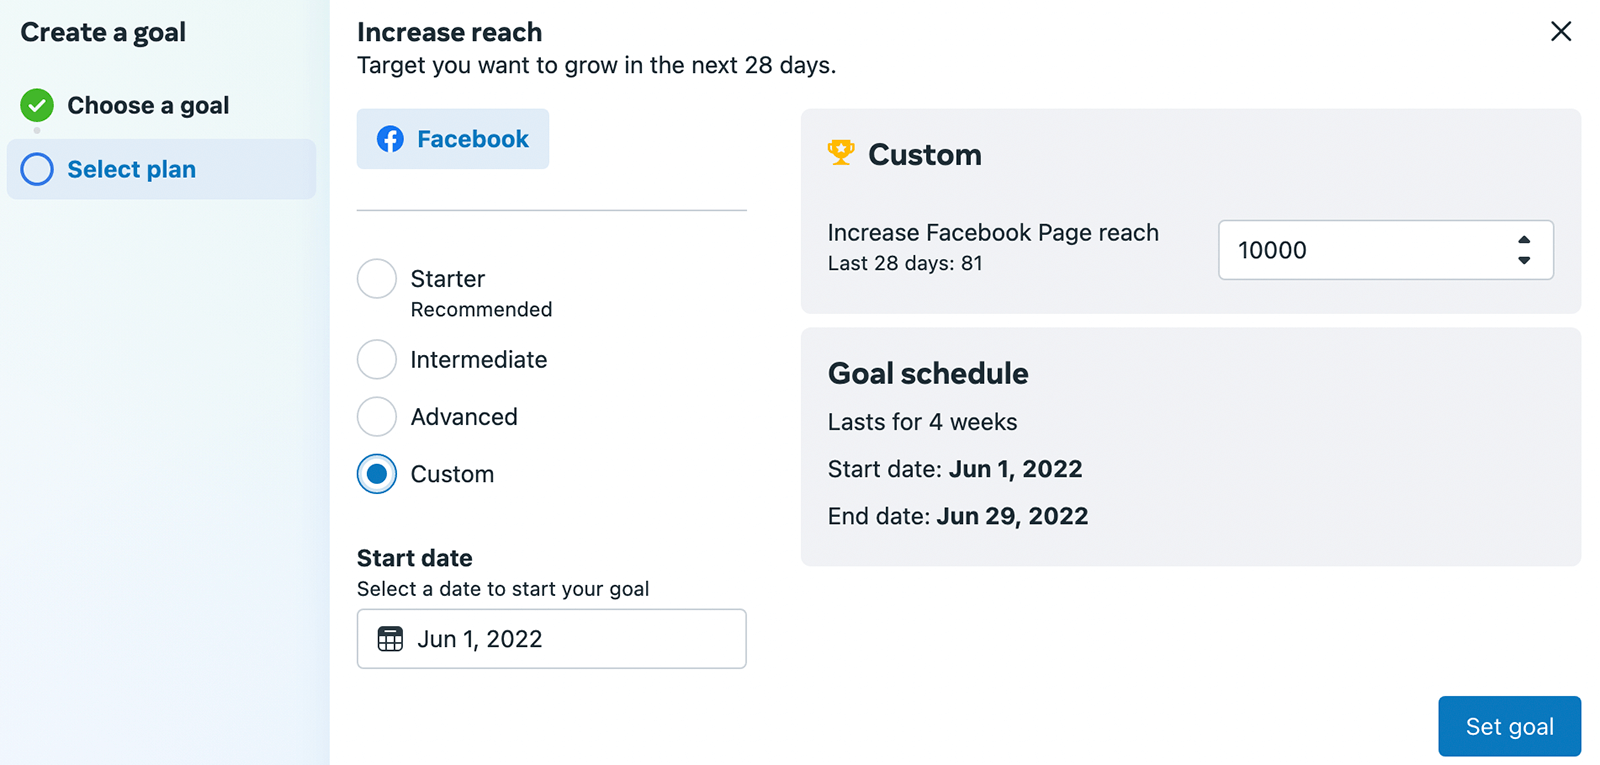
Once you save the goal, your team can track progress throughout the 4-week period. It’s easy to see whether you’re on track or figure out if you need to update your approach before it’s too late.
How to Set Up Meta Business Manager to Work With Clients
If you or your clients are using Business Manager, use the workflow below to get your team on board and set up essential tools.
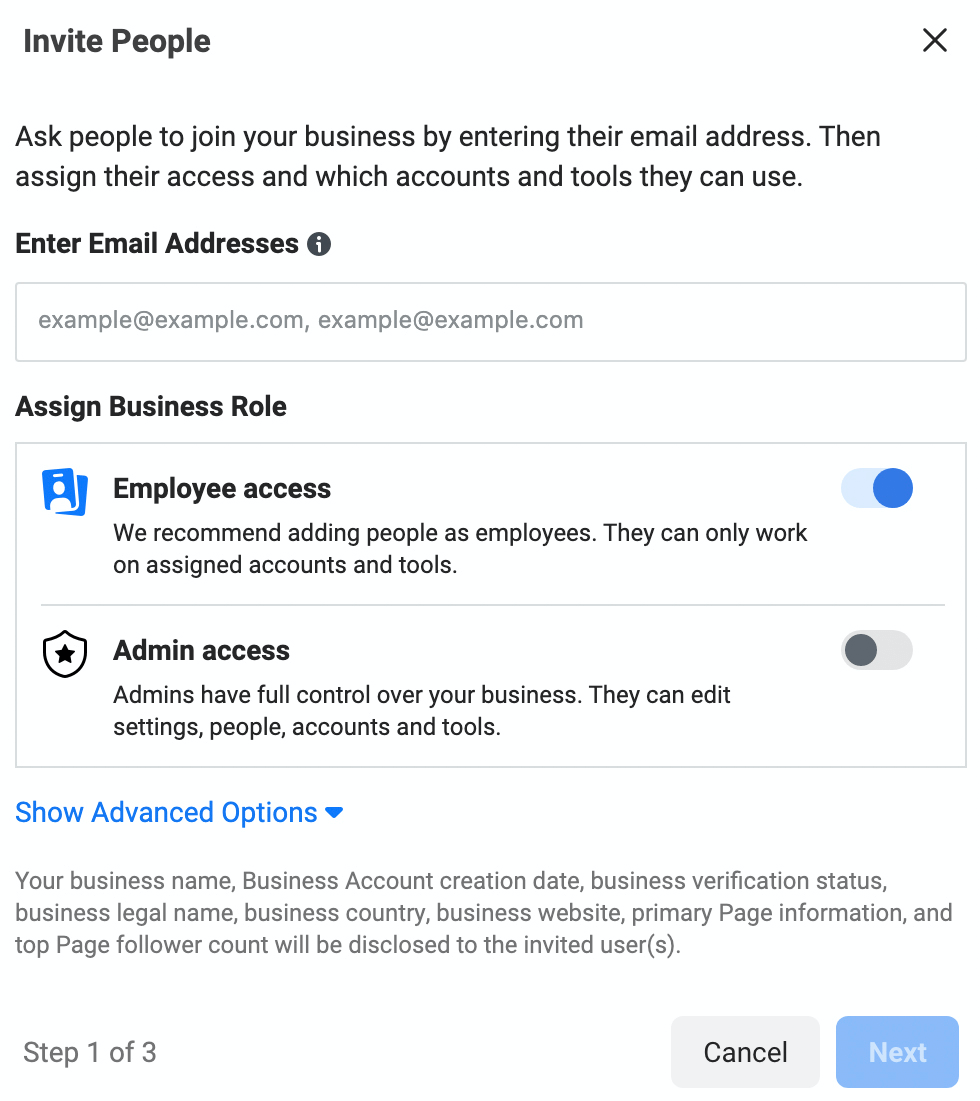
Onboard Your Team in Business Manager
First, give your team access to your agency’s Business Manager. Meta recommends giving at least two people admin access to a Business Manager. It’s best to give the rest of your team employee access so you have greater control over the tools they can manage.
To add people, open Business Manager and click the gear icon in the lower left to open business settings. In the left menu, click Users and select the People tab. Click the add button and enter the email addresses of your colleagues or employees. When your colleagues accept your invitation, they’ll be added to your Business Manager.
Give Your Team Access to Client Social Media Accounts in Business Manager
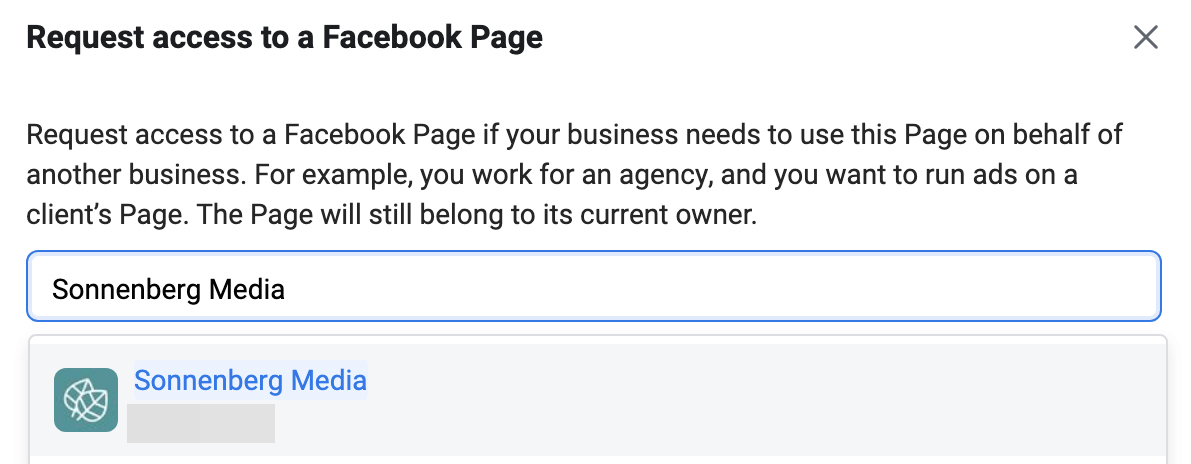
Now you need to give your team appropriate access to client pages. In the left menu of business settings, select Accounts and click the Pages tab. Then click the Add button to request access to a page. You can enter the URL or search for the page. Click the Request Access button to proceed.
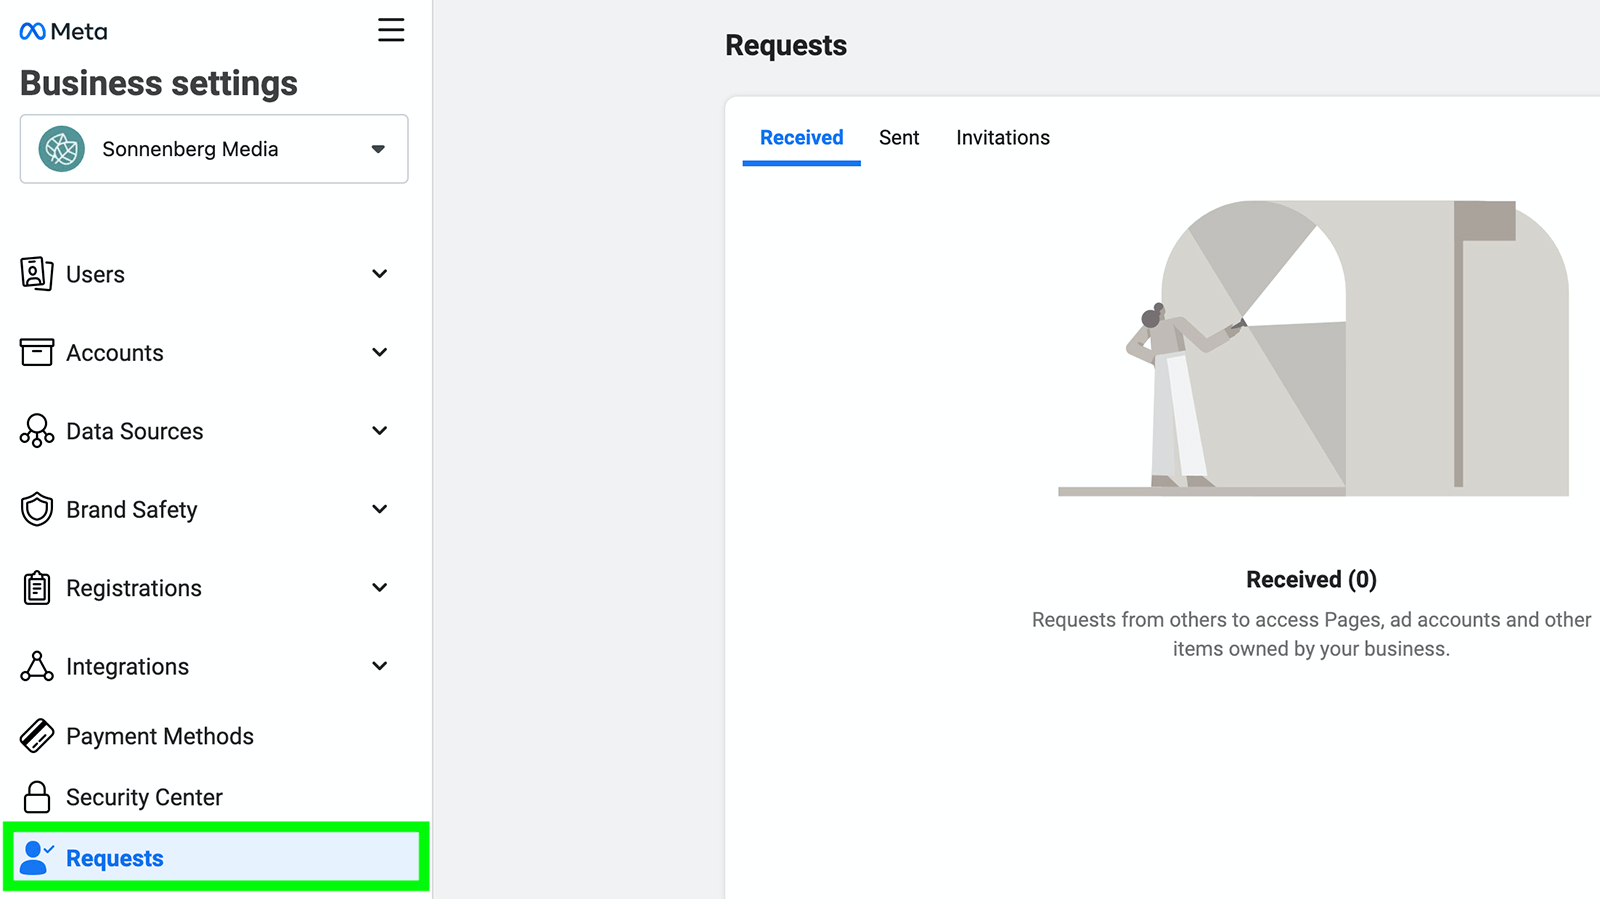
Clients will need to approve your request through their own Business Manager. In Business Settings, they can select Requests from the left menu. On the Received tab, they can view and approve any requests.
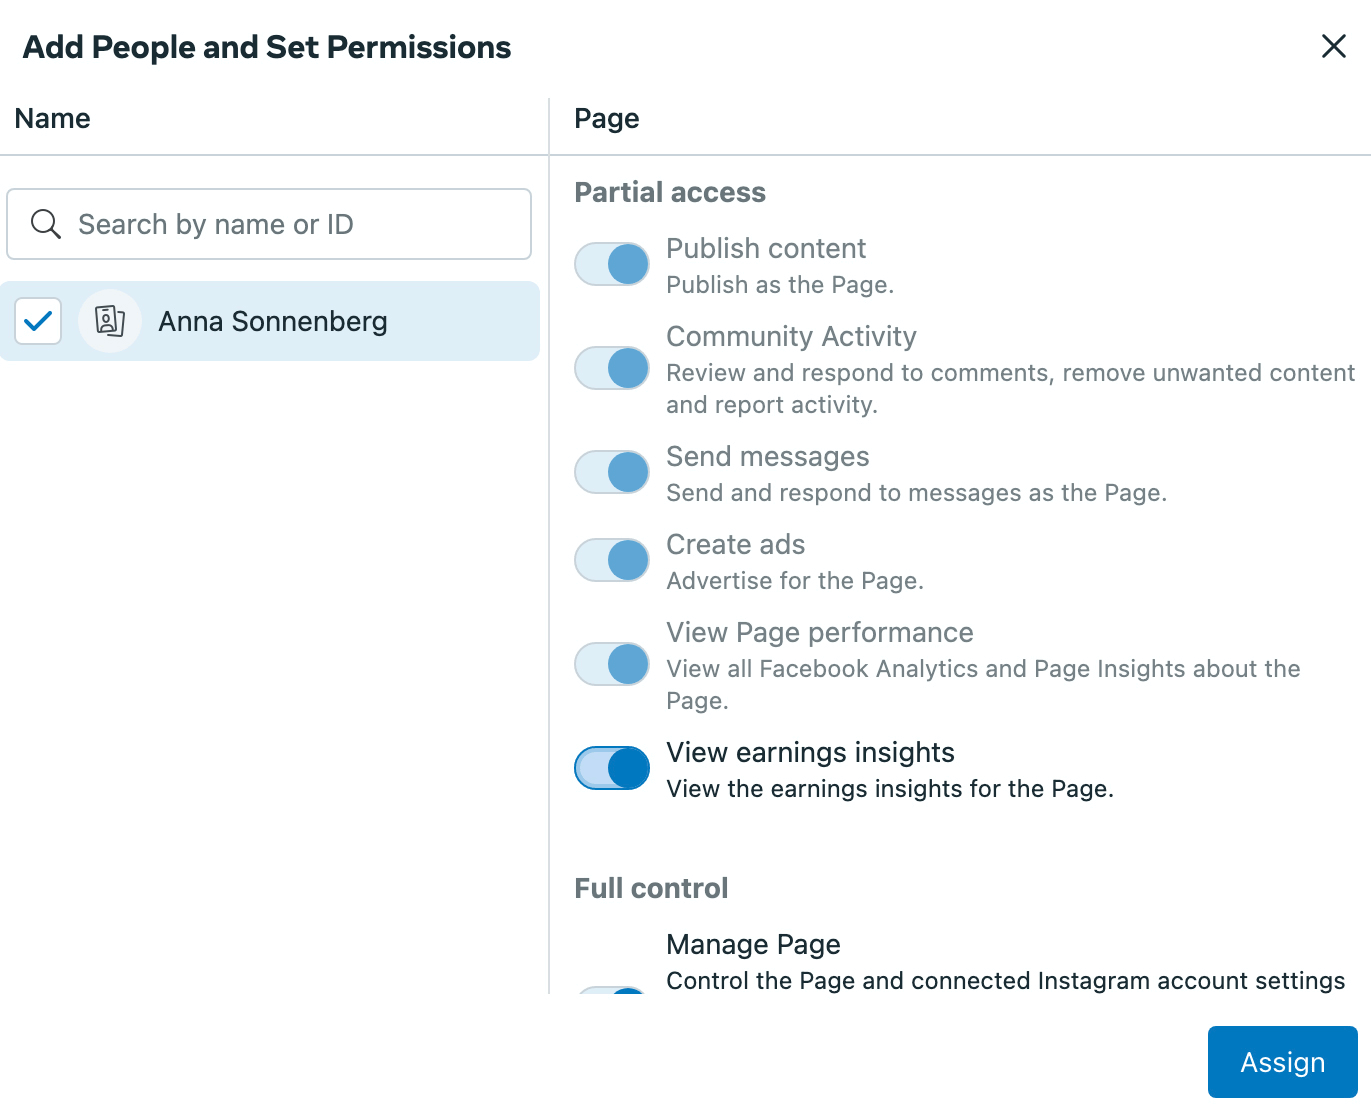
Once a client has approved your request, you can go back to the Pages tab in Business Manager and configure access. Click on your client’s Facebook page and select everyone who should have access to the page. You can toggle the Manage Page switch to give people full control over the page or allow individual permissions as necessary.
Click the Assign button when you’re finished. Everyone you’ve added should now be able to see and access the client page in Business Manager.
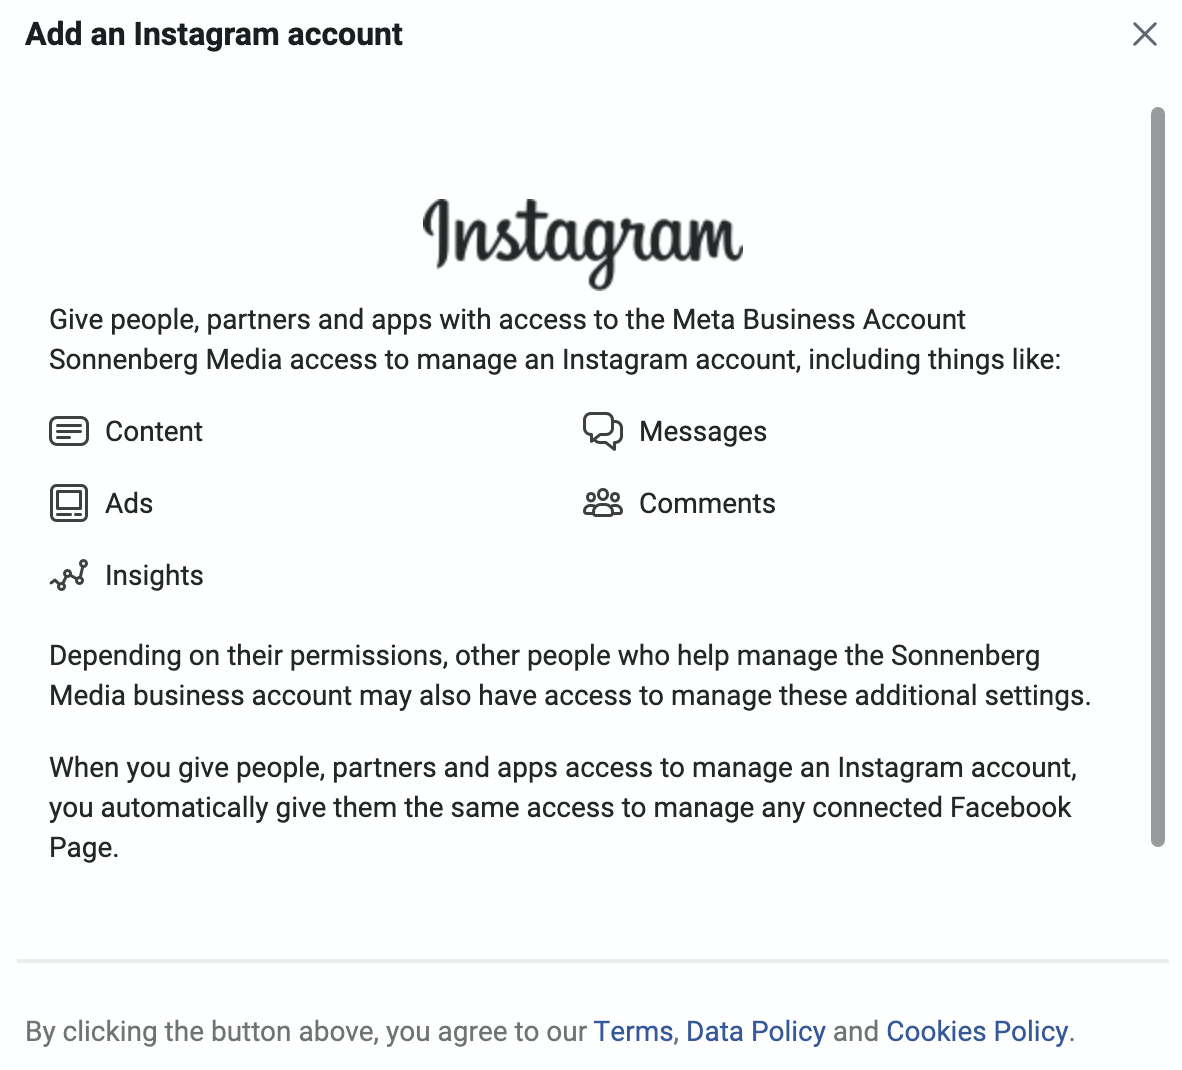
Next, add client Instagram or WhatsApp accounts to your Business Manager. In the Accounts menu, select Instagram Accounts or WhatsApp Accounts and follow the prompts. Once you’ve successfully connected these accounts, you can assign team members to manage them.
Give Your Team Access to Client Ad Accounts in Business Manager
The process for adding team members to client ad accounts uses a similar workflow. In Business Manager business settings, open the Accounts drop-down menu and select Ad Accounts. Then click the Add button and opt to request access to an account. Enter the client’s ad account ID.
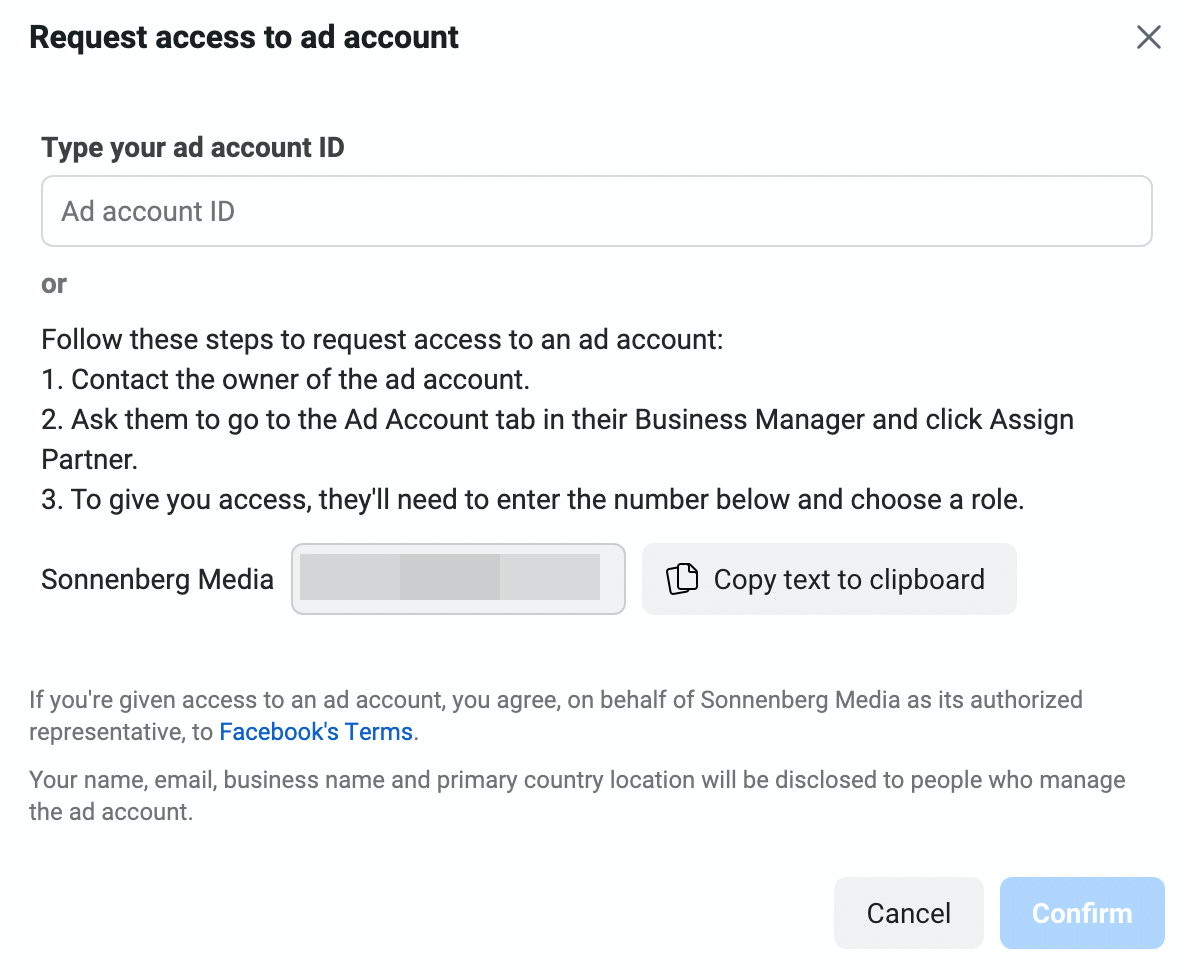
If you don’t know their account ID, you can provide your company’s ID instead. Copy and paste your business ID and send it to your client, asking them to assign you as a partner in Business Manager.
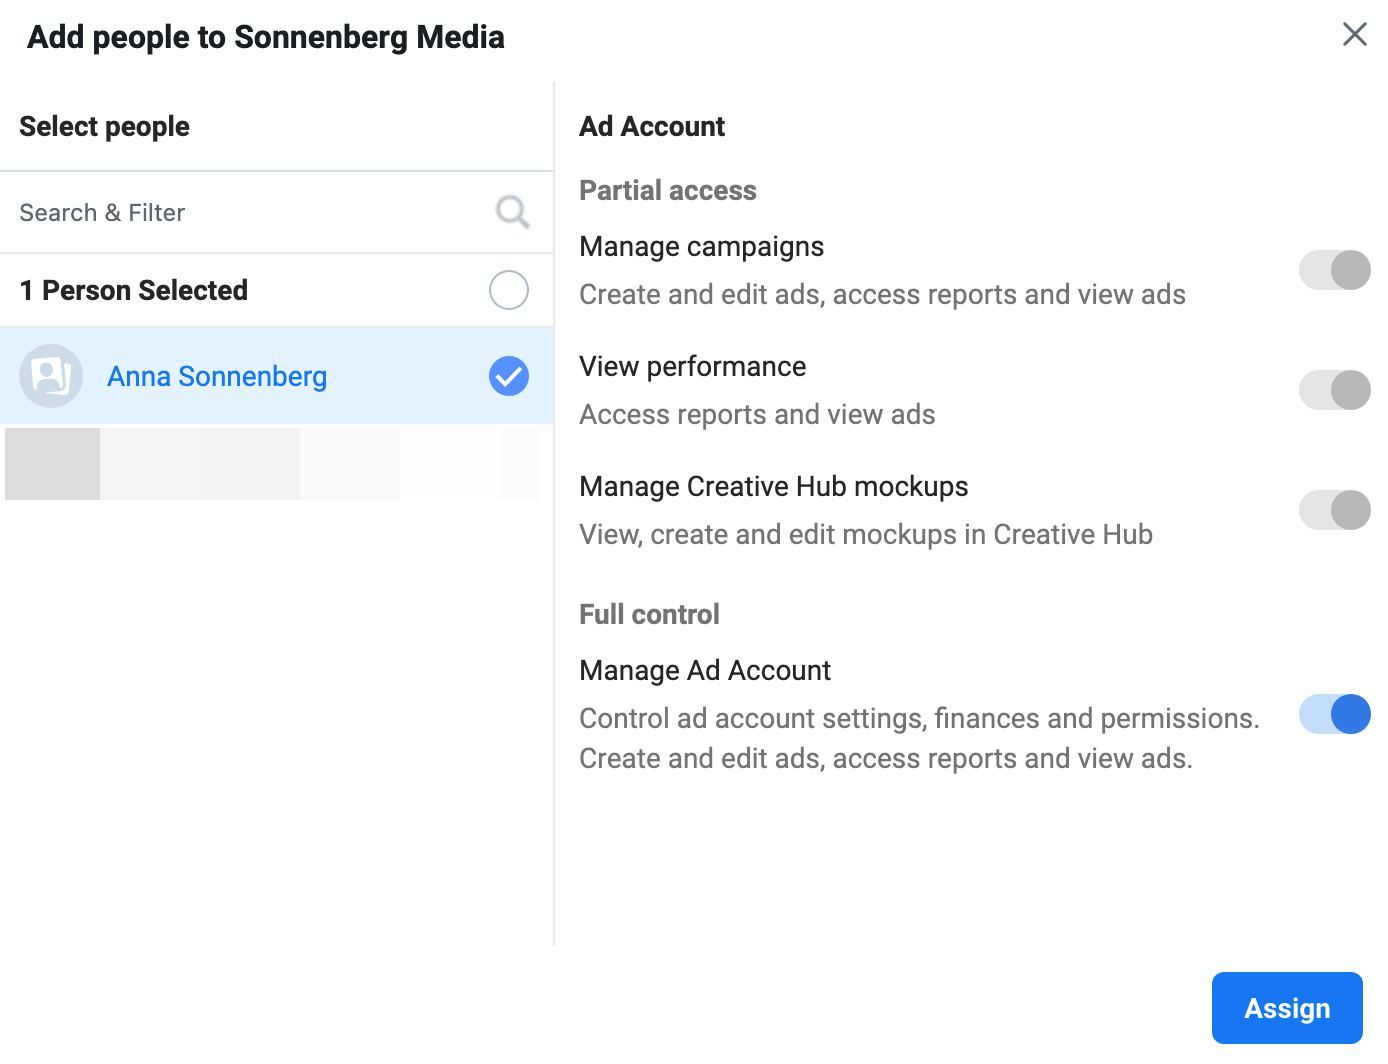
Once you get access, go back to the Ad Accounts tab and find your client’s ad account. Click the Add People button and select members of your team. You can give people full control over the ad account or access to create campaigns or view performance only.
Manage Client Meta Pixels and Conversion Events in Business Manager
If you run ads for clients, you may need access to their Meta pixels and conversion events. Clients can share their pixels with you, as long as they know your business ID.
In business settings, clients can open the Data Sources menu and click Pixels. After selecting the pixel they want to share, they can click the Assign Partners button. They’ll need to enter your business ID to give you access.
![]()
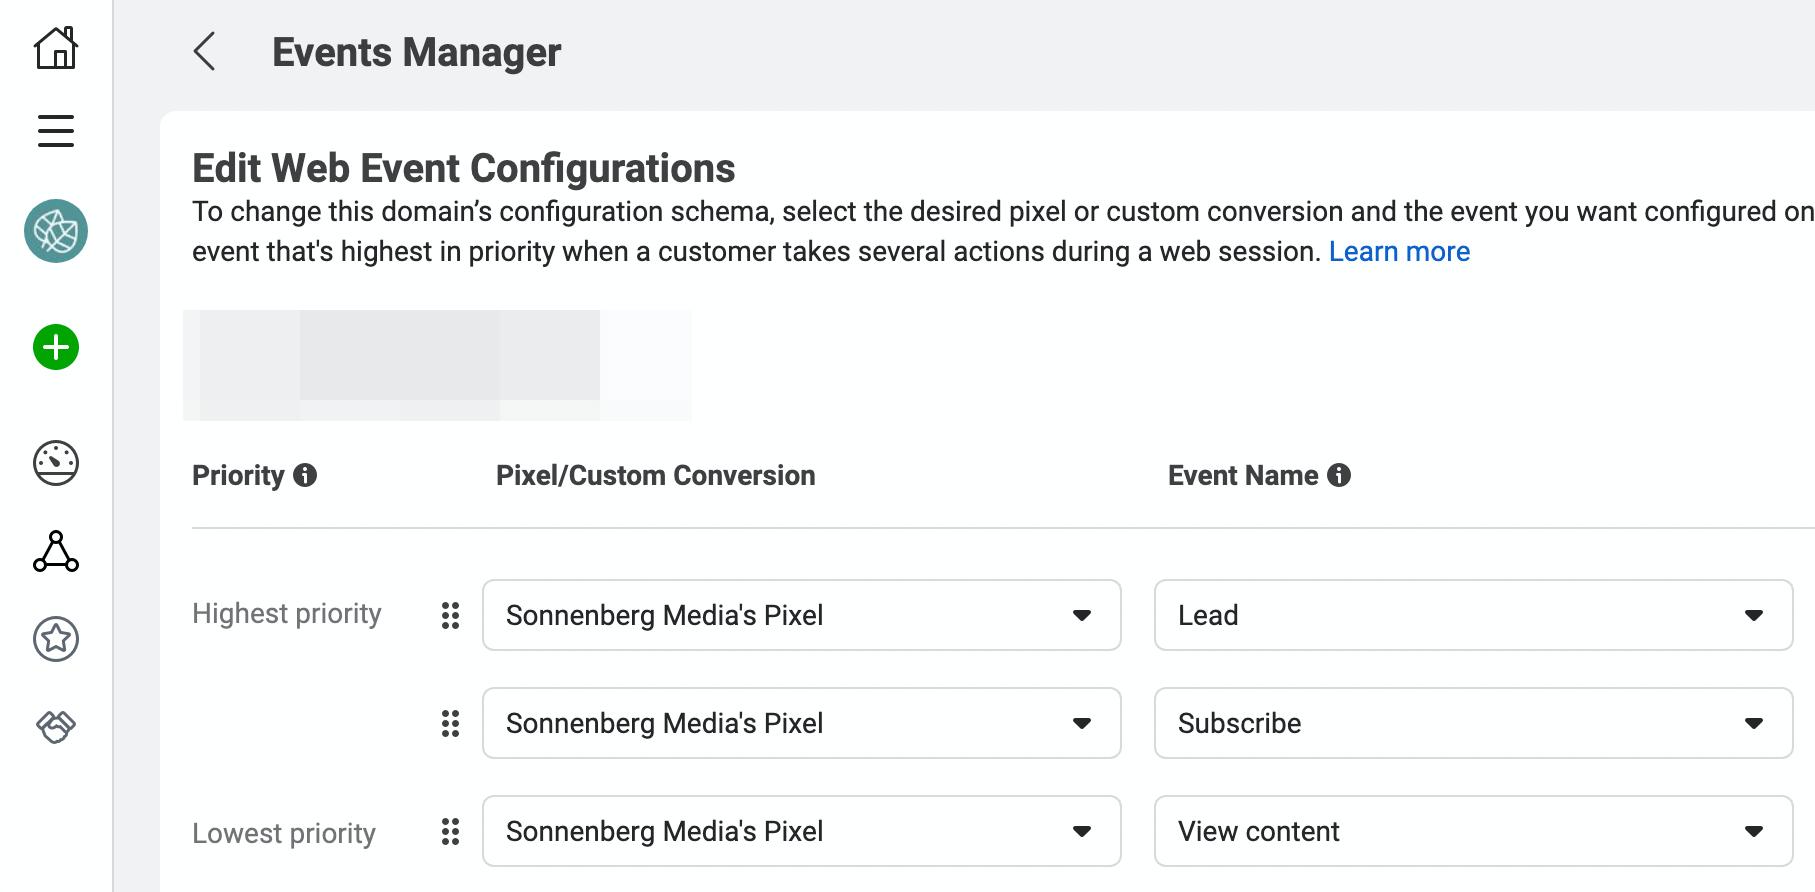
Once you get access, you can check and update their conversion events. In the Business Manager tools menu, select Events Manager. Select the desired client pixel and click the Configure Web Events button. Then add conversions and arrange them in order of priority so you can track ad-related conversions accurately.
Manage Client Catalogs in Business Manager
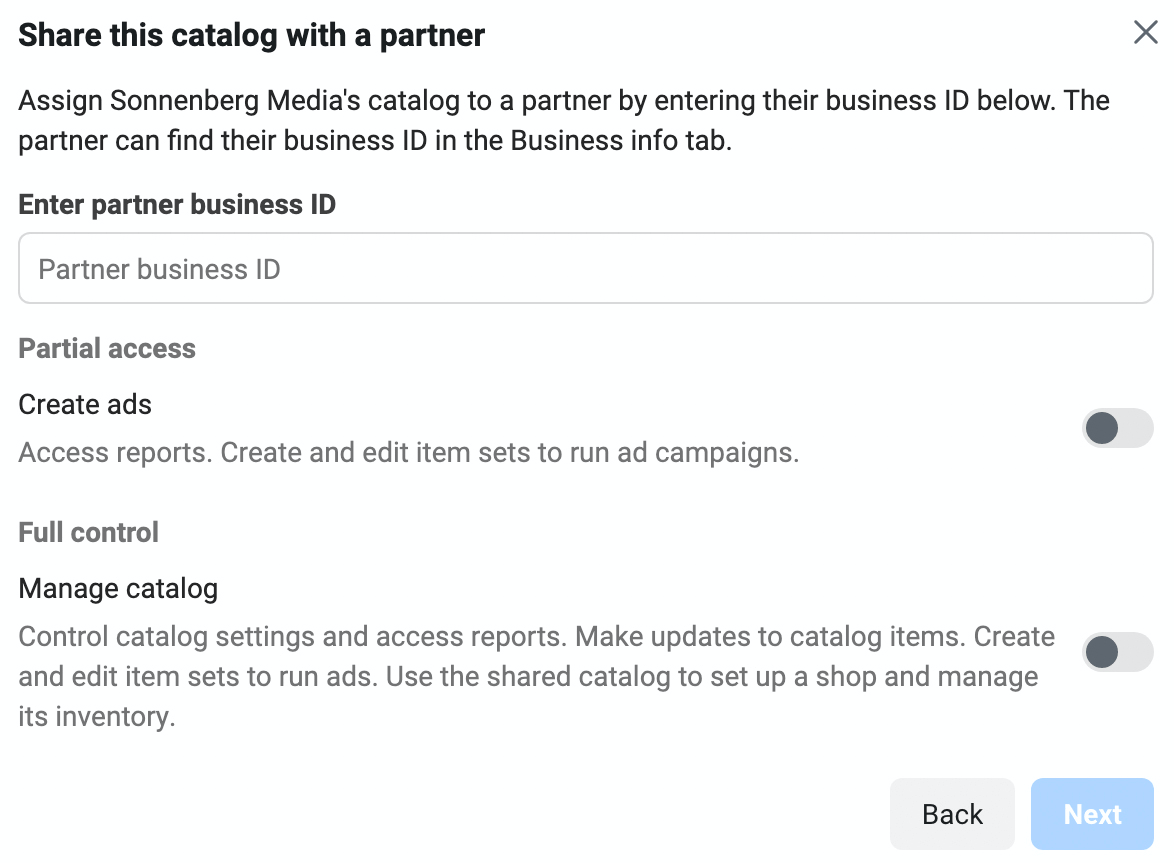
Clients can also give you access to their product catalogs so you can run sales ads or set up shops. To share a catalog, clients should go to the Data Sources menu in business settings and select Catalogs. They can click the Assign Partners button and enter your business ID to share access.
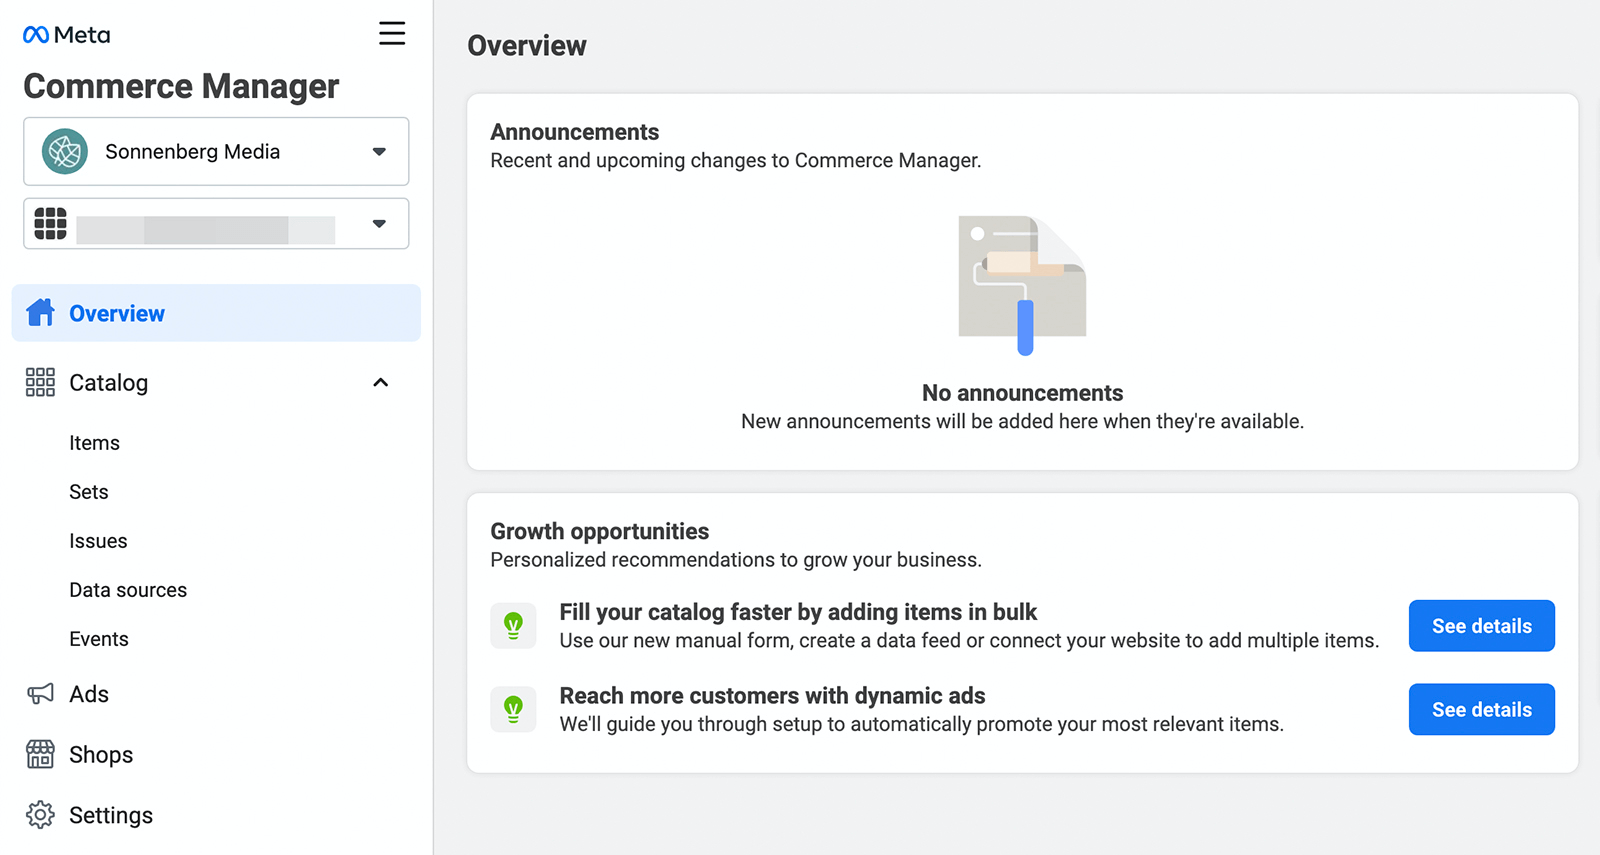
You can open Commerce Manager from the Business Manager tools menu. From there, you can update catalogs, resolve issues, organize Facebook and Instagram shops, and create ads to run in Ads Manager.
Conclusion
While Business Suite has a more robust set of content creation tools, Meta hasn’t directly integrated some of the most essential management tools into the platform yet. Fortunately, you can use the menus in both Business Suite and Business Manager to find links to all of the tools you need to manage Meta accounts and features for your company or clients.
Get More Advice on Facebook Marketing
Stay Up-to-Date: Get New Marketing Articles Delivered to You!
Don’t miss out on upcoming social media marketing insights and strategies! Sign up to receive notifications when we publish new articles on Social Media Examiner. Our expertly crafted content will help you stay ahead of the curve and drive results for your business. Click the link below to sign up now and receive our annual report!
YES! I WANT YOUR UPDATES
Get Your FREE Course: Web3 for Beginners

Curious about Web3, but don’t know where to start or who to trust?
Introducing Web3 for Beginners, a course taught by Michael Stelzner, the founder of Social Media Examiner.
Learn the basics of Web3 and apply it to your business with this FREE comprehensive course.
CLICK HERE TO GET FREE ACCESS


![Toni Kroos là ai? [ sự thật về tiểu sử đầy đủ Toni Kroos ]](https://evbn.org/wp-content/uploads/New-Project-6635-1671934592.jpg)


