
How to Design a Winning WordPress Blog in 2022
Welcome to Chapter 6 of our complete guide to setting up a blog! Today we’re going to discuss WordPress blog design.
Visit any of the top performing blogs in the world and they all have one thing in common. They all provide the information you need within a couple of clicks. It takes some designing to do that and that’s what we are covering today.
When we talk about designing a blog in this article, we don’t mean creating your own WordPress theme or redesigning a minimalist theme to make it your own.
We mean putting your blog together, choosing your theme, selecting fonts, colours, headers, adding necessary pages, adding a favicon, adding authors and all those elements you see on successful blogs.
Mục Lục
How to Design a WordPress Blog
If you have read the other articles in our series, you should already know your blog niche, have a name, be using WordPress as your platform, have a web host and have a fully operational WordPress installation.
Now comes the fun part. Building the framework of your blog. By the end of this article, you should have something that closely resembles a fully operational blog!
Activate Maintenance Mode
If you’re designing a blog that’s brand new, you don’t really need to put it into maintenance mode but it’s good practice.
Any time you perform any significant changes to your blog, putting it into maintenance mode prevents visitors landing on a website that isn’t working and spoiling their experience.
Instead, visitors will see a specific page telling them you’re working on the site. That makes it well worth using.
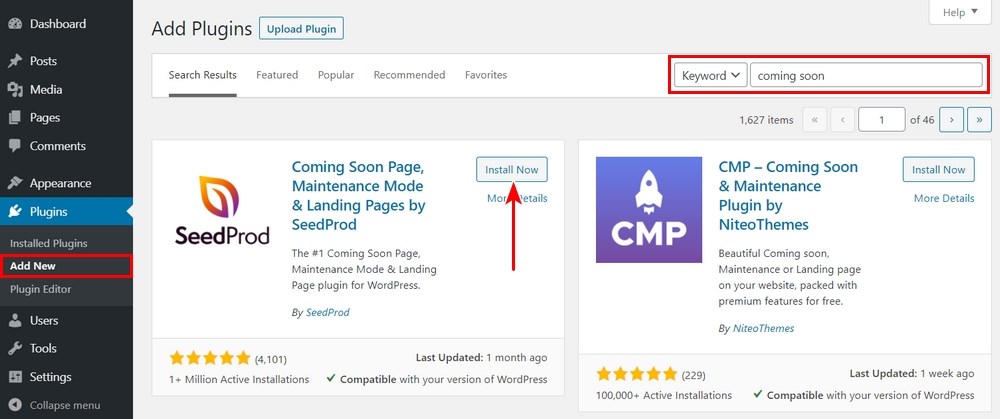
We use a plugin to activate WordPress maintenance mode. There are dozens out there but we like Coming Soon Page, Maintenance Mode & Landing Pages by SeedProd.
- Install a maintenance mode plugin in WordPress.
- Access the plugin dashboard from the left menu in your WordPress dashboard.
- Set up or enable maintenance mode.
Perform your work while in maintenance mode, then disable maintenance mode when you’re done.
Always remember to disable maintenance mode when you’re done. It is very easy to forget!
Select the Best WordPress Theme
WordPress theme choice is one aspect of starting a blog that will take the most time. Until you discover Astra that is.
Astra is a superb WordPress theme that has everything blogs need to compete in a global market. It’s free, very easy to use, loads incredibly quickly, has a very smart one-click installer and makes it as simple as possible to use.
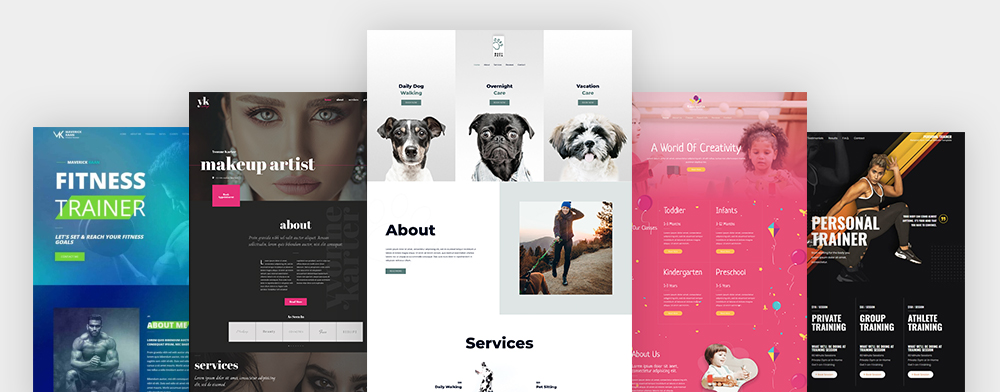
Astra was built by WordPress enthusiasts for other WordPress enthusiasts. While capable of a lot, it is intended to be user friendly and welcoming to beginners. For all those reasons and more, we cannot recommend the Astra WordPress theme enough!
As we use the Astra theme on our websites, many of the following steps will use it too. You will be able to perform all steps with other WordPress themes but the options may be in different places.
Add a Logo and Favicon to Your Blog
A logo is an opportunity to make your blog unique. If you’re blogging for a brand or company, you’ll already have a logo. If you’re blogging for yourself, you really should consider getting one.
You can use a text logo if you like though.
A favicon is the small graphic you see on a browser tab when you land on the website. It’s a small thing, but another way to personalize your blog and make yourself memorable.
![]()
To add a logo to your blog:
- Log into your WordPress dashboard.
- Select Appearance from the left menu and select Astra Options.
- Select Upload Logo from the centre of the screen.
- Select the Change Logo button on the left.
- Upload your logo or select it from the Media Library.
- Adding a favicon happens on the same page as changing the logo.
- Select the Select Site Icon option in the left menu.
- Upload or select your favicon from the Media Library.
Use the Right Font
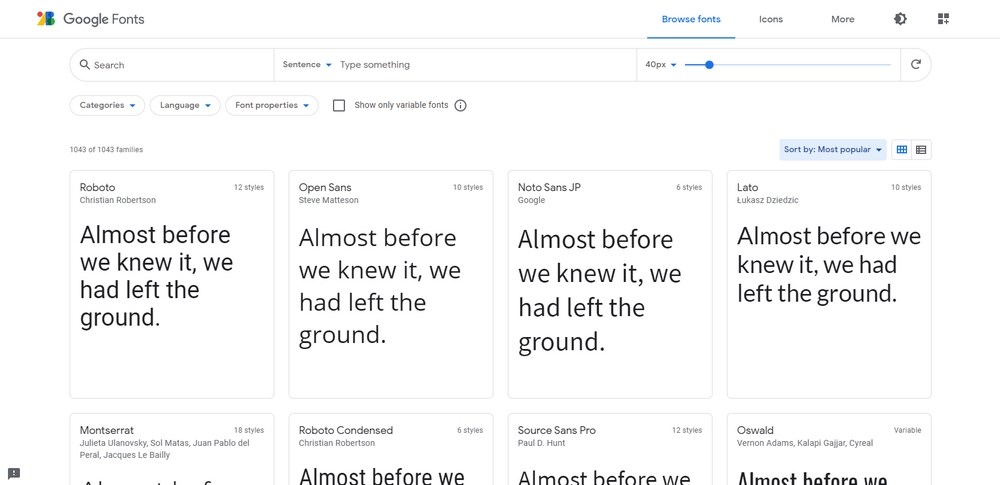
Most Astra themes will come with well-chosen fonts included. If you want to change those fonts, you are free to do so. However, you should give font choice a lot of thought as fonts can make or break a design.
Here are resource to help you with font choice:
Select the Right Colours for Your Blog
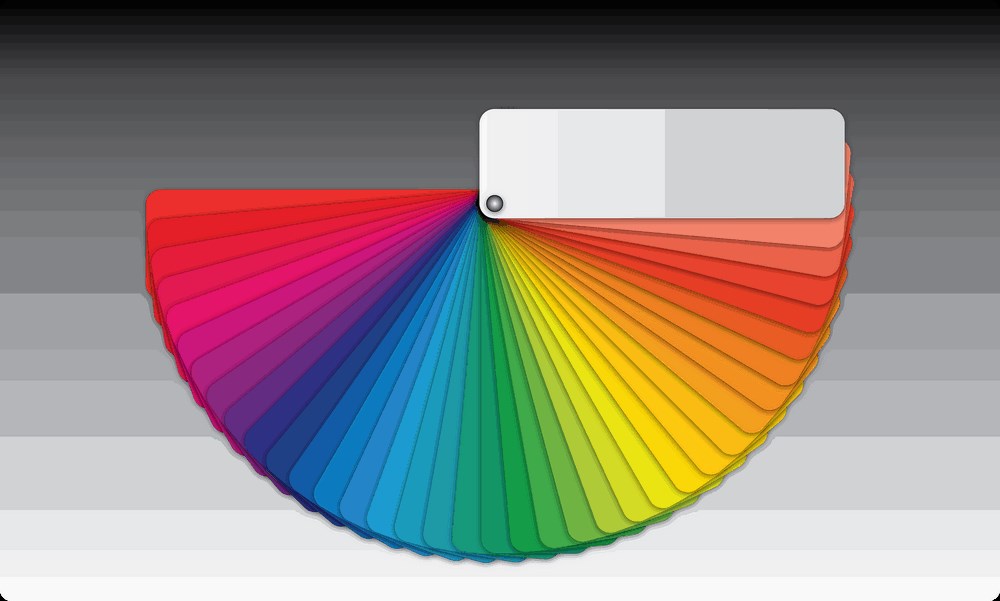
The design team at Astra puts a lot of thought into the colour schemes of our WordPress themes but that doesn’t guarantee they will work for you. Like fonts, you can change any colour, anywhere in an Astra theme.
Also like fonts, you need to put a lot of thought into colours and colour combinations. Here are some resources to help:
Set up Your Blog Header
The header is a vital part of any WordPress blog design as it’s the part that surrounds navigation and any social areas and supplemental information at the top of your website.
It’s another of those small design touches that can make a real impact and is something you should set up from the very beginning.
Astra uses a number of tools to create headers. Each theme comes with at least one attractive header for each design but you can also create your own if you wish.
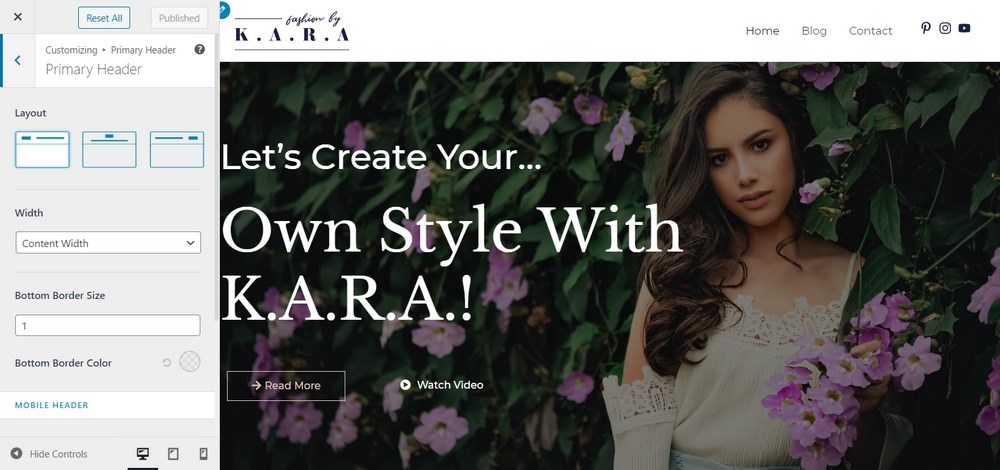
To modify a blog header:
- Select Appearance and Astra Options from the left menu of your WordPress dashboard.
- Select Header Options from the centre pane.
- Select Header and Primary Header from the side menu on the next screen.
- Select one of the layout options within the left menu.
If you want to create a new blog header and use an Elementor theme from Astra, this page walks you through creating a WordPress header and footer with Elementor.
Create Necessary Blog Pages
Now your WordPress blog design is coming together, it’s time to add the pages you’ll need to make it work.
Some WordPress themes will create these pages for you, others will not. The easiest way to check is to select Pages and All Pages from the left menu. If you see these pages in the list, you’re good to go. If you don’t, we can create them.
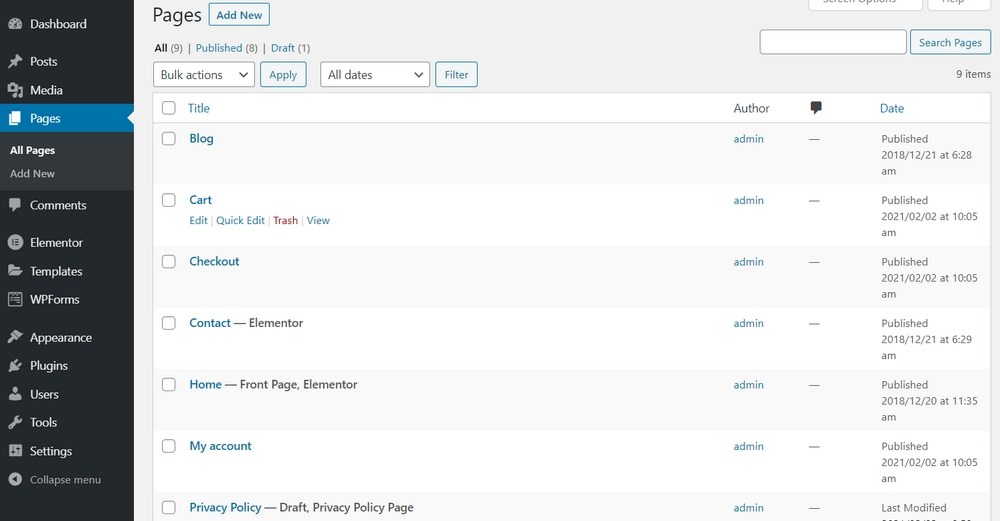
You may need to create:
- Home
- Contact Us
- About
- Portfolio
- Resources
- Services
- Privacy Policy
Some blogs won’t need all of these pages but many will.
To create a new page in WordPress:
- Select Pages and Add New from the left menu of the WordPress dashboard.
- Add a title for your new page in the Title area.
- Add content in the centre section.
- Design the page and set it up to match the rest of your theme.
- Save as Draft or Publish your page.
Set Readable Permalinks
Permalinks are the permanent links you see in the browser window when on a blog page. A permalink should be readable by humans to help with usability but also be SEO-friendly.
WordPress has several permalink options but most people recommend using postname. This provides a readable URL that both humans and search engines can use.
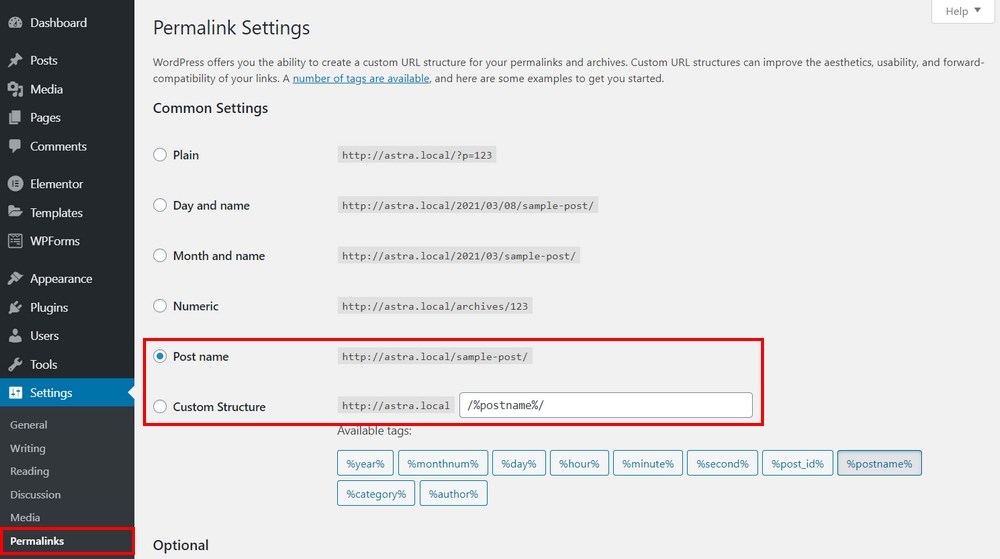
- Select Settings and Permalinks from the left menu of the WordPress dashboard.
- Set Post Name as your permalink structure under Common Settings.
- Select Save Changes at the bottom of the page.
Set Your WordPress Homepage
When you install the Astra theme, it will automatically set your homepage to the theme’s main page. Not all themes do this so it’s a good idea to check.
If you decide to create a custom homepage, you will need to set it manually.
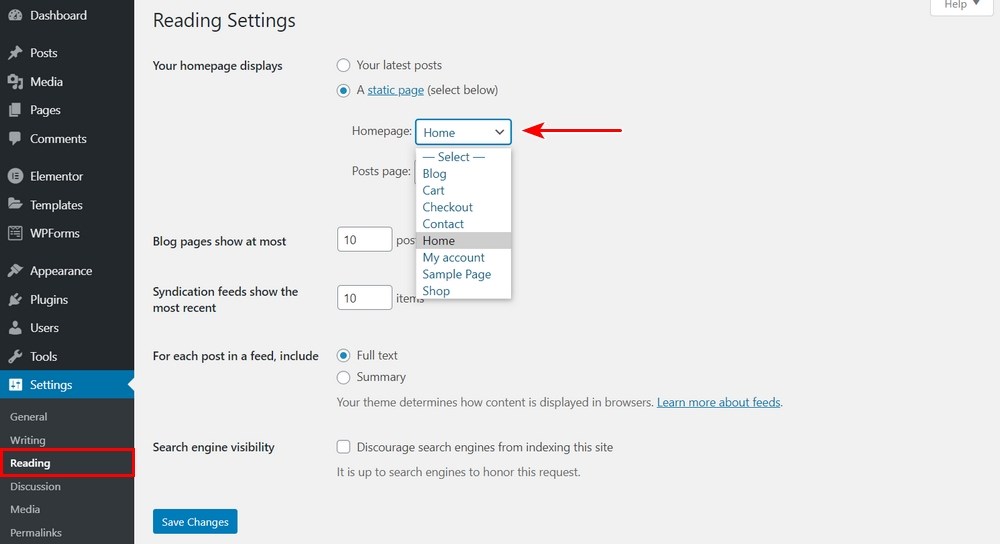
Here’s how:
- Select Settings and Reading from the left menu of the WordPress dashboard.
- Select the page you want to be the main page from the dropdown menu by Homepage.
- Select Save Changes at the bottom of the page.
As you’re setting up a blog, you should also check that your blog page is also set correctly. Select it next to the Posts Page. Save any changes you make.
Display Images in Rows and Columns
This step is optional but if your blog is going to feature lots of images, layout is key. By default, WordPress will arrange images in a column. That’s fine if you only have a few but if you’re displaying more than a few, the page becomes long and difficult to use.
You can use built-in tools to create a more usable layout for images or you could use a WordPress gallery plugin.
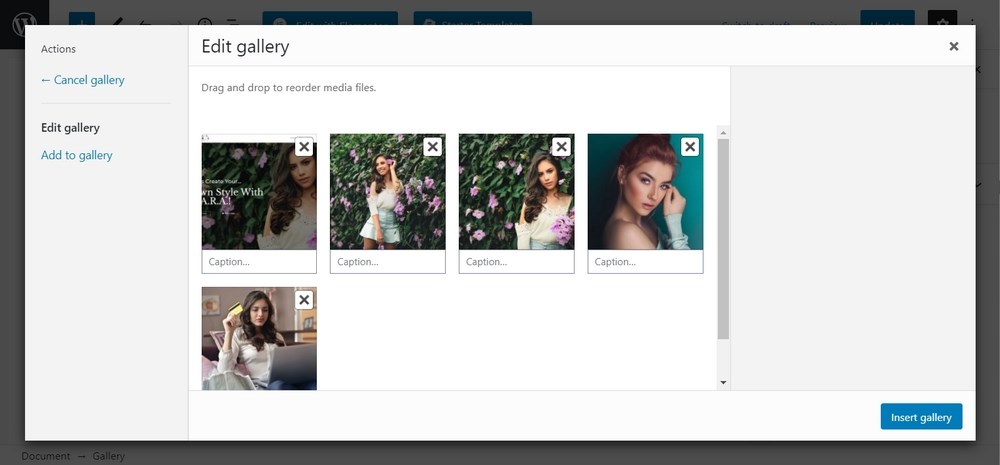
Using WordPress tools:
- Create a new post and select Add Media.
- Select Create Gallery from the left menu.
- Select all the images you want to add to your page.
- Set the number of columns you want to use on the right side.
- Set any other settings you want.
- Select Insert Gallery at the bottom right.
- Finish your page as normal.
We recommend using built-in tools if you’re not going to be making image-heavy pages often. Otherwise, one of those gallery plugins or a WordPress portfolio plugin will make life much easier.
Add Images in WordPress Sidebar
Sidebar images are another of those small but important elements of WordPress blog design. Images can add interest to the page, provide self-hosted image links or showcase your work or WooCommerce products.
Adding an image to the sidebar is very straightforward:
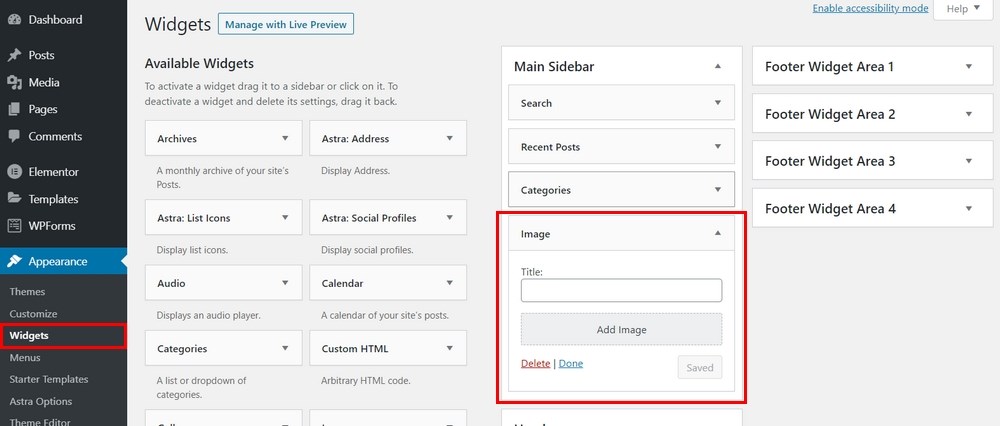
- Select Appearance and Widgets from the left menu of the WordPress dashboard.
- Select the sidebar you want to add images to on the right.
- Drag the Image block from Available Widgets across to your sidebar.
- Place it in position and add the title and image(s).
- Select Done when complete.
If you want to do more with your blog sidebar, consider using a plugin like Lightweight Sidebar Manager.
Add a Featured Image to Every Post
A featured image is also known as a post thumbnail as it will be used by many themes to display your posts and in social media. You should include a featured image in every post you publish.
To add a featured image:
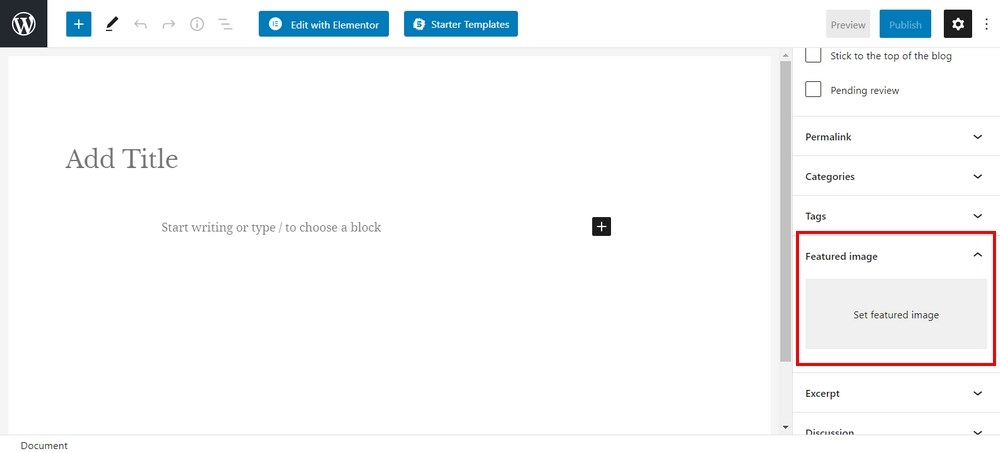
- Select the Featured Image box on the right menu of any New Post page.
- Select Set Featured Image.
- Upload or select an image from the Media Gallery.
- Set the Alt Text and optionally add a caption and description.
- Select Set Featured Image.
This page lists 20 websites to download high quality images to use on your blog.
Ideally, you want to include the highest quality images you can but make them as small as possible to help them load fast. This guide on optimizing images for WordPress could will help you strike that perfect balance.
Add a Sticky Floating Navigation Menu
This is another optional WordPress blog design step but is one well worth considering. A sticky navigation menu is also known as a sticky header. It describes a website menu that stays at the top of the screen even when you scroll down the page.
It’s can be a valuable usability feature if you choose to use it.
Astra supports sticky navigation and many other WordPress themes will also support it. You will need the Astra Pro Addon plugin for this to work.
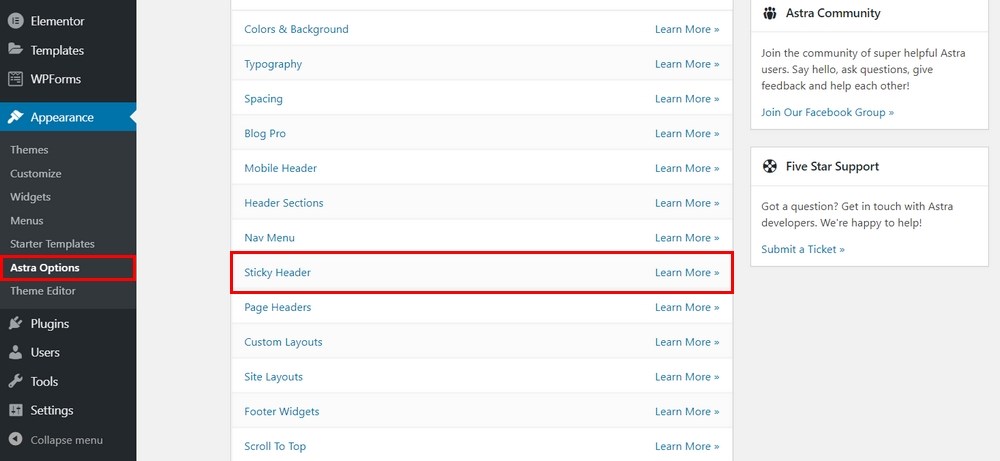
- Select Appearance and Astra Options from the left menu of the WordPress dashboard.
- Select Sticky Header from the options list and Activate.
- Configure your header according to your chosen theme using these instructions.
Different themes will use different header designs so we recommend following the guide linked above to personalize the sticky header to your exact specifications.
Add a Default Gravatar
Gravatar is short for Globally Recognized Avatar and is a user avatar that will appear in blog comments by the user’s name. If you don’t set one, your users will see the grey ‘Mystery Man’ gravatar which is a little boring.
Adding gravatars is a small element of WordPress blog design that can enhance the user experience.
For that reason, we recommend using them.
![]()
Setting the default gravatar in WordPress:
- Select Settings and Discussion from the left menu of the WordPress dashboard.
- Scroll down to the Avatars section.
- Select a gravatar type from the available options.
- Select Save Changes.
You can also create custom gravatars if you prefer. You can use Gravatar.com and link it to your website or create your very own gravatar.
- Create a square image using your favourite image editor.
- Save it as a PNG sized small (35 x 35 or 50 x 50).
- Upload it to your WordPress website in the /images folder of your active theme.
- Select Appearance and Editor from the left menu of the WordPress dashboard.
- Select Theme Functions (functions.php).
- Add the following code before the ?> closing tag.
//**Custom Gravatar**//
add_filter( 'avatar_defaults', 'new_custom_default_gravatar' );
function new_custom_default_gravatar ($avatar_defaults) {
$myavatar = get_bloginfo('template_directory') . '/images/YOUR-AVATAR.png';
$avatar_defaults[$myavatar] = "Custom Default Gravatar";
return $avatar_defaults;
}
Change where you see ‘YOUR-AVATAR’ to filename you used in step 2. Then repeat the steps at the top for setting a default gravatar, only this time, select the version you just uploaded.
Use the Inspect Element Tool to Customize WordPress
Inspect Element is a feature within most mainstream browsers that allow you to check web pages and make changes in real time. Technically, this is a debugging tool but it can also be used when designing a blog.
You cannot save the changes you make but you can quickly see how a page would look in a different colour, with different fonts and so on.
It’s a useful way to test out an idea before you take it further and something any blogger should become familiar with.
You can access the Inspect Element tool by using F12, right clicking the page and selecting Inspect Element or Ctrl + Shift + I.
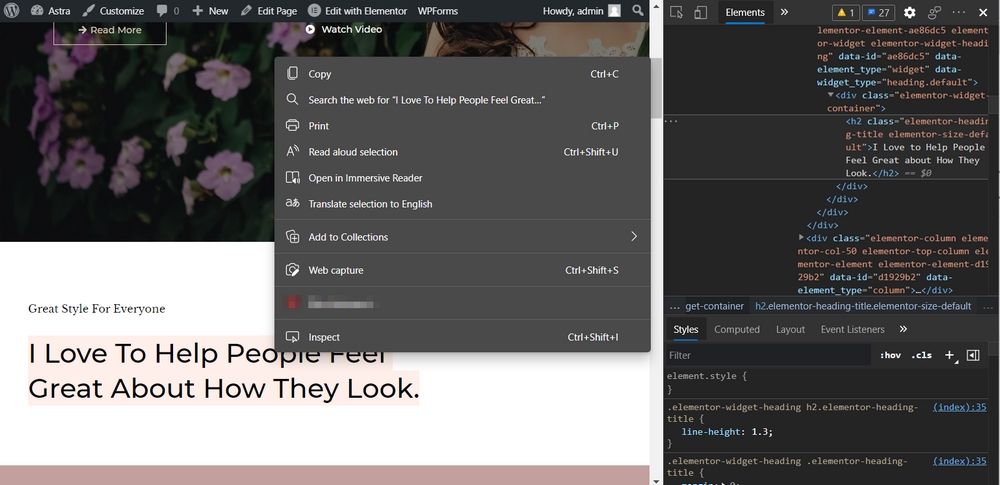
You should see two panes appear in your browser. There should be HTML on the left and CSS on the right. Hover over any element within these panes and you should see the corresponding part of the web page highlighted above the inspection pane.
- Highlight a part of the web page you want to customize.
- Change the corresponding HTML or CSS in the lower pane to change.
The changes will not be saved but you can see in real time how your page can be customized. It’s a very useful way to experiment without committing the change or creating a child theme.
You can also use Inspect Element to check pages for errors. Simply select the Console tab at the top of the Inspect Element area to see any errors that appear on any page of your website.
Add Categories to Posts
Post categories are an essential part of WordPress blog design. They provide organization for your posts and make it easy for users to find what they are looking for.
Every blog should have a simple, logical hierarchy for posts and pages to help page layout and usability.
Creating WordPress categories is very straightforward. It will take more time to plan your hierarchy than it will to implement it!
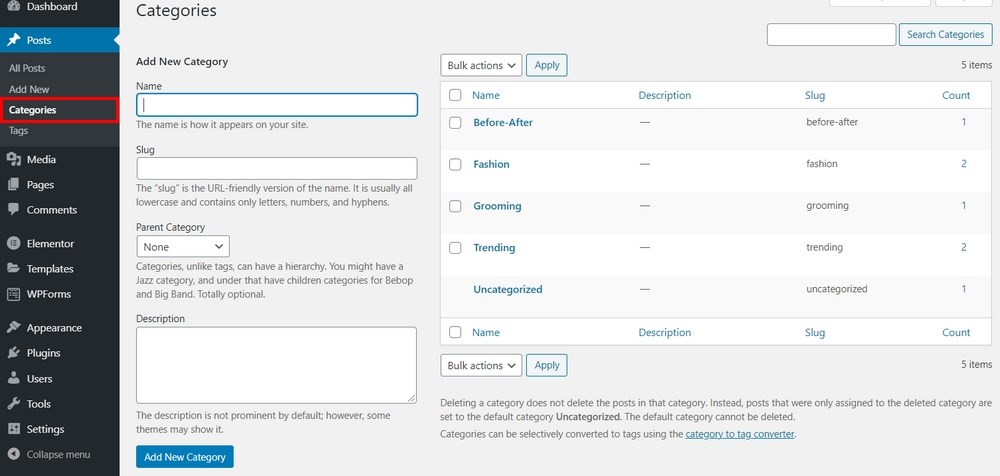
To add new categories in WordPress:
- Select Posts and Categories from the left menu of the WordPress dashboard.
- Type the title of your new category under Name on the left of the main window.
- Add a parent category and description. (Optional and not required)
- Select Add New Category.
- Repeat for all required categories.
Once saved, you should see your new categories appear in the list on the right. They will also appear in the Add New Post page on the right hand side. Simply check the box to select one or more categories for the post.
Add Multiple Authors to Your Blog
If you’re planning to let others contribute to your blog, you’re going to want to add them as authors.
There are two types of multiple author settings. One enables authors to create their own content on your site and publish it under their name. We’ll call this adding authors to your blog.
The second allows you to add multiple authors to a single post to attribute their efforts on the piece. We’ll call this adding multiple authors and we will need a plugin for this.
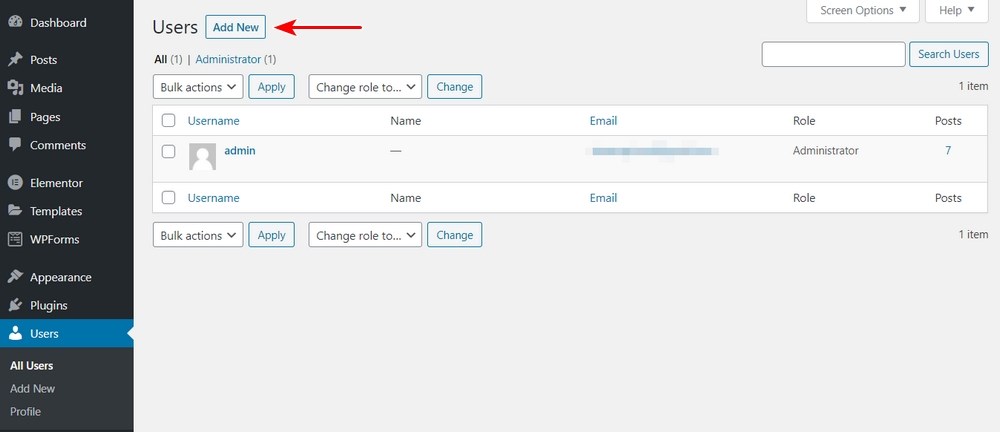
Add authors to your blog:
- Select Users and Add New from the left menu of the WordPress dashboard.
- Complete the user form as required.
- Set the Role as Author at the bottom.
- Select Add New User.
That user will now be able to log in and contribute to your blog.
Add multiple authors to your blog:
- Select a multiple author plugin from WordPRess.org. Molongui Author Box, Guest Authors & Co-Authors is a good option.
- Install and activate the plugin.
- Select the Author box on the righty of any Add New Post page.
- Select the author(s) you want to attribute to the piece.
- Publish as normal.
Split Long Posts Into Pages
Splitting longer blog posts into pages helps usability and breaks up very long posts. It’s not an essential part of designing a blog but can be useful if you find yourself writing longer posts.
If you’re writing 5,000 – 10,000 word blog posts, it may be a good idea to split it up into more digestible pieces.
It will still be a single post and will still be accessible from the original link but won’t be quite so intimidating to users who don’t want to read a super-long post.
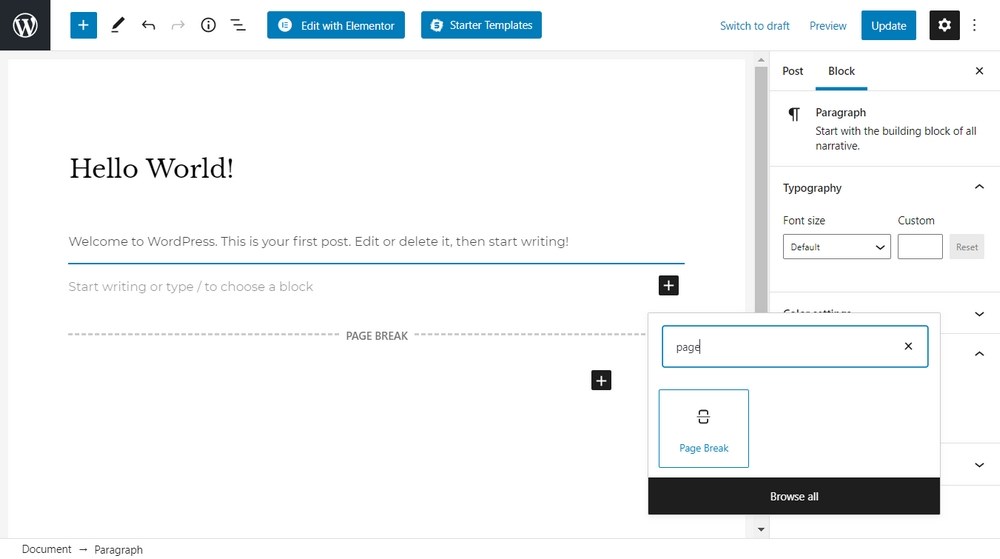
All you need to do is switch to Text view in the Add New Post page and add the <!–nextpage–> tag in the post where you would like to split it into pages.
If you add the code in the standard Visual view, the code will appear on the page but not create pagination.
If pagination doesn’t appear when you publish the post, check your ‘single.php’ file and add <?php wp_link_pages(); ?> at the end.
Designing a Blog That Works
Good WordPress blog design is about more than just installing a WordPress theme and setting it up. It’s about the little things too.
The gravatars, post categories, the Contact Us page, fonts, colours and the many small elements that complements your overall design.
This isn’t an exhaustive list of how to design a blog but it does cover the most important things you need to take care of. We hope it helps!
Join us next time when we discuss the best WordPress plugins for blogs.


![Toni Kroos là ai? [ sự thật về tiểu sử đầy đủ Toni Kroos ]](https://evbn.org/wp-content/uploads/New-Project-6635-1671934592.jpg)


