
How To Create Custom Elementor Blog Post Template In 2 Ways
Are you looking for the easiest tutorial on how to create a custom Elementor blog post template?
Blogs are one of the most popular and effective ways to create awareness about your product. However, if you want to enjoy the most benefit out of content marketing, you need to make sure your blog page has a captivating look along with the right information.
To make your blog post appealing, you need to create your own custom blog template. And you can achieve an outstanding blog post template to engage your audience using Elementor. You can create Elementor custom blog page from scratch as well as build one using prebuilt templates.
In this article, you will learn how to create a Elementor blog post template using two methods in the simplest ways possible. So, keep reading…
Plugins you need to install to create custom Elementor blog post template
To create a blog post in WordPress with Elementor page builder effortlessly you will need both
- and Elementor Pro.
How to create Elementor custom blog page Template from scratch
Elementor Pro provides all the necessary widgets you will need to create a stunning custom blog post template from absolute scratch. Just follow the below-mentioned steps to create your single Elementor post template:
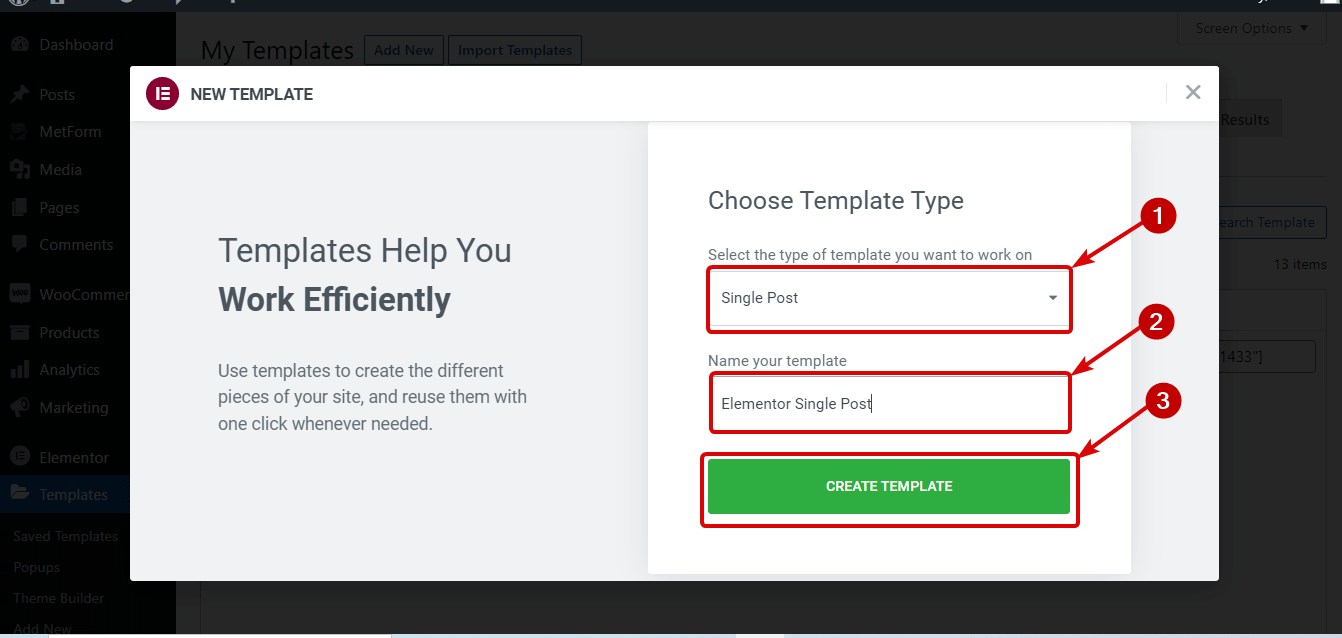
Step 1: Create a new Single Blog Template
First, you need to create a single blog template. For that go to WordPress Dashboard and then navigate to Templates ⇒ Add New

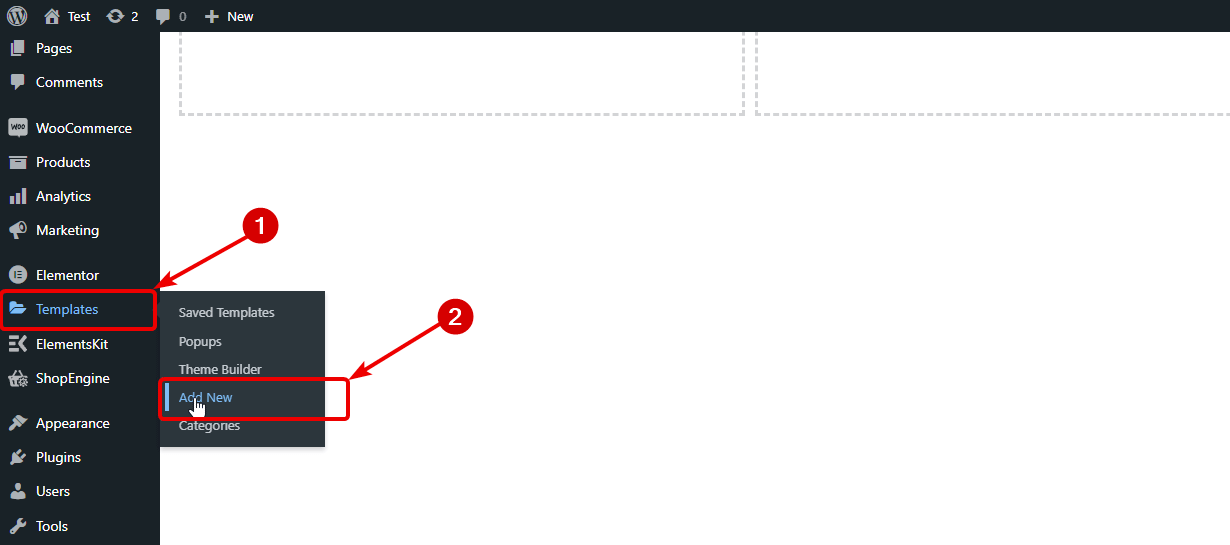
and click on the Add New button. Once the new window open, select Single Post as the type of template from the dropdown, provide a name of your choice then click on Create Template.
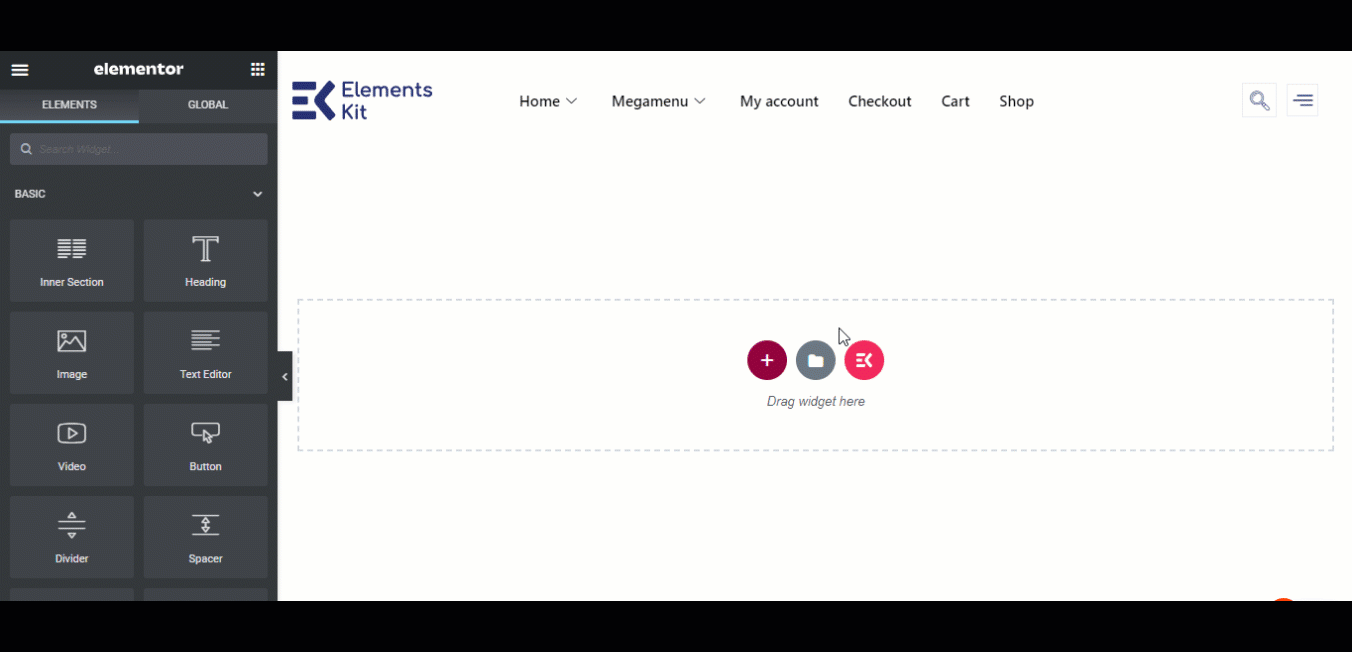
Now you should see the premade layouts (will cover how to use that later). Since we are going to build a blog template from scratch, click on the cross button on the top right corner to close this window.
Step 2: Select a structure/layout for the blog post template
Now, you need to choose a structure for your blog template, it’s recommended not to use the whole width of a page as it gets hard for the user to read it. To choose a structure for your Elementor custom blog page template click on the + icon and select the one you like and just click on the structure to insert it.
Note: To see how a blog will look with the template you are creating, select an existing blog from the preview dynamic content option. To set that, click on the Settings option at the bottom left corner.
Then, choose Post from the Preview Dynamic Content as a dropdown, type the name of the blog you want to select on the second dropdown below. Finally, click on Apply & Preview.

Step 3: Add Featured Image widget and customize Image style options
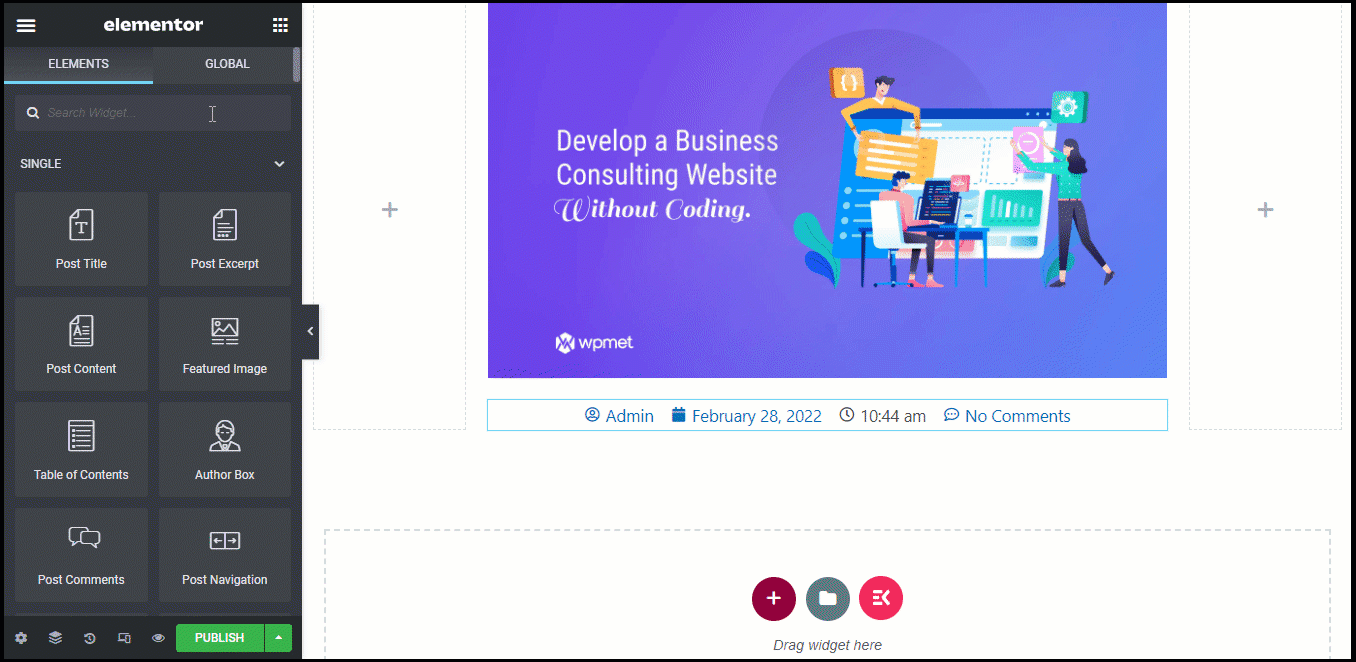
Once you have the layout, on the left editor bar, search for the Featured Image widget. After you find the widget, drag and drop it on the desired location.
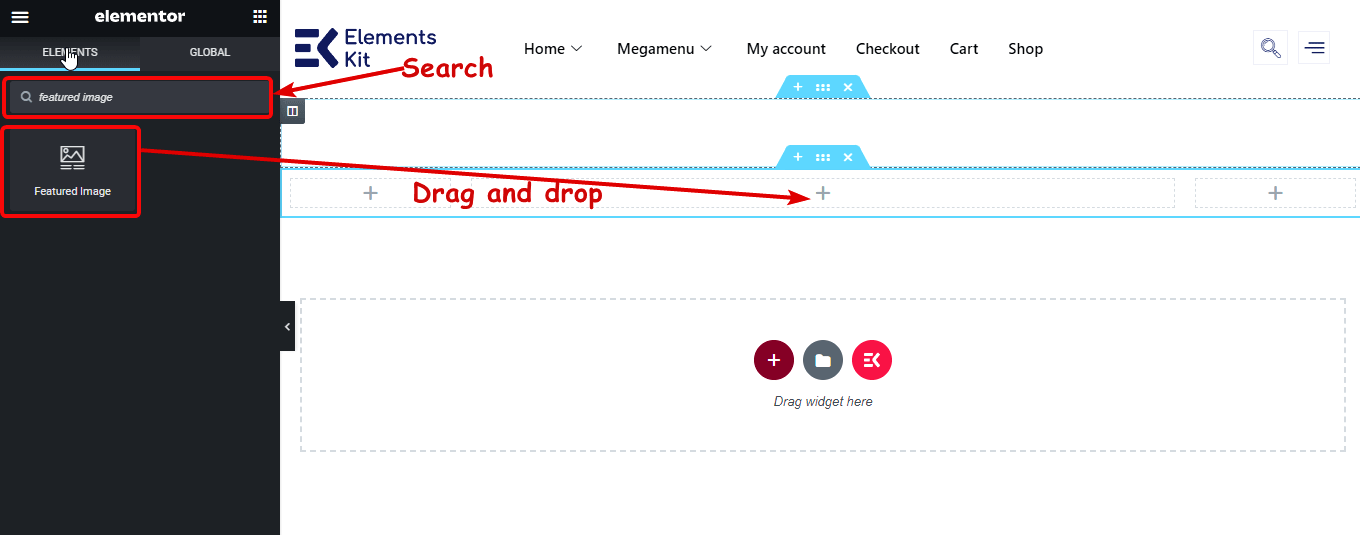
After the widget loads, customize the image size, alignment, caption, link, and lightbox option.
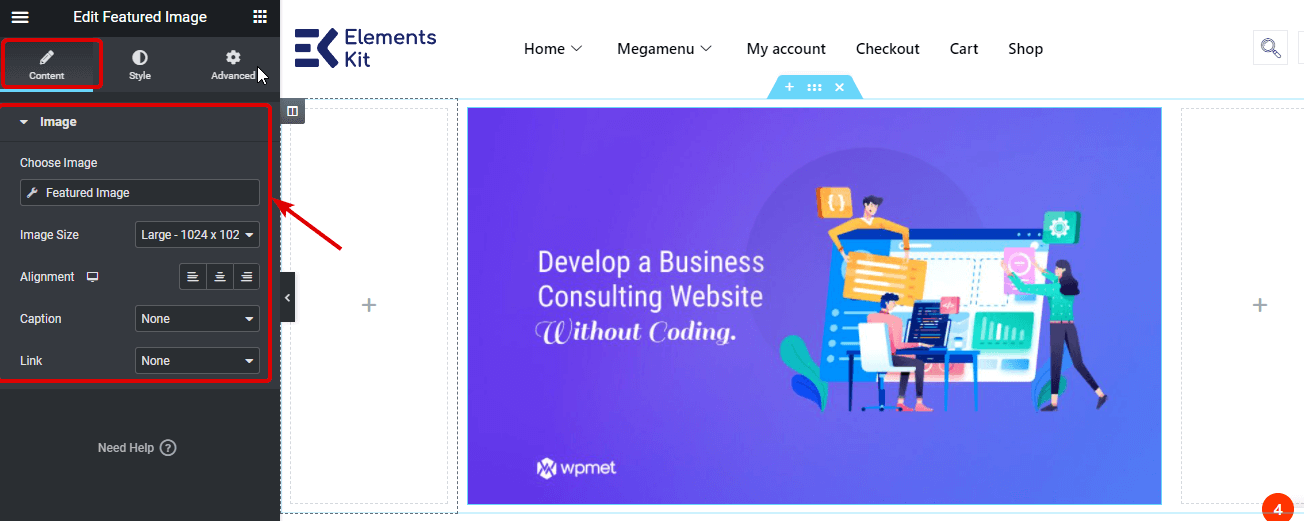
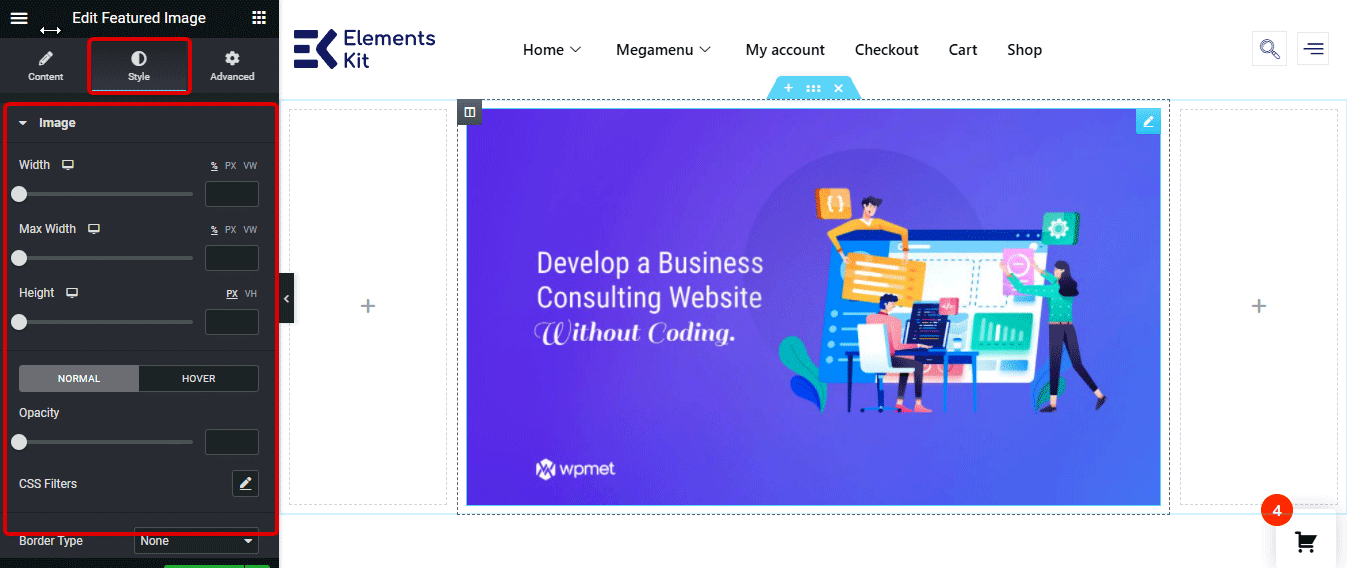
To change the style settings, navigate to the Style tab. Here you can change image height, width, opacity, border, radius, etc.
👉👉 You can also checkout our blog on How to Build a Mega Menu With Elementor
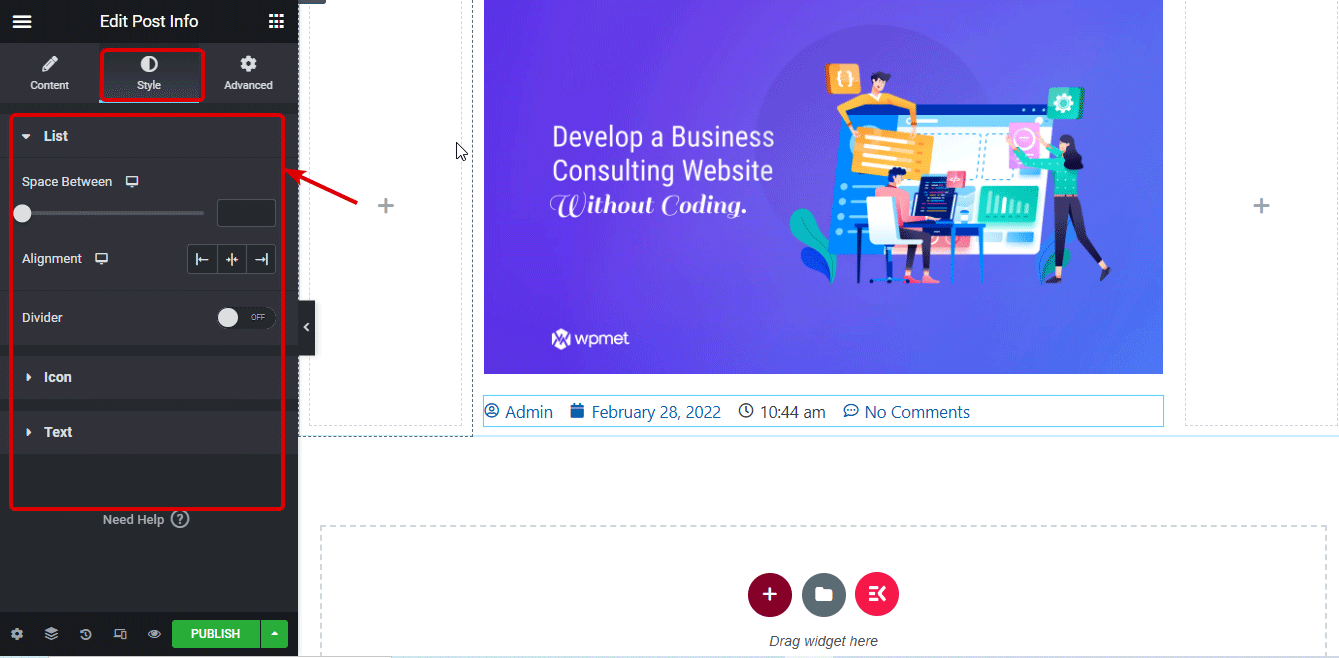
Step 4: Add and customize Elementor Post Info widget
After the feature image, you should display the post-related information which you can do with the Post Info widget. Just like the featured image, at first search for the Post Info widget then simply drag and drop below the Featured Image widget.
On the Elementor Editor Content tab, you can set the layout as Default or Inline. You can edit/delete Author, Date, Time, and Comments Options. You can also add a custom field to the Post Info widget by clicking on the + ADD NEW button.
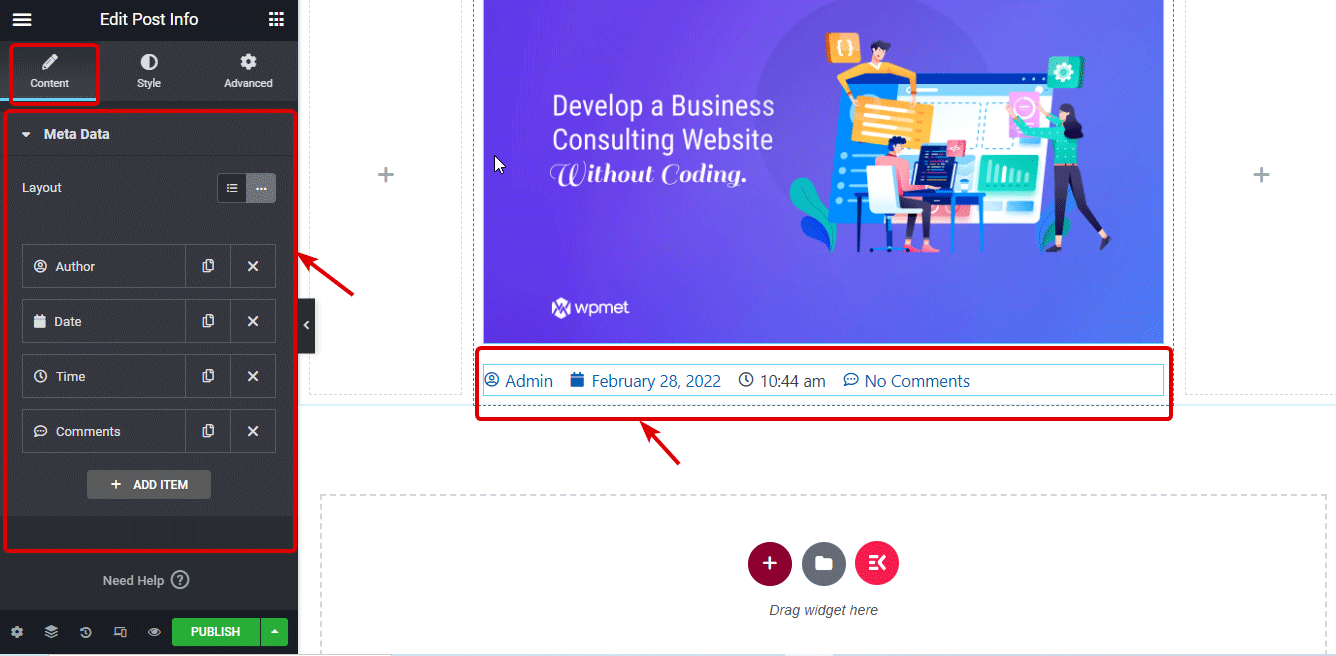
Again, move on to the Style tab to customize the style settings like Space between lists, alignment, Icon color and Size, Text color, and typography.
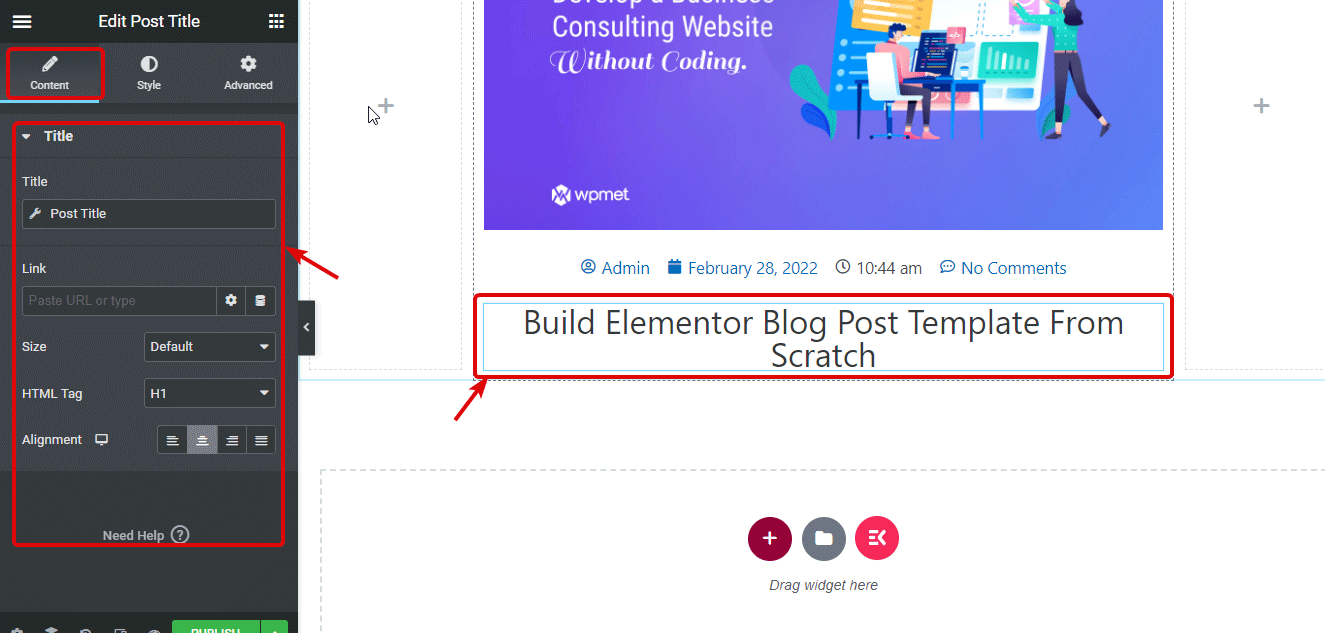
Step 5: Drag and drop Post Title widget and customize
Now, search for the Post Title widget and drag and drop below the post info widget.
You can customize the size, HTML tag, and alignment of the Post Title tag.
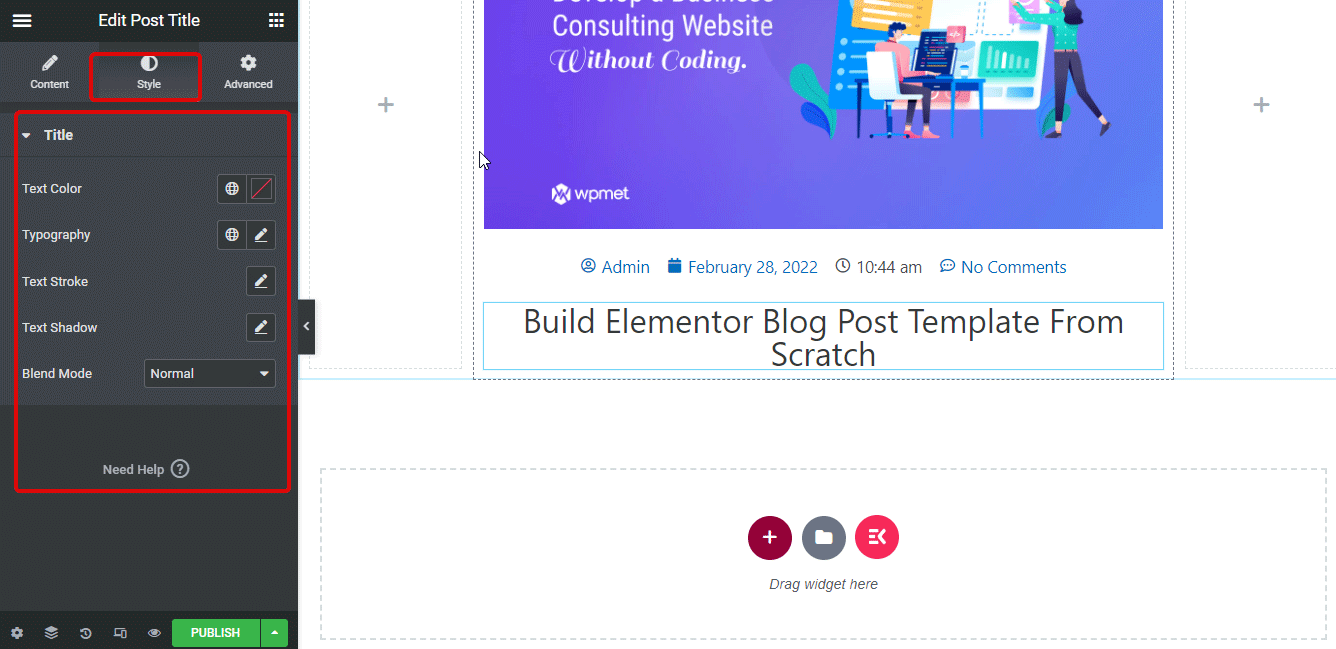
On the style tab, you will find options to customize Text Color, Typography, Text Stroke, Text Shadow and Blend Mode.
Step 6: Add and customize the Post Content widget
Now, drag and drop the post content widget. Post content widget of ElementsKit represents the body (main content) of the blog post.
After the post content, add the Social Icons widget by dragging and dropping. Social Icons will provide options to share your blog on different social platforms.
You can add /delete as many social icons as you want. In addition, you can customize the shape of the icons, the number of columns they should show up, and alignment. You can also customize the Social Platform Icon, color, and link for each of the social icons.
![]()
Navigate to the Style tab to change the Icon size, color, padding, spacing, border type.
![]()
Step 8: Add Author Box widget and customize the settings of the widget
Search for Author Box, and drag and drop the widget after the Social Icons. You can also add a custom Author if you want from the source dropdown. You can choose to show/hide Profile Picture, display name, and Biography. You can also customize other settings such as HTML tag, Link, Layout, Alignment.
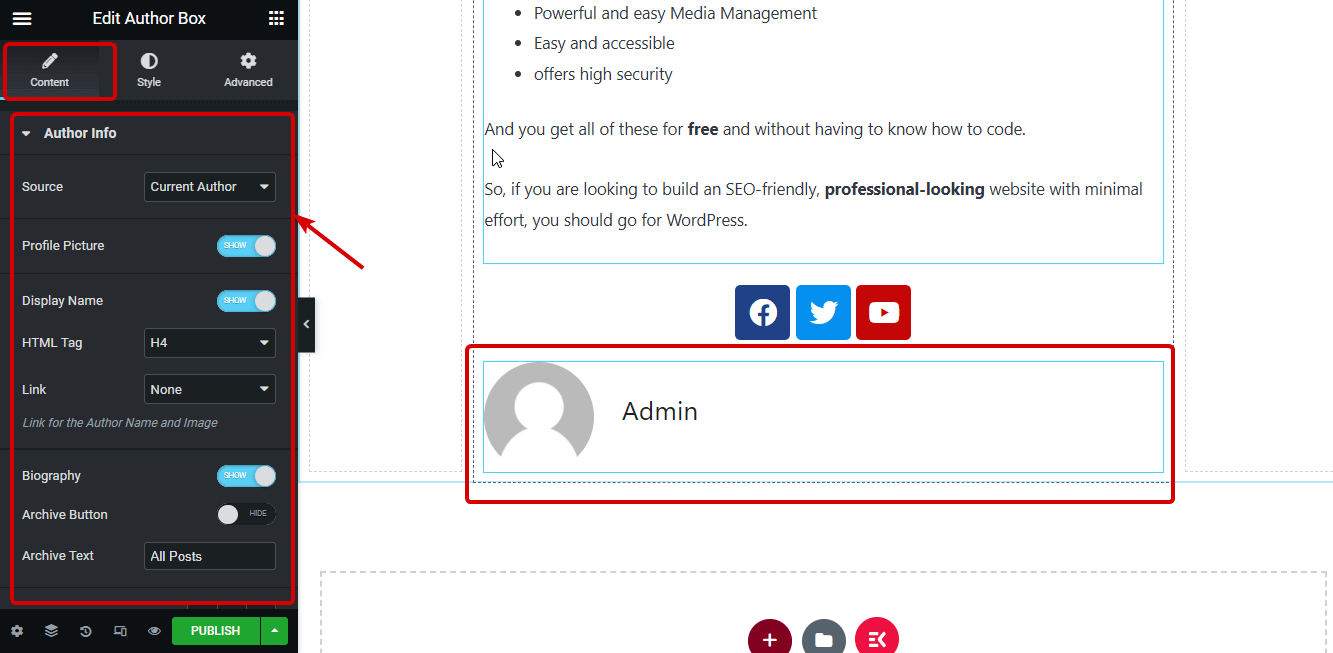
Navigate to the Style tab to customize options such as Image size, border, color, and typography of author name, biography, etc.

Elementor Post Navigation widget will offer navigation options to readers so they can switch to different blogs. To add the post navigation widget, like before search on the editor and then drag and drop after the author box widget.
You can either show or hide the pagination label or arrow sign. You get around 8+ design options for arrows. You can also customize the previous and next-level text.
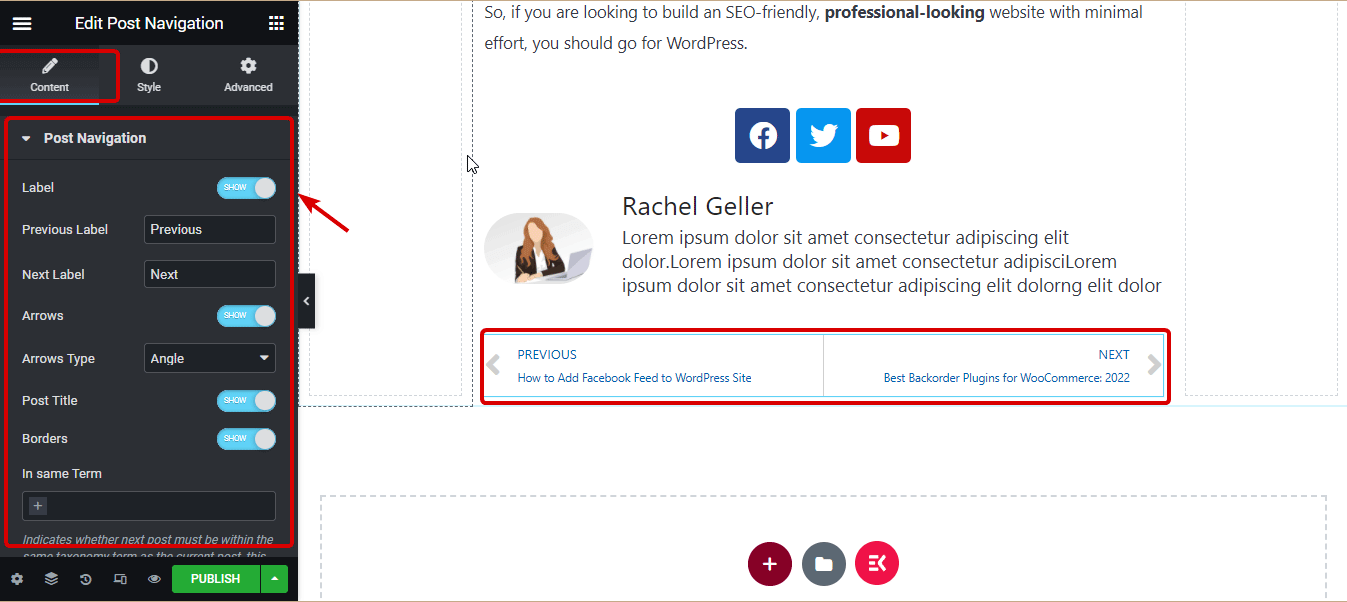
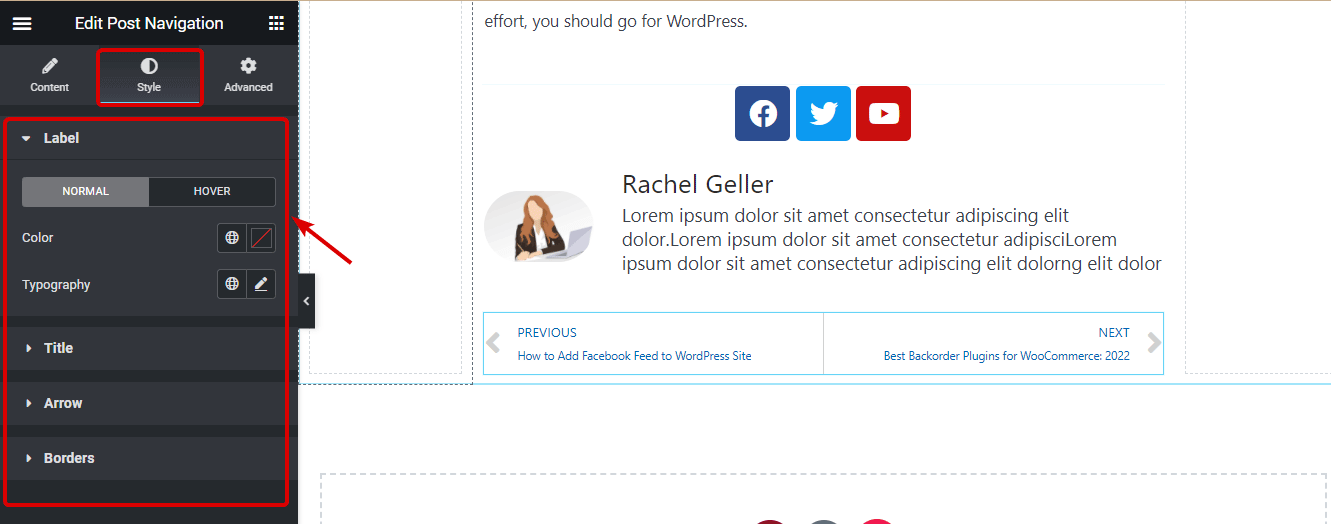
You can change the color and typography of label, title, arrow, and borders for both normal and hover views.
To showcase the related posts, we are going to use the Elementor Posts widget. So, drag and drop the posts widget after the post navigation widget. With this widget, you can change the skin color, set the number of columns, number of posts per page, image position, and many more settings. You can also change the different styles of layout, box, image, and content.
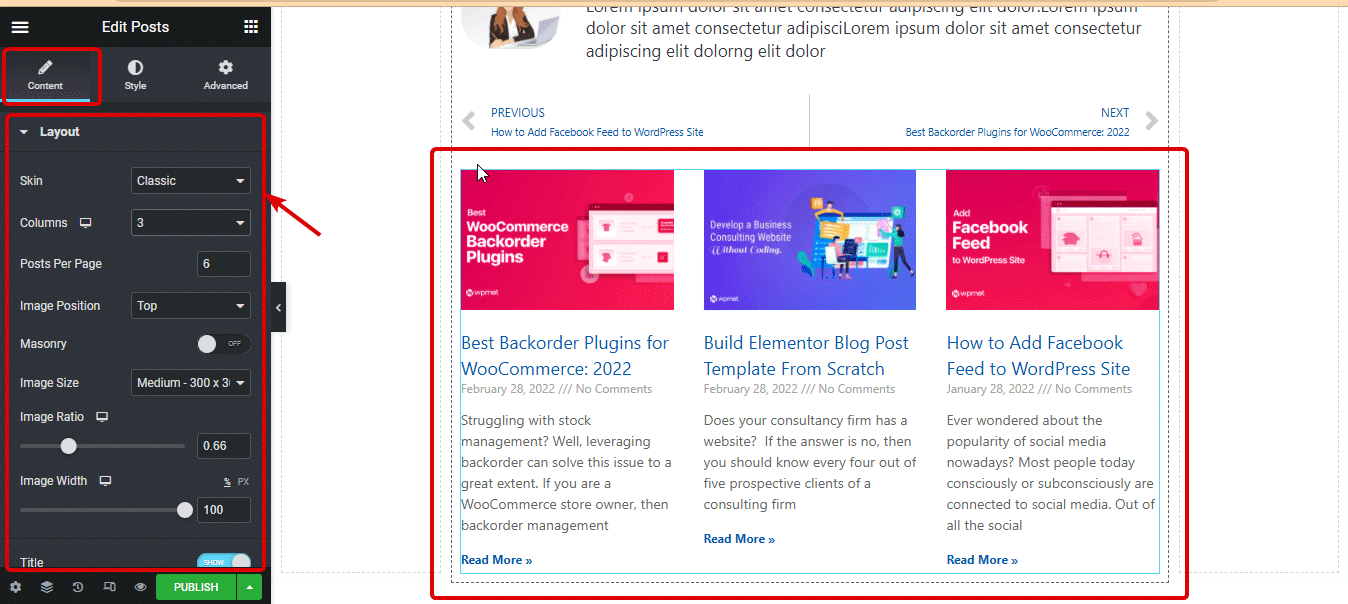
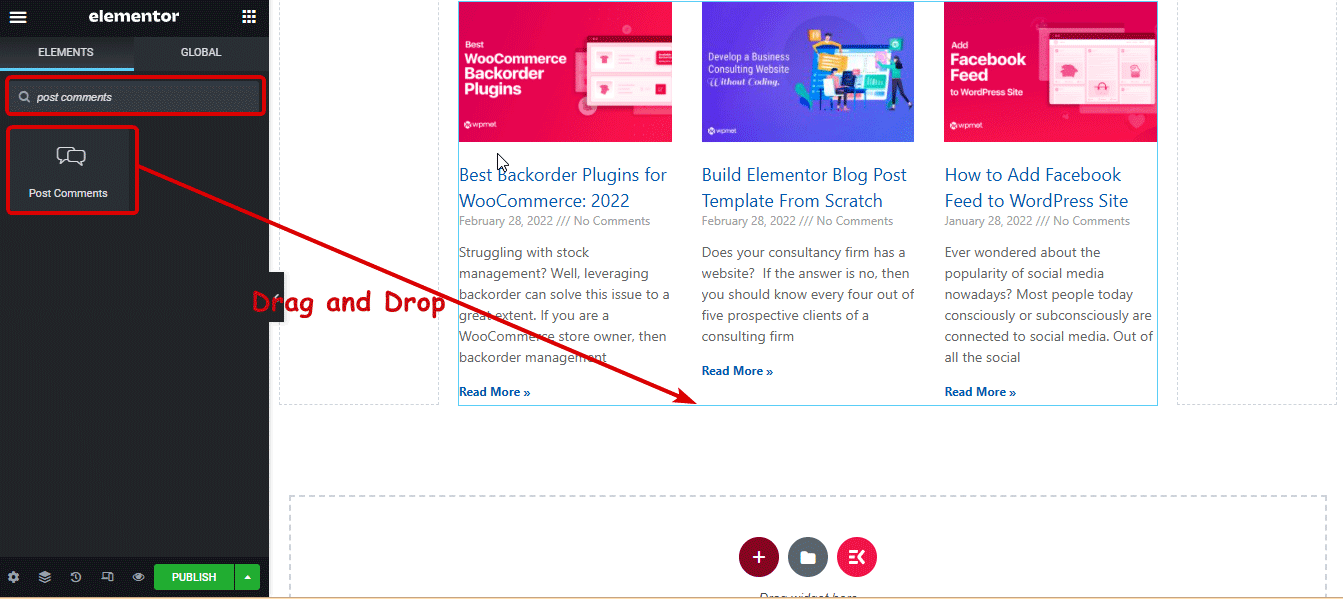
To give an option to your users to comment on your posts, you need to add the Posts Comments Widgets. Search for the Posts Comments widget and drag and drop below the posts widget.
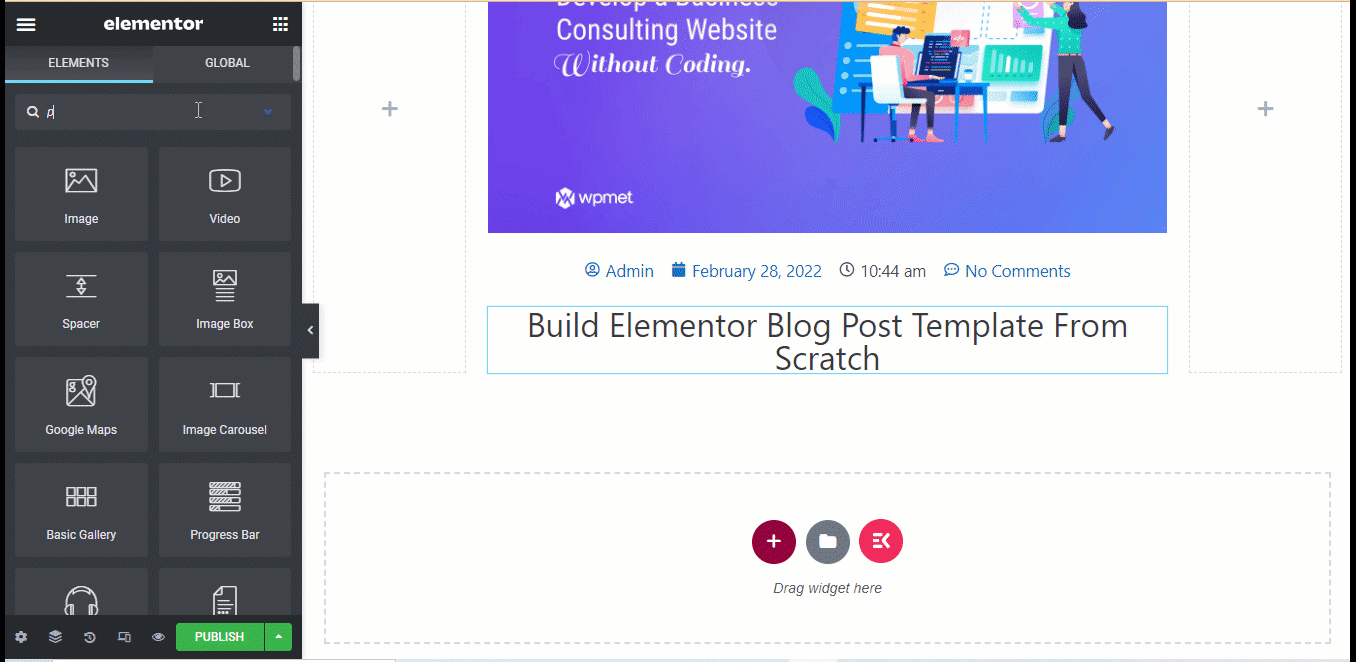
Now that all the design is done, click on the update button. If the publishing setting window shows up, click on Save and Close.
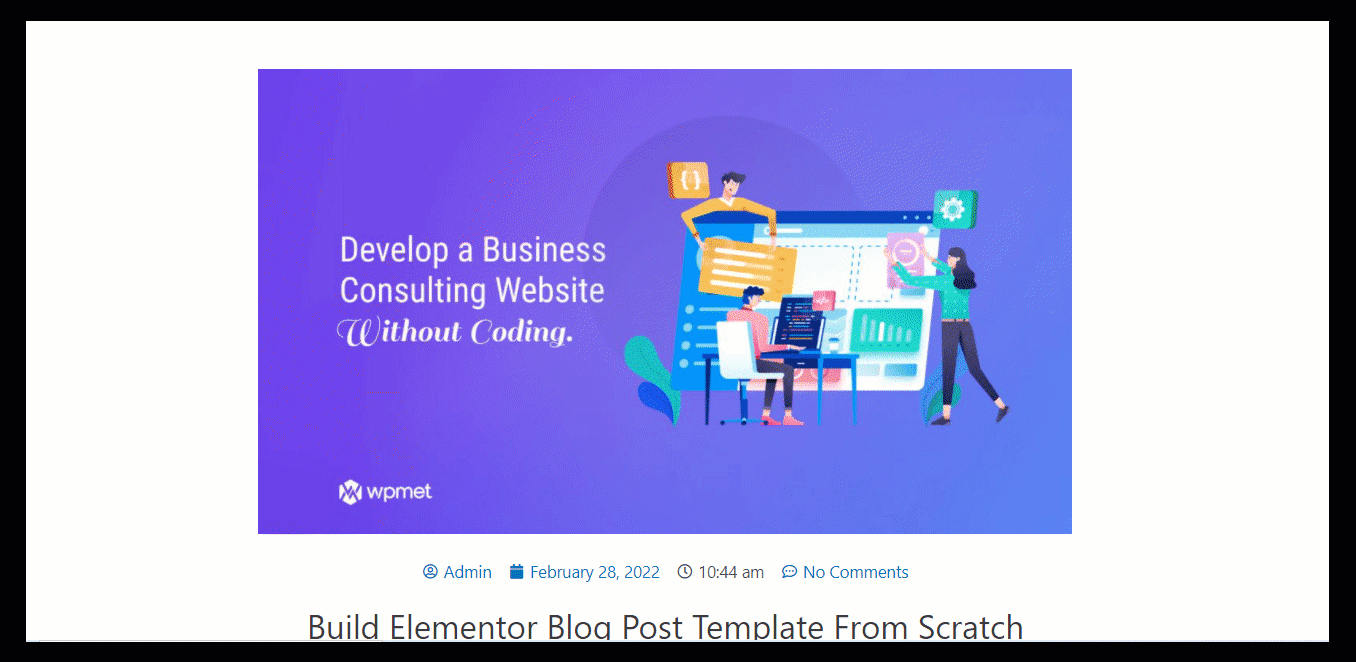
Here is the preview of the custom Elementor blog post template we just created.
If you found the method described above too time-consuming, you can opt for the method mentioned below where you don’t have to build and design each section from scratch.
👉👉 You can also checkout our blog on How To Add Multi Step Form In Elementor In 5 Easy Steps
How to create the single post page using premade Elementor template
If you plan to use an pre built template for your Elementor custom blog page, you can do it in just 3 steps. Let’s check how:
Step 1: Create a new Single Blog Post Template from the dashboard
Like the first method, you need to create a new single blog template. For more details on how to create the new template scroll up a little and check the first step of the first method (how to build a blog template from scratch).
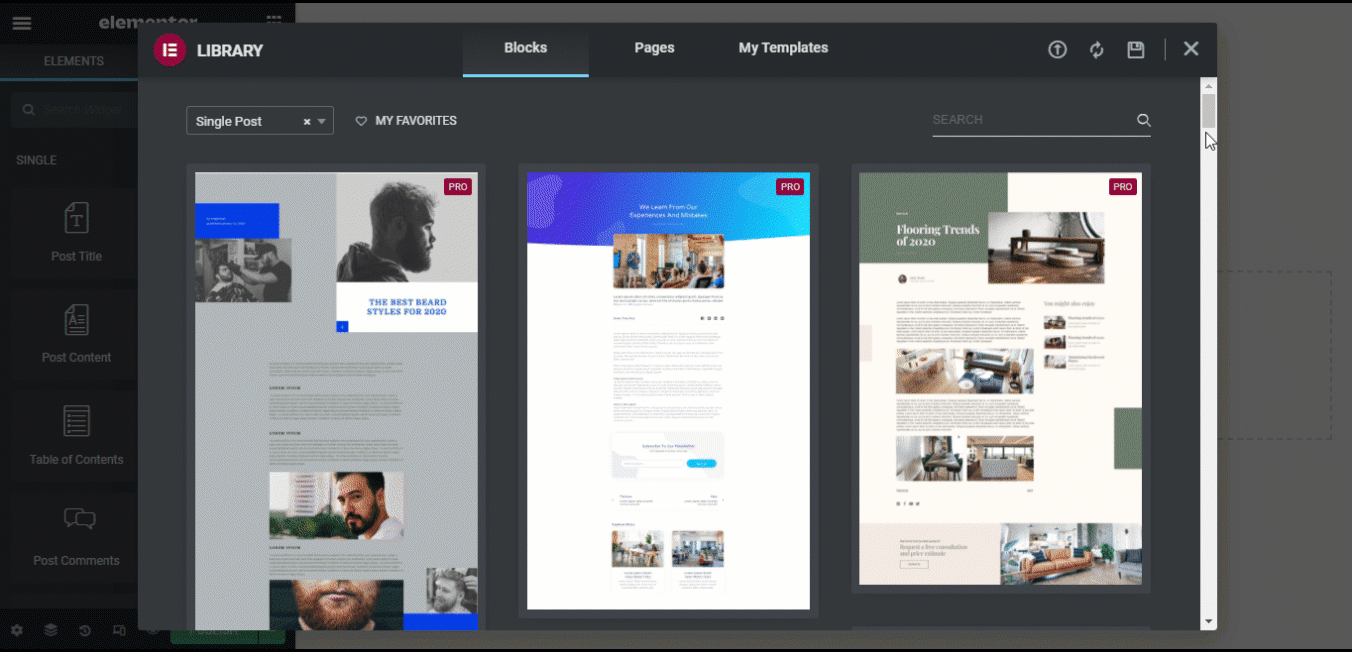
Step 2: Choose a premade Elementor Single Post template
Once you click on Create Template, you will see the Elementor library window with many custom single post templates. Here you can choose any of the Single post blocks you like. Hover on the template of your preference, click on insert.
Step 3: Choose a premade Elementor Single Post template
Once the template loads, click on publish button to save all new blog templates.
Here is a final look of a blog post using an Elementor blog post using a premade single post template.
How to create a Elementor latest posts page with ElementsKit
Now that you have an attractive single post template, it’s time to make a custom blog listing page so all your blogs are displayed in an eye-soothing and user-friendly way. Let’s have a look at how you can create a custom Elementor latest posts with ElementsKit.
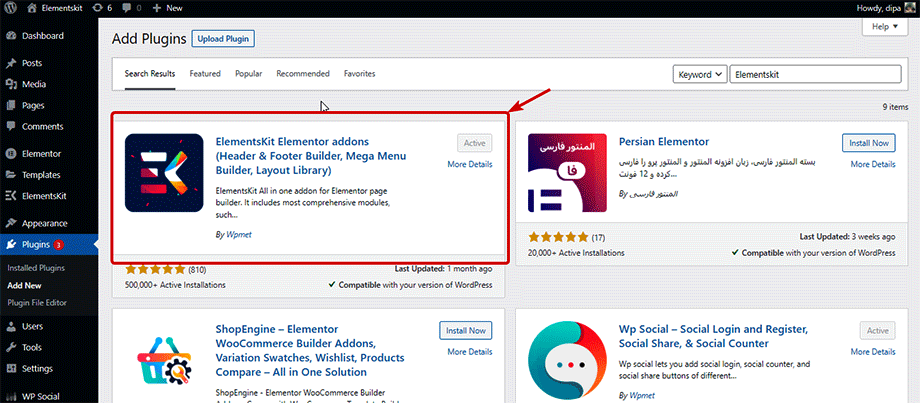
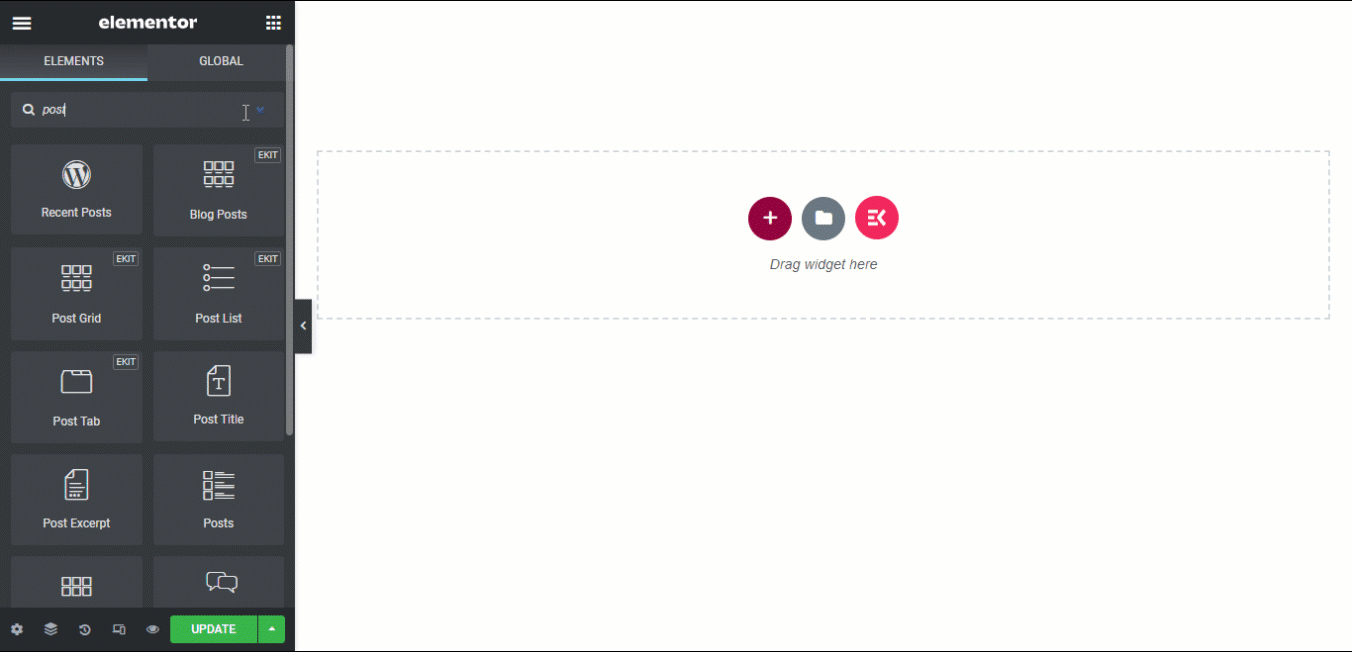
Step 1: Install and Activate ElementsKit
To create a stunning blog listing page, along with Elementor page builder, you will need ElementsKit. ElementsKit is an all-in-one plugin for Elementor with 85+ widgets and modules to make web development easier than ever.
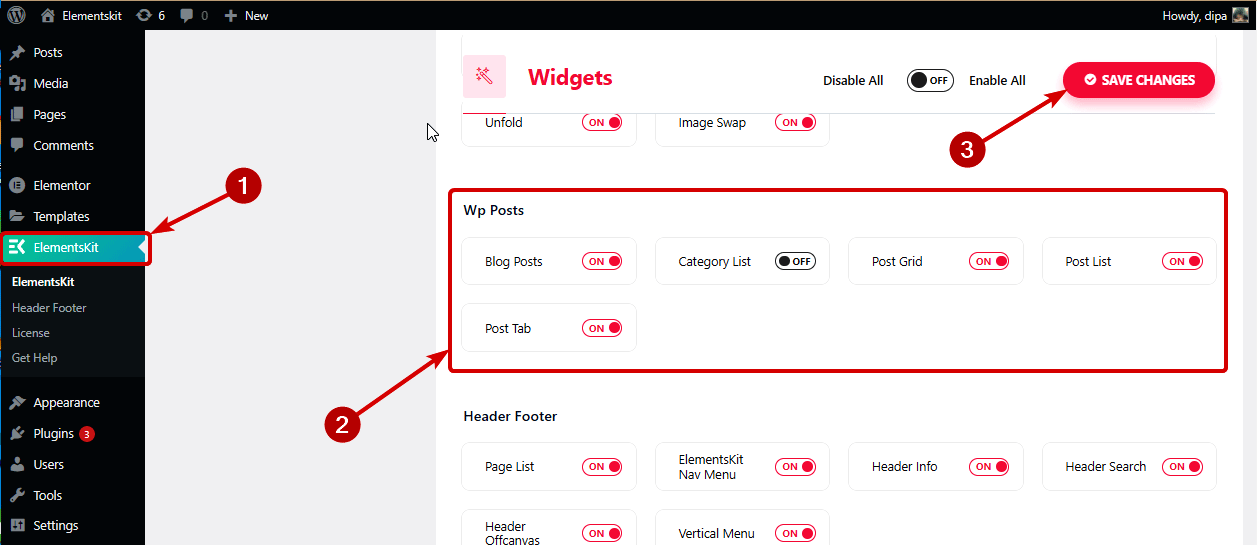
Once activated you need to turn on the post related widget to build the post list page. ElementsKit provides a number of widgets to display your blog lists which includes Blog Posts, Post Grid, Post List, Post tab widget, etc. You can enable the widget you want to use.
👉👉 Check out how can create a beautiful Elementor one page scroll navigation using ElementsKit
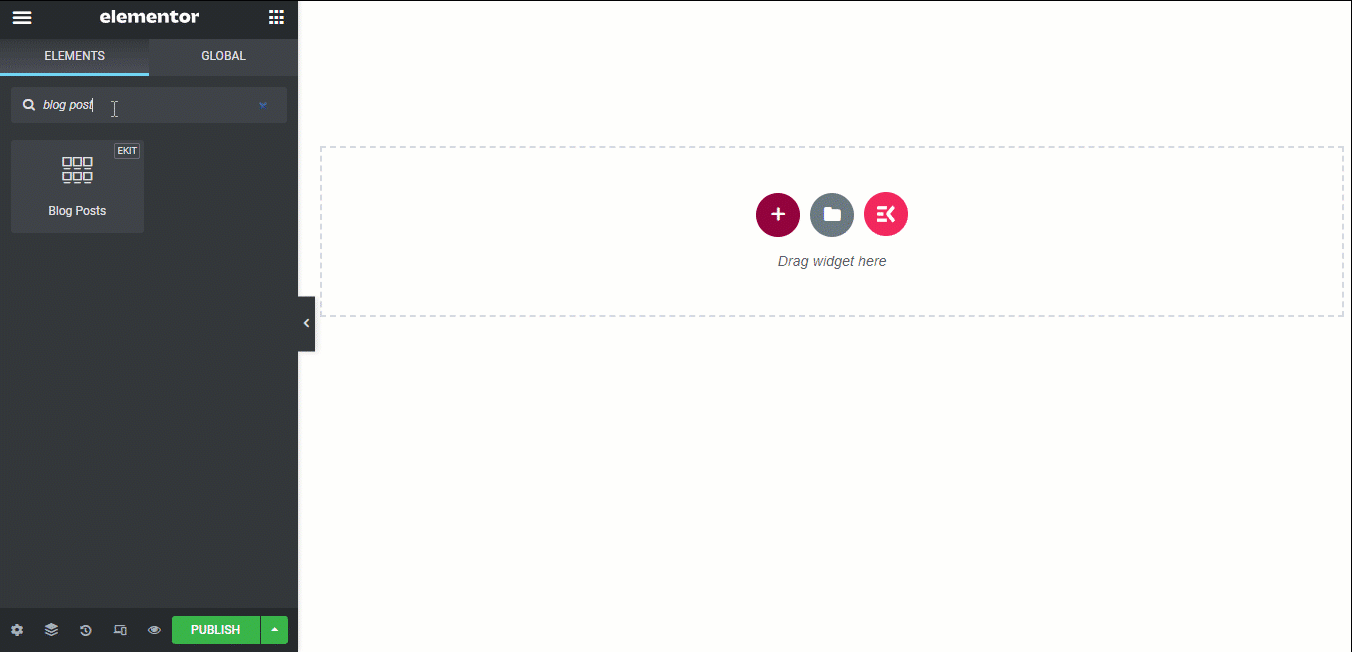
Step 3: Add the widget and customize
Now, go to the blog list page, search for the widget and simply drag and drop. Once the widget loads, you can customize the related settings to personalize your blog list page. Let’s have a look at what a blog list page will look like with a few of the ElementsKit widgets and their customization options.
Using the Blog Post widget, you can display your blogs in Block format, Grid with thumb, and Grid without thumb design. You can also set the number of posts to show per row, enable/disable pagination, and many more options. For more details check out our blog on how to display recent blog posts.
With the post grid plugin, you can customize which category blogs you want to display in your blog list. You can also choose the number of posts to display and the column numbers each row should have. For more details, check our documentation.
With a Post Tab widget, you get all the customization options like Post Grid along with an extra category tab. With this option, users can just hover on any category tab and see only the blogs from that particular category.
Once you choose your widget and make customization according to your choice, click on the update button to publish. Now you should have a page that displays recent Elementor latest posts in a enticing way.
Final Words
We have tried our best to provide you with an easy tutorial on how to create a custom Elementor blog post template in two ways. We hope you found the blog helpful to build your custom Elementor blog template. You can follow the steps and change the layouts as well as designs according to your choice.
And don’t forget to give an extraordinary touch to your blog list page with ElementsKit widgets. ElementsKit is the perfect complement to Elementor, do make time to check out all the amazing widgets this addon has to offer.


![Toni Kroos là ai? [ sự thật về tiểu sử đầy đủ Toni Kroos ]](https://evbn.org/wp-content/uploads/New-Project-6635-1671934592.jpg)


