
Home office: making a cheap IKEA server rack
Spend about $60 plus some Liquid Nails and you get a 3-shelf unit and a much neater office.
Like many small businesses, my office IT has grown organically, without much of a plan.
Over the last couple of years I’ve added a small server, a NAS, a couple of network switches, VoIP phone, security cameras and other bit and pieces.
The trouble is that my office now has Ethernet cables and devices all over the place. Something needed to change.
Finding a cabinet
I started looking at small server cabinets but the prices were in excess of what I was prepared to spend, with even used cabinets on eBay selling for over $200.
Newsletter Signup
Get the latest business tech news, reviews and guides delivered to your inbox.
I have read and accept the privacy policy and terms and conditions and by submitting my email address I agree to receive the Business IT newsletter and receive special offers on behalf of Business IT, nextmedia and its valued partners. We will not share your details with third parties.
Given that none of my gear is designed for rack mounting, I’d need to buy some shelves and then come up with some cable management gear as well.
After some searching around, I found a few interesting solutions created using cabinets and other furniture from Ikea.
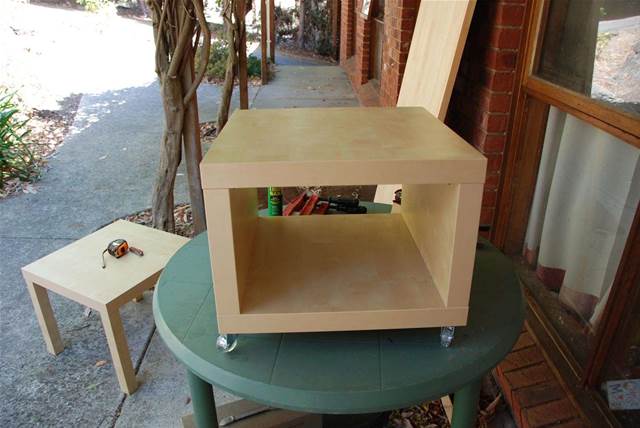
Having looked through the Ikea website I found my solution: The Lack Side Table and Lack Side Table with castors were the two pieces I needed.
The total cost – $59.98. The coffee table contributed just $9.99 of that. I chose these two units as they are the same size – 50cm by 50cm – so they’d stack neatly.
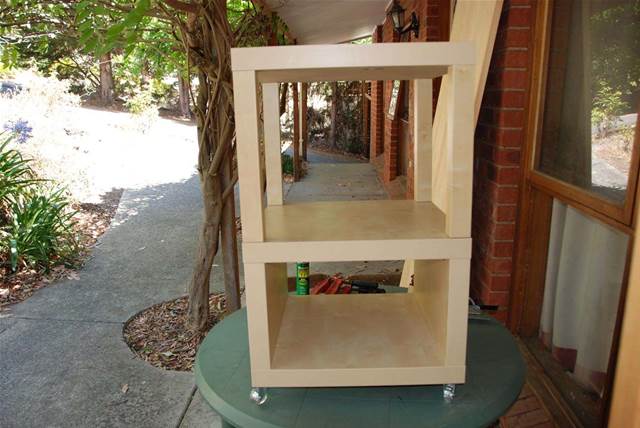
Assembling the rack
The first step was to assemble the two units. All told, that took about 30 minutes.
Once that was done, I needed to find a way to secure the table on to the table with castors. With a little more skill, I’d probably have drilled the legs of the table and top of the table with castors and used dowels to put them together. Instead, I decided on a simple method using some Liquid Nails to secure each leg of the table to castor table.
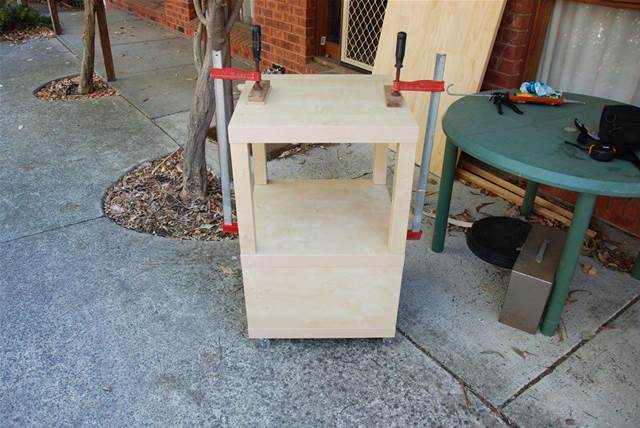
I put a dab of Liquid Nails in each corner of the bottom unit, sat the table on them and clamped the lot together. Remember to use some blocks when clamping so that you don’t damage the table surface.
The adhesive needed 24 hours to set so I had to wait till the next day to keep going.
All of the devices in my rack are connected to a single Uninterruptible Power Supply (UPS). This makes the cabinet quite portable. As long as I can get an Ethernet cable and power to it, I can place just about anywhere in my office.
I put the UPS at the bottom of the unit. Eventually, I’ll cobble together a simple door to cover the front as that’s where all of the power supplies and excess power cabling are. I’ll keep the back open for ventilation.
In order to keep everything neat, I’ve used cable ties and used my labeller to tag every cable so I know what it’s for. This makes life easy, because if I need to move something, I know what each cable is for.
All told, the project cost about $63 including a tube of Liquid Nails. It took longer to undo the tangle of cables and parts I previously had than it did to put it all together.


![Toni Kroos là ai? [ sự thật về tiểu sử đầy đủ Toni Kroos ]](https://evbn.org/wp-content/uploads/New-Project-6635-1671934592.jpg)


