Carl’s Place customer Guy explains step-by-step how he built his awesome home golf simulator from the ground up on a tight budget.

It is possible to make a nice home golf simulator for a reasonable price. Just ask Guy Smiley, who provided all these photos of his home setup.
“Coming out of golf season, and I’ve been doing just fine
Gotta, gotta be down because I want it all
It started out with a launch monitor, hitting net and hitting mat, how did it end up like this?
It was only indoor golf; it was only indoor golf.”
Anybody recognize the song? If you guessed “the golf simulator version of Mr. Brightside by The Killers,” you are correct! No, we are not lyricists, and don’t ask us to sing it.
Many home golf simulator DIYers can relate to those lyrics, including Carl’s Place customer Guy Smiley (no, that’s not his real name; we changed it to avoid everyone within a 15-mile radius from wanting to use his golf simulator). He started outside in the fall of 2021 with a small hitting mat, pop-up net and the Garmin Approach R10 launch monitor.
“But it was cold, so I cleared out some space in the shop and set up there,” Guy said. “After a couple of days, the net had holes all over and was covered in duct tape to keep it from falling apart. I added a canvas drop cloth to help contain my wild shots.
“Then, I started thinking, ‘A full-on simulator would be awesome. I already have the launch monitor. I really just need a projector and an impact screen. I bet I could do it all for under $3,000.
“Ha! Little did I know how far this rabbit hole would go.”
BUILDING A KILLER HOME GOLF SIMULATOR
Although Guy might not have stayed under his $3,000 budget, he was able to build out the main home golf simulator necessities for just a couple hundred bucks more than his goal. With an extra investment of just more than $2,000, he was able to build an awesome, immersive golf simulator setup with customized add-ons in just a few weeks.
“It’s still pretty inexpensive compared to what other people have spent for almost the same thing,” Guy said.
Below, we’ll take you step-by-step through his “budget build,” but first, a quick background on Guy.
He’s a 39-year-old business owner who is retired from the Navy. He had golfed on and off for a good chunk of his life until this past year, when he and his business partner took golf a little more seriously.
HOW TO TAKE A DIY APPROACH TO A HOME GOLF SIMULATOR
STEP 1: UNDERSTAND THE BASICS FOR A BETTER PLAN
A basic home golf simulator needs a place to hit from, a place to hit into, and something to tell you how you did.

Guy bought his Garmin R10 launch monitor, a pop-up hitting net and a GoSports hitting mat for a total of about $740. He was playing outside, but when it got cold, he cleared out some space in his shop and moved the small setup inside.
“The Garmin ($600) is on par with a SkyTrak that costs $2,000,” Guy said. “It is super accurate, and it is great because it gives you all the metrics you need … I freakin’ love that launch monitor. I can’t talk enough about that thing.”
Guy added a canvas drop cloth to help contain some wild shots, but after a short time, he figured that having a full-on golf simulator would be a better option because the net and mat fell apart.
STEP 2: FIND THE SPACE THAT FITS YOUR GOLF SIMULATOR
Guy cleared out the space, ripped cupboards off the walls and moved a bunch of wood. However, it looked ugly, and Guy wanted his golf sim area to look nice and clean like the others he saw online.

“I’ll just slap a coat of paint on,” Guy said.
But he said his drywall was all messed up, so he needed to do some drywall repair and sanding. Then, he thought doing a smooth wall would save time and money compared to what texturing would cost.
Long story short: it was less expensive, but it was not easy turning his older garage drywall into a nice smooth wall and ceiling.
“So much mud, so much time waiting for it to dry, so much sanding once it does, so many do-overs,” Guy said. “Not my idea of a good time, but it was good practice.”
STEP 3: PAINT AND PREP THE AREA
After four days of work, Guy finally was able to put on some paint. Then, it was on to the fun stuff.

Just kidding.
“I had to install light fixtures before I built the cool stuff,” Guy said. “I had to get the heater off the floor and mounted. And put the curtains up. They’re held up with hooks in the walls, and I didn’t want to drill holes in drywall over the new turf.”
For the light fixture, Guy chose an adjustable focus beam fixture and track light kit to slightly focus in on the hitting mat. He avoided a spotlight because he thought the more direct light circle might be a bit distracting.
“I wanted something that focused down to a tight beam, and didn’t wash out the screen at all,” Guy said.
He installed five 10-by-8.5-foot room divider curtains hung on hooks to separate his golf simulator area from the rest of his shop, and to also keep the heat from escaping.
STEP 4: BUY A HIGH-QUALITY ENCLOSURE AND SCREEN
“Now I could do the fun stuff,” Guy said.
Guy purchased a DIY enclosure with a Preferred impact screen from Carl’s Place. One hack Guy used was buying gutter foam cushions from Home Depot to put behind the impact screen flaps to protect the enclosure frame and minimize bounce back if a ball were to hit the frame. Carl’s Place does offer foam cushion inserts as well.
Carl can custom finish impact screens in 125 different ways.
(Carl’s Place) prices are two-thirds of the cost of the next guy,” Guy said. “That was a massive selling point because I was trying to save money on this. My wife was not happy when I explained to her how much I was going to spend on this. I had to negotiate by saying, ‘Here’s what it costs most people, and this is what it’s going to cost us.’
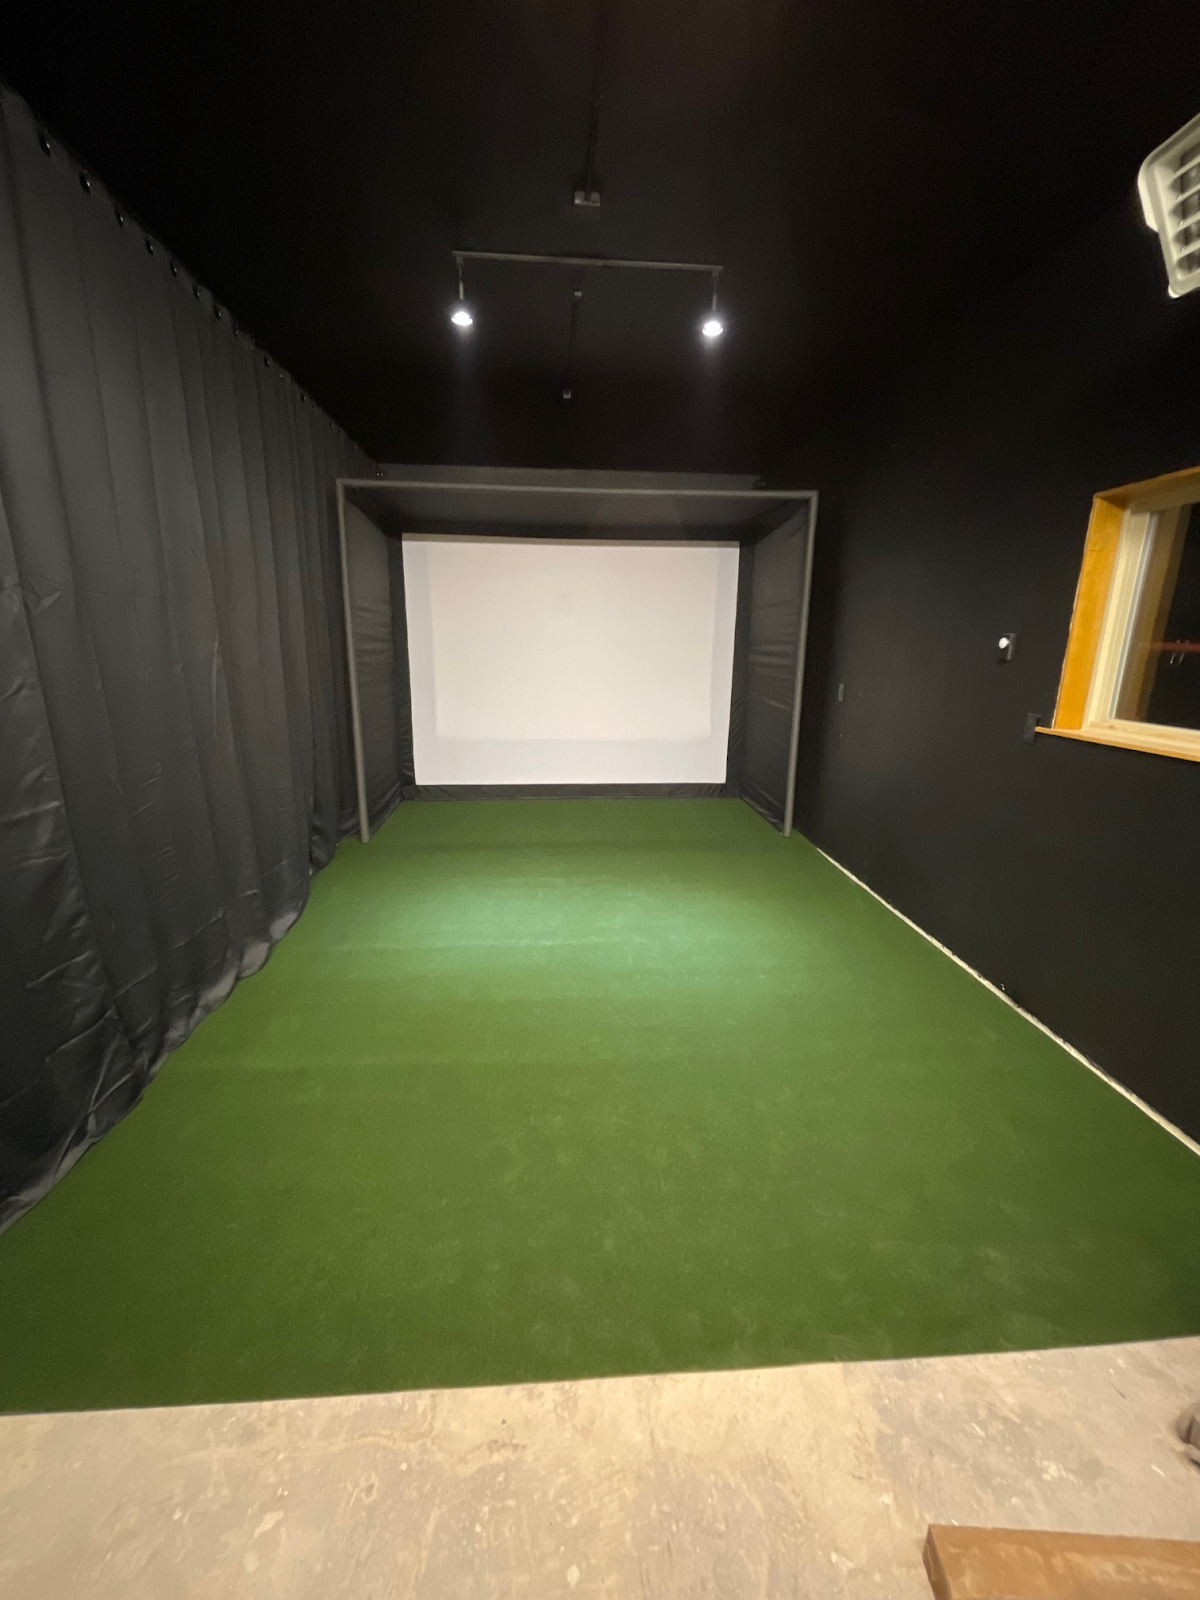
“The fact that (Carl’s Place) can custom build stuff is a big deal because not everybody can fit (the standard sizes) … The customer service there is top-notch, stellar. As a business owner, I value good customer service more than anything else.
He also added 1-inch pipe foam to the front and depth pipes of the enclosure for frame and bounce-back protection for errant shots that don’t quite make it inside the enclosure.
Once the enclosure was assembled, he put 1-inch exercise mats underneath the Grizzly Grass turf that he bought from Lowes.
He only put the exercise mats to the front of the enclosure before stopping so that he could roll up the turf to install the projector without ruining the turf.
Carl’s Tip: Having trouble convincing your partner that a home golf simulator is a good investment? We’ve got you covered.
STEP 5: USE A PROJECTOR FOR A VIRTUAL GOLF EXPERIENCE
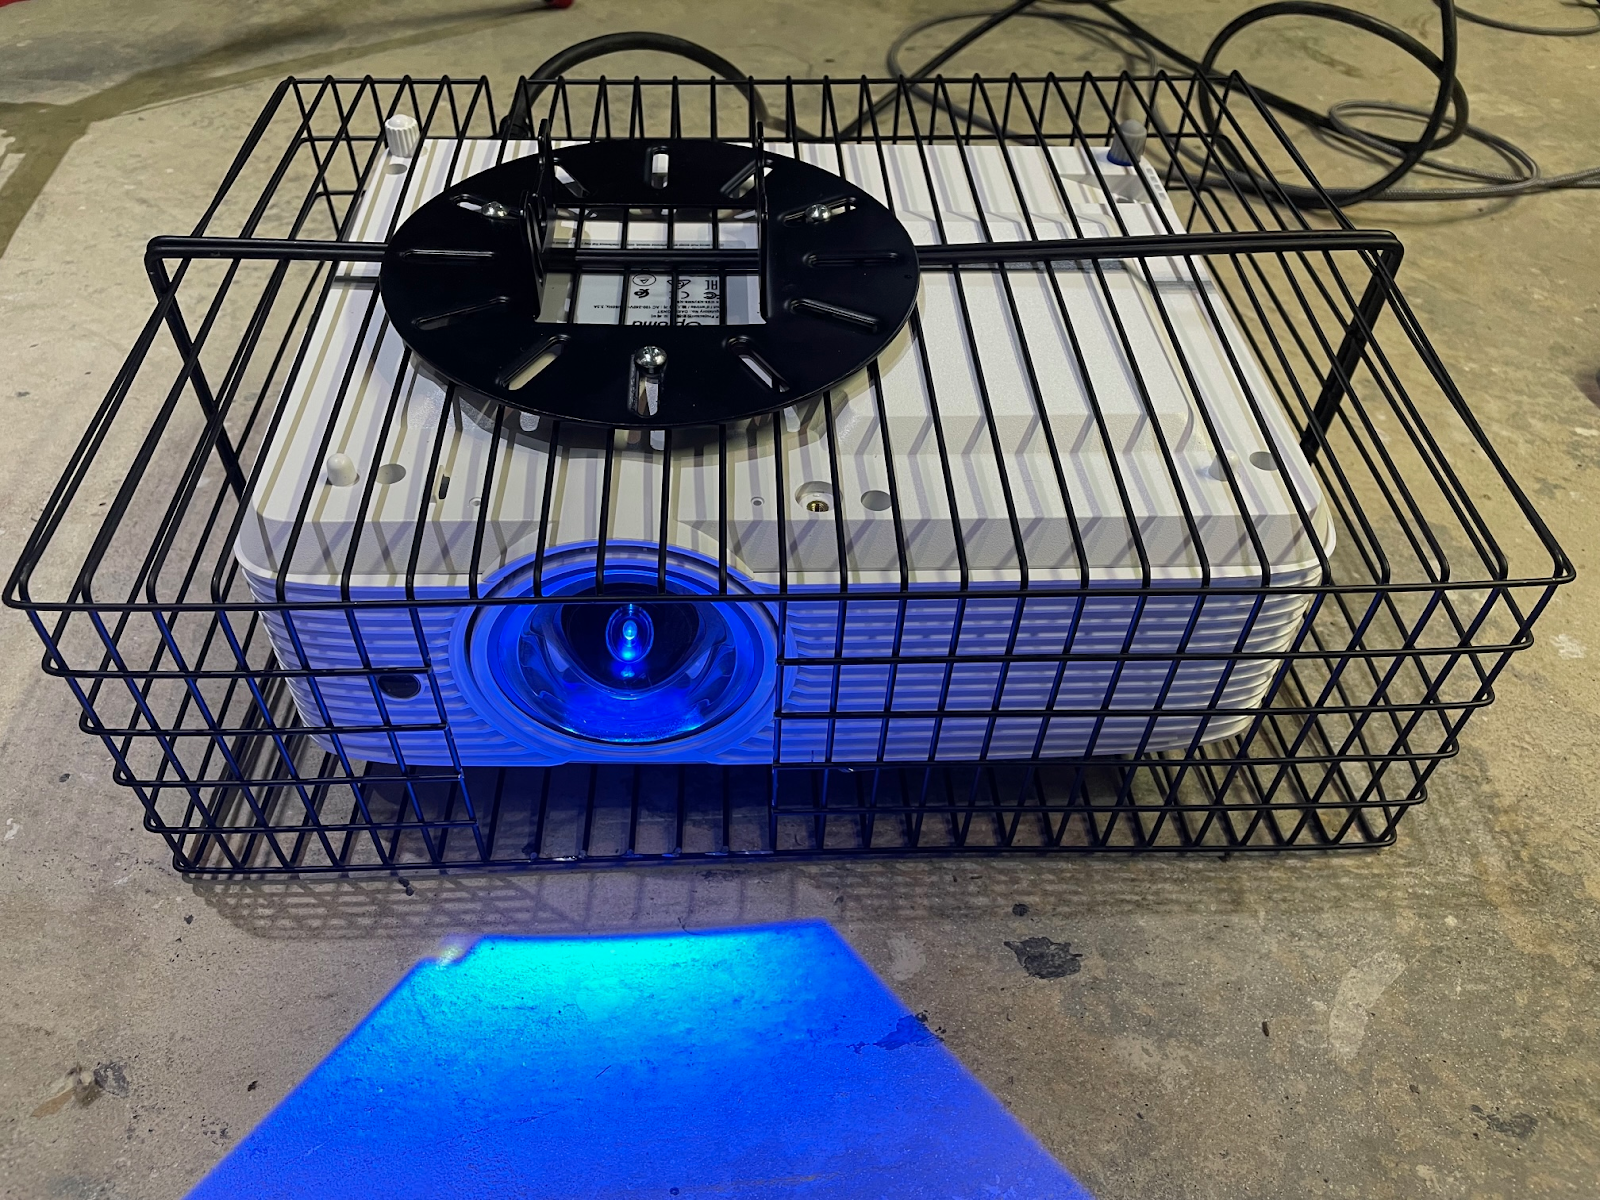
“I wanted to go with a laser projector, but went with an Optoma GT1080HDR because of the budget,” Guy said.

Before mounting his projector, he wanted to make sure that it was well protected. Although it wasn’t the highest-end projector, he wanted protection for peace-of-mind when other golfers used his simulator. Of course, Guy’s swing is near perfection now that he’s got golf at his fingertips; his friends, maybe not so much.
So, he built a projector cage out of two $15 metal organizer baskets from Amazon. He sandwiched the baskets between the projector and mounting plate, cut holes out for the lens and connector access, and zip-tied the baskets together.

“I wasn’t too worried about a ball bouncing back and hitting the projector, but because it’s right over
the top of your head, someone is going to have the club over their head and start waving it around and smack the projector,” Guy said. “I’d rather not destroy an $800 projector.”
He added cable-hiders and spray painted them black, using a Gibbon Universal Projector Mount to mount it to the ceiling.
Then he installed LED light strips to his home golf simulator enclosure, added more of the 1” foam exercise mats and unrolled his turf.
STEP 6: TEST YOUR GOLF SIMULATOR
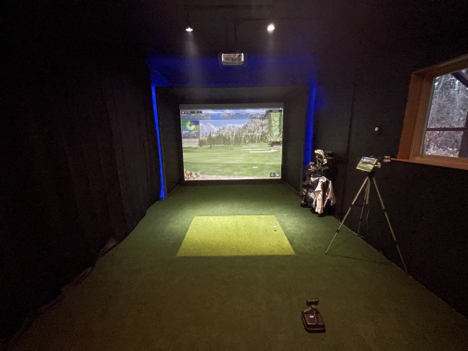
Guy then placed his iPad on a tripod, and brought in his hitting mat and clubs to test out the setup.
After his test, he extended the LEDs to the bottom of the enclosure, cut out some of the foam exercise mat to insert his hitting mat, and then installed the rest of the exercise mats.
He tested it out again.
“I hit my longest simulated drive yet!” he said.
STEP 7: ADD PUTTING CUPS
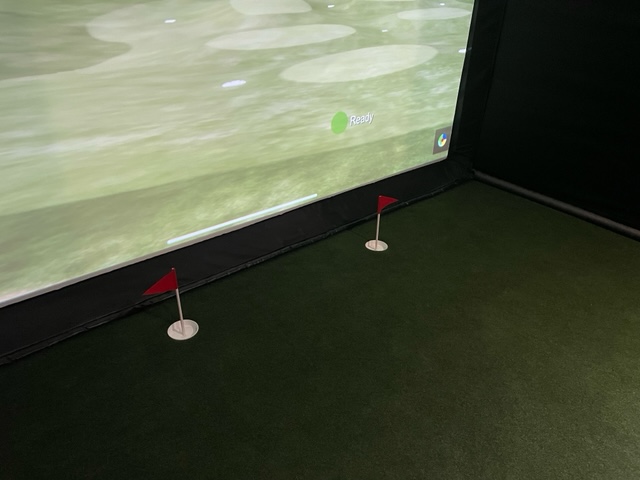
Although the Garmin R10 does not read putting, Guy bought drainpipe caps with a 4.25-inch inner diameter to use as his holes for putting practice, installing them in his turf and exercise hitting mats. The flags were made by Guy’s wife out of wood dowels and red felt.
“So, I was done, right?!” Guy asked. “But my bag keeps tipping over on the soft floor. So I had to fix that.”
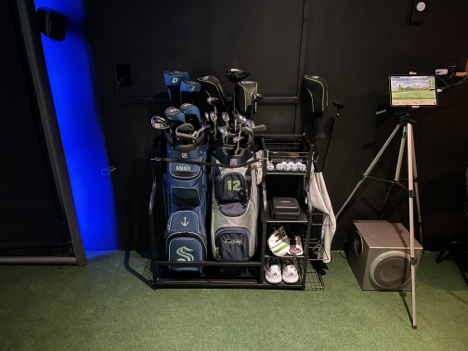
Guy bought a golf bag holder off Amazon to fix that.
“I’m done!” Guy thought. “Oh wait, no, I needed better sound.”
STEP 8: ADD SOUND
Guy mounted speakers on the tops and the sides of the enclosure, and a couple of rear speakers as well.
“I finally got to put an 18-year-old Logitech 5.1 computer sound system I had back in service,” Guy said. “I had to use an HDMI to optical adapter because the stereo predated HDMI … Time to hit some balls in my new home golf simulator.
“Now can I sit back and relax, knowing I’m actually done?”
STEP 9: BACK TO THE PROJECTOR
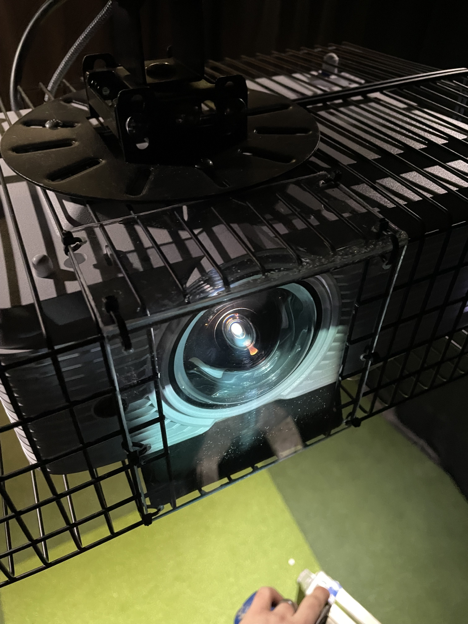
“Nope, I needed to protect the lens (of the projector) and keep dust off since I won’t be able to access it easily,” Guy said.
So he placed a folded over piece of Lexan in the lens hole of his projector cage.
“It looked good, and it had no image distortion,” Guy said.
STEP 10: OF COURSE, ADD A BAR AREA
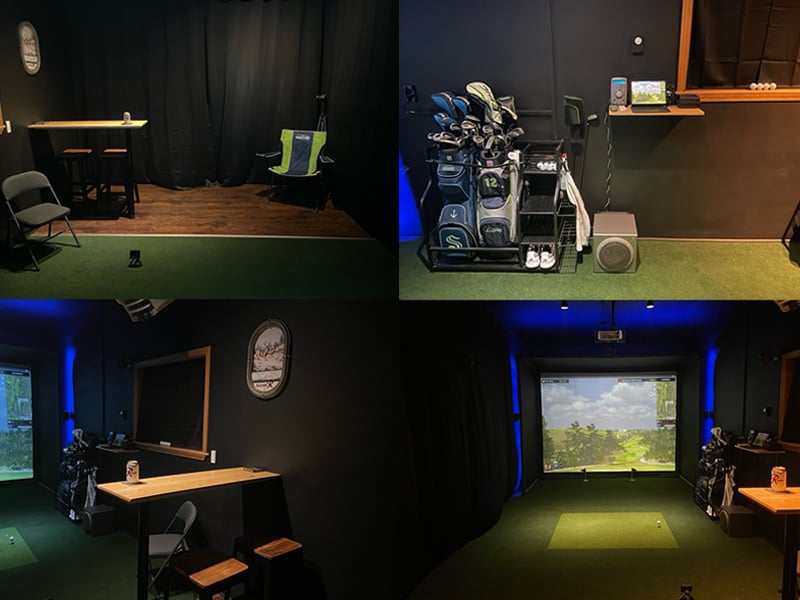
To put the finishing touches on his golf simulator area, Guy thought it would be a good idea to top it off with a small bar area. He had to extend his area 5 feet, which meant more drywall finishing, repair and painting. Then he added subflooring, laminate, carpet transition and his bar with stools.
The bar top is made out of 1-inch-by-8-inch common board and is held up by adjustable table legs.
He also made a small shelf using just two feet of this 1-inch-by-12-inch common board and 10-inch shelf brackets for his iPad, Garmin R10 charging station and stereo head unit. He kept the iPad tripod around to put his phone on to record his swings.
WRAP UP
So, for those of you who think a nice golf simulator room is stuck in your dreams or out of your budget, use Guy’s ideas as motivation.

“This was a crazy project,” Guy said. “I set a goal of $3,000 with a budget of $4,500. I realized quickly that $3,000 wasn’t feasible. I was able to get the bare necessities for a decent sim for just over $3,200, so not too bad. But I had a lot of extra costs and it ended up, all-in-all, at nearly $5,500.”
“Even at over $5,000 total cost, I would still call it a budget build considering the end result. My biggest pieces of advice for anyone starting a simulator project are plan, plan, plan and research, research, research. Dive deep into the golf simulator forums and subreddits to find all the info you need.”
“Look closely at projector throw calculators to find the right projector for your project, and know that, even with the measurements provided, you will have to adapt it to your space.”
Here’s a list of all the items he purchased with associated costs.
Golf Simulator Equipment
Extras
This post contains affiliate links. If you click through and make a purchase, Carl’s Place may receive a small commission at no additional cost to you.


![Toni Kroos là ai? [ sự thật về tiểu sử đầy đủ Toni Kroos ]](https://evbn.org/wp-content/uploads/New-Project-6635-1671934592.jpg)


