Fix: Windows Cannot Connect to the Shared Printer | Windows OS Hub
In this article, we provide solutions to common Windows errors (0x0000011b and 0x00000002) that can occur when connecting a shared network printer from a remote computer (print server). Find the error that appears when connecting a printer in the list below and proceed to the fix.
0x00000002 – Printer Connectivity Error
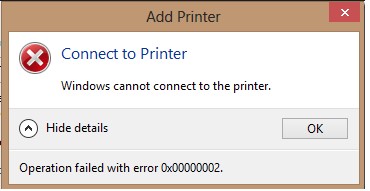
Error 0x00000002 can occur when trying to connect a shared network printer (from the Print Server or the local TCP/IP port) in both Windows 10 and Windows 7. After you have opened the list of shared printers on a remote computer (via UNC path \\computername), and clicked the Connect button, an error appears
Connect to Printer
Windows cannot connect to the printer.
Operation failed with error 0x00000002.

The error 0x00000002 means that the driver of this printer installed on the computer is corrupted. First of all, you should try to remove this driver from the driver store (like in the case of error 0x00000057).
Run this command:
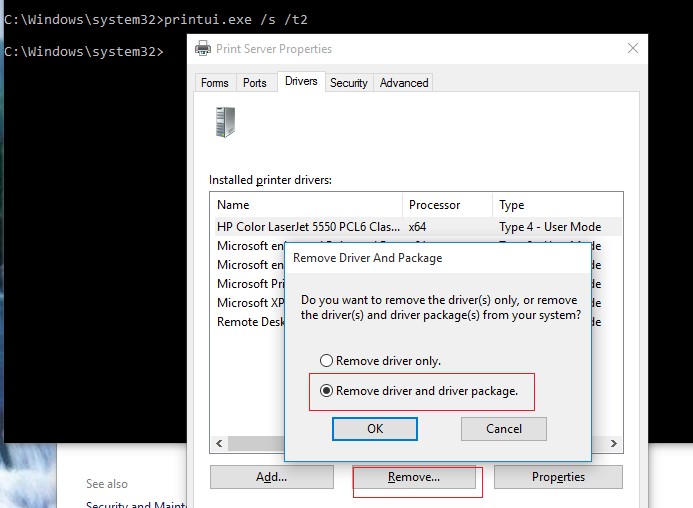
printui.exe /s /t2
In the list of installed drivers, find the printer driver you want to reinstall and remove it by clicking Remove and select the Remove driver and driver package option.

Restart the spooler (net stop spooler & net start spooler) and try to connect your printer again.
It is likely that the driver will be installed and the printer will connect successfully.
Otherwise, try the following:
- Remove this registry key: HKEY_LOCAL_MACHINE\SYSTEM\CurrentControlSet\Control\Session Manager\PendingFileRenameOperations;
- If there are any subfolders with the names from 1 to 499 in
c:\Windows\System32\spool\prtprocs\x64, delete all of them except winprint.dll; - Delete all Print Processors and drivers (except winprint) from the reg key HKLM\SYSTEM\CurrentControlSet\Control\Print\Environments;
- Restart your computer and connect to the shared printer.
As a workaround, if the previous methods haven’t helped, connect your printer via UNC path following the instructions in the article How to Print on Windows 10 Network Printer from XP.
Error 0x0000011b: Windows Cannot Connect to the Printer
The mass issue with connecting shared network printers with error 0x0000011b started after installing Windows security updates from September 15, 2021.
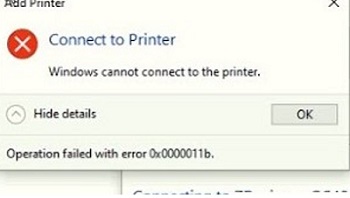
When connecting a shared printer from a remote computer an error appears:
Connect to Printer
Windows cannot connect to the printer.
Operation failed with error 0x0000011b.

This issue is related to the latest security updates in which Microsoft is trying to close the Print Nightmare vulnerability. Unfortunately, the updates are not fully tested and cause massive errors 0x0000011b.
To solve the problem, you need to remove the last security update on the computer where the printer is shared (!). Depending on the version and build of Windows on the computer sharing the printer, you need to uninstall one of the following updates:
- KB5005565 — Windows 10 2004. 20H2 and 21H1
- KB5005566 – Windows 10 1909
- KB5005568 – Windows 10 1809 and Windows 10 LTSC
- KB5005030 — Windows Server 2019
- KB5005573 – Windows Server 2016
- KB5005613, KB5005627 — Windows Server 2012 R2, Windows 8.1
- KB5005563 – Windows 7, Windows Server 2008 R2 (who has an Extended Security Updates subscription for Windows 7 and Serve 2008 R2)

To remove an update, go to Start -> Settings -> Update & Security -> View Update History -> Uninstall updates. Select the recently installed update based on your version/build of Windows (for example, Security Update for Microsoft Windows (KB5005565)) and click Uninstall.
Or use the wusa command (specify the update number for your Windows build):
wusa.exe /uninstall /kb:5005565
Restart your computer and try to connect your network printer manually or using Group Policy. Note that if users cannot connect network printers without local administrator permissions (due to the PrintNightmare vulnerability fix), you can temporarily allow non-admin users to install printers by running the command:
reg add "HKEY_LOCAL_MACHINE\Software\Policies\Microsoft\Windows NT\Printers\PointAndPrint" /v RestrictDriverInstallationToAdministrators /t REG_DWORD /d 0 /f
Then the user will be able to connect the shared printer and you must set the value to RestrictDriverInstallationToAdministrators = 1.
After uninstalling the update, you need to hide it from the installation. In this case, it won’t be automatically installed on the next Windows Update scan cycle.
You can hide updates with the official tool wushowhide.diagcab or using the PowerShell PSWindowsUpdate module:
$HideList = "KB5005565", "KB5005566", "KB5005568"

Hide-WindowsUpdate -KBArticleID $HideList -Verbose
If you are unable to uninstall the update, as a workaround, you can connect a network printer through the local port. For example, the local port name for connecting a printer from a remote computer might look like this: \\pcname123\HP1220
Connecting a printer via a local port is described in the article about another common error connecting a network printer – 0x0000007e.
Another workaround is to set the reg key HKEY_LOCAL_MACHINE\System\CurrentControlSet\Control\Print\RpcAuthnLevelPrivacyEnabled to 0.


![Toni Kroos là ai? [ sự thật về tiểu sử đầy đủ Toni Kroos ]](https://evbn.org/wp-content/uploads/New-Project-6635-1671934592.jpg)


