
Fix Cannot Access Network Shares on Windows 10 – Technipages
Not being able to access network shares can be really annoying. For example, if other computers can detect the shared folders and yours cannot, you need to fix this issue. In this guide, we’ll show you how you can solve this problem.
Mục Lục
My Computer Doesn’t Detect Network Shares
Use the same sharing protocol
First of all, make sure all the computers are using the same sharing protocol. That is to say, there should be no incompatibility issues at this level.
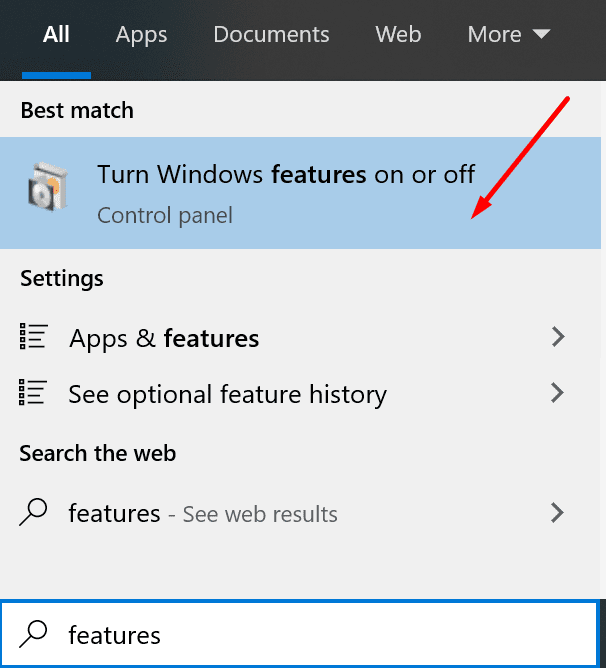
- First, type features in the Windows search box.
- Select Turn Windows features on and off.
- Then expand the \SMB 1.0/CIFS File Sharing Support category.
- The next step is to check all the options. As a result, your computer will support all the sharing protocols.
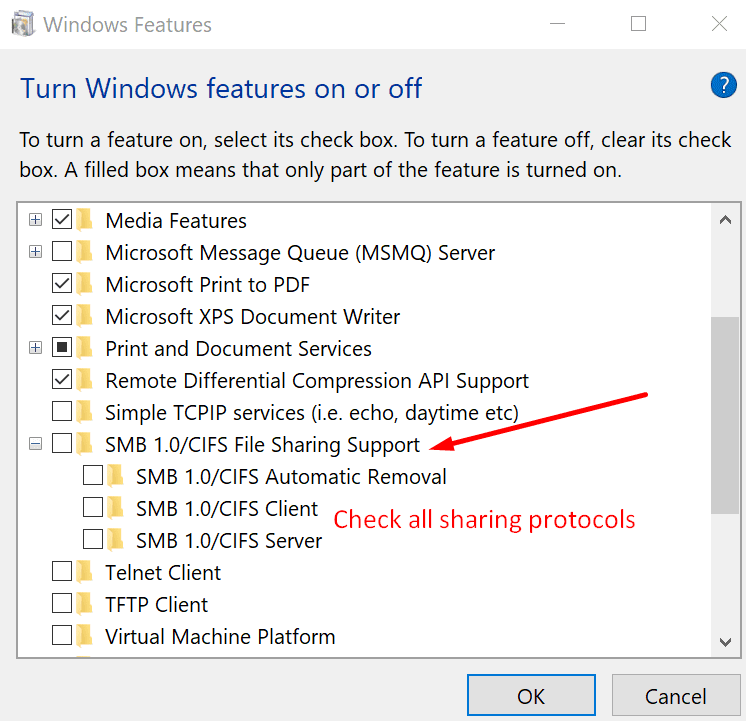
- Apply the changes and restart your computer.
Enable Public Sharing
If the public sharing feature is disabled, certain folders may not visible over the network.
- The first step is to launch the Control Panel.
- Then go to Network and Internet.
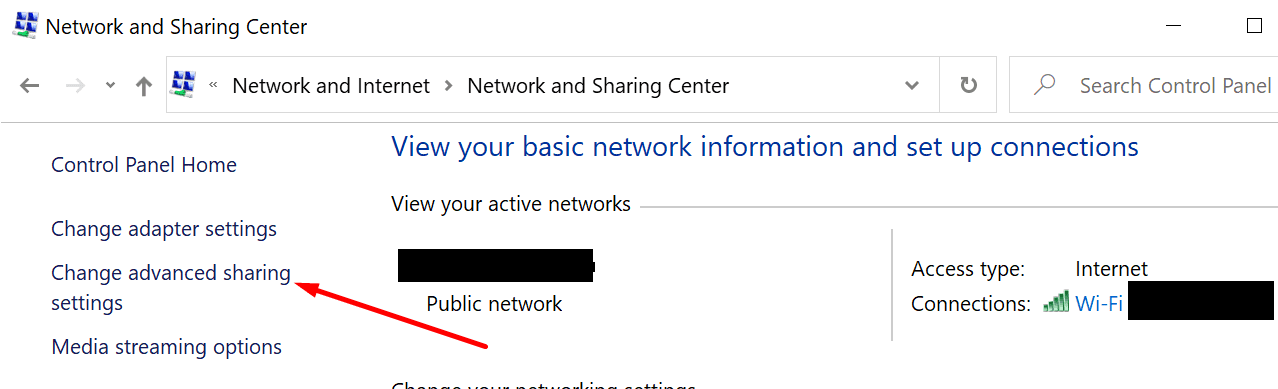
- Select Network and Sharing Center.
- Go to Change advanced sharing settings.
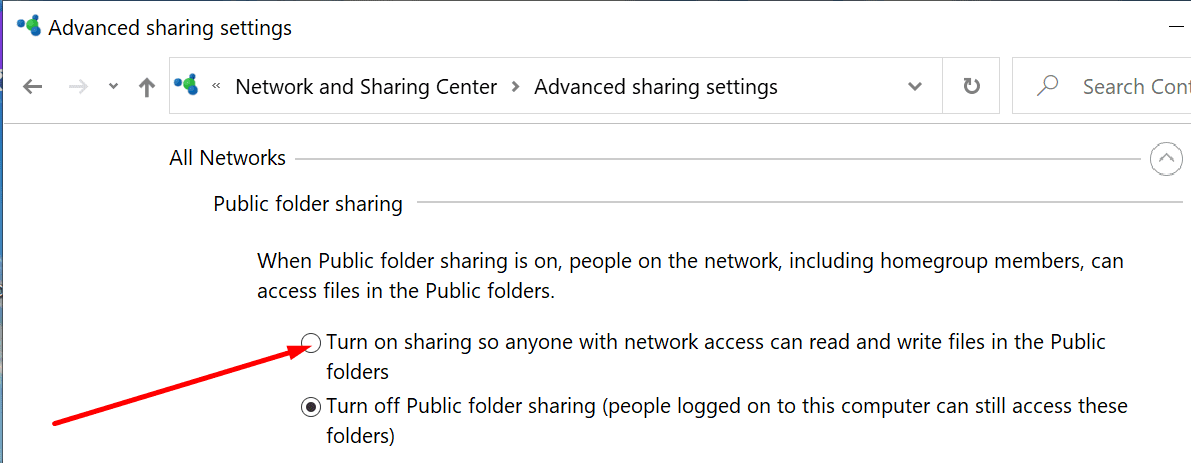
- After that, expand All networks.
- Locate the Public folder sharing option and make sure it’s checked.
- Then restart your computer.
Check the sharing settings for individual folders
Equally important, make sure to check the sharing settings for the folder you’re trying to share.
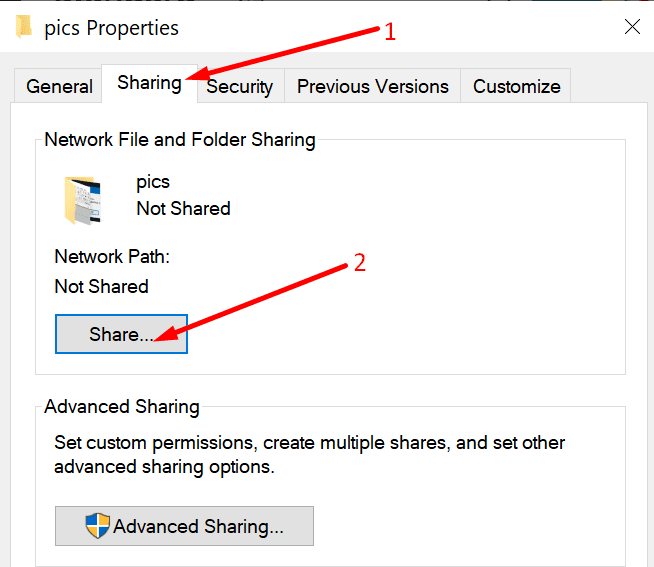
- Right-click on the folder.
- Then click on the Sharing Tab.
- Hit the Share button.
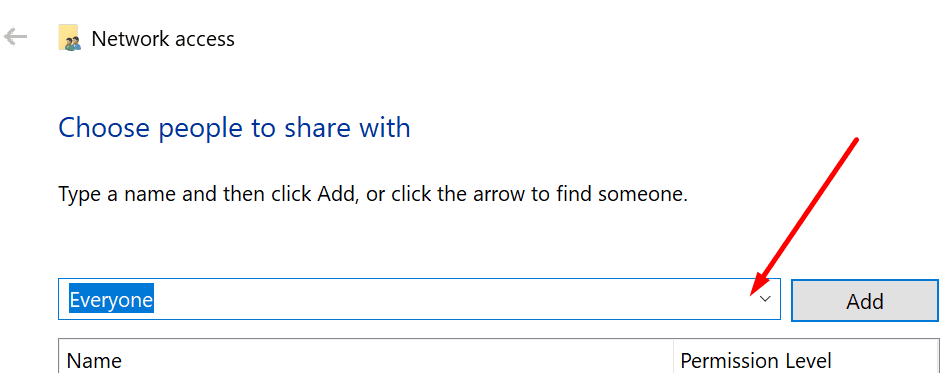
- Go to Choose people to share with.
- Select Everyone from the drop-down menu.
- Go to Advanced Sharing.
- Check the Share this folder option.
- Go to Permissions and make sure it’s set to Everyone.
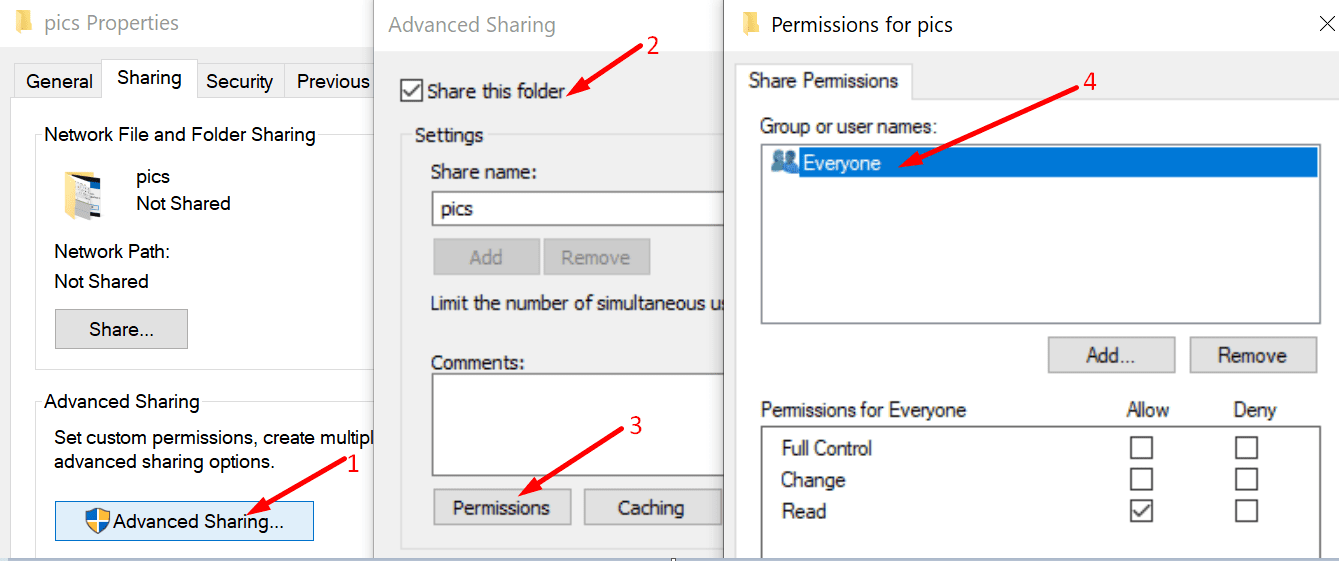
If you can’t find the Permissions tab, click on the Add option. Then, click on Advanced, and then Find Now. The computer will list all the users. Select Everyone and you’re ready to go.
Disable your firewall
Some users said that disabling the firewall did the trick. If you’re using Windows 10’s built-in firewall, open the Control Panel. Select Turn Windows Defender Firewall on and off.
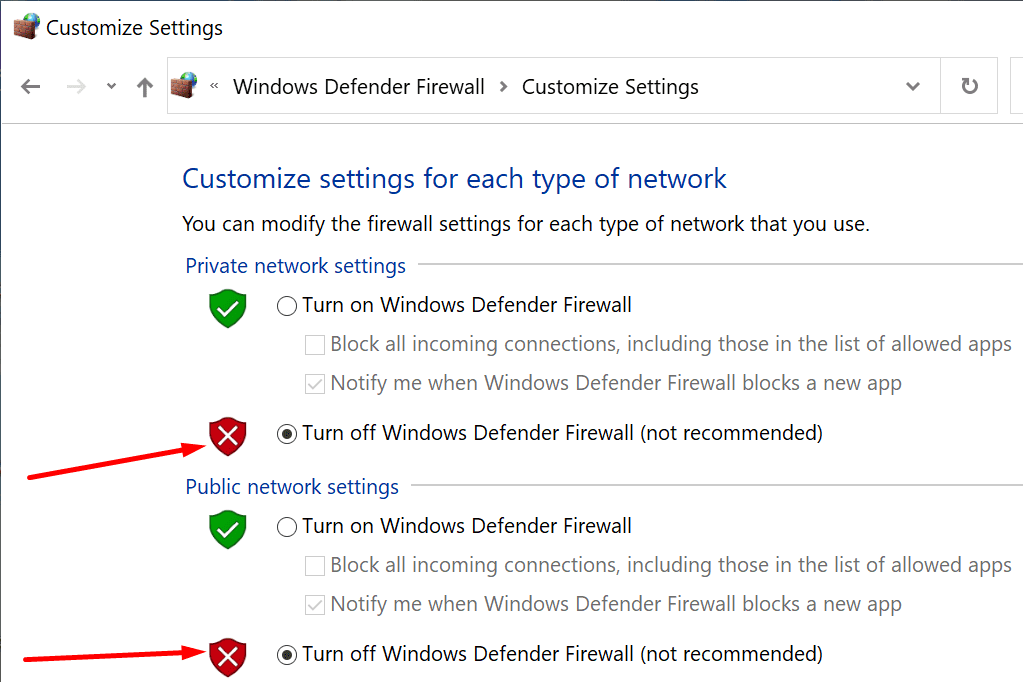
You can then disable the firewall, and restart your computer. Check if the network shares are visible now.
Enable LanMan Workstation
This policy allows users to block or accept insecure guest logons. It could be the reason why users can’t access network shares.
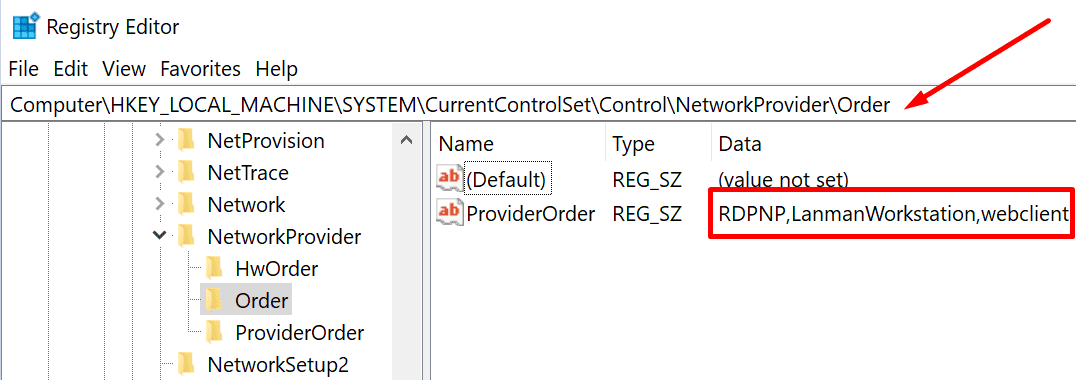
- To check if the policy is enabled, enter regedit in the Windows search box and launch the Registry Editor.
- Next, go to HKLM\SYSTEM\CurrentControlSet\Control\NetworkProvider\Order and HKLM\SYSTEM\CurrentControlSet\Control\NetworkProvider\HWOrder
- Check if the RDPNP,LanmanWorkstation value is set for both of these keys.
If it’s not, you can enable it via the Group Policy Editor.
- Press Windows + R and type gpedit.msc in the Run window
- Press Enter to open the editor
- Go to
ComputerConfiguration\Administrative Templates\Network\Lanman Workstation - Double click on Enable insecure guest logons
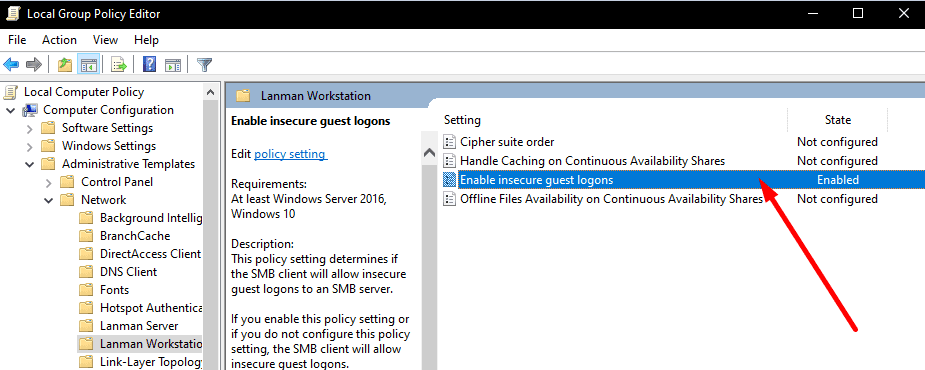
- Set the option to Enabled
- Save the changes and restart your computer.
In case the Group Policy Editor fails to edit the Lanman Registry key, follow the steps below. Use the same steps if GPEdit is not available on your computer.
- Open the Registry Editor (type regedit in the Windows search bar and select the Registry Editor)
- Go to HKEY_LOCAL_MACHINE\SYSTEM\CurrentControlSet\Services\LanmanWorkstation\Parameters
- Then locate the AllowInsecureGuestAuth key
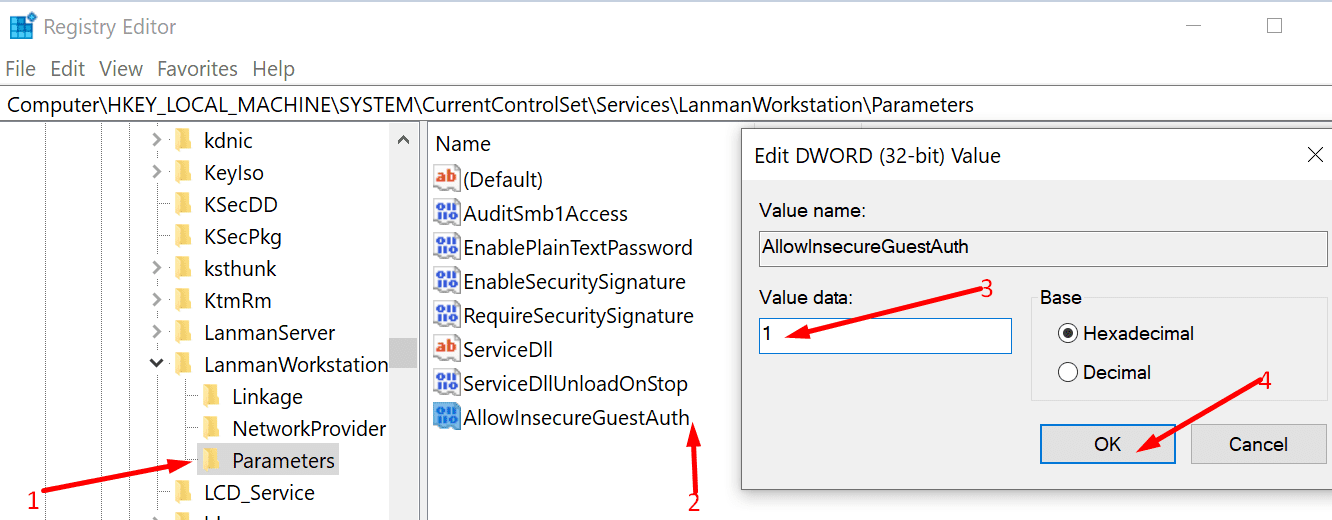
- Double-click on it and make sure the DWORD value is set to 1.
Of course, if the AllowInsecureGuestAuth key is not visible, you need to create it yourself. Right-click on Parameters → New → DWORD Value.
In conclusion, fixing any sharing protocol issues is crucial. Certainly, the sharing settings for individual folders are worth checking as well.
Meanwhile, let us know if you managed to fix this problem with the help of this guide.


![Toni Kroos là ai? [ sự thật về tiểu sử đầy đủ Toni Kroos ]](https://evbn.org/wp-content/uploads/New-Project-6635-1671934592.jpg)


