Building A Home Studio On A Budget (Ultimate Guide)
Building a home studio on a budget has never been easier.
The advancement in audio technology has decreased the demand for professional recording studios to a point where you can produce amazing-sounding records from the comfort of your own home. And for cheap!
In this guide, I’ll give you some valuable tips on what studio gear will give you the best bang for your buck and how you can transform any room into a great-sounding recording and mixing space.
Let’s get started!
Budget Computer For Music Production
The single most essential piece of equipment for your studio setup will be your computer. It’s basically a place where 90% of your production tasks will be performed.
If you have the resources to do so, you can go for a build that can sustain intense tasks and mixing sessions, but if you are trying to save wherever you can, pretty much any computer will do.
Many of the records we love were produced on machines with way less power, so there’s no reason it can’t be done even on 10-year-old machines.
As a bare minimum, I would recommend at least 4 GB of RAM and a dual-core CPU. You will still have difficulties loading multiple instances of more CPU-intense plugins, but there are some workarounds.
You would pretty much have to work with audio tracks exclusively. This means that you can’t afford to have multiple VST’s running simultaneously, but bouncing down your VST tracks to audio is a great way to save CPU power for mixing plugins.
The downside of this is that you won’t have the flexibility of tweaking sounds within the plugin as you go along, but that’s not such a big trade-off if you know the sound you are after from the get-go.
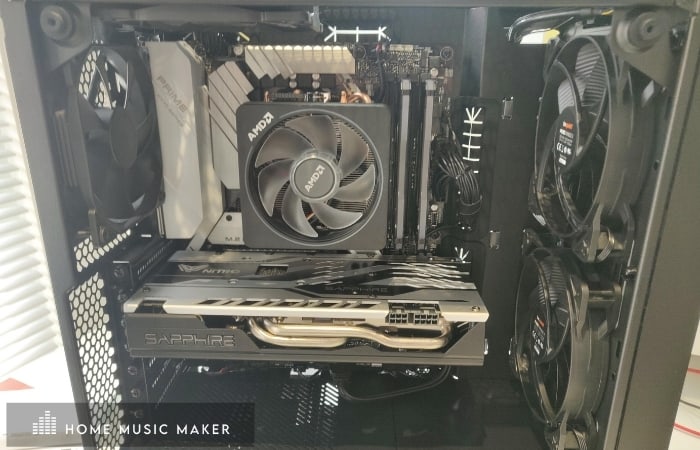
Building Your Own Studio Computer Is A Great Option
However, if you do plan on spending some money on upgrading your computer, I’d advise going for at least 8GB of RAM, and any new-generation CPU will be well worth the investment as you will enjoy a more comfortable and reliable experience.
If you are interested in building your own computer, check out our step-by-step guide HERE.
If building your own PC isn’t your thing, and you’d rather have an off-the-shelf laptop, then check out the Acer Aspire 5 range.
Which Is The Best DAW For Beginners?
The next thing we need is software that will enable us to record and process our music.
In the old days, you had to have an expensive mixing console and lots of hardware inserts to produce professional-sounding records.
Nowadays, all of the needed features are emulated in a single software called DAW (Digital Audio Workstation).
There are plenty of options to choose from, and all of them sound equally good, the only difference being the learning curve, workflow, and complexity of options.
Some of the DAW’s are packed with advanced features, while others focus on keeping the software focused on the essentials.
Which one works for you will entirely depend on what you want to achieve with your productions.
One thing is clear – no matter which DAW you choose, they are all more than capable of providing you with all of the tools you need to make a record.
Now, if your job is not only restricted to recording and mixing music, you might want to consider what each one has to offer.
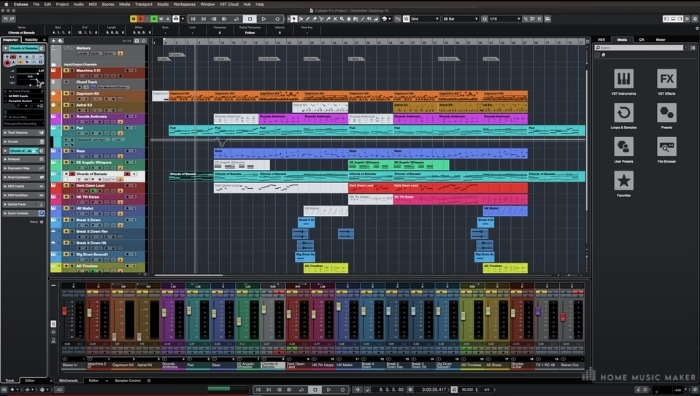
Cubase
I’ve found that Cubase, Pro Tools, and Logic have the most features packed in one program. They also have the steepest learning curve, though.
They’ll provide you with all of the possible tools you need to process the audio – from pitch correction and time warp to all of the plugins needed for mixing and mastering.
A nice in-between option is Studio One by Presonus. It has a beginner-friendly UI with the essential features highlighted in the main working area, so there’s no need to search through various pop-up windows.
Then, there are DAW’s like Ableton, designed to integrate seamlessly with live performances, but you still have all of the things traditionally found in the recording software. Their latest version Ableton Live 11, has recently been released.
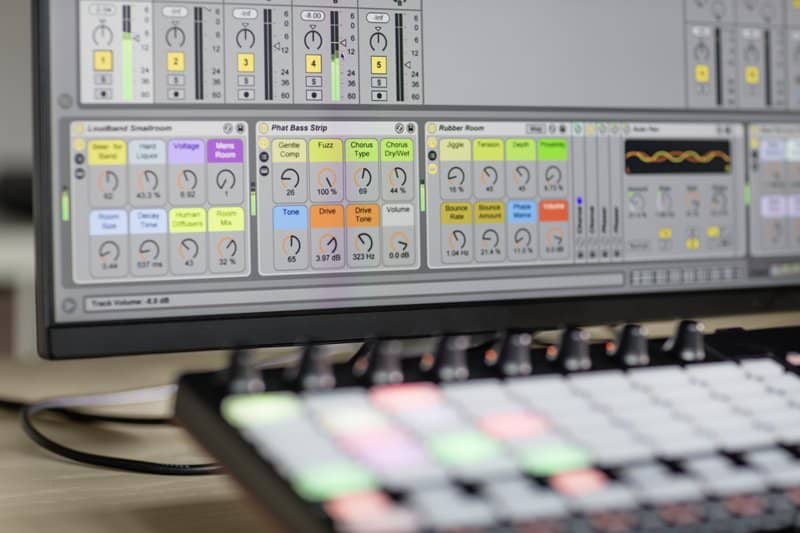
Ableton Live
If you are looking for the best ratio between money and value, many producers recommend going for Reaper. It’s much cheaper than other major DAW’s but is packed with tons of good plugins and features.
It’s well worth doing online research and figuring out which one works the best for you and your purposes. If you find that having lots of fancy editing tools is redundant, you can buy the basic versions of DAW’s that cost significantly less.
Steinberg offers Cubase Elements that is more than enough to get you started in the recording world, while Avid even has a free version of Pro Tools.
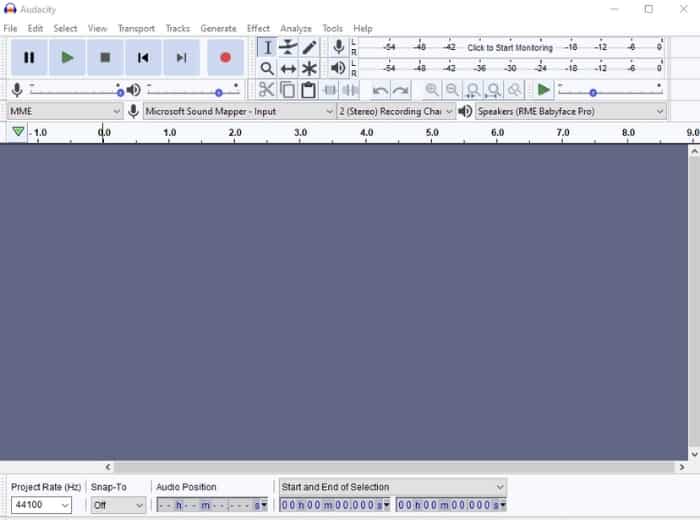
Audacity
Speaking of free stuff, there is a free, open-source DAW called Audacity capable of doing some amazing things just as well.
I’ll be honest and say that it looks horribly dated and complicated to use, but it is an option for those that want to invest the biggest chunk of money on the rest of the equipment needed for a home recording studio.
Best Budget Audio Interface
Although a DAW will handle most of our music production needs, we still need one vital piece in our audio chain that will allow us to record any sound source properly, whether it be a vocal, acoustic guitar, or drums is an audio interface.
An audio interface is an external hardware unit that allows you to record your signal clean and latency-free.
Plugging your guitar or microphone straight into a sound card input won’t produce a pleasant result as you’ll find that the signal has a lot of unwanted noise and doesn’t sync well with what you’ve played or sang.
Having an audio interface between your sound source and your computer will solve all of the above problems and double as an amplifier for your monitors and headphones.
To start with, you can go for the USB interface with a single input, as they cost the least. This means that you will be limited to recording one source at a time, but that’s all you’ll ever need most of the time.
The exception where having multiple inputs is necessary is when recording drums or a whole band playing together.
If you plan on building a music studio for such purposes, a bare minimum would be an interface with at least 4 inputs.
You won’t be able to record a whole band playing together, but at least you will be able to cover a basic 4 drum mic setup and stereo recording of acoustic guitars.
For more serious recording studio sessions, you’ll likely need a 16 input device, but that probably exceeds the budget intended for this article.
A single input is still a good option and worlds apart from using your integrated sound card.
There are plenty of companies that produce affordable and quality units. I highly recommend
Steinberg’s UR series. I’ve been using the UR22 without a single issue for many years. It also comes with a light version of Cubase and a dedicated Yamaha driver so that you can enjoy a very stable system.
There is a single-input version called UR12 for anyone who does not need an extra channel and is looking to save some cash.
Other great options include Scarlett 2i2 by Focusrite, AudioBox by Presonus, and Mackie Onyx. If you want to save even more, you can opt for the single-channel options.
Best Cheap Studio Monitors
These items can be one of the priciest pieces of studio gear, but luckily there are some good budget options.
Because of the budget restrictions, you probably won’t be able to get a single unit that will accurately give you a representation of what’s really going on in your mix, so it’s advisable to monitor on multiple devices.
This is where a combination of your monitors and headphones will go a long way in helping you make better mixing and recording decisions.
If possible, I would suggest going for a 3-piece monitoring setup. Your main studio monitors should be the ones that give you the flattest frequency response possible. Also, the ones you are the most familiar with, as you’ll be making the most important mixing decisions through these. I would recommend getting something like Presonus Eris E3.5 or KRK Rokit RP5 G4.
They are super affordable with great clarity and a pretty even response. A big bonus is an EQ for room correction found at the back of the speakers, so you can adjust them until they sound right in your particular setup.
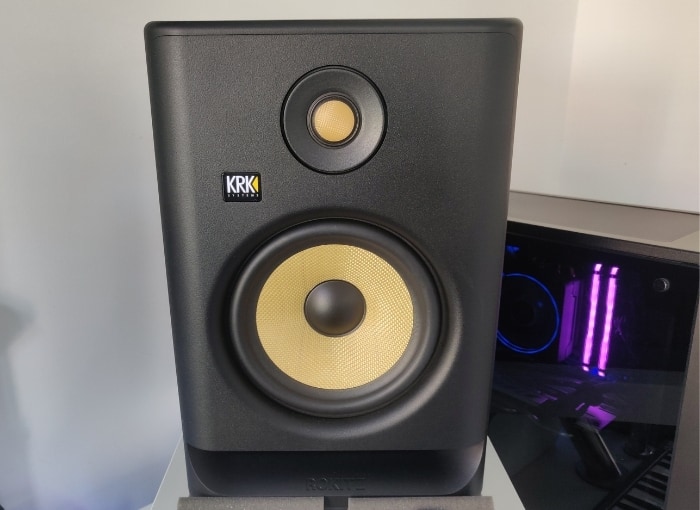
My KRK Rokit 7’s
If your budget can stretch to it, you can look at the KRK Rokit RP7 G4’s. These are the monitors I’m using in my home studio, and I’ve got to say I’m really impressed with their performance.
Best Budget Headphones For Music Production
Headphones are brilliant when you need to hear every detail in situations like dialing in the ambiance or editing recordings.
Also, you can check your low end with greater confidence as the room you’re mixing in doesn’t get in the way. Some good options for budget studio headphones include Presonus HD7, Sennheiser HD 206, and AKG K240.
I would try to avoid mixing exclusively through headphones, though, as the ones with even remotely flat response cost a fortune, and even in that case, you’ll need a lot of time to get accustomed to them.
However, headphones can be amazing to double-check your mix and pick out the fine details.
As the final piece of your monitoring setup, I would recommend getting the cheapest and the most horrible-sounding speakers available to you.
Even the pro mixers in fancy studios have a pair of these to check how their mix will sound on a setup that most listeners will be playing the song through.
If your mixes hold up in these 3 setups, you can be sure it will translate well to any system.
Microphones
When it comes to microphones, there really are no rules as any mic can be useful depending on the desired sound source being recorded. In that regard, even a $20 microphone can be a better fit in some situations than a $5000 one.
Best Budget Dynamic Mic
I would recommend buying a tried and tested dynamic microphone for beginner producers, something like Shure SM57.
This thing can basically cover every need you could have and handle it quite well. Sure, it might lack the ability to pick up the tiniest nuances as condenser microphones do.
Still, you can use it effectively on virtually any source, from recording vocals and guitars to drums. It’s a Swiss Army knife of microphones.
If my condenser mic wasn’t working for a particular singer, my SM57 always saves the session numerous times.

Best Budget Condenser Mic
Having said that, a condenser microphone definitely has its place in the studio, and I would strongly recommend getting both a dynamic and condenser mic if the budget allows it.
It is irreplaceable when it comes to recording delicate vocal or guitar parts.
A mic like MXL 770 sounds great overall and has a bass roll-off switch to filter the lowest frequencies right from the source.
Another favorite mic of mine is the Audio-Technica AT2020, which I’ve enjoyed using over the past year, and is a worthy addition to the studio.
Best Budget Midi Keyboard
MIDI keyboard (or any other MIDI controller) is another essential piece of equipment every home studio should have. It allows you to control your virtual instruments and lay down tracks fast and efficiently.
If a lack of space is an issue, a perfect solution can be a KORG micro key series or the AKAI LPK25, which I own. It easily sits on my desk and takes up hardly any room.
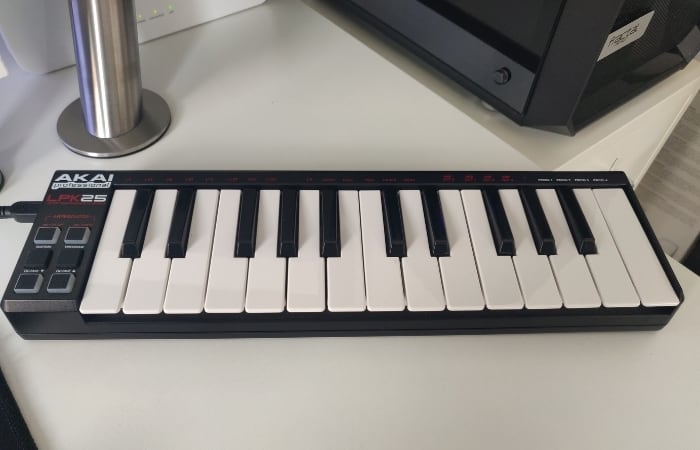
AKAI LPK25 On My Studio Desk
Piano players might find them too small and uncomfortable to play on, but it gets the job done for producers. A 61-key version of the Korg is small enough to fit on almost every desk, and it offers you the range of a grand piano. Another great option is the M Audio Oxygen 49.
I have the older version and highly recommend it.
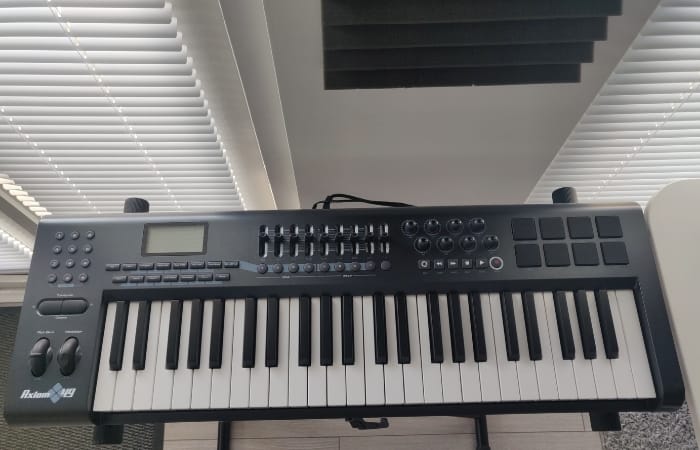
I Have The Older Version Of the M Audio Axiom 49
If you are looking for a real-sized keyboard, you can’t go wrong with any, as long as it has velocity-sensitive keys and a pitch and modulation wheel.
Having drum pads and other features is fine but not necessary. You can save quite a bit if you buy a plain one.
Budget Home Studio Accessories
Other little things needed in a home studio are cables, microphone stands, converter jacks, and a pop filter.
With these items, not going for the absolute cheapest ones can save money in the long run as you’ll probably buy them once and, if maintained properly, could last you a lifetime.
10ft (Twin Pack)
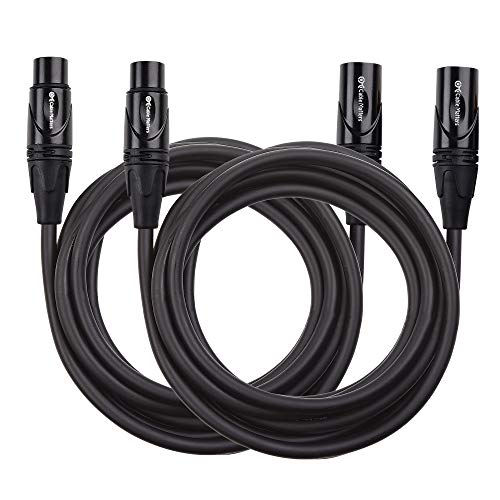
Cable Matters XLR to XLR
- Pro-grade microphone cord.
- Copper braided shielding.
- Balanced Mic cable with soft PVC jacket.
Click For Latest Price
6.6ft

TISINO 1/4 To XLR
- TRS to XLR Cable.
- Heavy Duty 24K Gold-plated connectors.
- Shielded 20 AWG 4N oxygen-free copper.
Click For Latest Price
Full Bundle

Kasonic Microphone Stand Bundle
- Heavy Duty Mic Stand.
- 2 Arms & 2 Microphone Holders.
- Collapsible & Adjustable.
Click For Latest Price
Microphone Boom Arm

Aokeo AK-35
- Multifunctional and universal fit.
- Made of high-quality steel.
- Arm bends back and forth.
Click For Latest Price
Our Top Pick

MINTHE Large MIC Cover (2 Pack)
- The Large Mic Cover Is made from a High-Quality Thick Microphone Cover Foam.
- Compatible with a Wide Range of Popular Microphone Models.
- The Condenser Microphone Windscreen Acts as a Mic Filter and a Pop Filter to Reduce the ‘P’s’ and ’S’s’ from your Voice.
Click For Latest Price
Pair

Vocalbeat Studio Monitor Isolation Pads
- Designed to fit with most popular 4″ – 5″ monitors.
- High-density acoustic foam.
- 5 different angle configurations.
Click For Latest Price
Budget Acoustic Treatment
Choosing a room to place your home studio in is a nice option to have, but unfortunately, most of us are left with what spare rooms we got, if any.
But there’s no need to worry, as any room can be treated in a way to make it fully functional for recording and mixing purposes.
Contrary to what many acousticians say, I think that with today’s technology and a tiny bit of DIY skills, any room can become an amazing space for mixing and recording music.
If possible, try to avoid having your studio space in a rectangular room. I won’t bother you with the exact reason why this is not desirable, but it has to do with the way soundwaves develop over distance.
If you have a rectangular room (which you most likely have), you can do a couple of things to improve how it sounds.
First of all, you should aim to treat the corners of your room with bass traps. Most of the bass frequencies tend to cluster in the corners and give you a false sense of too much bass, while in reality, not a whole lot is coming directly from the speakers.
Putting a bass trap in the corner will greatly reduce this effect, making your room a bit more “honest,” so to speak, in terms of frequency response.
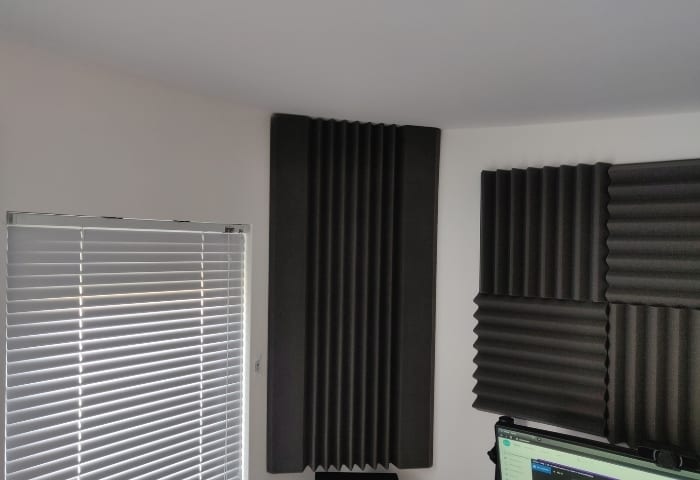
Bass Trap In My Home Studio
Bass traps, and all the other acoustic panels, can be easily made using materials found in your local building supply shops or purchased off the shelf online.
Speaking of which, egg carts do not work, and using them will only result in your room looking ugly. They have absolutely no impact on how your room responds to certain frequencies, let alone acoustically treating your room.
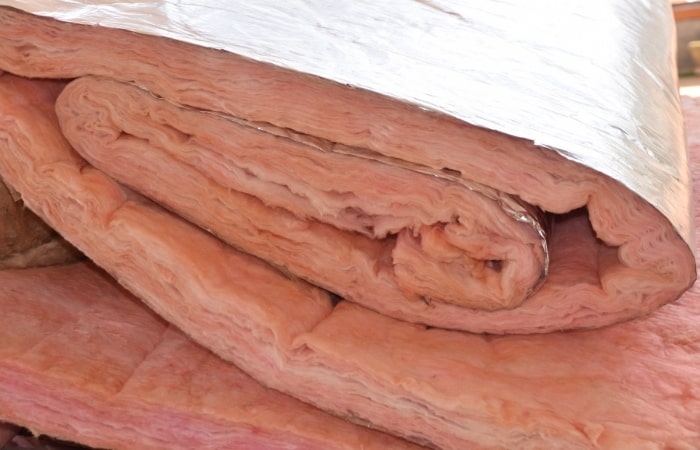
The stuff that really makes a difference is mineral wool.
You can get it from most hardware stores, and it’s not that expensive either. The only thing to consider when making panels out of that material is to cover it with some plastic wrapping as the particles tend to fly around the room, and those are not safe to breathe in.
Other than that, it’s a pretty straightforward task, and with some basic tools, you can make your own sound absorbers reasonably cheap.
If you decide to go down this route, make sure you wear appropriate protection like a mask, gloves, and safety glasses, as it’s not a very nice material to handle.
If all that sounds like hard work, you can buy foam acoustic tiles and stick those to your studio walls. That’s the route I’d personally recommend.
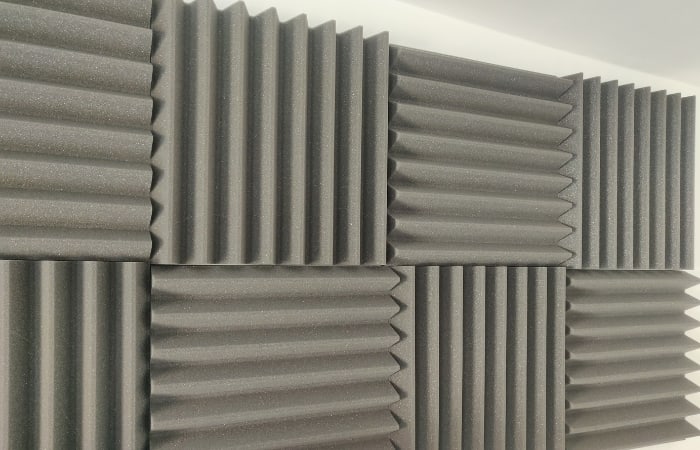
Acoustic Foam Tiles On My Studio Walls
Once you cover all four corners with bass traps, it’s time to decide where to put the rest of the panels/tiles. Ideally, you’ll want to put them on the ceiling right above your sweet spot, the others go on the wall facing away, and the rest on the sides of your room.
Having bookshelves, some furniture, and carpets will also help stop the sound waves from bouncing all over the room.
8 Pack

TRUE NORTH Bass Traps
- Remove excess and unwanted sounds in your room.
- A density of 30kg/m3.
- 12″x6″x6″.
Click For Latest Price
12 Pack

Foamily Acoustic Panels
- Each tile is 1 square foot of 1 inch thick.
- Made in the USA.
- For professional acoustic control, and sound dampening.
Click For Latest Price
At this point, you should notice a significant difference in the way your room sounds. You’ll notice a drastic suppression of reverb, and it won’t sound as hollow as usual.
But there are still some finishing touches that can make the room sound even better.
I strongly recommend using software like Sonarworks to fine-tune any weird bumps and standing waves. After you’ve calibrated your monitors to be as flat as possible in your room, you’ll have a great space for audio production.
FAQ – Building A Home Studio On A Budget
What is the smallest budget possible for setting up a studio at home?
If you already have a decent computer, I’d say that you could spend as little as $300, even less if you shop around.
What is the best recording software for a home studio?
Probably the one you’ve grown used to using. All of them sound great and have more features than you’ll probably ever need.
Should the aspiring music producer drop over a thousand dollars to get started?
If you can comfortably afford to spend that much right away, go for it. But it really isn’t necessary to get great results.
How to choose your studio monitors?
Unless you have an experienced friend who will give you a specific suggestion based on your room, I suggest going with whatever cheap monitors you can get your hands on. There’s no other way to see what works for you other than spending a lot of time with one pair and finding out what you like and don’t like about a speaker.
How do you make a homemade vocal booth?
You can buy microphone shields that can stop some of the room reflections from being picked up. If you don’t want to stuff your room full of sound absorbers, a good trick is to place a bunch of thick blankets all around your vocalist. It isn’t a fancy solution, but it works!
What about recording an entire production with only one mic?
That would be quite a challenge. I guess it could work in theory if you have an awesome-sounding room and carefully rearrange the performers around the microphone. Some genres could benefit from that approach, so feel free to experiment with it.
What kinds of instruments will you be plugging into the audio interface?
Mostly electric and bass guitars, although any instrument with a pickup can be plugged in. Even DJ equipment.
How can you make your voice sound better when recording?
Make sure to have proper gain levels when recording. Try not to have it too loud, so it doesn’t clip and not too low either, as the noise floor can get too close to the recorded material. A pop filter will also help with any plosive sounds.
Instead of a computer, can you use a laptop?
Absolutely. There is an added benefit to laptops, as you can move them around the house and find some great spots for different instruments.
Final Words
As you can see, it’s possible to build a decent basic home studio setup without having to spend a fortune on equipment. It’s not always the case that the more you spend, the better you get; however, If you can stretch your budget, investing it into a higher spec computer is definitely worthwhile and will help you future-proof your setup.
If you don’t already own a DAW, it could be a good opportunity to try different ones out, as most of the options mentioned above offer free trials. This is a great way to test them out and see what one suits you best.
Acoustically treating your room is always a good idea, as that can drastically improve the sound quality in your workspace without shelling out a ton of money.
Finally, remember you can always upgrade your equipment in the future, and you’ll probably find you will build up a pretty decent selection of studio gear over time.


![Toni Kroos là ai? [ sự thật về tiểu sử đầy đủ Toni Kroos ]](https://evbn.org/wp-content/uploads/New-Project-6635-1671934592.jpg)


