
A Step-by-Step Guide to Creating a Blog on WordPress
As consumers have come to rely on blogs as a trusted source of accurate online information, more businesses are using them as a powerful content marketing tool. Regularly creating blog content makes businesses look credible, which is why businesses that have blogs as part of their content marketing mix get 67% more leads than those that don’t.
Blogging can help improve your site’s SEO. You can improve your rankings on search engine results pages (SERPs) and drive sustained organic traffic to your site through blogging.
Now that you know the main benefits of having a blog for your business, you may want to start blogging right away. Where do you start? How do you decide what to write about and how often to write? How do you even embed a WordPress blog into a website? This post will answer these questions. Below, we’ll walk you through the steps needed to create a quality blog on the WordPress content management system (CMS).
Or, if you’d rather follow along with a video, check out this walkthrough created by Elementor:
Mục Lục
How to Create a Blog Post on WordPress
- Add a new post.
- Add content.
- Format the post.
- Preview the post.
- Publish the post.
1. Add a new post.
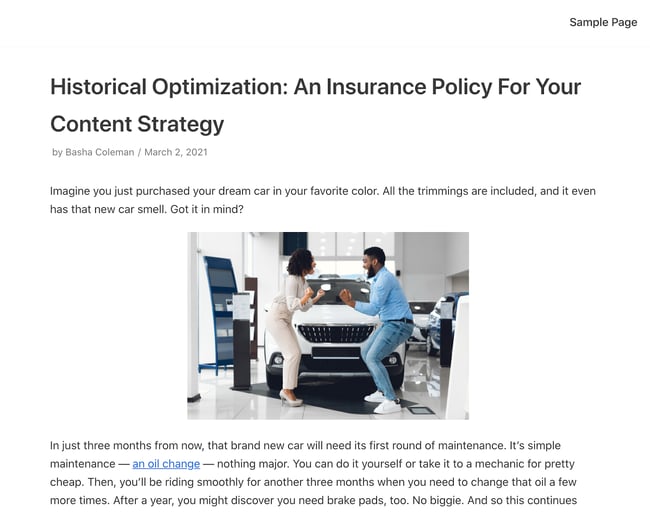
To aid you in starting a WordPress blog, we’ve created a WordPress blog example you can follow. To begin creating your new blog post in WordPress, log in to your WordPress administrator area and select “Posts” from the menu options on the left. Then, select “All Posts” in the dialogue box that appears.

2. Add content.
You’re in! This blank canvas is where you’ll add your content. As a best practice, I usually draft my content in a document before adding it to WordPress, so I don’t get overwhelmed with formatting, editing, and writing at the same time.
But before you get started with this process, keep in mind that you’ll want to save your work often. WordPress does save your progress automatically as you work, but if you lose your internet connection, it may not pick up the changes during that time. To save your work, click the “Save draft” button on the upper right-hand corner.

Next, you’ll add your content. You can copy-paste your text directly into WordPress.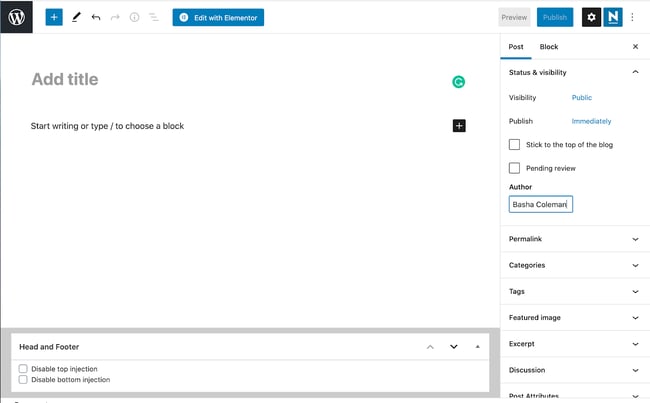
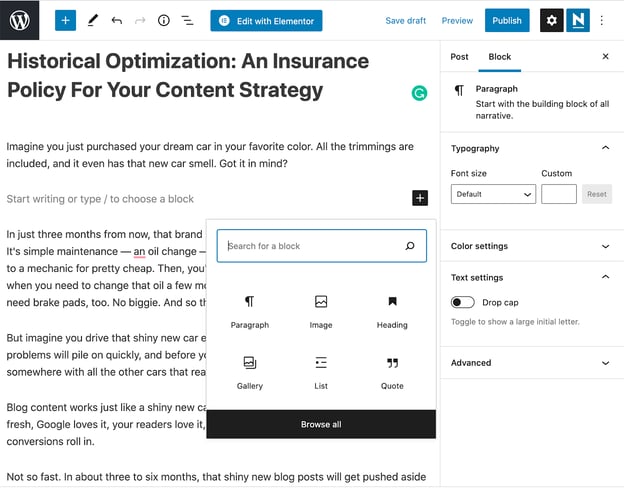
WordPress uses a block editor, and it works just like it sounds — it creates blocks for each section of content you add. For example, paragraphs will be separated into blocks, as will images and headings.
Uploading Images
To upload an image, press “enter” on your keyboard to create a new block. Then, click the “+” button in the top left corner to view the different blocks. Select the “Image” block.
Now, upload your image. You can either upload one from your computer, select one from the WordPress media library, or insert an image with a URL from a site like Flickr.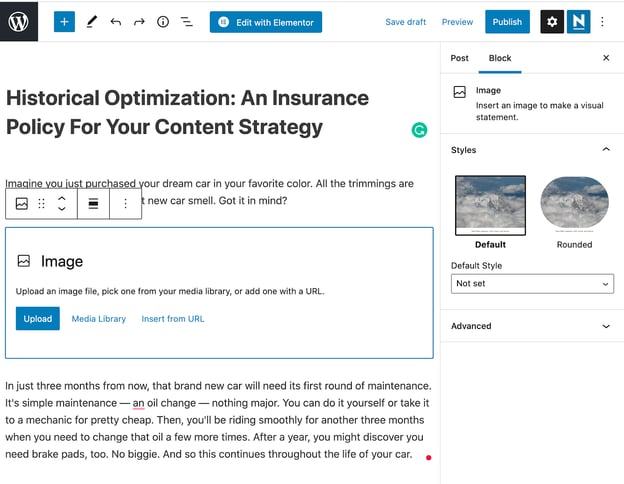
Your image should now be visible in the block.
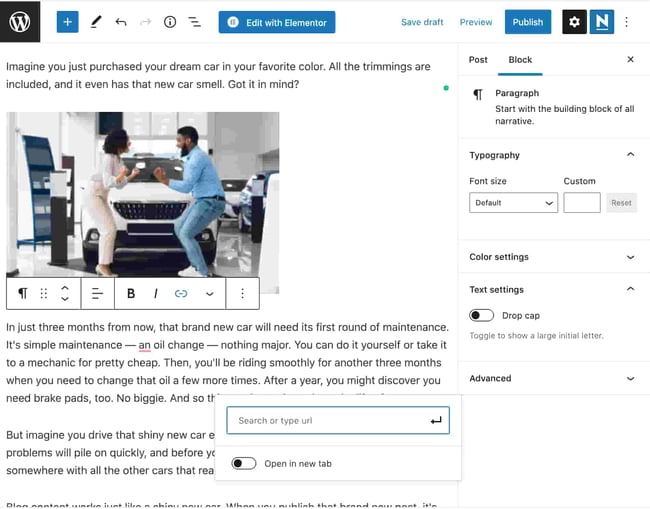
Adding Links
Whether internal or external, adding links to content is an essential part of a quality blog post. The anchor text is also crucial for SEO, as it tells site crawlers what the page you’re linking to is all about.
There are two easy ways to add hyperlinks to your content. The first way is to select the text you want to hyperlink. Then, find the floating menu box and select the link icon highlighted in blue below.

A box will appear that allows you to add a URL.
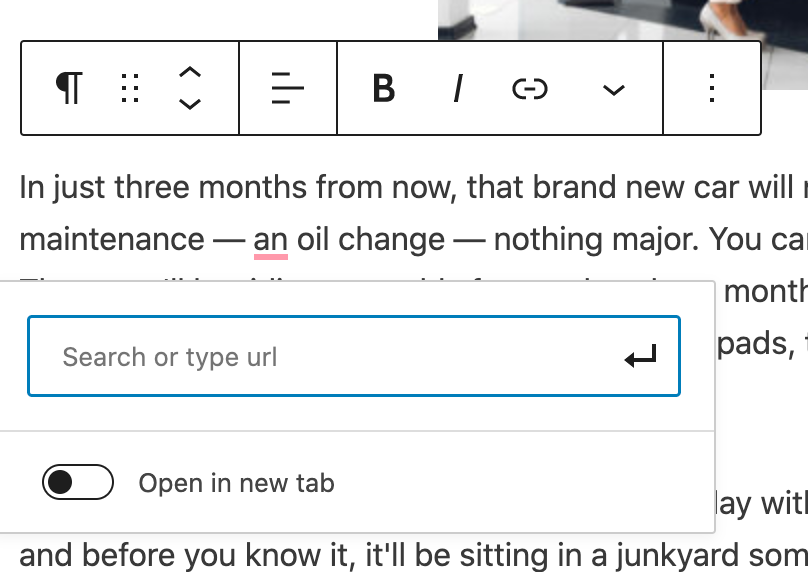
From there, you’ll be able to add your link.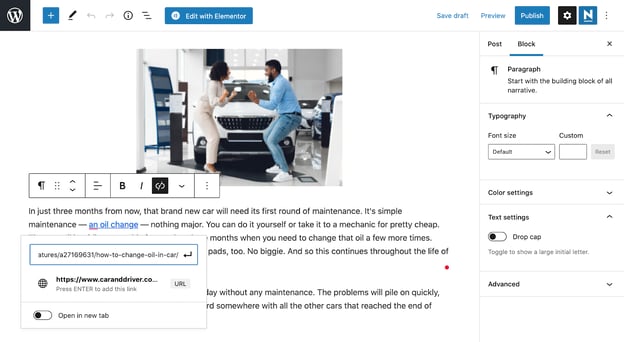
The second (and more straightforward way) to add hyperlinks is by using a keyboard shortcut. Start by selecting the text you want to hyperlink.
Then, press Command+K (Mac) or Control+K (PC) to bring up the box and add your URL on your keyboard.
3. Format the post.
Your content might be well written, but if it isn’t organized for the reader’s experience, your audience would likely not spend as much time as you expect on the post. Readers don’t want to spend time figuring out how to navigate your post, so make it easy for them with clear formatting.
Headings
To organize a blog post, you’ll want to use headings. Headings tell the reader (and the search engines) what is essential on the page using a hierarchy.
Here’s how it works: An H1 is the title of a page and lives at the top of the hierarchy and the top of the page. A blog post should only have one H1 — any more, and Google (and your reader) will get confused reading your post.
H2s are subheadings. You might have one, two, or more of these in your post. H2s are next in line in the hierarchy of a blog post. They always go below an H1. H3s follow a similar order — they always go below H2s. All subsequent headings follow the same pattern.
To change a heading in a WordPress blog post, find the menu box and select the paragraph button highlighted in blue.
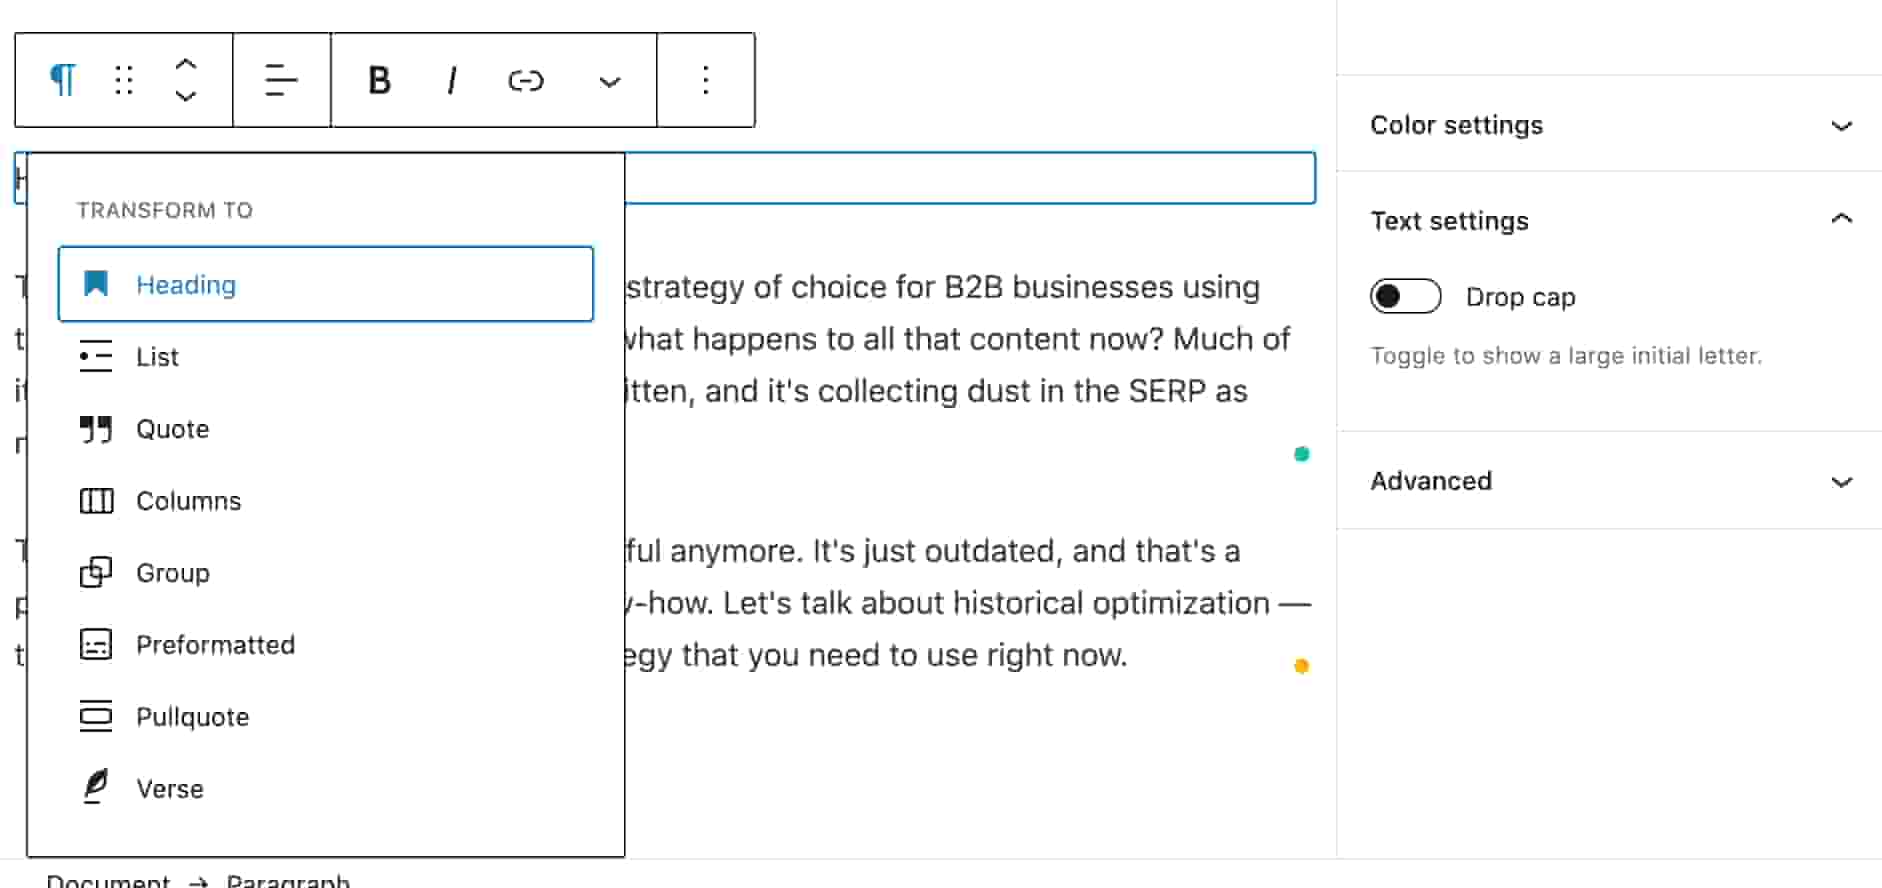
Select “Heading.” Depending on the CSS settings your site has set up, you’ll see your text change in size and even color. To edit the type of heading, click the “H2” button in the menu box and select the appropriate heading.

Images
Images can help readers navigate your blog post too, so remember to format these properly. Formatting images in WordPress is relatively easy. Here’s how.
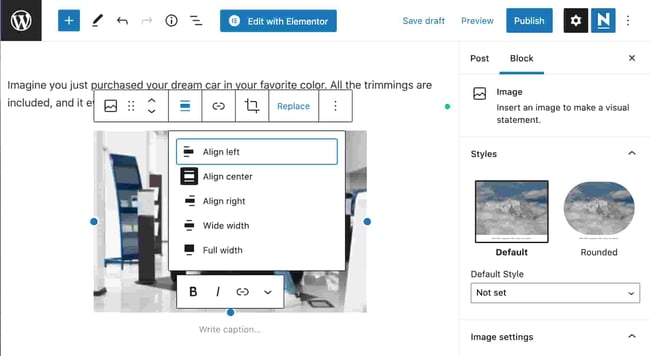
Select your image and find the floating menu box. Next, select the format button — the one with three horizontal lines. Next, choose the alignment you’d like for your image. Here, let’s stick with a center alignment for the photos in our blog post.
4. Preview the post.
You’ve added content, images, and links then formatted it for the user experience. Now it’s time to preview your post before it goes live. Previewing the posts allows you to check for any issues with the content, formatting, or user experience.
First, select the “Preview” button in the top right corner. Then choose whether you want to preview a desktop, tablet, or mobile version of the post. I chose “Desktop” here. Finally, select the “Preview in a new tab” option.

Take a look at your post for any errors. If you see any, simply go back to the editor tab and adjust as you need to.
If everything looks good, you’re ready to publish your WordPress blog post.
5. Publish the Post
To publish the post, select “Publish” in the top right corner of the page. You’ll see a few different options for publishing, but if you want this post to be available to anyone on the internet, select “Public.”

Schedule for a Future Date or Time
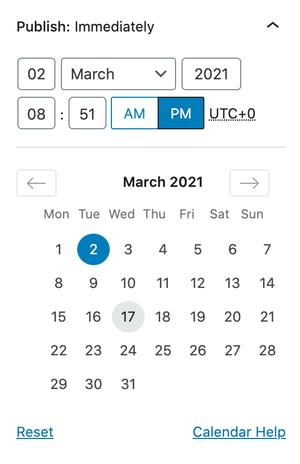
Next, you’ll want to schedule the post. You can either publish it immediately or schedule it for some time in the future. If you schedule your blog post, it will automatically go live on that date at that time, so be sure you’ve reviewed it beforehand.
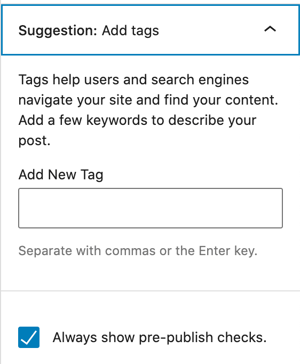
Add Tags
Finally, you’ll have the opportunity to add tags to your post. These help readers navigate your posts by similar topics. This is optional, so you can leave them blank if you don’t yet have a process to organize tags.
Your blog post is now live on the web!

How to Create Quality Blog Content on WordPress
- Choose your topic.
- Pick a hosting provider and set up your domain.
- Select and customize your theme.
- Create an editorial calendar.
- Create high-quality content.
- Optimize your posts for search engines.
- Add call-to-actions.
Now that you have the nuts and bolts of creating a WordPress blog article, we’ve curated a comprehensive guide to creating quality blog content on WordPress. These tips should help you organize your ideas, plan your content calendar, and optimize your posts for search engines.
Step 1: Choose your topic.
Before you begin writing, you need to clearly understand what your blog will be about. While blogs can be an entire website on their own, yours will likely be an extension of your business. While that helps to narrow down your selection of topics, there are other factors to consider. The key to picking a topic is finding one that specifically ties into your business and industry but is still broad enough to accommodate hundreds of articles.
When coming up with a topic for your blog, consider your target audience. Ask yourself questions about your audience’s job titles (or roles), specific needs, and what would resonate with them.
To help you answer these questions, you can create buyer personas. These fictional representations of your ideal readers will help you map out and create content tailored to their goals, behaviors, and concerns. This type of strategic content creation and mapping will help ensure you create the right content for the right people.
HubSpot, for example, blogs about marketing, sales, service, and websites because we sell products related to those four subjects. As a result, these blogs are likely to attract readers similar to HubSpot’s core buyer persona, which improves the chances that those visitors will convert into leads.
If you need help creating buyer personas for your businesses, check out the free tool MakeMyPersona.com.
Step 2: Pick a hosting provider and set up your domain.
By hosting your blog on WordPress, you’ll have a robust CMS to help you publish and manage your content.
You have a few choices for setting it up. First, as mentioned above, blogs can exist as their own site. If that’s the case for your business, then you’ll register a root domain, which would look like yourblog.com. Many businesses, however, want to create a blog that lives in its section of their company site.
If you want your blog to be part of your company website, you have two options. You can set up a subdomain, or you can set up subdirectories. Subdirectories are divisions of your domain that represent specific pages on your website.
Let’s take a closer look at the differences between subdomains and subdirectories. The most fundamental difference is how WordPress creates URLs for them. A subdomain is a part of your root domain. If you set your blog as its subdomain, a blog post URL would look like blog.yoursite.com/blog-post-title. If you set up your blog to run on subdirectories, a blog post URL would look like yoursite.com/blog/blog-post-title.
The critical difference between subdomains and subdirectories is where your content is hosted. Subdomains are considered equal and distinct from root domains. That means instead of aggregating backlinks to your main domain, you’re “splitting” them between your subdomain and primary domain. This phenomenon can lessen the chances of your subdomain’s content ranking. On the other hand, subdirectories are considered part of your root domain, so any keywords they rank for or backlinks they receive will strengthen the authority of your domain.
In short, if you’re a startup or small business looking to optimize your SEO, consider subdirectories over subdomains. However, for more extensive blog operations, consider setting up your blog as a subdomain. This structure is better suited for organizing a large and growing body of content in the long term, especially if that content isn’t directly correlated with your root domain.
However you decide to set up your blog, you’ll need to choose a website hosting provider that can provide the speed, support, and security you need to manage it. When signing up with your hosting provider, you can create a new domain, subdomain, and subdirectory, or connect an existing one.
Step 3: Select and customize your theme.
After installing WordPress, you’ll notice a default theme has been activated on your blog. If you’ve installed the latest version of WordPress, the default theme will be Twenty Twenty-One — a minimalist and lightweight theme you can customize using the Gutenberg editor or another WordPress page builder.
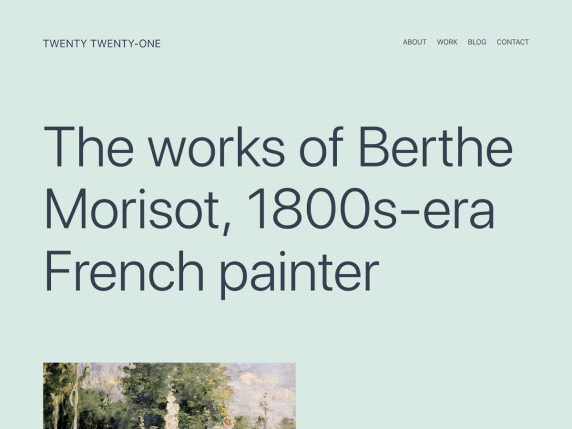
Image Source
While this typography-driven single-column layout may be perfect for your blog, it may not work for others. A blog that would like to feature a sidebar for related links, tag clouds, or ads in their posts, for example, would benefit from a two-column layout. In addition, you can choose from hundreds of free and premium WordPress themes available through the WordPress theme directory or third-party marketplaces for more color options, sidebars, background options, Google Fonts, and layouts.
When selecting your theme, consider what your blog is trying to achieve. This will help you decide what features you need. A basic list might include an uncomplicated design and comment section and the ability to upload your logo, customize the header and footer, and add social sharing buttons. You’ll also want to ensure you select a fully responsive theme and built with lightweight code, so it looks great and loads quickly on any device. Not only will this type of theme delight your mobile users, but Google and other major search engines will also favor it.
After selecting your theme, you can customize your theme to ensure that the appearance of your blog appeals to your target audience. One approach you can take is to think about how you can tailor it to your content. For example, if you’re writing about sustainability and the environment, then you may choose a color palette with lots of green. On the other hand, if your blog is news-heavy, then you may want to choose a sans-serif font for a contemporary look that’s easy to read.
Step 4: Create an editorial calendar.
As you begin writing, you’ll also need to figure out how you’ll create and publish all your content. What types of content will you be publishing? What is your content pipeline like? Is there a substantial editing and approval process that each piece of content goes through? How often will you post?
To avoid getting overwhelmed by these questions, you can create an editorial calendar. An editorial calendar is a visual workflow that can help your content creators manage and schedule their work. With an editorial calendar, you can keep track of assignments, writers, editors, content types, promotional channels, due dates, and — most importantly — publish dates.
The most important step in creating your calendar is establishing your business goals and what type of content can help you achieve those. For example, if you’re trying to attract new customers and make more sales, you could focus on writing case studies or other posts about your products. You could alternate these with listicles, which are the most viral type of content, to get more shares on social media.
You can build your editorial calendar on a platform like Trello that allows multiple people to brainstorm, collaborate, and provide feedback on assignments in real-time and in one place.
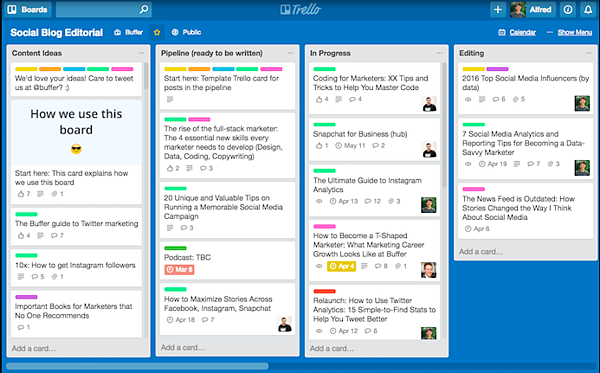
Image Source
Step 5: Create high-quality content.
Creating high-quality content is essential to running a successful blog. Without great content, even the most well-designed blogs will fail to attract and engage visitors.
This idea might be a no-brainer, but the steps for creating valuable content are far from simple. From keywords to images to headings to grammar and spelling, many factors go into content creation.
Keyword Research
After you’ve created your buyer personas and decided which topics to cover, the next step is to perform keyword research to see if those topics appeal to a larger audience. Keyword research will show you the search volume of a specific keyword phrase so you can decide whether it’s worth your time and effort to write WordPress content about it.
Readability
Once you’ve decided on a topic, your next step is to create readable text that draws and keeps readers on your blog. To ensure your posts are easy to read for as many site visitors as possible, make sure to shorten any long sentences or paragraphs, avoid passive voice, add headings and subheadings, and use transition words. These strategies will improve the flow of your blog posts and help you better organize chunks of texts.
With Hemingway Editor, you can ensure your writing is high-quality while simultaneously cutting down on time you spend editing. You can also install the browser extension Grammarly to help you avoid any grammar and spelling mistakes that might impact your brand credibility.
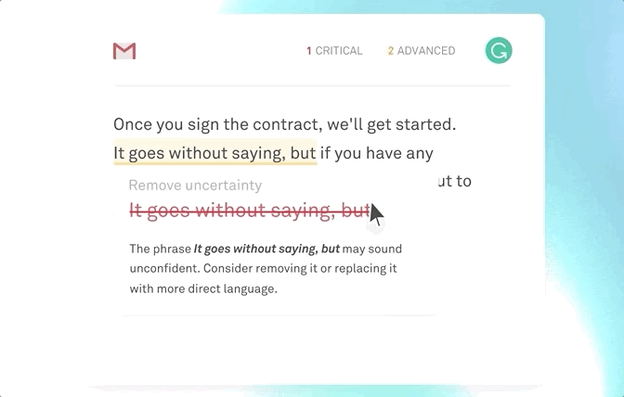
Image Source
Images
Another way to enhance the reader experience on your blog is to add visuals. Incorporating images into your content makes it more engaging and memorable. Blog posts that contain images every 75-100 words have a 200% share rate, and visual content is also 40 times more likely to get shared on social media.
Step 6: Optimize your posts for search engines.
Creating and publishing high-quality content on your blog is only half the battle. To improve your rankings and attract new traffic, you have to optimize your blog posts for search engines.
One way to do this is to optimize your titles, meta descriptions, and links. These elements are collectively referred to as on-page SEO because readers can see them on the page. Let’s quickly look at a few of these key elements below.
Titles and Meta Descriptions
Along with the URL, the title and meta description can convince readers to click — or not click — on your blog post in a SERP. To optimize your titles and meta descriptions, you need to include the keywords you’re trying to rank for and meet the length requirement. Ideally, keep titles under 60 characters and meta descriptions under 160.

Image Source
Internal Links
Providing links to related content within your blog posts will help both search engines and readers understand the value and relationship between the content on your site. This will make your site easier to navigate, which increases the chances of readers looking at more content and staying on your site longer. It will also help search engines find all the content you own on a particular topic. This improves your chances of ranking for the keywords associated with that topic.
Step 7: Add call-to-actions.
Say readers love your content. They clicked on one of your blog posts in a SERP and have now read dozens thanks to your internal links. You don’t want to risk letting these readers leave your site without converting them into leads.
One way to turn readers into leads is by inserting relevant calls-to-action into your blog posts. CTAs direct visitors to a landing page where they can submit their contact information in exchange for a resource. A compelling CTA might offer an ebook about a specific topic mentioned in the post or a discount code for a related product. Whatever the offer, it has to provide value that the reader can’t pass up.
Step 8: Track blog analytics.
So you’ve created great content. But, how do you know whether visitors love it? How do you know how many people visit your blog daily, weekly, quarterly?
Several analytics and traffic WordPress plugins can help streamline your workflow and track blog performance over time. Some of the metrics these plugins track include:
Number of Visitors
This measures the number of people who visit your website to read or share what you write about on your blog.
Bounce Rates
Bounce rates track the number of visitors who exit your blog seconds after landing on it. High bounce rates suggest that readers or visitors are not getting what they expect once they land on your blog.
Dwell Time
The dwell time metric shows how long a visitor stays on an individual page or URL on your WordPress blog. Tracking this metric will help you easily identify your website’s most engaging pages.
Other important blog analytics metrics include top traffic source, average pageview per session, social shares per post, and returning visitors.
Examples of Impressive WordPress Blogs
Here are some examples of WordPress blogs that can inspire you as you create yours.
TechCrunch
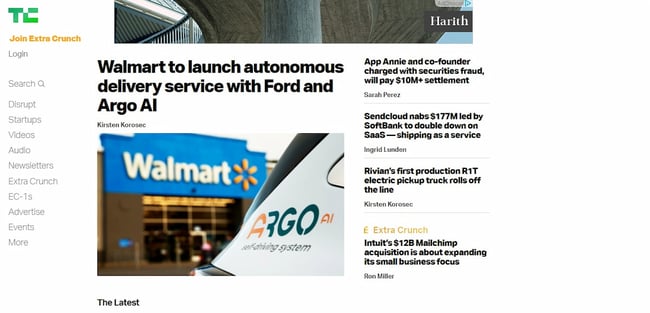
TechCrunch is one of the most popular tech news websites globally. You can borrow a leaf from their blog if you plan to run a news website too.
PlayStation

Want a blog where you share company news and updates? Then, look to the PlayStation blog for inspiration.
Windows
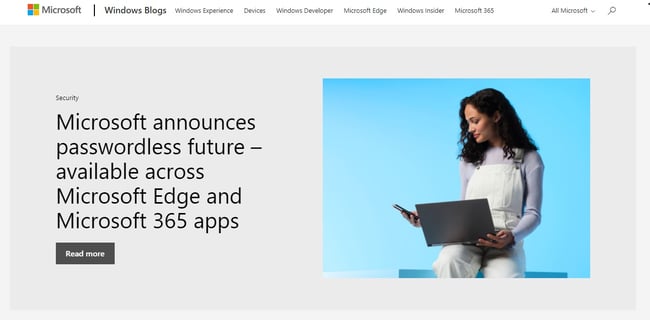
Similar to PlayStation, Microsoft also uses its blog to share news around company events and product launches.

The LinkedIn blog contains articles that help professionals get better at building connections and doing their jobs. You can imitate LinkedIn’s model by creating helpful content that inspires your audience to achieve their goals.
How to Monetize a WordPress Blog
The time you spent creating a blog on WordPress shouldn’t go to waste. It’s important to find ways to make money off your blog. Here are several common ways you can monetize your blog.
Display Ads
You can partner with advertising networks to have pop-ups and static display ads show on your website. You get paid depending on the number of impressions or clicks the ads on your website gets.
Affiliate Marketing
Affiliate marketing involves promoting a 3rd-party product on your website. You get paid commissions whenever someone buys said product using your unique affiliate link. To start affiliate marketing on your blog, you can join an affiliate program.
Sponsored Blog Posts
If you already have an engaged audience, you could also monetize your blog by writing sponsored blog posts. In this case, companies pay you to write a review of their product, service, tool, or software.
Offering Memberships
You can choose to create content that only members of your gated community can access. However, these community members would have to pay a recurring fee to continue enjoying your premium content.
Selling Merchandise
Last but not least, you can start an online store to sell branded merchandise to your website visitors. It could be anything from journals to mugs to t-shirts and socks.
A Better User Experience on Your Website
While dozens of factors contribute to a blog’s success, the ones mentioned above are crucial to providing a positive experience to your readers and optimizing your blog for search engines. With a bit of practice, you can create a quality blog on WordPress that ranks and gains traffic from search engines, gets you more leads, and makes you more money.
Editor’s note: This post was originally published in December 2019 and has been updated for comprehensiveness.


![Toni Kroos là ai? [ sự thật về tiểu sử đầy đủ Toni Kroos ]](https://evbn.org/wp-content/uploads/New-Project-6635-1671934592.jpg)


