
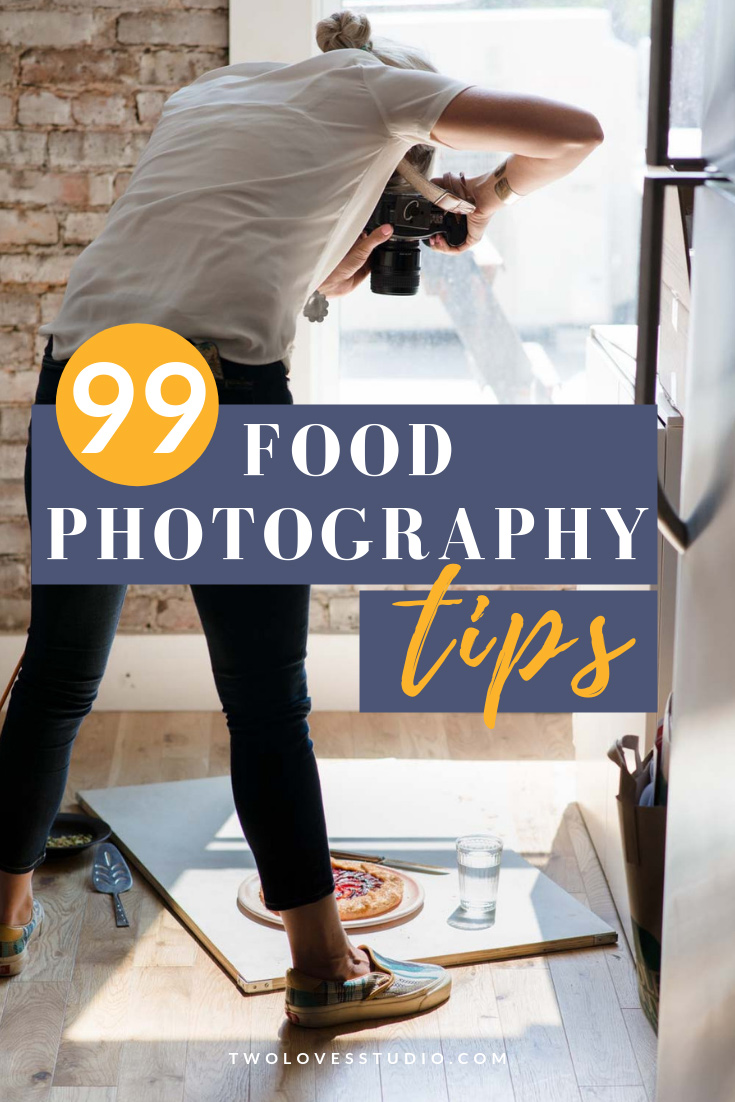
99 Food Photography Tips From Photographers (That’ll Blow Your Mind)
This post may contain affiliate links from products and services we love and trust.
Ready to improve your food photography?In no particular order divided up into Food Photography Tips, Lighting Tips, Photography Hacks, Propping & Styling, Creative Mindset.
We’re all at different stages of our food photography journey and we’ve all had amazing advice from people who’ve walked the walk before us. What I love the most about the food photography community, is how generous the creatives are with their support for one another’s journey.
This list involves tips that allowed food photographers to take better pics of food.

Mục Lục
Food Photography Tips
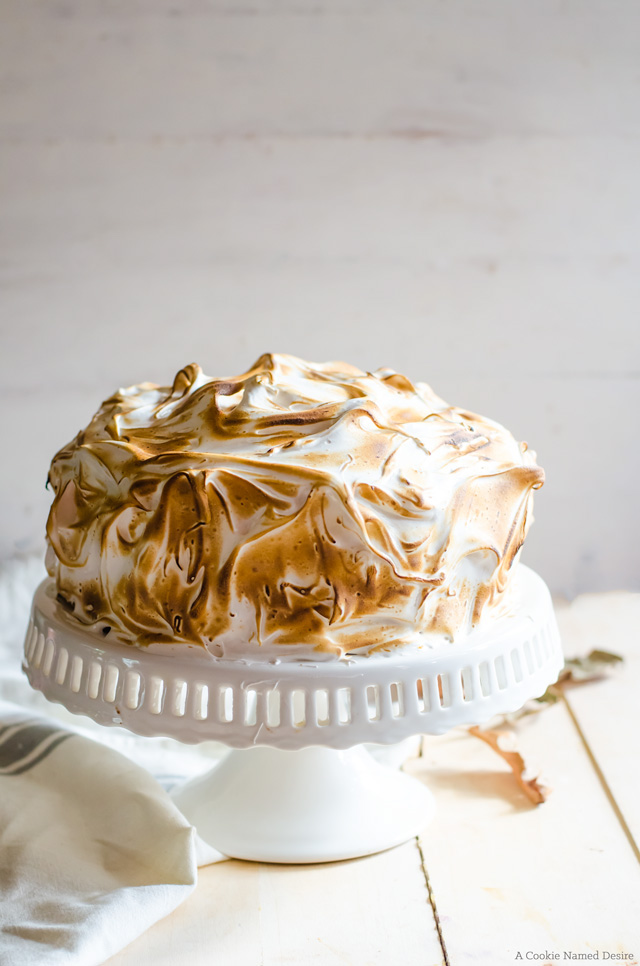
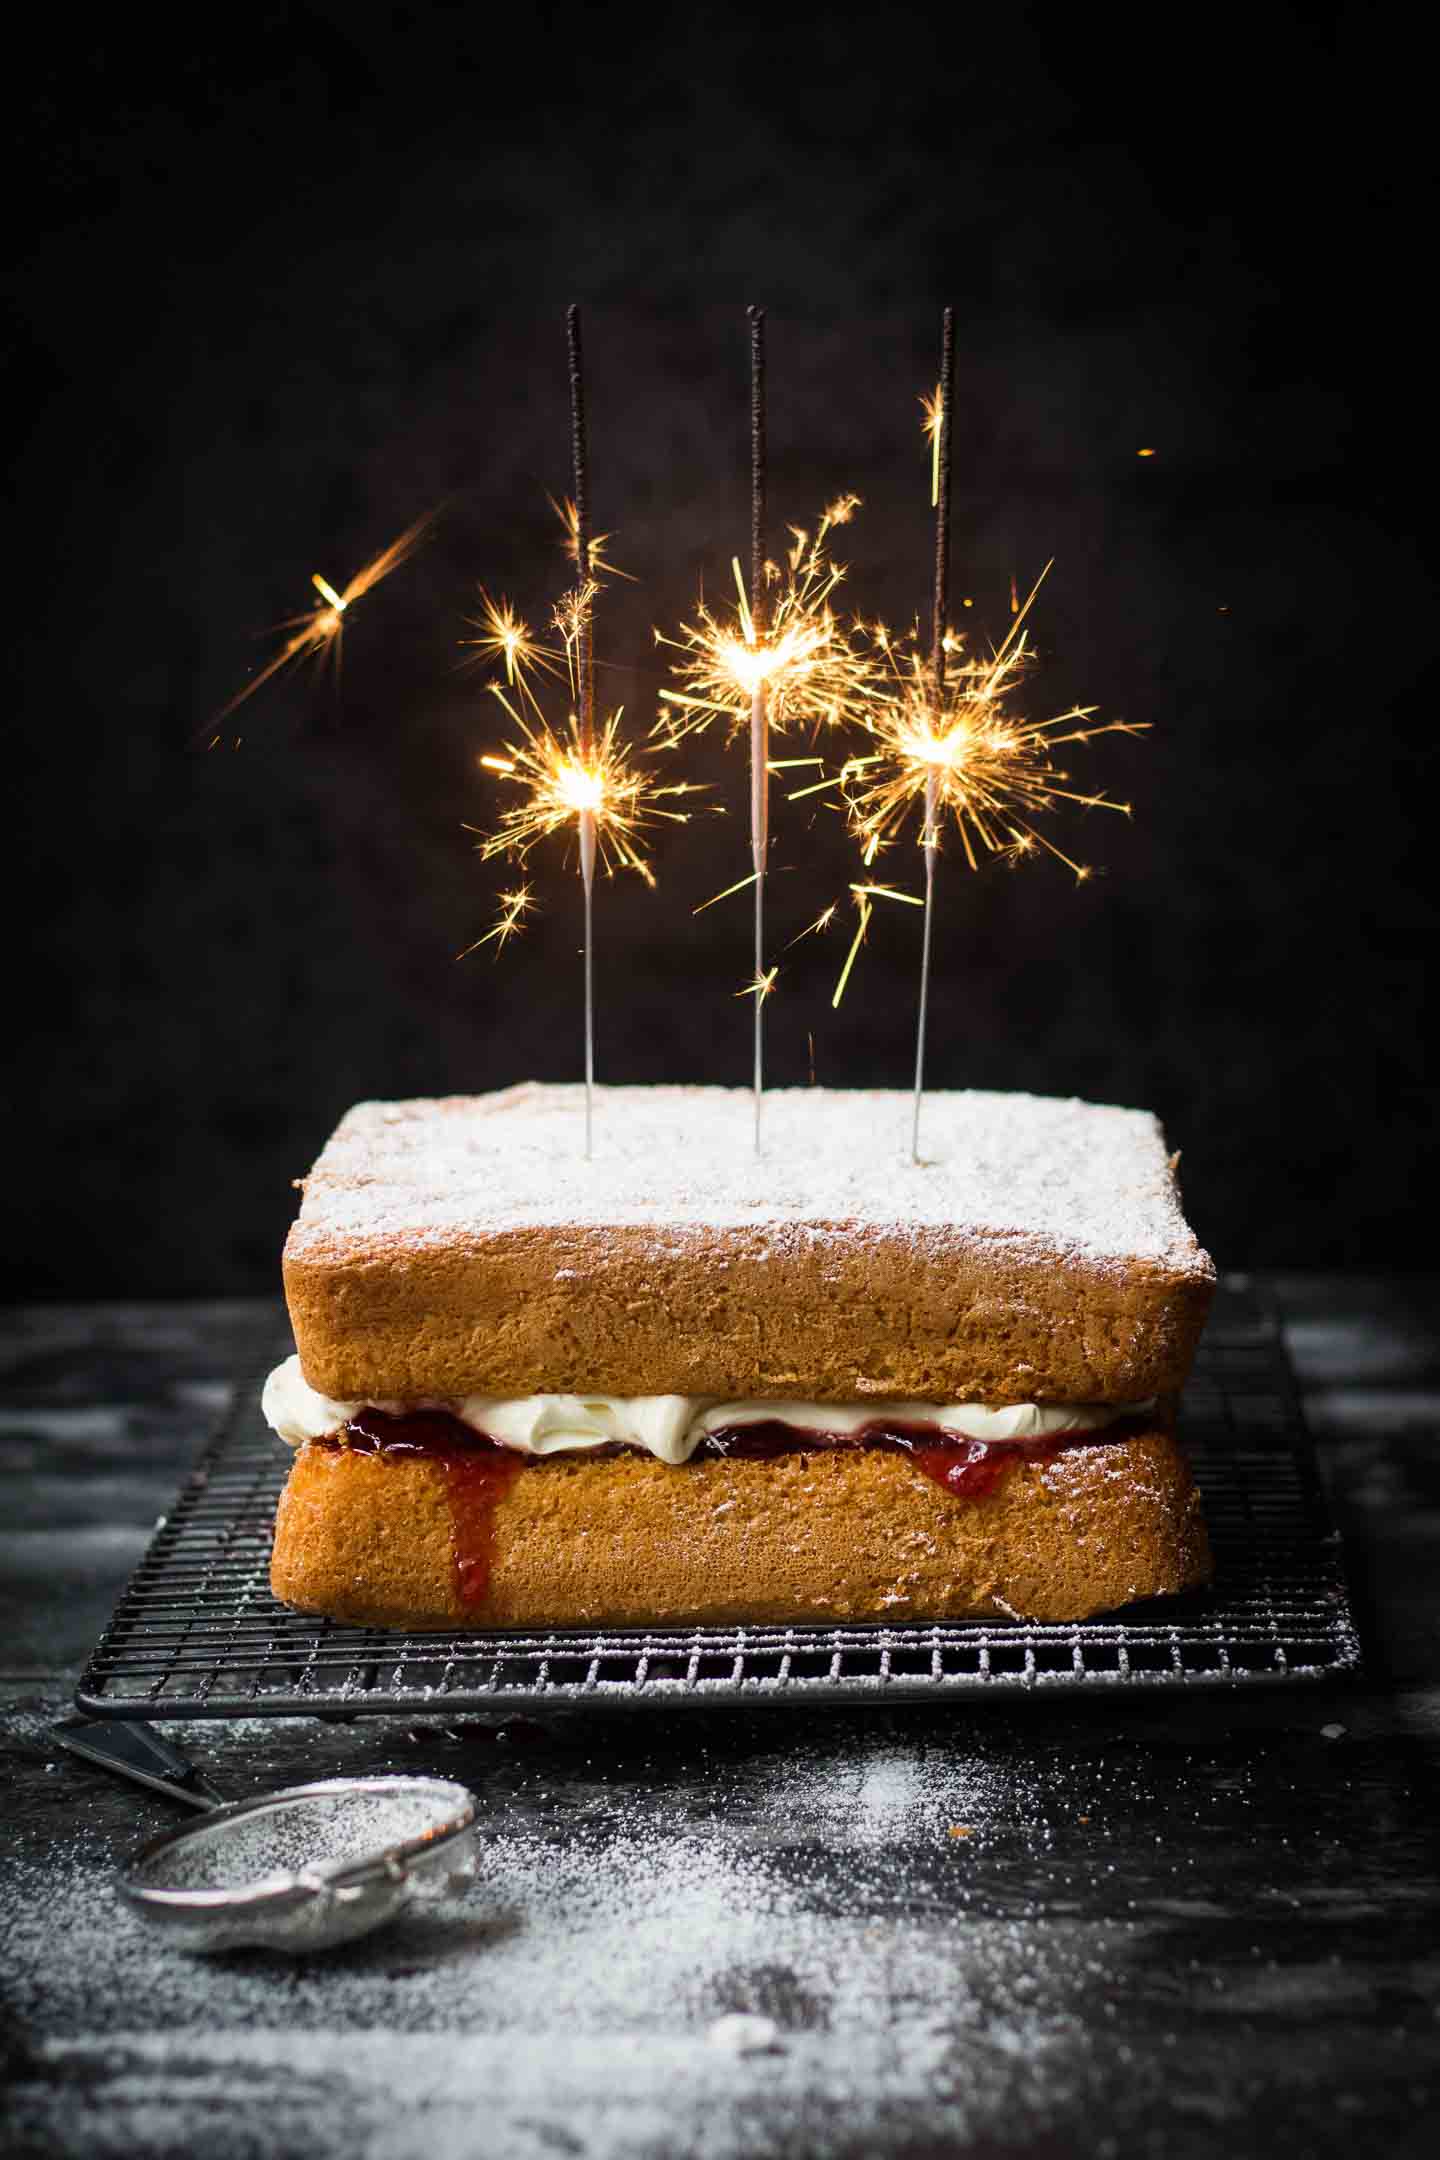
1. Experiment With Different Heights
Experiment with height and creating different levels.
Use a cutting board to raise up some of your scene. Place something on a cake stand or use glasses in different heights.
You don’t even have to go higher, placing things on a wrinkled kitchen towel create texture and breaks things up by creating visual differences or layers. Adding height can create a natural frame that you can work off, especially if shooting straight on or at different angles ~ Amanda, A Cookie Named Desire
2. Create A Consistent Portfolio
I went to a seminar where a photographer was talking about the power of a portfolio – and boy, is that true
It is extremely important to have a consistent portfolio to land gigs, and it’s important to know that your portfolio should be a reflection of who you are.
If you show your unique character – and every single person is unique – in that space, people will for sure pay much more attention ~ Gabriela Klafk
3. My Tripod Changed the Way I Shoot
The best tip I have ever received is to use a tripod. That changed the way I shot! ~ Deeba, Passionate About Baking
4. Absorb Beautiful Imagery
Continually look at good food photography. 10-15 minutes a day spent absorbing beautiful images from blogs and searching on Pinterest really refreshes my creativity and inspires me to create through my own lens.
My goal is to saturate my subconscious with images that make me sigh so that when I start shooting I know what will move me emotionally. ~ Erin Beutel

 Amanda – A Cookie Named Desire
5. Learning to Balance Depth of Field and Shutter Speed
A skill that will allow you to capture a combination of different moments with very different styles. Learn the dance and let that be your guide to telling stories through sharpness, focus and of course exposure. ~ Leen Al Zaben
6. Exporting, Uploading, Sharing
Sometimes you have to edit specifically for whatever media or print form you are using.
In my personal experience with transferring, exporting, uploading, sharing photos the quality can become diminished 🙁 and distorted if you are on a WordPress platform for example – beware!
Experiment beforehand by seeing a sample in print or a preview of your images on the site so your final product will be exactly as you want it. ~ Des, Oh So Delicioso

 Eirin Helland – Luminate Photography
7. Shoot Tethered For Better Photos
I know some photographers don’t like the idea of tethering as they feel constrained by the cord. However, shooting tethered has been a game-changer for me.
It allows me to see the final photo in real time so that I can make lighting and styling adjustments, and any unwanted elements I couldn’t see in the camera ~ Lyn.
8. Capture Your Overall Vision on Paper
Plan out your ideas for your photo shoots by using sketches.
Don’t worry about details, just create quick sketches to capture your overall vision on paper. When sketching, focus on the story you want to tell, think about the props to use, choose the colour palette and make notes about the lighting direction and all aspects related to the composition.
This will help you to bring to life the mental image you had when first planning the photoshoot and photograph it, instead of shooting away and hoping to get a good image in the process. ~ Laura, Lau Sunday cooks
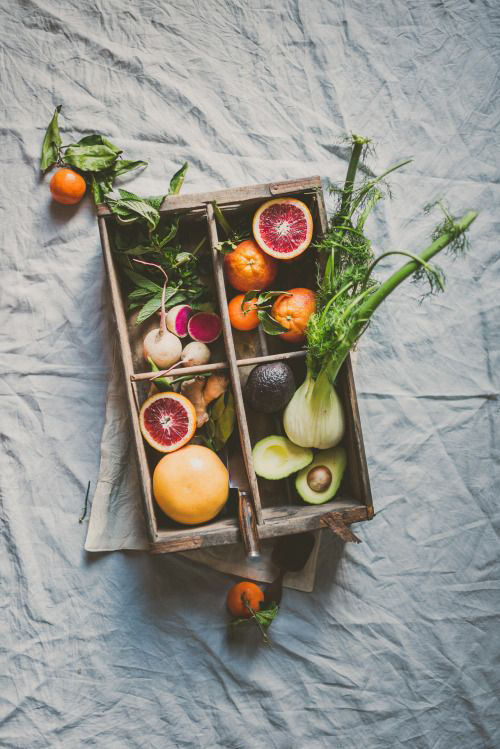
9. Use Negative Space
Give the viewer some room to breathe, i.e. don’t zoom in all the way, let there be some negative space in the picture. It’s soothing on the eyes and mind. ~ Manon Krikke

 Pang Wannawanit
10. Find The Your Dishes Biggest Strength
To help me when I am going to shoot it’s crucial to ask myself what is the biggest strength of that dish or food?
Is it the freshness, the texture, the colour, the shape? And, very important too, what kind of feeling does that food bring, can be comfort, freshness, cosiness, heath… Even find it’s hero side.
This combination is what will move all my work to the final picture, throw light, angle and composition. ~ Joana Leitao
11. Knowing How To Frame Your Shot
Use a tripod. I recently started using a tripod and I’m able to set up a better scene and I know exactly how to frame my shot.
I thought it would make a big difference in reducing camera shake (it does) but the difference it has made in styling has been the best bonus for me. ~ Sharon, What The Fork
12. Decide On Your Angle Before You Begin Styling
Use a dummy and decide on an angle BEFORE you start styling.
Too many times I have started setting up the food and styled it – just to find out that the angle is not right – have to change it – and then do all the styling one more time. ~ Eirin Helland
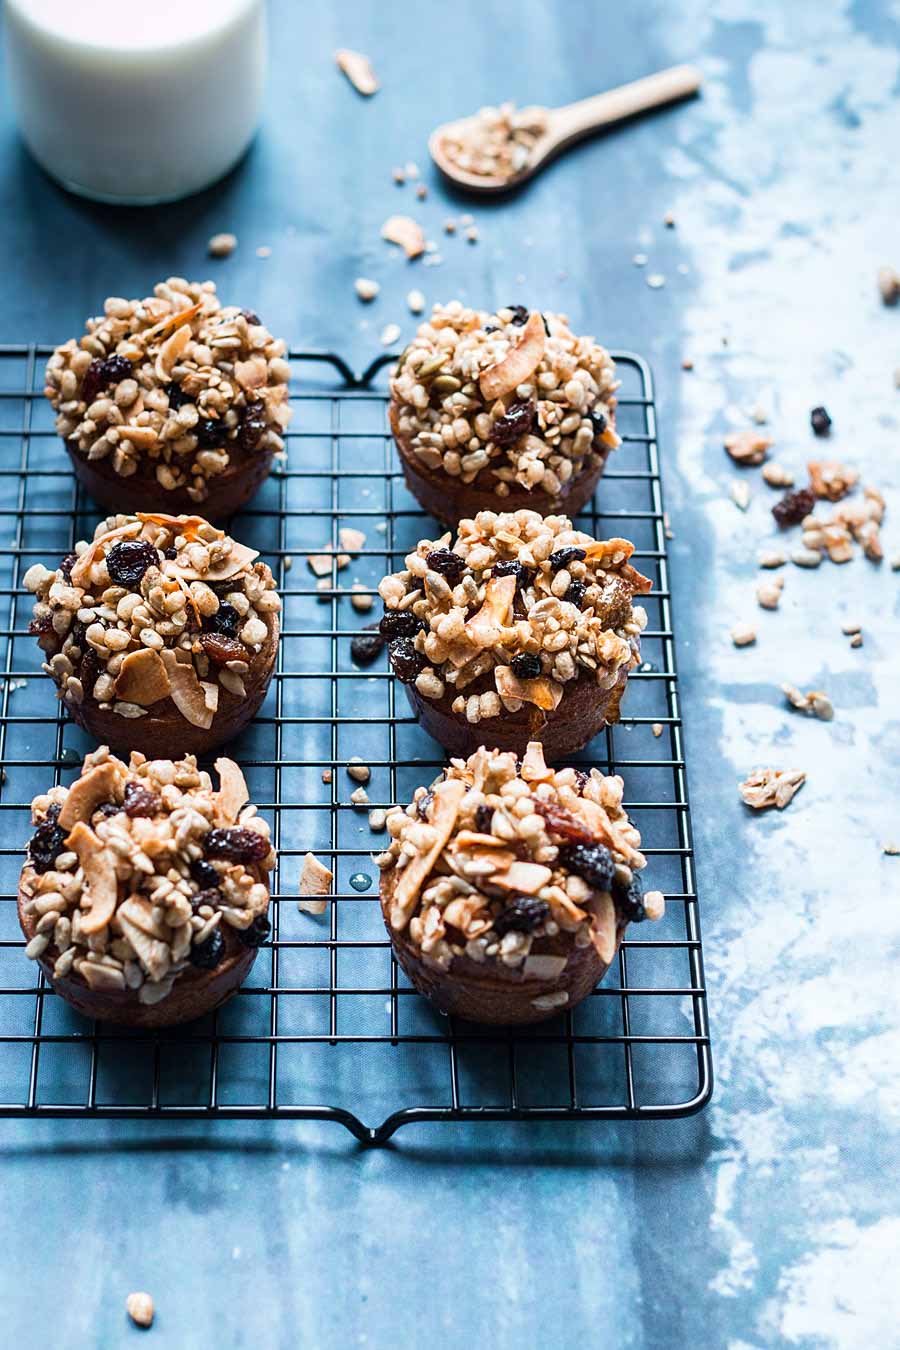
13. Think Layers & Texture
Texture is what has taken my food photos to the next level. I aim to have about 3 layers of texture in my photos, like a napkin, cutlery, herbs, spices or ingredients.
Things that are in the dish look great when layered into the photo ~ Amanda, Sweets & Greens.

 Betty Liu
14. Use Stand In Food
Do what the Hollywood shooters do when working with movie stars – set up on a stand-in, get the lighting and composition sorted mark the plate with blocks, throw the stand in food away, replate with the hero food, put it in the blocks, take the blocks away and shoot as fast as, you can.
Voila, freshest food – shot fast. ~ Tim Hill, photographer
15. Study Images and Recreate Using The Resources You Have
STUDY the photo that you love – light, styling, camera angle etc.
Then try to find the way to get the result using the resource I have – youtube has tons of clips to watch. Once I get a grip of the method, I can make it my own using my recipe. ~ Pang Wannawanit, photographer
16. Always Have a Full Back-Up Battery
Have a backup battery full charged for each shoot.
One of the worst things that can happen during a shoot is having to delay it for hours because of your battery dying. This is definitely a necessity and time saver if you’re shooting in RAW! ~ Jessica, Jessica in The Kitchen

Laura, Lau Sunday Cooks
17. Use a Tripod For Razor Sharp Images
Use a tripod to shoot your photos. Nobody is attracted to a blurred dull photo.
To get those razor-sharp crystal clear photos you need a tripod that is controlled by a remote. You’ll see a huge difference in how your tripods help you get those perfect sharp images which can be very appealing.
So a tripod is a must, not just while you are shooting in low light conditions, but even otherwise. ~ Joythi, Curry Trail
19. Have a Brief and a Concept
I can’t stress this enough how important this is as this not only ensures that I’m following what the client wants/hopes to achieve but also shows the clients vision for their brand/company.
So many times I ask prior to a shoot to provide a brief or a concept and if I’m lucky I’ll receive a very detailed one.
Most times though, the client tells me at the shoot how they want it to look, without much preparation done beforehand. ~ Todd Beltz, photographer
20. White Balance for Brighter Cleaner Whites
I use Lightroom and for almost every photo I cool it waaaay down, this always helps the whites seem brighter and cleaner
If I feel it’s cooling down my food/products too much I take the saturation up a few notches. Also, I typically increase exposure, always sharpen as much as possible, increase contrast a bit, make my shadows and black more dramatic.
From there I continue minor adjustments as needed ~ Des, Oh So Delicioso

 Kelly – A Side Of Sweet
21. Invest in a Good Prime Lens
A good prime lens will make a world of difference to your food photos. I started with a 50mm f1.8 and used this inexpensive lens exclusively for almost 2 years.
However, I noticed a huge improvement in my food photos when I started using a 90mm f2.8 macro lens and now I use this lens for 95% of my food photos. The longer focal length compresses the background and creates a really beautiful look. ~ Jo, The Luminous Kitchen
22. The Nifty Fifty
For me, it would be using a tripod, using evening natural light (this is not deliberate, it is simply because I take pictures after work) and the “nifty fifty”. ~ Sandi, Cooking On Canvas
23. Practice, Practice, Practice
Visualise the shot, be creative, attention to details and light. All are a must in food photography, and probably won’t finish here…practice, practice, practice. ~ Patricia, Kan Arts Photography
24. Make The Photo Yours In Some Way
Make sure you make the photo your own in some way. Give it a look and style that is reflective of oneself, your philosophies and attitude towards everyday life. ~ Matt, Yeast of Green
25. Draw Your Set-ups
A tip (given by a known food photographer here in France I met at a workshop) is to draw your setups.
He said that most professional food photographers have generally their preferred setup and they only adjust it to their subject. So drawing your setup gives you a… “base” that you can build your photography session on. ~ Chaimae, Une Pincee de Sel
26. Invest in a Tripod For Beautiful Overhead Shots
Investing in a good tripod is worth it, especially if you want to do beautiful overhead shots! The integrated arm has totally changed my food photography ~ Kelly, A Side of Sweet

Lens Quiz
Which Lens Matches Your Food Photography Style?
TAKE THE QUIZ
27. Take Photos on a Full Stomach
Take photos on a full stomach. It’s no good taking photos when you’re hungry because you’ll probably eat the dish before you get the perfect shot. ~ Lauren, Healthy N Happy
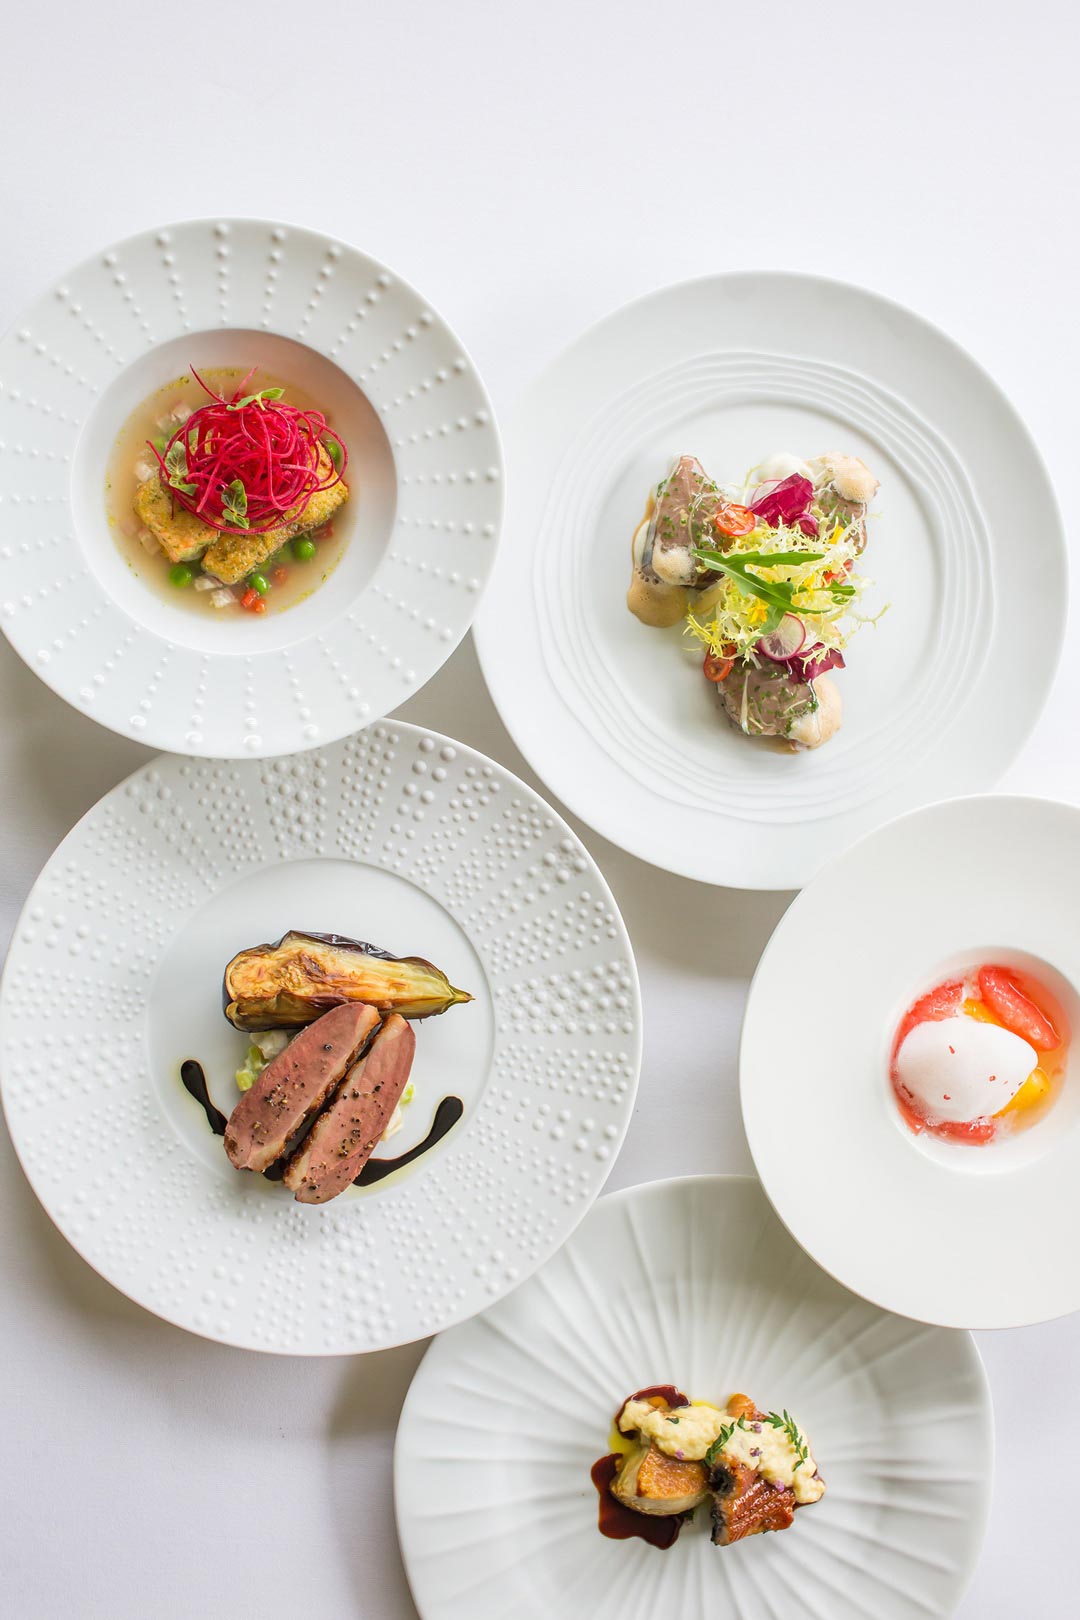
28. 75 and 25 Degree Angles
I usually take photos from top, front, at 75-degrees and 25-degrees to determine the hero angle. ~ Lew, Malaysian Mom
29. Be a People’s People
I believe that our business is based on human connections. You are your brand.
You market your business everywhere, all the time. Be kind, open and friendly. All day long. Whenever you talk to people. When you talk you can tell them about what you do, what makes you do it ~ Inbal, Pretty Things Photography
LIGHTING TIPS
30. Use A White Sheet In The Window
Using a white sheet in the window was one of the best purchases I ever made. The light is always amazing ~ Monica
31. Look At Your Shadows
Look at your shadows. Shadows tell you what the light is doing. ~ Nick Tresidder
32. Tweak Your Light
I would say it’s “light”. As with all types of photography, light plays a very important role in food photography. Just by tweaking a little with the source of light, you can make a good photo into an awesome photo.
My personal preference is always natural light, and so I try to take photos as much as possible during the daytime. ~ Sudeshna, Bengali Cuisine
33. Always Side, Back or Top Light
Always back, side or top light. Don’t have the light source coming from the same angle or direction as the camera. ~ Craig Ferguson

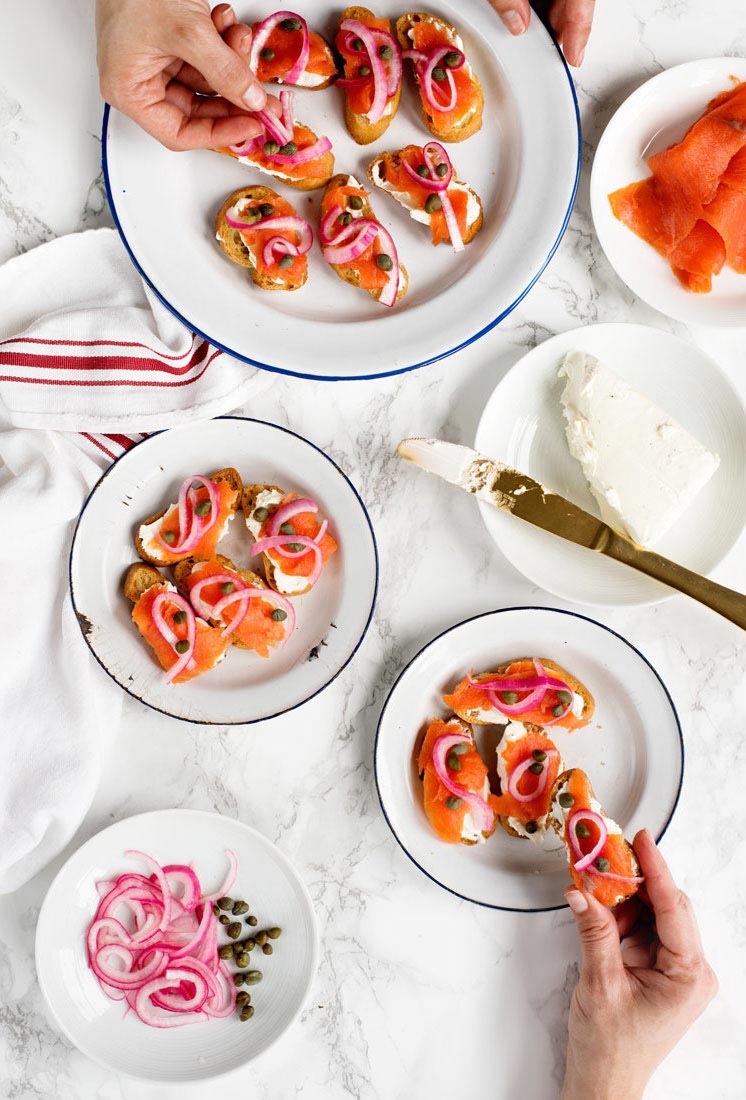
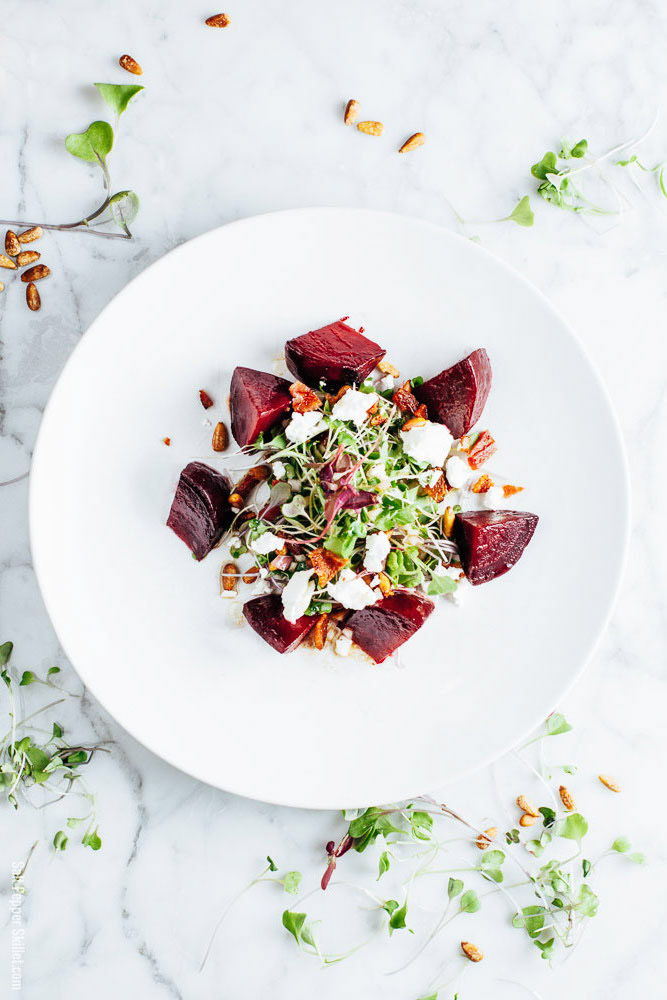 Justin, Salt Pepper Skillet
34. Artificial Light Can Be Your Best Friend
We hear it all the time; “I only use natural light”, “natural light is the only light to use,” etc.
I absolutely do not agree. Using artificial light can make beautiful food photography possible at any time of day and in any conditions. It is consistent, predictable and always there for you even if it is pitch black outside
If you a photographing your dinner; chances are you don’t want to cook early just so the light will be perfect. Putting together a quality light and softbox can change everything. ~ Justin, Salt Pepper Skillet
35. Understanding Natural Light By A Large Window
Using natural light by a large window, understanding light and using the manual settings on the camera to capture a certain look. Then being able to touch things up in Lightroom have all truly taken my food photography to the next level. ~ Ashley, Fit Mitten Kitchen
36. Put Artificial Light in Your Window
Take a look at your favourite window.
Where is it usually when you shoot? How big is it?
Is it high up shining down or does it come lower spreading light fully from the side? What you’re going to do is mimic your window light as best you can. Put your light source exactly where you window light normally is.
That way you’re familiar with where the shadows normally are and it gives you a better reference point to finesse the light. ~ Jonathan Thompson, photographer

 Nick Tresidder
37. Use Side or Back Light To Add Shadows and Depth
Light, no matter what you choose, seems to look best when you have it coming in from the side or even from the back. The light used this way adds interest and shadow giving the food more depth. ~ Jackie Sanders
38. Don’t Be Afraid To Experiment With Natural Light
Don’t be afraid to experiment with artificial lighting.
Natural lighting is great when it’s available, but it can be stressful trying to fit all of your photography in during daylight hours when you’re juggling a full-time job, a social life, and anything else you might be up to.
Artificial lighting can be a real game changer and a massive stress reducer! ~ Claire, The Simple, Sweet Life
39. Use Aluminum Lids and Mirrors to Play With Light
I shoot with my Canon 5D and my lovely 50mm lens.
Rather than using reflective professional panels, I use large blacks and white bristol boards, polystyrene panels, aluminum lids and mirrors to play with the light. ~ Sonia

 Jonathan Thompson
41. Use One Main Light Source Until You’ve Mastered Lighting
Whether you’re using natural light or studio lights, start with one main light.
Food photography is a natural subject, so usually, the aim is to try and keep things looking natural. There’s only one sun in nature, so one main light just makes sense. This light sets the atmosphere for your shot.
If it is low, it might feel like early morning or late afternoon – higher up is brighter and less atmospheric. Once you have set the main light you can build up the shot with fill-in light.
I like to experiment with bouncing light off polystyrene boards, tinfoil, gold foil, copper foil and even little mirrors to reflect light into the shadows of the shot – this helps to keep things simple and subtle. ~ Karene Wedekind

 Claire, The Simple Sweet Life
42. Use The Golden Hour To Shoot
In food photography, I consider that one of the most important element to take in consideration is the Light.
The light can change and affect how your picture looks like, you should have enough light, to see the details in your pictures, but it shouldn’t be too hot, or the colours of your pictures won’t look nice.
I personally like to take my shots with natural light, especially in the morning ~ Mahmoud
43. Find The Windows Of Gold
Follow the light around your house throughout the day to find the windows of gold. Every house will have at least one sweet spot where the light comes through beautifully ~ Amanda, My Goodness Kitchen
44. Say No to Front Flash
Be it P&S or DSLR, do not use Camera’s inbuilt Flash. They create boring, dull, unreal, unappealing & funny coloured images. I can really fall short of adjectives.
Professional photographers do use an external flash to bounce light but they never do it on the subject ~Sandhya Hariharan
45. Don’t be Afraid of Shadows
Don’t be afraid of shadows and using blackboards to emphasise the shadows in your inmate.
Soft shadows created by effectively diffused natural light can give your image depth and create a lot of visual interest. ~ Jo, The Luminous Kitchen
There is some gorgeous light to be had inside a deep box. Utilise these deep shadows by moving your set up into the box. This will give you a nice moody feel. ~ Rachel Korinek
FOOD PHOTOGRAPHY HACKS
47. Manage Reflections When Shooting Beverages
Trace your lens cap in the middle of a large piece of white foam core/cardboard. Cut out the circle with box cutters.
Put your lens through the cardboard when you shoot. This will help you manage reflections on the glass without having to retouch ~ Darina, Gastrostoria
48. Make transportable Background Graphics
You can print background graphics out onto vinyl. So rather than lugging around massive pieces of board, you can neatly roll a light, durable, transportable background graphic with exactly the right colour tone and texture that you’re after.
I will often buy a hi-res file from a photo library (wooden boards for example) and then duplicate and blend it until it is the size I’m after at 300dpi for print quality (often about 1.2m square).
Most signmakers will have a machine that will output onto matt digital canvas material. Shop around, the price differences can be huge ~ Fran Flynn

 Darina Kopcok
49. Spray Your Cutlery With Anti-glare
Spray your cutlery with anti-glare spray for instant matte. ~ Sina, The Kosher Spoon
50. Polarising Filter To Control The Glare
Use a good circular polarising filter to control the glare, it also helps make the colours pop ~ Charne Baird
51. Corn Syrup To Make Things Stick
My most valuable tip is to use corn syrup to make things stick that might not otherwise.
For example, I brushed corn syrup on the exterior of these cake pops before dipping them into the sprinkles to ensure they would stay in place ~ Leah Nolan
52. Go For Uniform Illumination on Bottles
For better more uniform illumination remove labels from the back of the bottles, WD40 is great for getting rid of hard to remove glue.
Nail varnish remover can be used to remove lot numbers and expiry dates that are printed directly onto the glass ~ Keith, Green Shoots Photography
53. Consider Shooting on The Floor
Consider even your own floor as long as it is nice and clean, you can use your wood floor (or any other surface floor) as a background or backdrop to some really great pictures ~ Alice, Living in Durham
54. Use a Rocket Blower For Styling Crumbs
In order to get crumbs and pieces to look natural on set, gently blow air from your Rocket Blower onto the pieces for a natural scattered look ~ Rachel Korinek

 Sina, The Kosher Spoon
Props & Styling Tips
55. Invest in Quality Backgrounds
A beautiful background will transform your food, but make sure your food is the star.
Choose something that has interesting textures and neutral colours. I started my own backdrop company, Bessie Bakes Backdrops to help food photographers get quality vinyl backgrounds for a low cost.
From marble to concrete, wood to tile. Discover your signature look with a quality backdrop ~ Leslie, Bessie Bakes Backdrops
56. Props Should Compliment Your Food
The food is your hero, so don’t overthink the styling. As in everything – less is more.
Use the most beautiful ingredients you can get. Beautiful food guarantees a beautiful picture. Props should only compliment the food ~ Zuzanna Ploch. Find out which props are essential.
57. Use Brown Paper to Add Texture
Use crumpled brown craft paper as a surface to place items on to photograph to add texture interest.
I recently received some items shipped to me that had pieces of very nicely crinkled brown paper used for padding inside the package. I liked the look of the crinkled brown and used it to photograph vintage pewter spoons full of spices with spices and bay leaves scattered over the textured paper surface ~ Marie Kaz

 Zuzanna Ploch
58. Oil and Ice Are Your Best Friends
Oil will add shine to your food that may have been out of the oven too long and doesn’t look fresh, and icy water will keep your herb garnishes fresh ~ Bec Dickinson
59. Colour is Most Important
Talking about food photography I would say that colour is the most important to me.
The food is all about colour and even when the dish itself does not have a powerful one, I like to add it with props and surfaces ~ Marta, The BudMaaS Kitchen
60. Keep Greens in a Wet Napkin in the Fridge
For fresh looking ingredients such as salad, lettuce, veggies with green ends. I always store it in a wet napkin in a fridge and I take them out right before I am ready to shoot them.
Sometimes I also wash them in cold water as well, so there is some small water drops left on the surface ~ Monika

 Marta, The BudMasS Kitchen
61. Scatter Ingredients For Work in Progress
I like my photos to be “messy” like a work in progress, using either some breadcrumbs or some powder sugar or flour near the pastry, or something of a kind.
That’s because I’m kind of chaos in the kitchen, and I like to portrait that in a “cool” way without overdoing it, bring more of a real situation to the photo ~ Ana, The Good Old Fashion
62. Adding a Human Element For Visual Appeal
Adding a human element to the photographs makes it visually appealing. E.g. holding a coffee mug or stirring a pot or pouring beverages while having a breakfast layout ~ Shibani, Pearls of Feast
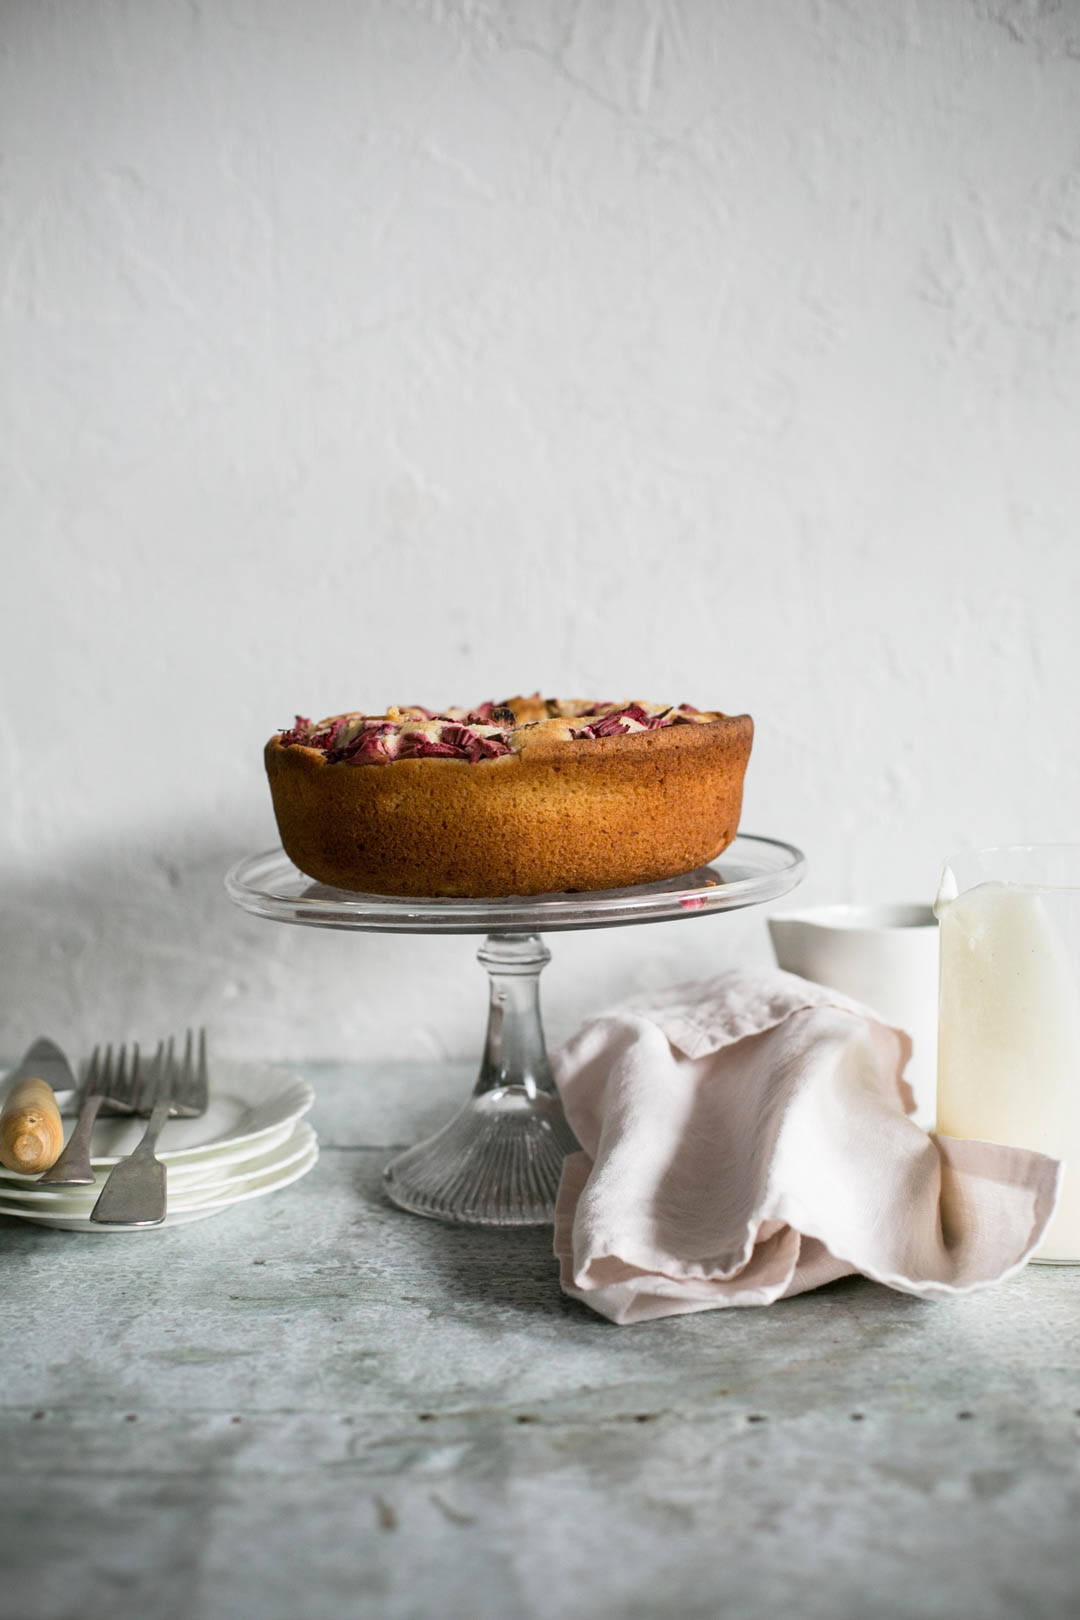
63. Invest in Signature Props
If you’re just starting your prop collection, try to buy a neutral colour palette that you can use over and over without the pieces becoming too memorable. Then invest in signature props that will make the dish pop.
Handmade ceramics work wonders for adding details to your shot ~ Rachel Korinek

 Bec, Daisy and the Fox
64. Small Props Don’t Compete With Yor Food
When props shopping, steer towards smaller props (i.e side plates, soup bowls), because you can fit more items into the frame and they don’t compete with the food.
This would have saved me heaps of time and money ~ Helen, Hungry and Fussy
65. Local Bric-A-Brac Stores For Props
Very new to food photography and for me the most enlightening moment for me was realising that the local bric-a-brac stores full of old style china, plates and linen worked wonders with the prop issue.
To date, my blog relied on my current kitchen hoard but wasn’t cutting the mustard. I have recently found lovely old spoons, boards and baking trays and will be utilising these I hope to good effect.
Somehow the worn textures, historic connotations make the food more everyday real, reminders of well-loved recipes our grandmothers and mothers made – the tastes we take through our history ~ Judi Castille
66. Think Before You Buy Props
Don’t waste your money on props (especially when you are new to food photography)!
Use the ones you find in your house or ask your family, friends, neighbours to lend you some pieces you might be interested in!
Using ingredients as props is also a simple (and cheap) way to get interesting photos. I have spent way too much money on food props that I have used once (some of them not even once) since I bought them!
They looked cool in the shop but not on my pictures! So think before buying them! Julia, HappyFoods Tube
67. Natural in my styling
Over-styling and over-fussing are a thing of the past in my styling – my photos become so much more relatable if they have a bit of messiness or realness to them ~ Michelle, Our Italian Table

 Helen, Hungry and Fussy
68. Less is More – Take One Thing Off
Coco Chanel’s words – get dressed, and then before leaving the house, take one thing off. In other words, less is more. I have lots of beautiful props and I can be guilty of wanting to overdress the shot ~ Melanie, Love Sets The Table
69. Stimulate as Many Senses as Possible
For me as a props stylist, are some of the greatest creative, collaborative opportunities ever.
The alchemy and magic that happens when creative talents come together is the energy that inspires me to strive to produce amazing food images. So my tip is aimed to produce an image that stimulates as many of the senses as possible. “Wow, that looks great.” ” I want to make that. “ I want to eat that.”
“I know what that will taste like.” ~ Tony Hutchinson
70. Plan Your Story
The best advice I got was to plan ahead and think of what I’m trying to say. Tell a story, don’t just plop a dish down with a few props. Also not to overdo with the props. Less is more.
I’m trying to think about the food, type of cuisine, etc.before I do my shot ~ Maria, All Our Way

 Ana, The Good Old Fashion
71. Add Contrasting Colours
Use colour theory. Put a yellow piece of cake on a dark plate. If the food is dark, use white plates. Or simply add a green plant or a flower in the picture. A photo with contrasting colours is more interesting and eye-catching ~ Daniela, Danis Cooking
72. Start With The Hero And Add
Keep it simple, less is more. You will be tempted to add everything plus the kitchen sink…don’t.
Start with your hero item and slowly add additional elements. With each item you add in, step back and objectively ask yourself does this does this enhance what I’m trying to photograph or does it clutter the image? ~ Stacy Howell
73. Visualise The Photo and Styling
For me, the best tip is to visualise the photo, think about the styling, what props would be best, think about new ideas I want to try, and if it makes me drool, it´s perfect ~ Julieta, Filosofia de Sabor

 Todd Beltz
74. Think Outside The Usual Garnish Box
My tip is to use garnish it really makes the food “pop” and become alive on photos.
And I’m not just talking about green herbs like parsley, cilantro, chives, but anything you can put on food and drinks that plays up the different dimensions and textures of the featured food/drink.
Like grated cheese, parmesan, crumbled feta/goat cheese, chopped up nuts, even tomato cubes, corn, seeds (pepitas, sunflower seeds, chia seeds, etc.), pomegranate arils, ground pepper, chili flakes, coarse sea salt, grated chocolate, coconut flakes/chips, cranberries, etc
The options are quite endless if you think outside the usual “green-herb-garnish box” ~ Stella, Stellicious Life
75. Simple = most effective
My top tip: Don’t over complicate your shot! Keep it simple. Simple = most effective! ~ Shannon SLR Photography
76. Realistic and Personal Styling
Realistic, personal and natural styling is more admirable and warm. Clean images, simple, with bold and clear colours. I like to see drops, crumbs, little pieces, grooves, stains.
To see every single grain of sugar or flour falling on a cake or in a bowl, set a very slow shutter speed on camera (on a tripod) and fire several flashes from hand with external flash – from the side of the shot. ~ Eva
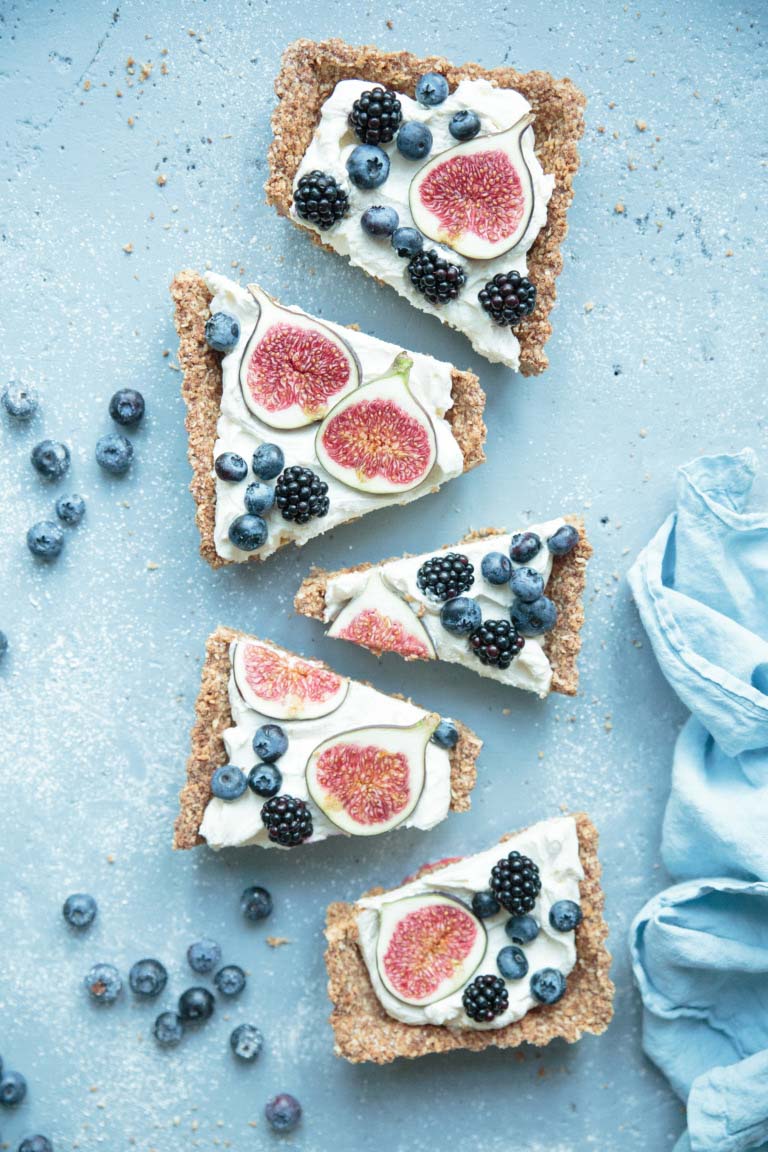
77. Include Ingredients as Props
When it comes to styling, I think including one or two of the ingredients used in the recipe as props with the final product is another life-changing element.
This will make the photo more layered and more appealing visually ~ Diana, Dreams Factory

 Des, Oh So Delicioso
Creative Mindset Tips
78. Set Your Focus On One Thing at a Time
I try to focus on one thing at a time when I’m shooting, whether it is lighting or composition or getting to know my camera better (playing around with the shutter speed, aperture, iso, white balance…)
You can set a goal every time you shoot, for a period of time, choosing any aspect of food photography until you feel comfortable with it, then you can set another one and so on!
You’ll see a huge difference in a short period of time!, but I would say my best tip would be to always have fun and enjoy the journey into food photography, I have it as a MANTRA! I know I’m a beginner but in x period of time,
I’ll be at another point in my food photography and so on, and so on. Being patient because you know you’ll get where you want to be ~ Alejandra, Simply Crudelicious
79. Forget All The Rules and Create
Follow your heart, the passion for food. I mean, sometimes you should forget all rules, all logic and just create. ~ Helene Dujardin

 Jodi, Happy Hearted Kitchen
80. Taking a Moment, And a Deep Breath Can Work Wonders
Breathe. Photoshoots can often be quite hectic. I don’t know about you all but my kitchen is usually a disaster and there is food and props everywhere. I can feel rushed or overwhelmed sometimes.
I always find that taking a moment, and a deep breath can work wonders. Reset and come back to the shoot. It’s always after these moments when I end up seeing a different angle or a new way to style ~ Jodi, Happy Hearted Kitchen
81. The Real Creativity Comes When You Step Away From Auto
Once I learned how to use the settings on my camera and what all the fancy photography language meant (ISO, shutter speed, depth of field, etc.) and could get away from the auto settings, that’s when the real creativity set in.
It was freeing to understand what each element means/does and use them to capture the look I was aiming for.
Don’t be afraid of your camera! ~ Erica, Flours in My Hair
82. Interest and Passion Are Key Drivers
Choose a professional field that you are really interested in – if you have to specialise in something, it is important that you like it.
Specialisation requires continuous self-improvement. For a long period of time to find the motivation to work, to develop, you should do what you really want and really like.
Besides in our life we spend quite a few time working 😉 Shame to spend it on activities that are not interesting for us. ~ Aneta Nowakowska
83. Set Aside Time To Shoot For Yourself
Practice as much as possible. Set aside time every week to shoot for yourself, whether it’s just for fun, images for social media or your portfolio.
Go to the farmer’s market, pick out ingredients that intrigue you, go home and give yourself an assignment. Keep a collection of photos from other photographers that you admire and try to recreate these images with special attention paid to the mood and lighting in these photos ~ Jenny, Hello My Dumpling

 Bea Lubas
84. Imperfection is Also Beautiful
Don’t stress if the outcome is not as planned. Not every picture needs to be perfect ~ Huma Kalim
85. Grow Through Getting Uncomfortable
Get uncomfortable. That’s when the magic happens and you find the opportunities necessary to grow your skills ~ Sarah & Laura, Wandercooks
86. Don’t be Afraid to Scratch Your Original Set-up and Try Something New
So many times I’ve set up a scene and ended up somewhere completely different from where I started.
And honestly, those are usually my favourite shoots because I know I pushed myself to find the best shot even if it meant spending twice the time. ~ Aubrie, The Blonde Chef
87. NEVER GIVE UP. To be a better photographer you’ve got to be stubborn.
Be very stubborn. Always go that extra mile. Always keep trying. Most of my pictures wouldn’t exist if I gave up on the first attempt. So appreciate failure and let it motivate you ~ Bea Lubas.
88. Continue To Look For New Things to Master
Never stop learning and perfecting your craft. If you think you have mastered something continue to look for new things to perfect. ~ Melissa, The Whimsical Wife

 Jo Anderson, The Luminous Kitchen
89. Don’t Let Seeing Different People’s Great Work Intimidate You
Study a lot of styles, but never copy them. Also, don’t let seeing different people’s great work intimidate you ~ Farouk, Beyond The Eats
90. We All Have to Start Somewhere
My ultimate tip and the one I keep telling people is START SOMEWHERE.
It’s so simple but I honestly wish someone had told me that sooner, I dithered around the thought of starting a blog/food photography for so long because I didn’t think I was good enough or ready.
Truth is I still don’t feel good enough or ready! But start somewhere, anywhere – and just keep going ~ Kym Grimshaw.
91. Stay Calmly Centred
When part of what I am styling or photographing just doesn’t seem to fit, or I can’t get the photo to look as I had hoped in my mind’s eye, being as centred as possible is a huge help.
The moment I start down a path of frustration I know everything will fall apart. Instead of getting agitated that my image isn’t how I’d pictured, or I’m not seeming able to create exactly the look I was initially going for I remind myself that creativity is a process.
It evolves, it grows. Being stuck on or hyper-focused on something going exactly as planned is rarely a recipe for evolving creativity.
When something in your image isn’t quite as you want it but you’re unsure how to proceed – take a deep breath, let go of expectations & let creativity pour from your heart. ~ Shanna, Kiss My Bowl

 Melissa, The Whimsical Wife
92. Two Hour Rule
If within two hours you haven’t gotten what you had in mind or something that makes you smile, let it go
Maybe you should give it a try tomorrow, or change your idea. Don’t force it, don’t force your mind. ~ June
93. Don’t Wait Until Your Work is ‘Perfect’
There is no such thing as perfect. Photography is such a huge subject that it will take a long time for you to learn everything that there is about it.
It takes a lot of time and repetition to be a great photographer. Even then “being great” is a relative term and everyone has their own version of it.
It doesn’t matter how much you know about exposure, white balance, Lightroom, your camera/lens, etc., just start now! Shoot every day and go back and look what you did on your computer.
Write down what you liked and what you didn’t. Learn from it and repeat the next day, every day! ~ Aysegul Sanford

 Aysegul Sanford, Food Proof Living
94. Don’t Get Too Close To Your Food
Macro lenses are amazing in food photography. But it’s about connecting with the food. Your viewer wants to see more than just a crumb on your cake.
You never want to be too close to your food or your viewer won’t be able to make that nostalgic connection.
95. Edits Your Images So They Pop!
The last piece of the photography puzzle is to edit your images. Editing helps us to put our final touches on an image and stamp it with our style.
You can really make your images pop when you know how to edit food photography in Lightroom.
96. Try Out A Tilt-Shift Lens
For those who are looking to really up-level their food photography and have a few lenses in their kit, take it up a notch by shooting with a tilt-shift lens.
You can change the plane of focus and create some really beautiful blur that is necessary for commercial photography.

 Kym Grimshaw
97. Put Your Subject In The Foreground/Middleground
The best place to put your subject when you are shooting food photography is to place it in the foreground or middle ground. This has the most impact within your frame.
Then, be sure to get the focus point right.
98. Search for Color Contrast.
The application of complementary colors is an important aspect of aesthetically pleasing art and photography. The contrast of complementary colors results in a point of focus in the frame and creates a vibrant look of food. Minimalism is an often-used photography style in food photography, like a solid-color background used to highlight the color of food as an example. Dark-colored food will look more dynamic and more visually attractive against a light-colored backdrop ~ Kate Backdrop
99. Don’t Stop Until You’ve Exhausted Every Angle, Every Possibility
If you’ve made it this far, share your favourite food photography tip from the list. What got you most excited!?
Two Loves Studio was not paid to write this post, however, it may contain affiliate links. If you purchase an item from an affiliate link, we do get a commission on the sale which helps us run this site. Only affiliates for products/services we believe in appear on this site.


![Toni Kroos là ai? [ sự thật về tiểu sử đầy đủ Toni Kroos ]](https://evbn.org/wp-content/uploads/New-Project-6635-1671934592.jpg)


