
7 Excel Dashboard Tools & Tips for the Quick Access Toolbar – Excel Campus
Bottom Line: Learn several tips and shortcuts for working with charts, slicers, and shapes by adding handy buttons to the Quick Access Toolbar.
Skill Level: Intermediate
Mục Lục
Watch the Tutorial
7 Tips to Save You Time
When creating dashboards, you can end up spending a lot of time aligning and resizing charts, shapes, and slicers. To streamline the process, I recommend adding some actions to the Quick Access Toolbar (QAT). Here are 7 ways to save time using the QAT when building a dashboard.
1. Select Objects Tool
The Select Objects Tool helps you to select multiple objects at the same time. When you use this tool, all you have to do is click and drag your cursor around the objects you want to select.
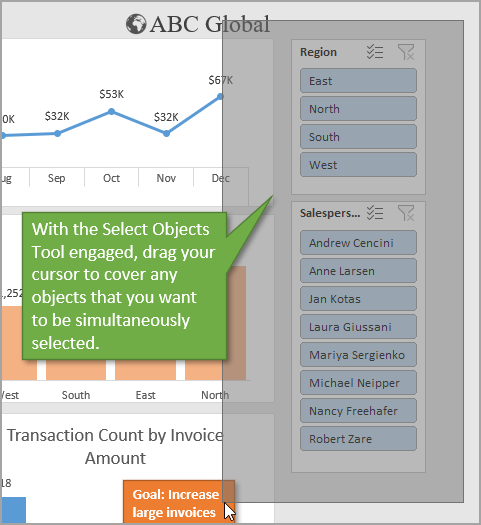
When you release the drag, you can see that the objects are selected.
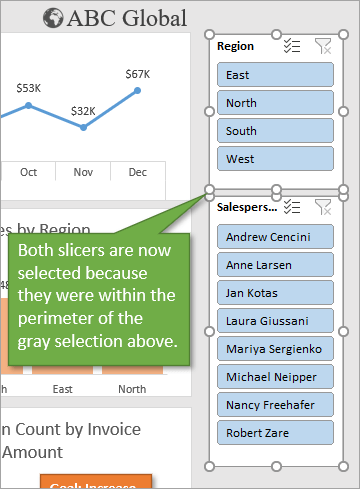
Your selection must encompass the ENTIRE object in order for it to be selected, not just a portion of it.
One other item to note is that when you have the Select Objects Tool engaged, you cannot select any cells on your worksheet. You must first toggle it off in order to interact normally with the cells on your sheet.
Adding the Select Objects Tool to the QAT
To add this feature to the Quick Access Toolbar:
- Start by right-clicking anywhere on the QAT.
- Then select Customize Quick Access Toolbar.
- That will open the Excel Options window, which shows a list of potential commands on the left and your actual commands on the right.
- Change the dropdown option to be All Commands.
- Select the Select Objects item and then click the Add button to move it into the right column.
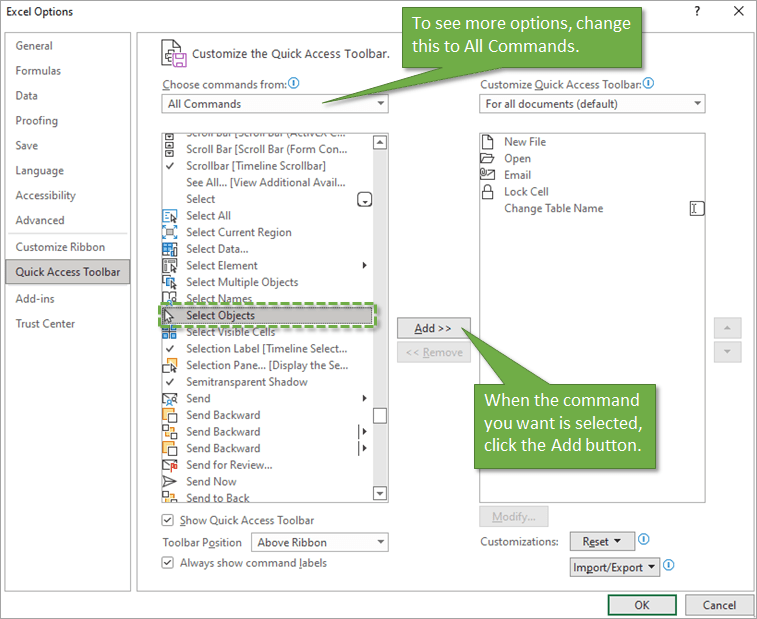
As you can see above, each command in the list comes with a specific icon. Once you press OK, you will see that icon as an option in the Quick Access Toolbar.
![]()
You can use this process to add any command to the QAT. But if the command you want is already found on the Ribbon, an easier way to add it to the QAT is to right-click on it.
2. Align Object Features
It’s likely you’ll want to align shapes and objects so that they appear clean and organized on your dashboard. While this is fairly easy to do in the Ribbon, the problem comes from the fact that the navigation to the alignment option changes depending on what type of object(s) you are trying to align.
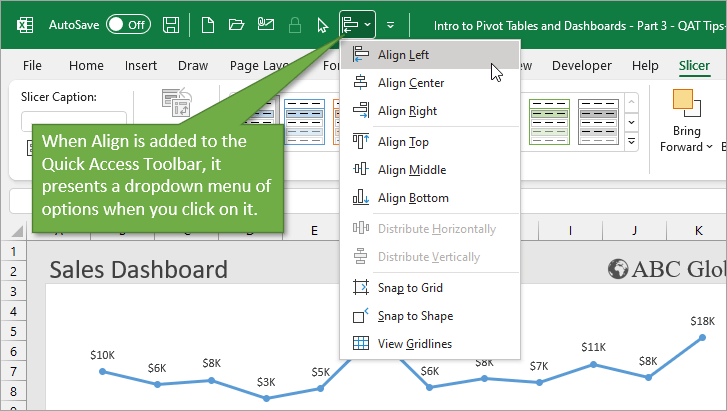
For example, if you are aligning a chart, you would go to the Format tab and then find the Align option in the Arrange section of the Ribbon. But if you want to align a slicer, you would go to the Slicer tab to look for the Align option.
By putting the Align icon on the QAT, it will always be right at your fingertips.
3. The Selection Pane
Another great option to add to the QAT is the Selection Pane. That’s because the Selection Pane lists all of the shapes and objects that you can find on the current sheet.
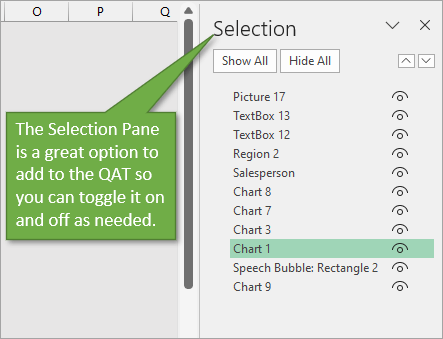
From the Selection Pane, you can select objects, rename them, hide them temporarily, make them visible again, and rearrange objects as well.
Again, you can quickly add any button to the QAT by right-clicking the icon as found in the Ribbon. You can locate the Selection Pane on the Format tab.
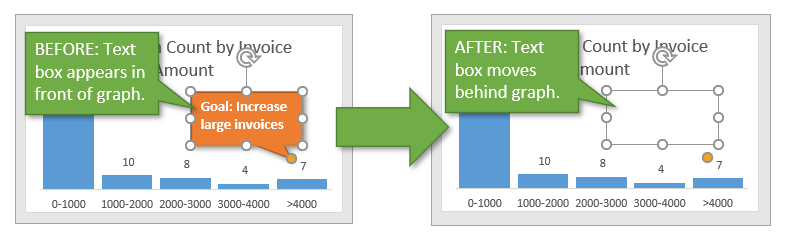
4. Bring to Front/Send to Back
When a shape is selected, you will find on the Format tab some dropdown options for Bring Forward and Send Backward. Within these dropdowns, you will also find Bring to Front and Send to Back. These options are for shapes and objects that are layered on top of each other.
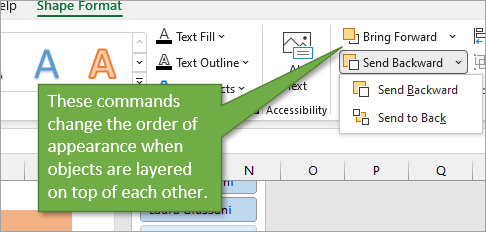
Bring Forward will move an object closer to you; Bring to Front moves it all the way closest to you. The same is true in reverse for Send Backward and Send to Back.
You can add any combination of these commands to the Quick Access Toolbar. My personal preference is just to use Send to Back on whatever object I want to move.
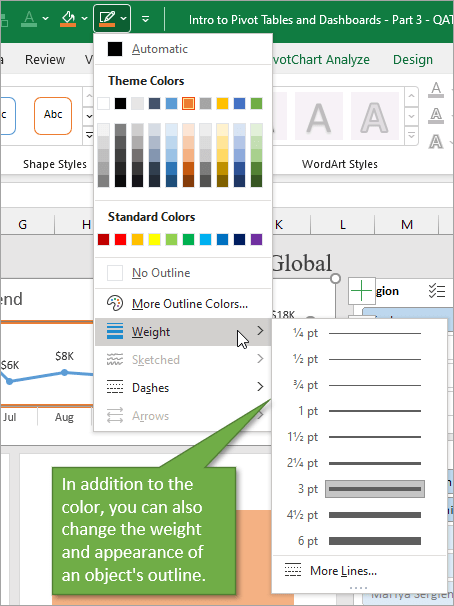
5. Change Font, Fill, and Line Color
Because these are actions that many of us use often, I recommend putting them in the QAT. You can find Font color and Fill color on the Home tab. You can find Line color on the Format tab (when an object is selected).
6. Snap to Shape / Snap to Grid
Snap to Shape and Snap to Grid are two great features that help you align and resize shapes. When the Snap to Shape mode is turned on, as you move an object with your cursor, it will automatically align with other nearby objects.
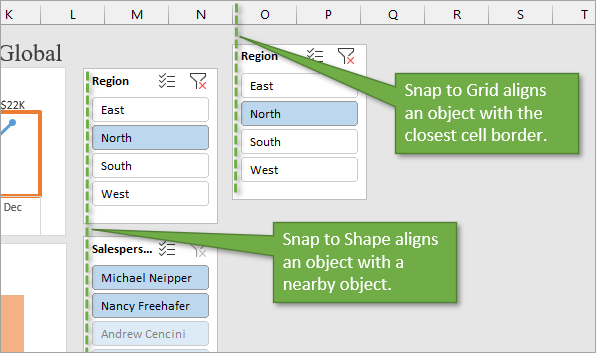
Snap to Grid moves the object to be in alignment with the cells on your worksheet.
If your Snap to Shape mode is turned on but you don’t want to snap align your object for whatever reason, you can hold down the Alt key while moving your object. That will allow you to place the object wherever you like.
You’ll notice that Snap to Shape and Snap to Grid come as a pair. When you turn on Snap to Shape, Snap to Grid will also turn on when you move the shape around.
7. Toggling the Gridlines On/Off
Another item I like to have in the QAT when I’m creating dashboards is the Gridlines button. Toggling it off and on will remove and replace the grid on the current worksheet.
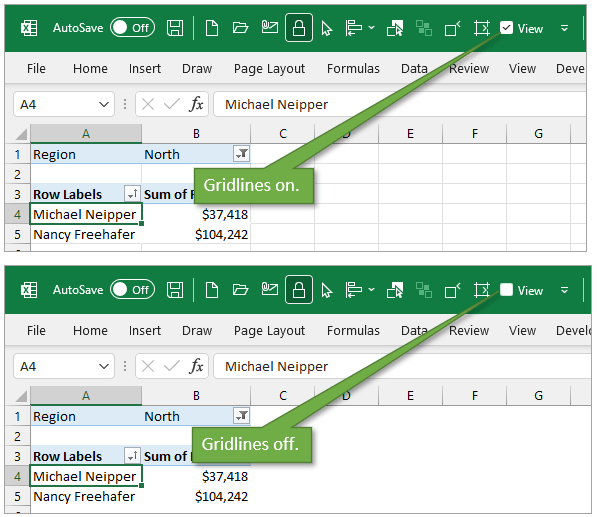
You can add the Gridline option by right-clicking the button on the View tab.
The keyboard shortcut to toggle gridlines is Alt, W, V, G on Windows.
Importing/Exporting the Quick Access Toolbar
If you’ve set up your QAT just how you like it on one computer and want to recreate it on another, you can export and import your QAT settings. Or maybe you want to see your existing QAT buttons only when you are working on dashboards but remove them the rest of the time. Again, you can export the settings and then reimport them when you want them.
You can find the import/export capability on the same Excel Options window that we worked with before.
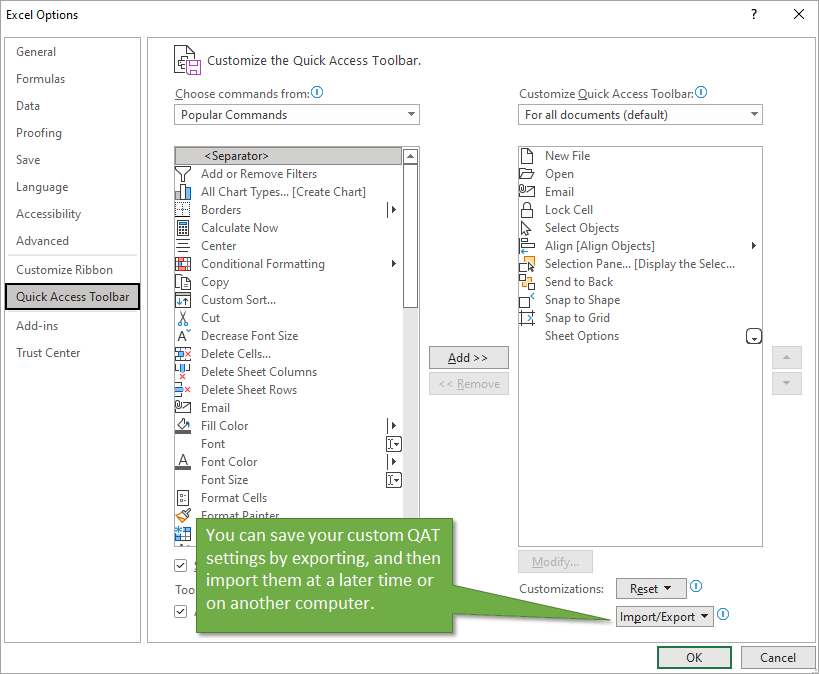
When you export your customizations you will get a prompt to save them to a file of your choosing. And when you click the button to import, you will get a prompt to browse for the file you previously saved.
Related Posts
If you like these tips, I recommend you check out these similar posts for more information.
Introduction to Pivot Tables and Dashboards includes the Excel file used for this post & video.
Resize & Align Dashboard Elements with Snap to Shape
Conclusion
I hope these tools help save you time when creating dashboards or working with shapes in Excel.
Is there a command you use so frequently that it makes sense to put it in the Quick Access Toolbar? Please share your favorites in the comments below.


![Toni Kroos là ai? [ sự thật về tiểu sử đầy đủ Toni Kroos ]](https://evbn.org/wp-content/uploads/New-Project-6635-1671934592.jpg)


