
7 Days to Die Beginner’s Guide (2023)
The horde never stops.
7 days to Die takes you into a world that has you clutching your seat every 7th in-game day. It’s currently available for PC and old-gen consoles, but console versions of the game are outdated due to licensing issues. Forced to scavenge, hunt, and build to survive the desolate world you spawned into. There’s quite a large learning curve, and it would only seem fitting to provide you with a 7 Days to Die Beginner’s Guide.
This guide will go in-depth about most of the game’s core mechanics, how you should prepare, and what you should do before the 7-day horde. It doesn’t matter if you’re playing it for the first time or coming back after a long break; this beginner’s guide will help you navigate the world of 7 Days to Die.
What is 7 Days to Die?
7 Days to Die is a voxel-based survival game that introduces players to many mechanics and genres in one game. It covers first-person shooter, tower defense, and crafting mechanics all in one go. The Funpimps are trying to deliver a product that appeals to many different types of gamers that want to take on unique roles in their worlds. It’s one of the more unique zombie survival games on the market.
The creators behind 7 Days to Die are called The Fun Pimps, and they’re known for having a unique upbringing. 7 Days to Die was initially marketed via a campaign on Kickstarter back in 2013. The initial development team promised many features that people wanted to see implemented at the time, and it became very successful because of that. People who pledged to the campaign got a glimpse of the game in its roughest state, and yet it still showed a lot of promise.
Nearly ten years later, 7 Days to Die still hasn’t left its early access state. However, it did make a mountain of progress, and players are more or less satisfied with the state of the game as of today. Fortunately, The Fun Pimps are planning on going gold with the game sometime soon. This enhancement will entail many necessary performance and story implementations, which 7 Days to Die lack.

General tips for surviving 7 Days to Die
As with any survival game, your main goal is to survive. 7 Days to Die makes survival an even more challenging task by having you tackle hordes every 7th day. This knowledge of impending hordes is why it’s essential to know some tips to help you prevail over any potential danger coming your way.
Staying alive is critical, so here are a few general tips that will aid you in your daily adventures:
-
First off, focus on gathering natural resources very early on. They are your best friends during the early game.
-
Do the beginning tutorial as soon as you can. Completing the tutorial will guide you to the nearest trader, where you can pick up quests for dukes and other rewards.
-
Prioritize looting everything in more accessible points of interest (houses, parking lots, farms.)
-
Zombies aren’t your only problem. Animals of all kinds roam around the world; some are hard to take down with only a bow and arrows.
-
Keep an eye out for different zombie types and how they behave. This knowledge will help you recognize patterns you can use to your advantage later on.
-
Get yourself a decent set of tools and weapons before day 5.
-
Learn to craft essential crafting materials and upgrade your equipment to increase your chances of survival.
-
It would be best if you focused on building and fortifying a 1×1 or 2×2 hatch fighting position for the 7-day horde. We will also cover this build in further detail below.
-
If you defeat the 7-day horde, start focusing on exploring the world around you. There are plenty of more difficult locations to scavenge for much better loot.
-
Hunger and thirst levels will deplete based on how active you are, so make sure to eat and drink regularly. You can find food and water at points of interest, but having a natural source of murky water to boil is also recommended.
-
Craft a bone knife as soon as you can. Salvaging animal carcasses with knives yields the most meat, bones, and animal fat.
-
Remember, if you kept your world settings on default, zombies sprint and will be more aggressive at night. Try to loot during the day and craft or build during the night when you can’t raid locations.
Gathering resources and materials
Gathering resources and materials will be an activity that you’ll spend most of your time on. Resources and materials are split into two categories:
-
Natural
-
Lootable
You can only gather natural resources in nature, and they are the first thing that you need to gather to survive what’s ahead.
Gathering natural resources such as wood, stone, plant fiber, and feathers will have to be your main focus as soon as you spawn. The beginning tutorial quest will lead you through how and where to gather those resources. In the beginning, having enough natural resources will help you craft tools such as axes, clubs, and bows. These will allow you to gather even more resources, as mentioned earlier.
Not only will having an abundance of those resources allow you to craft tools, but it will also aid you in constructing or fortifying a base of operations later into your first day. Wood is vital in crafting frame shapes and upgrading the placed shapes. On the other hand, you can turn stone into cobblestone rocks, which is also essential for base fortification.
Then you have natural materials like feathers: feathers, wood, and stone yield stone arrows. Due to the early-game stamina limitations, you’ll encounter with melee weapons, bows, and arrows that will be your greatest friends when you’re just starting out. Feathers are found in bird nests on the ground. The best way to farm these would be to look for them in the wilderness.
Lootable Materials
As for other lootable crafting materials, those can only be found in the existing locations of the old world. These are buildings of various kinds and other locations that are located within a settlement or town. Looting boxes, chests, and piles of materials from these places is a task that will sustain you in the long term.
Naturally, you have to know what to loot to save time, and plenty of crafting recipes will let you know what you need. A great example is the craftable forge. A forge will require you to gather plenty of lootable and natural materials such as duct tape, leather, or pipes. All this will force you to explore both sides of the coin when gathering materials in 7 Days to Die.
Crafting System
Known for its extensive crafting system, 7 Days to Die attracted many players simply because of everything you can craft and how it connects to every other aspect of the game.
As crucial as it is, crafting in 7 Days to Die isn’t that simple at first glance. Just going into your inventory and crafting certain items won’t be enough. You’ll have to secure other lootable crafting materials to create workstations that will let you upgrade your gear and craft other higher-tier items. The most notable workstations you can craft are the forge, workbench, and chemistry station.
The forge smelts natural resources like iron, brass, lead, stone, and sand. Once enough of those resources are deposited into the forge, you’ll be able to start making materials that you will later use in crafting recipes.
Crafting is done at the workbench and will be your go-to workstation for general crafting. The chemistry station is also prevalent, as it will allow you to streamline the production of essential crafting materials like glue and gunpowder.
Actually, crafting those workstations is a bit challenging, especially early on in your playthrough. However, everything else should come quite easily once you craft the forge. Check the traders for schematics that will allow you to craft these workstations. If you can’t find or afford these schematics, you can invest your starting skill points into the ‘Advanced Engineering’ skill and eventually unlock all of these workstation schematics.
A basic iron tool and armor set is one of the most important items to craft early on. Primitive stone tools may serve you well initially, but other tools will get the job done better and faster. As you progress through the game, you’ll have the resources to craft even more advanced tools and gadgets that will help you defeat horde after horde.
Building a base
Building bases in 7 Days to Die can be challenging, but with proper planning and execution, it is possible to create secure and effective bases in a relatively short time. Previous game iterations made building effective bases harder, but it’s much easier nowadays due to specific zombie pathing changes that have been implemented.
Your first task would be to find a suitable place to reinforce. Now, we’d advise you to make two separate bases. One will be your home base, and this is where you’ll keep most of your loot and crafting materials. The purpose of your second base is to act as a structure from which you can fight hordes. We’ll be focusing on building a good horde base right now.
Building a horde base
You’ll first have to find an easily fortified location or build a structure from scratch. Finding a suitable building won’t be too hard, and making a fighting position from scratch is simple enough. There is plenty of viable horde base designs out there, and mentioning them would take too long.
We recommend checking out these videos on beginner-base designs and how to build the perfect horde base.
The practicality of a base design may differ depending on where you build it. So keep that in mind when planning to turn an existing house into a fully-fledged horde base.
Zombie AI pathing chooses the path of least resistance, meaning you must consider block durability and thickness when building a horde base. The most common fighting position for horde bases includes a 1×1 or 2×2 hatch setup, which will fool the zombies into thinking it’s the easiest way to get to you. This setup allows you to get a lot of shots and hits on them as they try to break the series of hatches you’ve prepared.
General Building Tips
-
Frame shapes are your best friend. You can turn your frames into hundreds of shapes.
-
You can layer specific shapes on top of each other if you place them correctly. This placement doubles the durability of the block behind the one you just layered on.
-
Upgrading blocks to increase their durability can be done by right-clicking a placed frame shape with a stone axe, claw hammer, or nail gun.
-
Gather as much wood and cobblestone as you can early on. You will use those resources to upgrade the frame shapes you’ve placed.
-
Don’t forget to make a bit of space for miscellaneous storage in your horde base.
-
Include multiple escape hatches and ladders so you may live another day if the horde breaks through your fighting position.
-
Fortify the pathway that leads to your fighting positions with various traps, spikes, and other ingenious designs that fool zombie AI pathing.
-
Install bars above your fighting position so you can deal with random vultures without leaving the room.
-
Place a land claim block in all of your bases so that zombies won’t spawn in your structures after a while.
Skills and leveling
You receive experience as you complete tasks or dispatch zombies. You’ll eventually get enough XP to where you receive a skill point. These skill points then need to be invested into various skills.
The first thing you need to know about leveling is the attribute system behind character progression. Attributes are the main factors that influence your skills, and skills are what significantly alter your gameplay. Here are all of the attributes that you can currently invest your points into:
-
Perception
-
Strength
-
Fortitude
-
Agility
-
Intellect
Players must also invest skill points into attributes to unlock higher skill levels in that attribute tree. Furthermore, each skill in this game is very detailed, and leveling them up will affect nearly every aspect of the game. A good example is the ‘Miner 69’er’ skill. It increases the damage you do to blocks, which helps with mundane activities like mining and woodcutting.
Leveling as a system has never been stable during 7 Day to Die’s lifecycle. And it’s going to be overhauled in the upcoming alpha update. Players have already accepted the current leveling and progression system, and the fact that it’s undergoing yet another change is disheartening.
Skill Books
Looting bookshelves and other miscellaneous piles of loot can turn up schematics and skill books. Based on the main theme of the skill book series, each skill book grants you a unique ability once read. When you find and read every book in the series, you’ll get a special reward in the form of a skill or ability. That special reward is why you should read every unread skill book, even if it initially seems useless.
Combat in 7 Days to Die
There are two ways that you can approach combat in 7 Days to Die – loud and stealth. Most of the skills are geared toward loud gameplay, which is how you’ll usually engage most zombies. Stealth is also helpful, but it only really applies to situations that have you clear buildings full of sleeping walkers.
Due to resource and game stage limitations, early-game periods will have you prefer melee weapons and bows over firearms. Everyone will eventually have to engage in melee combat, so we’d advise you to keep an eye out on your stamina bar if you’re in melee range. Using a bow or crossbow in stealth is also very useful because it multiplies your damage if you get a sneak attack.
Combat tips
-
Always aim for the head when trying to melee or shoot zombies. A clean headshot has a higher chance of knocking them down.
-
Manage your stamina carefully and prioritize taking breaks to regenerate stamina when needed.
-
Play into the behavioral patterns of various zombies and use that to find their weaknesses.
-
Use any cover around you to your advantage.
-
Invest in the ‘Parkour’ skill to jump higher and climb on top of objects that zombies can’t reach. This skill is perfect for dire situations.
-
Utilize traps and explosives to dispatch late-game zombie hordes.
-
Invest in at least two weapon skill groups – weapon variety is key.
Traders and exploration
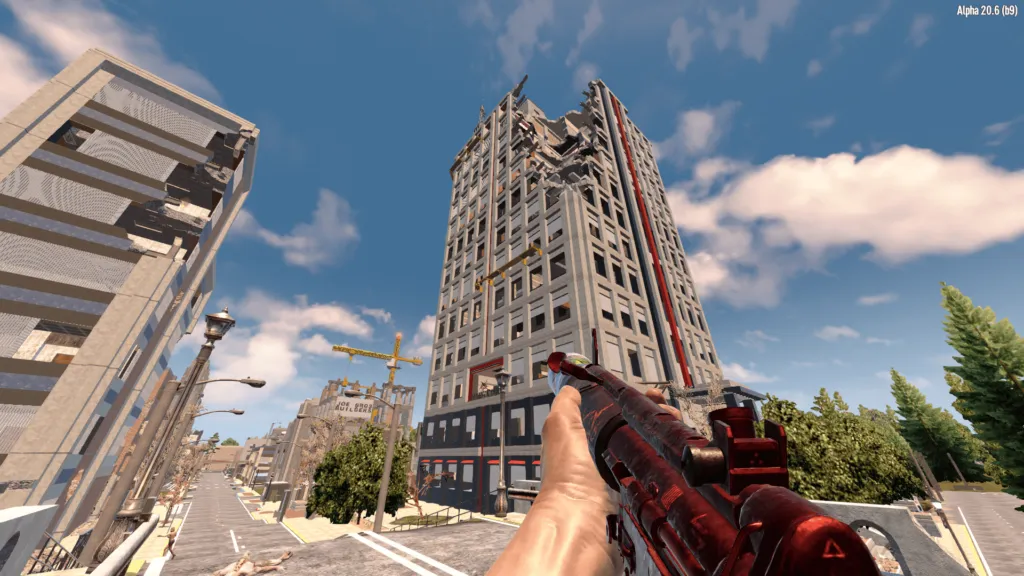
In 7 Days to Die, exploration is just as crucial as crafting and building. Many points of interest from the old world are scattered all around Navezgane and any randomly generated worlds. There is always an effortless way into the building, and each offers a degree of loot you can turn into other items or tools.
Cities and towns should be common occurrences in your world. But it would be best if you did not loot all of them immediately. Points of interest have their own difficulty tier that you can spot by the quality of the final loot chest. The higher the tier, the more difficult the zombies inside it will be. All of this should be noted when looting in cities and towns.
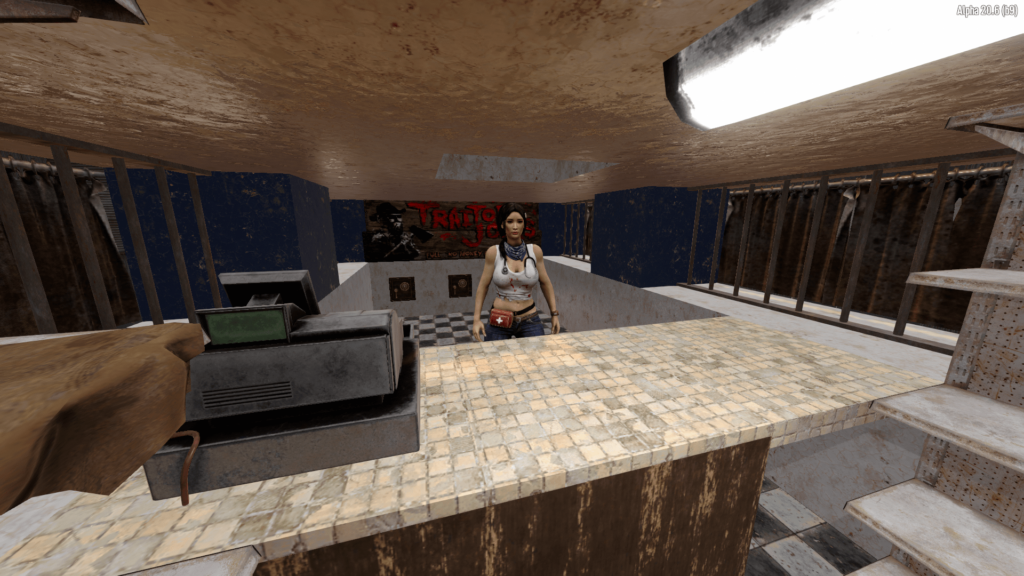
As for traders, you should prioritize keeping up with traders all around the world. You’ll usually find traders around the outskirts of settlements, or you can wait until you’ve done seven quests in one tier to unlock the location of another trader. Traders are great for getting rid of high-value tools and weapons you may not need anymore. All in all, traders will compensate you nicely for treating them well.
Death and respawn
Dying and respawning is as straightforward as it gets in this game. You can respawn near or on your bed roll regardless of what you died from. That brings us to our next point – make sure to place your bed roll somewhere safe so that you can respawn on it instead of in the wilderness.
One of the major downsides of dying in 7 Days to Die is the ‘Near Death Trauma’ effect, a debuff that makes you lose 10% of your XP while also giving you an XP debt. You can only pay off this debt by earning more experience. A debuff like this can become a nuisance if you can’t seem to get to your dropped backpack. Nonetheless, it is a necessary evil that gives weight to death.
You’re ready to tackle the horde.
With the knowledge gained from this guide, you’re officially set to take on the zombie-filled world of 7D2D. These tips should prove helpful in your first or even 5th playthrough of the game.
We hope you enjoyed our 7 Days to Die Beginner’s Guide. To learn more about this game’s history, check out our 7 Days to Die Review.


![Toni Kroos là ai? [ sự thật về tiểu sử đầy đủ Toni Kroos ]](https://evbn.org/wp-content/uploads/New-Project-6635-1671934592.jpg)


