
5 Architecture Photography Tips to Take Your Photos to the Next Level!
Architectural photography can offer its fair share of challenges. The lighting is unpredictable, buildings have a way of tilting and people always seem to be in the shot. But have no fear, architectural photography can be conquered.
We have come up with some solid tips to help you with your architectural photography. If you follow these tips your headaches will be reduced and the results are sure to be amazing.
Architectural Photography Tips
Architecture photography is all about details and perspective. Whether you’re photographing a building or adding the sky in the frame for more context, here are simple tips and tricks to level up your skills as an architecture photographer.
Mục Lục
1. Use a Wide Angle Lens
Wide-angle lenses are invaluable to architectural photography. Chances are that you will be shooting in a relatively tight space. This makes backing up to get everything in the frame nearly impossible. By using this one, you will be able to fit everything into the frame without having to back up too far.
When choosing wide lenses, I would recommend using anything between 15-35mm. 16-35mm lenses work great for architectural photography. It gives you a nice range of super wide at 16mm, while still allowing to zoom out to 35mm.
Be aware of distortion though. You will find that 16mm lenses will cause a lot of distortion, especially if you are taking images close to a building. Be aware of using fisheye lenses as well. Fisheye lenses are very very wide, so they capture a lot of information and cause a lot of distortion.
In my opinion, when used improperly, it can look somewhat amateur. But there are plenty of professional photographers that can pull of the fisheye look and create amazing photographs.
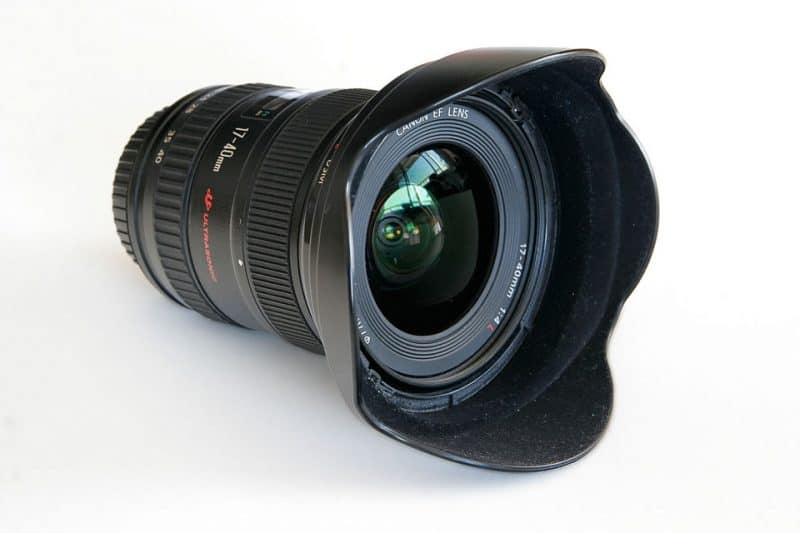
A 17-40mm wide-angle lens, perfect for architectural photography.
2. Try Tilt-Shift Lenses
If you have never heard of tilt-shift lenses, you are in for a treat. In the old days when people used box cameras, photographers could fine-tune the camera to combat distortion. Essentially the photographer could minimize if not eliminate the tilted look of tall buildings.
This allows you to make these same fine-tuning adjustments, keeping everything straight. The shift function of the camera allows the photographer to capture the tallest of skyscrapers while maintaining straight lines along the side of the subject. With any other lenses, you will get tremendous distortion whenever you tilt a wide lens upwards.
Another cool aspect of tilt-shift lenses is the tilt aspect. Using the tilt function, you can keep different elements in focus on different focus plains. If you have ever seen an image or timelapse of a street scene that looks like a miniature town, this is how it’s done.
By photographing from up high and using the tilt function, you can create a miniature effect by using this selective focal plane. The only downside to this lens is its price. It’s a very expensive lens, especially if you are not doing architectural photography full time.
I recommend renting it first and seeing if you like it. But if you only have a wide lens, fear not, my next tip applies to you.


Above, a tilt-shift helps straighten the appearance of tall buildings, below, the tilt function miniaturizes the world.
3. Level Your Camera
Any time that you have to tilt your wide lens up you will get distortion in lines that run up and down. In an effort to combat that distortion you can try shooting level, which means trying to get your camera as flat as possible. In order to do this, you will need a tripod.
You may also need a level that fits in your hot shoe on top of your camera, they sell these on Amazon for about $9. Some cameras come with a build-in level so make sure and check before you go out and buy one.
The next step is simple, level your camera. You will first want to level side by side, move the camera until the bubble gets to the middle of the level. Do the same thing for front and back movement. Once both sides are leveled, you will have substantially reduced the distortion in your image.
Leveling from front to back can be tricky with tall buildings, it will most likely result in chopping off the top. Even by leveling side to side though you reduce some of the distortions. You can also try backing up as well, this will help minimize distortion.
This tip works very well when photographing indoors though. It allows those walls to straighten up and results in a polished image.
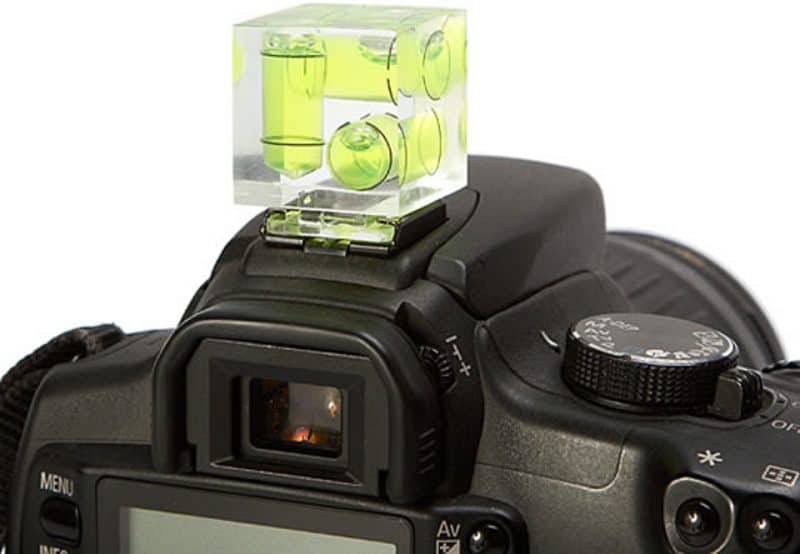
A simple bubble level can make a world of difference.
[ad id=’5′]
4. Pick The Right Time
Picking the right time of day is key to executing a beautiful architectural photograph. I am not going to tell you the magic time that you should be doing architectural photography. But different times will result in completely different images. I usually try to shy away from taking images at noon for almost everything. At noon the sun is directly overhead and creates harsh shadows. If you are looking for harsh shadows in your photos then this time is great for you. There could actually be special features of a building that could be highlighted by this lighting.
Generally, though you are going to want to stay closer to the sunrise and sunset times. During these times of the day is when you will see beautiful colors in the sky. There may still be lights on in buildings so you can get a beautiful balance of light from the sun as well as man-made lights. If you devote a few hours to the shoot you can get a wide array of lighting. Also by photographing either early or later in the day, you will see fewer people. By eliminating people, you save time in Photoshop and have more freedom to shoot from different angles. Commit to waking up early or staying late and the payoff will be well worth it!

Morning light is soft and golden.
5. Do Your Research
If you are shooting either a famous or historic building, it’s important to gather some information about the building. Many buildings either have historic significance or important architectural aspects. In either of these cases, you will want to make sure and highlight these aspects. If you really get to know a building, you can learn to appreciate the time that went into designing and building it. This will make your photography better and more compelling. Make sure to get well-composed images of special details of the building. These were well thought out pieces of the final product and the images will be cherished for bringing attention to them.
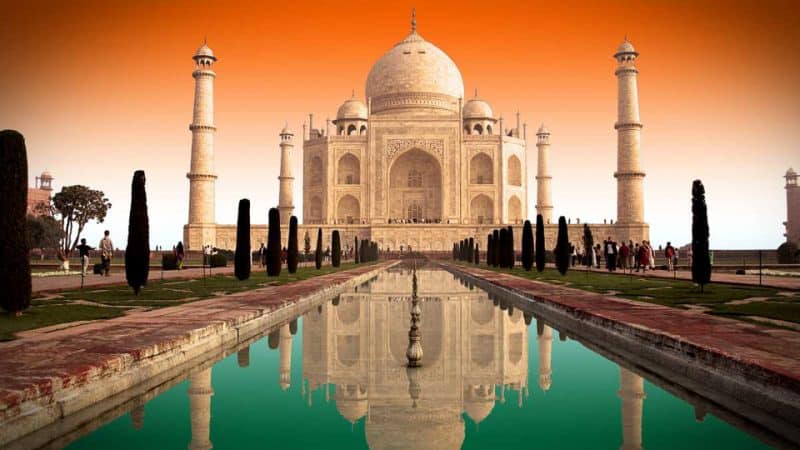
Some buildings need no introduction.
6. Take Advantage of Weather Conditions
Tricky weather is one of the common challenges photographers face when shooting outdoors. However, you can photograph some of the most creative architectural shots in unexpected weather conditions.
For example, an old building may look a bit plain on a sunny day, yet it will radiate a different aura during a misty night or when there’s a storm brewing overhead. The trees in the park will look different in winter as opposed to spring or fall.
As you can see, you’ll get a diverse portfolio of shots by revising and shooting the same structure in several weather conditions and scenarios.
7. Head Indoors
Exterior architecture photography is often the first thing that comes to mind when photographing a structure. However, architecture photography isn’t all about a building’s facade.
A structure’s interior can give you an abyss of interesting and creative shots, especially since there will be different lighting conditions, angles, colors, and shapes.
While the main challenge involves a lack of natural light, you can always bring an off-camera flash or compensate for the white balance to get enough lighting.
8. Play With Lines and Details
Architectural photography isn’t all about aesthetics; it also involves playing with lines, light, and shadows. It features the principle of symmetry and strengthening composition.
Practice zooming in to achieve a detailed close shot and bring attention to the smaller parts of a building. For instance, try to get close to windows, arches, brickworks, and columns of a building. Focus on patterns, textures, spiral stairways, and curving lines.
Likewise, take a break from following structures’ straight lines and rectilinear angles by including curves and circles in the form of reflections and shadows.
9. Explore Various Angles and Composition
It’s a habit for some photographers to take an image from eye level. When it comes to architecture photography, height plays a role in the mood or tone of an image.
Approach structures from all perspectives and use various compositions, even for a single building. One way to do this is to photograph something from all possible sides.
When you see a massive staircase, instinct may push you to get an eye-level shot. To make things more interesting, climb to the top or take photos from the bottom steps. Similarly, looking up can make a building seem powerful or dominant in an image while looking down on a structure emphasizes shapes.
10. Keep a Tripod Handy
Taking images of architecture at different times of the day can create fascinating angles and composition, yet this also means experimenting with camera settings.
One of the best photography tips is to pay attention to details while maintaining sharp shots. You can achieve this by using a narrower aperture, like f/8 or a higher f-stop, to put the building in focus in your image.
While a narrower aperture creates motion blur, a tripod can keep your pictures sharp when shooting toward the end of the day or during low-light conditions at night.
11. Invest in Architecture Photography Accessories
Owning a graduated ND filter would be an excellent investment as a photographer, especially if you want to try long exposures. This filter cuts the amount of light hitting the sensor, which is perfect if you’ve exhausted your exposure triangle options.
Another must-have accessory is a cable release or off-camera shutter release system that can keep mirror shake to a minimum. In this way, you don’t have to press the shutter button yourself, especially during the night and low-light situations.
12. Learn How to Post-Process Images
Architecture photographers must know how to post-process their shots to help bring out details of the subject. The best way to do this is by using software such as Adobe Photoshop and Lightroom.
With some tweaks and adjustments, you can direct viewers toward the most enthralling points of an image. Changing the exposure, shadow, or clarity values can transform the overall look of a shot. You can even convert images into black and white.
Aside from that, you can try image manipulation by stitching HDR shots together, jazzing up the sky, and drawing out the contrast between light and dark areas.
Final Words
Fine art architecture photography means you need to photograph the essence of a structure or subject. With some pre-planning, proper equipment, the right light, compositional techniques, and editing skills, you can produce the best architectural images.
We hope that these tips help you to create beautiful images of all things architectural. By taking time to go beyond the physical building, you can create truly moving images. Take the time to dig deeper and the payoff will be well worth it. Good luck.


![Toni Kroos là ai? [ sự thật về tiểu sử đầy đủ Toni Kroos ]](https://evbn.org/wp-content/uploads/New-Project-6635-1671934592.jpg)


