
Set up an RSS-to-email blog subscription for an external blog
If you don’t host your blog with HubSpot, you can still offer an email-based subscription (RSS) to your blog using HubSpot.
Mục Lục
Create a subscription type
Your contacts manage subscriptions to all your email subscription types separately. This way, if they decide to unsubscribe from one subscription type, they won’t have to unsubscribe from them all. To create a subscription type for your blog subscription emails:
-
In your HubSpot account, click the
settings icon in the main navigation bar.
-
In the left sidebar menu, navigate to
Marketing
>
Email.
-
Click the
Subscription Types
tab.
-
Click
Create subscription type.
- In the dialog box, add a name and description for your new subscription type, then click Save.
- If you have
General Data Protection Regulation
(GDPR)
functionality enabled in your account,
add a process and operation for your subscription type.
Create a custom property
Next, create a custom contact property for your external blog. This will be used in your subscription form to manage which contacts receive your blog subscription emails. Click the Field type dropdown menu and select Single checkbox. Then, click Create.

Create a subscription form for your external website
Next, create a subscription form for these emails that you can embed on your external blog pages so that visitors can easily subscribe.
-
In your HubSpot account, navigate to Marketing > Lead Capture > Forms.
-
Click Create form, select Regular Form and click Next.
- Under Add form field, use the search bar to find the property you just created, and click the
property
to add it to your form. You can
embed this form on your external blog pages
.
Next, create an active list of your blog subscribers:
-
In your HubSpot account, navigate to Contacts > Lists.
-
Click Create list.
- In the upper left, click the
pencil
icon and enter a name for the list, then click the
dropdown menu and select
Active list.
- Set your list filters to Contact property | select the property you created | is equal to |
Yes.
- Click
Done.
- In the upper right, click
Save.
If you already have an existing list of contacts subscribed to your blog emails, you can import the list from a spreadsheet. Be sure to include a column for Email with your contacts’ email addresses and a column with a header that matches the property label for your subscription status property. Enter Yes as the value for all rows in the subscription status property column.
Create a new RSS email
Next, create the RSS email that will go out to your blog subscribers. The RSS email is simply an email template that you can customize to include the latest items from a particular feed, such as the RSS feed from your blog. You can use any email template that you like for this email, as long as it contains a main email body module.
Depending on the email editor you are using, follow the corresponding instructions below to create your RSS email:
Create a new RSS email in updated classic editor
Create a new RSS email in drag and drop editor
Create a new RSS email in the updated classic editor
-
In your HubSpot account, navigate to Marketing > Email.
-
Click Create email.
-
In the dialog box, select Blog/RSS.
-
Select
External blog
and insert the RSS feed URL.
-
In the Custom tab, select a template for the RSS email.
-
In the dialog box, insert a name for your email.
- In the email editor, click the Edit modules icon in the left sidebar, then select Main Email Body.
- In the RSS feed URL text field, enter an RSS feed URL to see a sample preview of the feed.
-
You can also set the number of posts to feature in each RSS email,
and
customize the styling
of your feed within the
Item layout/style
text box.
-
You can move around the tokens in your RSS email or adjust the fonts and font sizes.
-
Click Advanced options to customize your author by line or set a max width for your post images.
-
Please note: each send will only include new posts since the prior send of the email, up to the maximum number you’ve chosen. For example, if you’ve set a maximum of five posts to display in your RSS email and the next week you only publish three blog posts, the next send of your email will only include those three new posts and will not pull in two posts from the previous week.
- Make any additional edits to the email as needed and add your
from details.

- Click the Settings
tab.
- Click the
Subscription type
dropdown menu to select the subscription type you created. Make any other
settings changes
(web version, campaign, etc.) as needed.
- Click the Send or Schedule tab. Under Recipients, select the
list
you created.
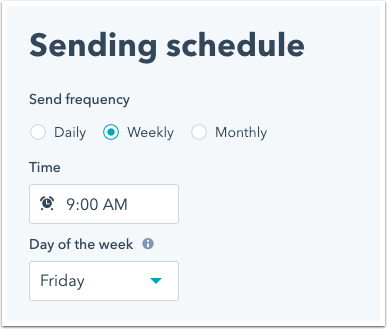
- In the right pane,
select your send frequency and the time of day to send the RSS email. If you select
Weekly
or
Monthly
, you’ll also be asked to select a day of the week or month.
- In the upper right, click Review and Publish.
Your RSS email will be sent to your subscribers every day, week, or month that a new entry has been added since the previous send.


![Toni Kroos là ai? [ sự thật về tiểu sử đầy đủ Toni Kroos ]](https://evbn.org/wp-content/uploads/New-Project-6635-1671934592.jpg)


