
How to install/update the driver of network adapter Manually in Windows XP? | TP-Link
Note: This article applies to the situation that failed to install the adapter through .EXE program and the adapter has .inf file to download.
TP-Link official site, and extract the zip file to see whether your adapter has .inf file.)
(please download the latest driver from, and extract the zip file to see whether your adapter hasfile.)
Note: If there already is a driver but it’s not working, you need to uninstall it first before installing the new driver. (control panel》program》uninstall program》uninstall driver for our wireless adapter)
Before the installation, please make sure the adapter is connected to the computer and is detected by the system.
1. Open Start Menu, and click Run…

2. Input “devmgmt.msc” and click OK.

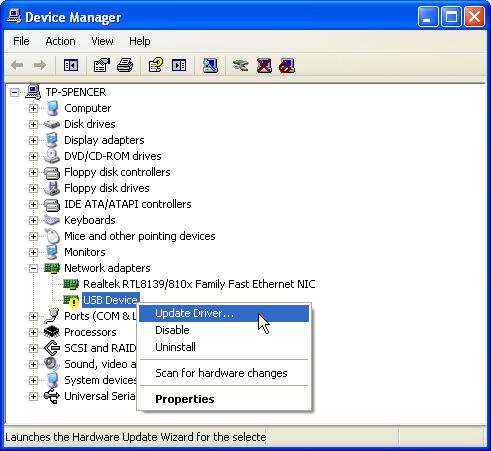
3. Find the new detected hardware, right click it and then click Update Driver…
4. Select No, not this time.

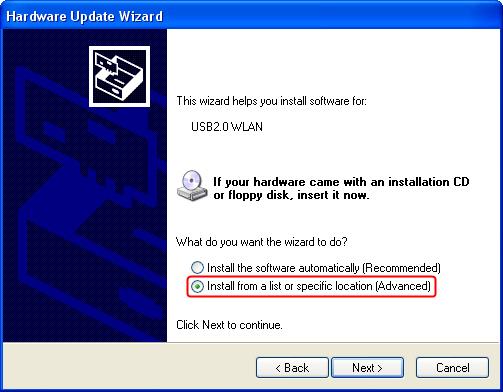
5. Select Install from a list or specific location (Advanced).
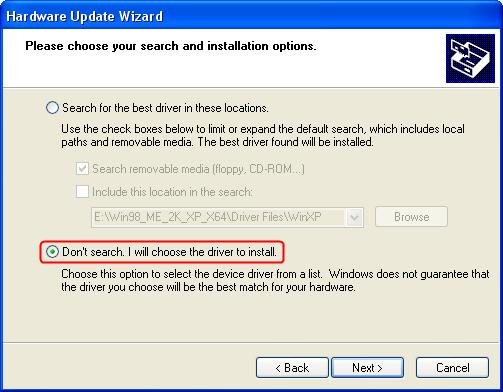
6. Select Don´t search. I will choose the driver to install.
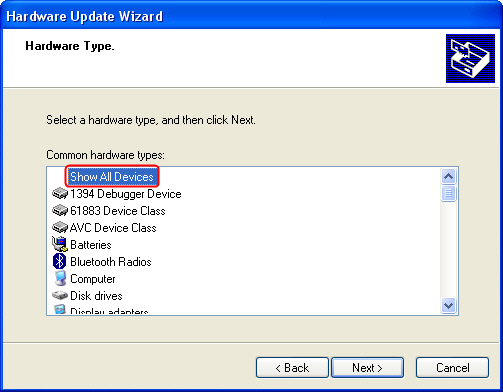
7. Select Show All Devices.
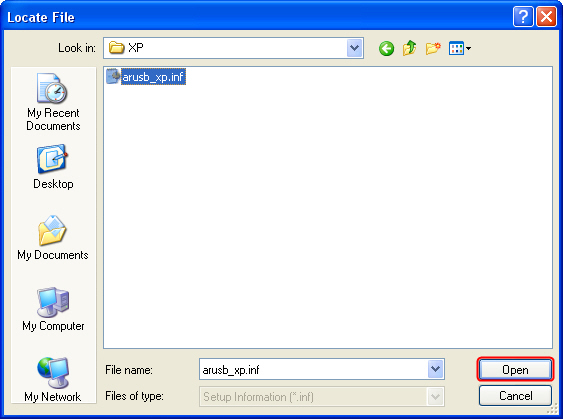
8. Click Have Disk.

9. Point to the inf file in the driver folder, and then click Open.
Note: Is your computer running the 32-bit or 64-bit version please click Start, right-click My Computer, and then click Properties.
-
If “x64 Edition” is listed under System, you’re running the 64-bit version of Windows XP.
-
If you don’t see “x64 Edition” listed under System, you’re running the 32-bit version of Windows XP.
The edition of Windows XP you’re running is displayed under System near the top of the window.
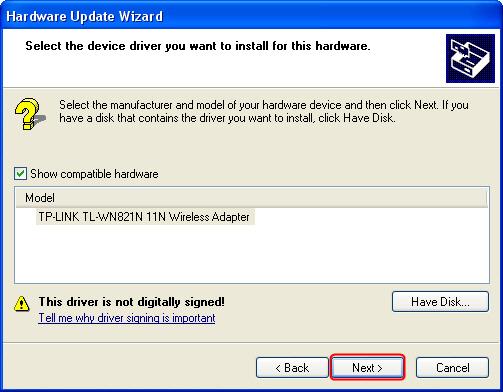
10. Click Next.
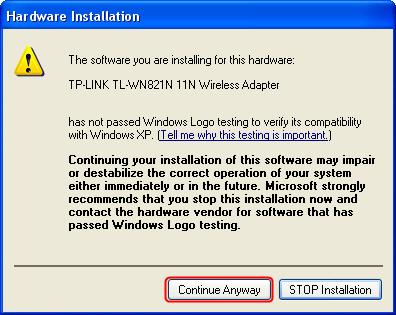
11. Click Continue Anyway.
12. Click Finish.
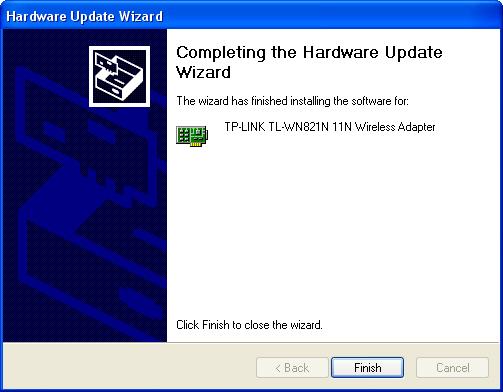
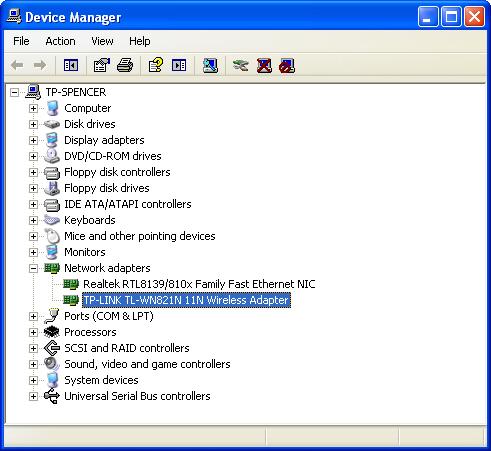
As yet, the adapter has been successfully installed. You can go to Device Manager and check Network Adapters.
If there are any further problems, please visit our FAQ page or contact TP-Link support.


![Toni Kroos là ai? [ sự thật về tiểu sử đầy đủ Toni Kroos ]](https://evbn.org/wp-content/uploads/New-Project-6635-1671934592.jpg)


